
The WiFi Pineapple has been a hot topic lately and I've managed to get my hands on one. Touted as a 'favourite among penetration testers and security enthusiasts' there's no arguing this little box packs a lot of punch. Whilst some criticise the capabilities of the WiFi Pineapple and claim it empowers hackers, it remains the perfect tool for demonstrating exactly what poor security can lead to.

Introduction
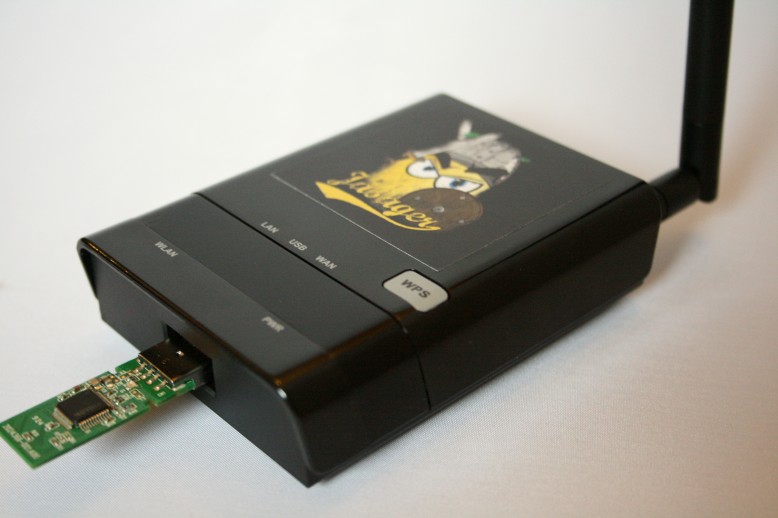
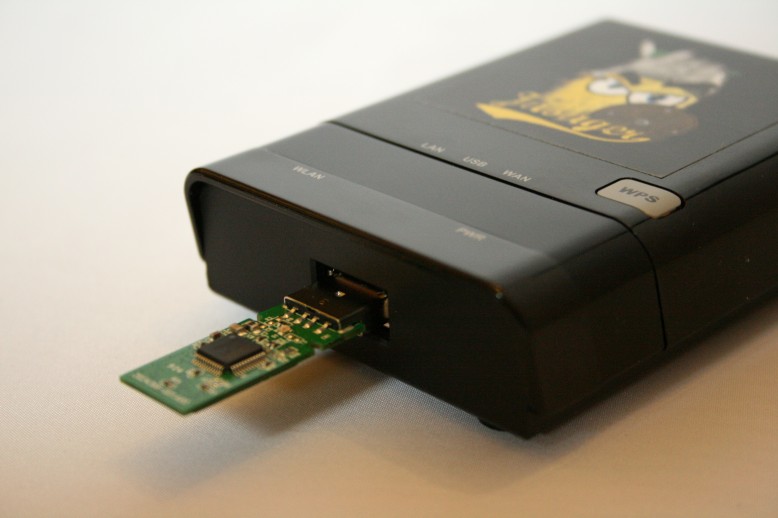
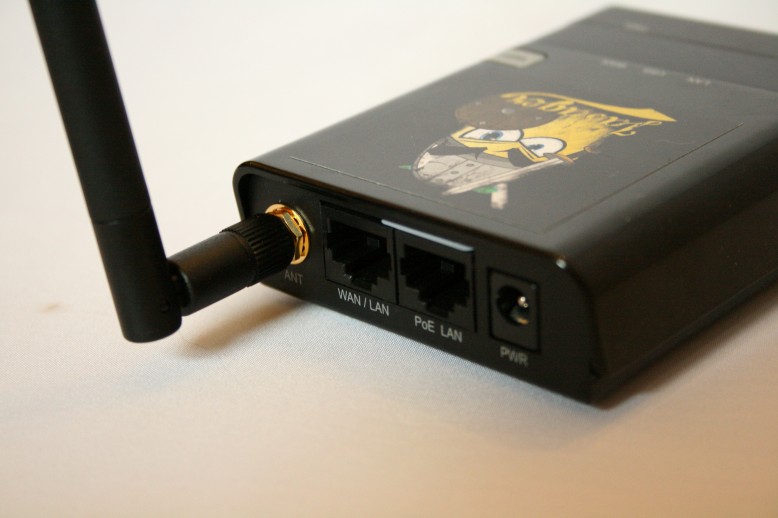
Sporting a price tag of only $99.99 the WiFi Pineapple isn't going to set you back too vast an amount of hard earned cash. Available over on HakShop my WiFi Pineapple only took a week to get the UK. On first unpacking the hardware doesn't seem all too dazzling and looks like any typical WiFi Access Point. The version IV hardware boasts 2 x LAN connections (1 x PoE), a DC power jack, a USB port and of course an antenna connection. (Shown below with my USB drive connected)
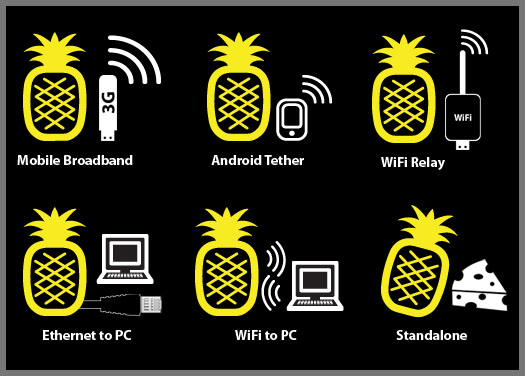
The WiFi Pineapple has many great features and whilst critics are quick to point out that it can be used for nefarious reasons (which powerful tool can't?) there are many great and handy things it can do.
- You can connect a USB 3G modem directly to the WiFi Pineapple so all devices connected to the access point have Internet access.
- You can tether an Android phone to the device and the Pineapple will again offer Internet access to all clients connected to the access point.
- The Pineapple can act as a WiFi relay and range extender providing greater coverage for existing WiFi networks.
- You can connect the Pineapple to your PC via ethernet and share your internet connection with WiFi clients.
- The Pineapple can also connect to ethernet networks and share the Internet to your PC over WiFi.
- Last but not least it can also run in standalone mode and simply provide a local WiFi network for clients to share.
Setup
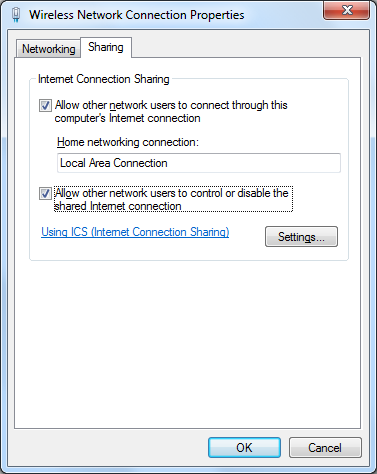
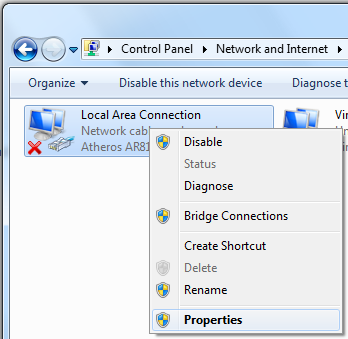
That's enough of the specs and features, for now, let's get on with getting this thing up and running! To set the Pineapple up as I am about to, you need a WiFi adapter and a LAN adapter just like most laptops and computers do. First you need to share your Internet connection from your WiFi adapter to your LAN adapter. Right click on your WiFi adapter and hit properties:

In the Properties screen change to the Sharing tab, tick the "Allow other network users to connect through this computer's Internet connection" checkbox, select your LAN adapter in the "Home networking connection" field and then click OK.
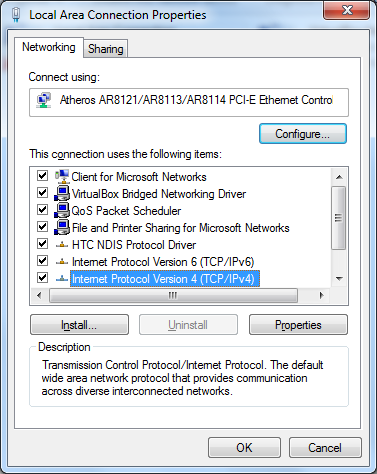
Once you have the Internet connection shared connect the WiFi Pineapple to your laptop or PC via ethernet and configure the LAN adapter with the following settings:
IP Address: 172.16.42.42
Subnet Mask: 255.255.255.0
Preferred DNS Sever: 8.8.8.8

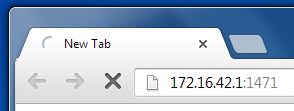
Once you've got the adapter configured you can power up the WiFi Pineapple and let it boot, you should be able to access it once the WPS light stops flashing. Open up a browser and head to the Pineapple's IP address:
IP Address: 172.16.42.1:1471
Once there you should be presented with an authentication prompt:
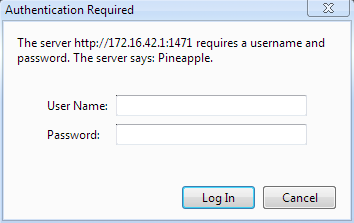
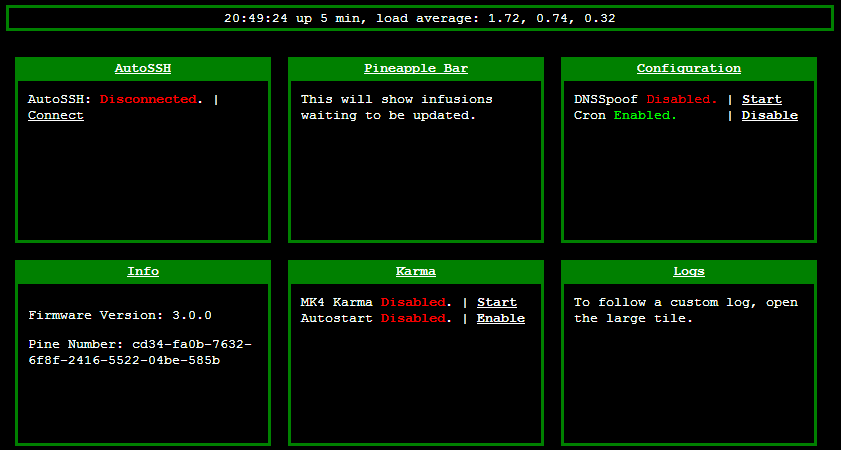
The default username is "root" and the password is "pineapplesareyummy". Once logged in you will find yourself at the main screen!
First Things First
The first thing you should always do with any new device is change the default password! It's not going to look very pro when someone logs in to your shiney new WiFi Pineapple and locks you out because the credentials are still factory defaults now is it... Hit the configuration button and change the root password:


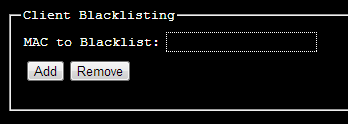
The next thing you need to do is add your device's MAC address to the WiFi Pineapple's MAC address blacklist. This will basically prevent you from accidentally "Pineappling" yourself if you decide to enable Karma (more on that later). Again, it's not going to look very "l337 h@x0r" if you end up hacking yourself... Head to the Karma settings, hit the config tab and insert your MAC address in the Client Blacklisting section.


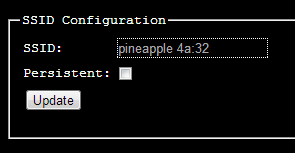
Whilst you're in this config section you can also take the opportunity to change your Pineapple's default SSID. It is normally set by default to be "pineapple" followed by the last 4 characters of your Pineapple's MAC address. Just type your desired SSID in the SSID field, check the Persistent checkbox if you don't want to have to set it every time you power cycle the device and hit Update.
Advanced Setup - SSH
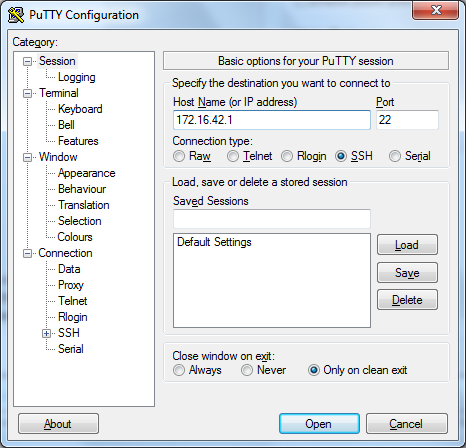
The only real thing left to do now on the WiFi Pineapple is to set your time zone. As the Pineapple is basically just a cut down Linux box running a modified version of OpenWRT we get cool features like a Secure Shell (SSH). The easiest way to do that on Windows is to download Putty HERE. Once you've downloaded Putty open it up, insert the IP for your Pineapple in the Host Name field and hit Open.
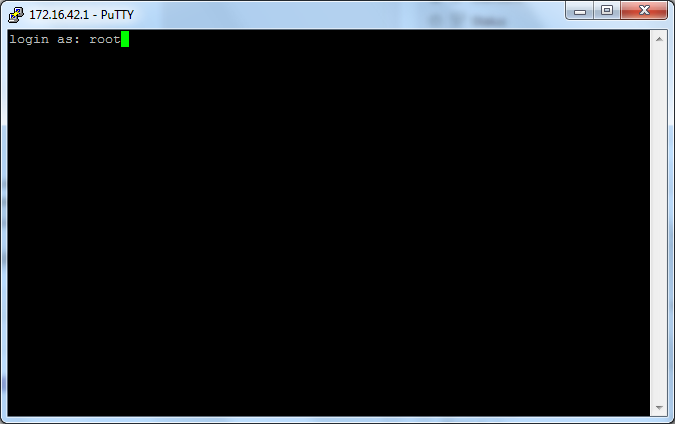
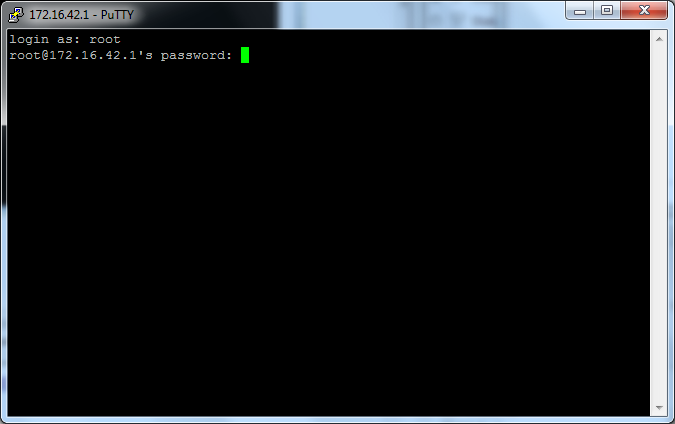
You should be presented with what looks like a fairly standard Command Prompt if you're used to those and you need to input the username "root" and the password that you changed earlier. You did change the password didn't you?...
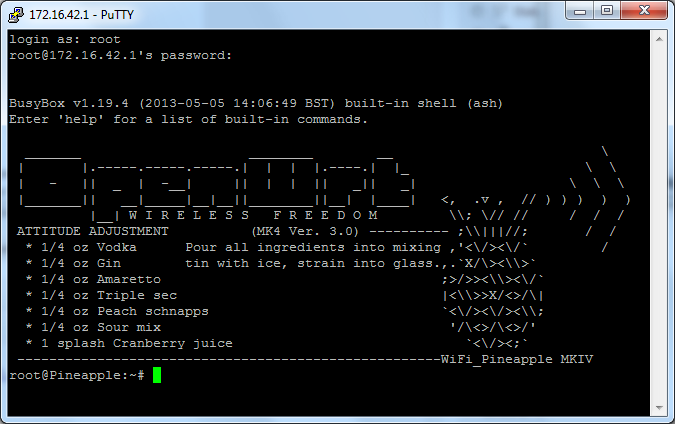
Assuming you entered the correct credentials you should now have a SSH connection to your Pineapple!
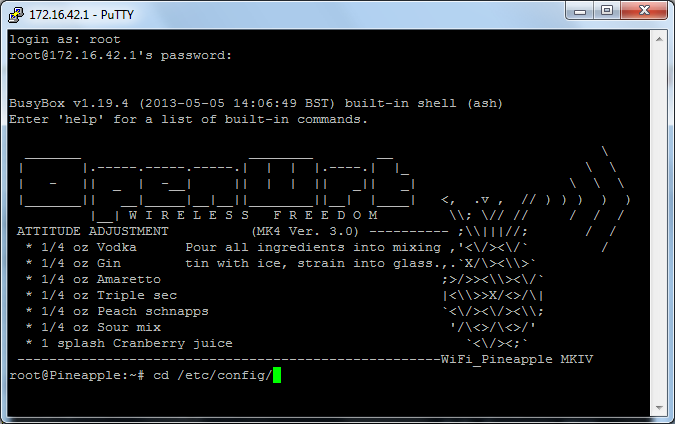
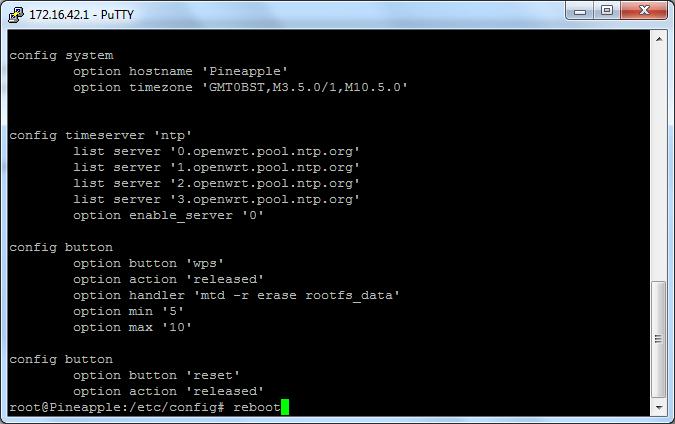
From here you need to navigate to the folder that contains the config file. The "cd", or Change Directory, command will allow you to move to the appropriate folder /etc/config/. Use the command "cd /etc/config/" and hit enter:

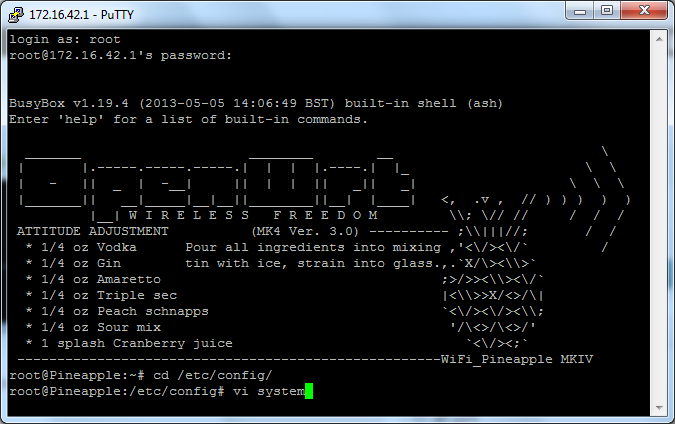
Now that you're in the correct folder we're going to use a text editor called Vi to edit the system file. Type in the command "vi system" and hit enter:
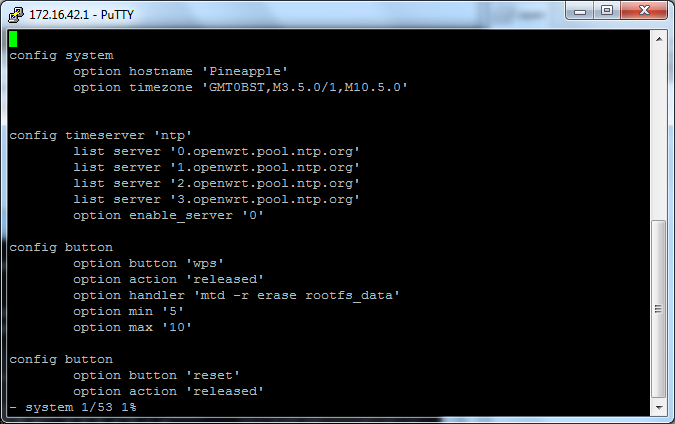
Using the arrow keys, move down to the option timezone value, hit the Insert key on your keyboard to start modifying the text and delete what's there. Next you need to head to the OpenWRT Website HERE and find your timezone value. Type that in place of the existing value, hit Escape, then type ":wq" and hit Enter. This should exit you out of Vi and your new timezone has been saved.
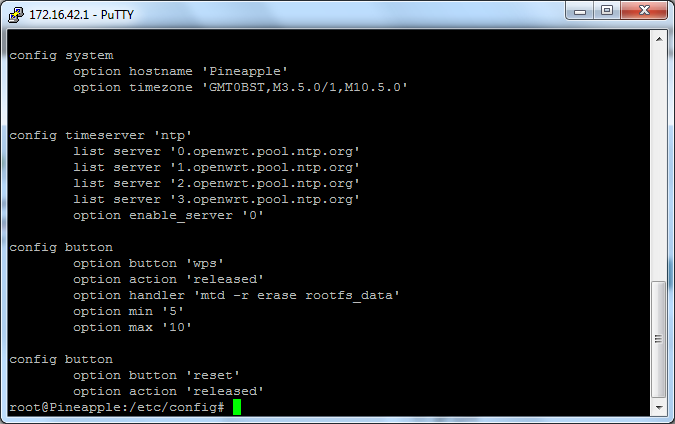
To load the config change the WiFi Pineapple needs a quick reboot so go ahead and type "reboot" and hit Enter to reboot the device:
Testing It Out
Now that all the basic configuration has been covered you should be able to connect a device to the Pineapple access point and have Internet access. Remember, don't try to connect with the WiFi adapter that the Pineapple is bridged with on your laptop or PC, try connecting your phone and make sure you can browse the web. As long as everything is working that's the WiFi Pineapple all setup and ready to go!
What's Next?
That's about it for this blog, the basic aim was to get you setup and running with your WiFi Pineapple and to have it configured correctly ready for use. In subsequent blogs I'm going to be covering Karma, Infusions from the Pineapple Bar, Session Hijacking with the WiFi Pineapple, SSL Strip, DNS Spoof, packet capture with tcpdump and much, much more! Stay tuned.