
DNS is the protocol that makes the web work. It's how we convert easy to remember names like facebook.com into hard to remember IP addresses like 157.240.1.35 and others. Without it, the web wouldn't work but DNS has a problem, it's not secure.
The Problem
DNS queries are not secure, they're sent in the clear, which means that others can see and manipulate the queries and responses. An attacker may change the IP address in a response to send you to a different server, ISPs can censor the web by blocking resolution of certain domains and they can even build a profile of the sites you visit by storing your DNS queries. DNS is not secure and whilst we have DNSSEC which fixes the integrity issue (I won't talk about why I don't like it), it doesn't fix the privacy or censorship issue. Today I'm going to look at a solution called DNS-over-HTTPS that fixes the integrity, censorship and privacy issue along with giving me several other security benefits.
DNS-over-HTTPS
DoH is a really simple idea, take an insecure protocol like DNS and issue the requests over a secure, HTTPS connection. Google has a DoH resolver available and you can read more details on the developer guide. To use it you simply issue your DNS requests like so:
https://dns.google.com/resolve?name=scotthelme.co.uk&?type=a
{
   "Status":0,
   "TC":false,
   "RD":true,
   "RA":true,
   "AD":false,
   "CD":false,
   "Question":[
      {
         "name":"scotthelme.co.uk.",
         "type":1
      }
   ],
   "Answer":[
      {
         "name":"scotthelme.co.uk.",
         "type":1,
         "TTL":299,
         "data":"107.170.218.42"
      }
   ]
}
Of course you can't simply use this as a DNS resolver, you need something to sit in the middle and speak DNS to your clients and DoH to a provider upstream that answer DoH queries. For that I'm going to use a Pi-Hole and get some extra bang for my buck.
The PiHole
The Pi-Hole is pitched as a 'blackhole for internet advertisements'. You run it on your local network as a DNS resolver and it kills queries for known bad domains. You don't need adblockers and all sorts of other stuff on the clients in your network if the DNS resolver won't resolve bad domains for them. I've wanted to setup a Pi-Hole for some time and something finally prompted me to do it recently. Cloudflare announced their new 1.1.1.1 DNS Resolver and it also supports DoH. This was a great opportunity to improve the security for all of my devices at home in multiple ways and with 1 easy to build tool. It had to be done.

Setting up the rPi
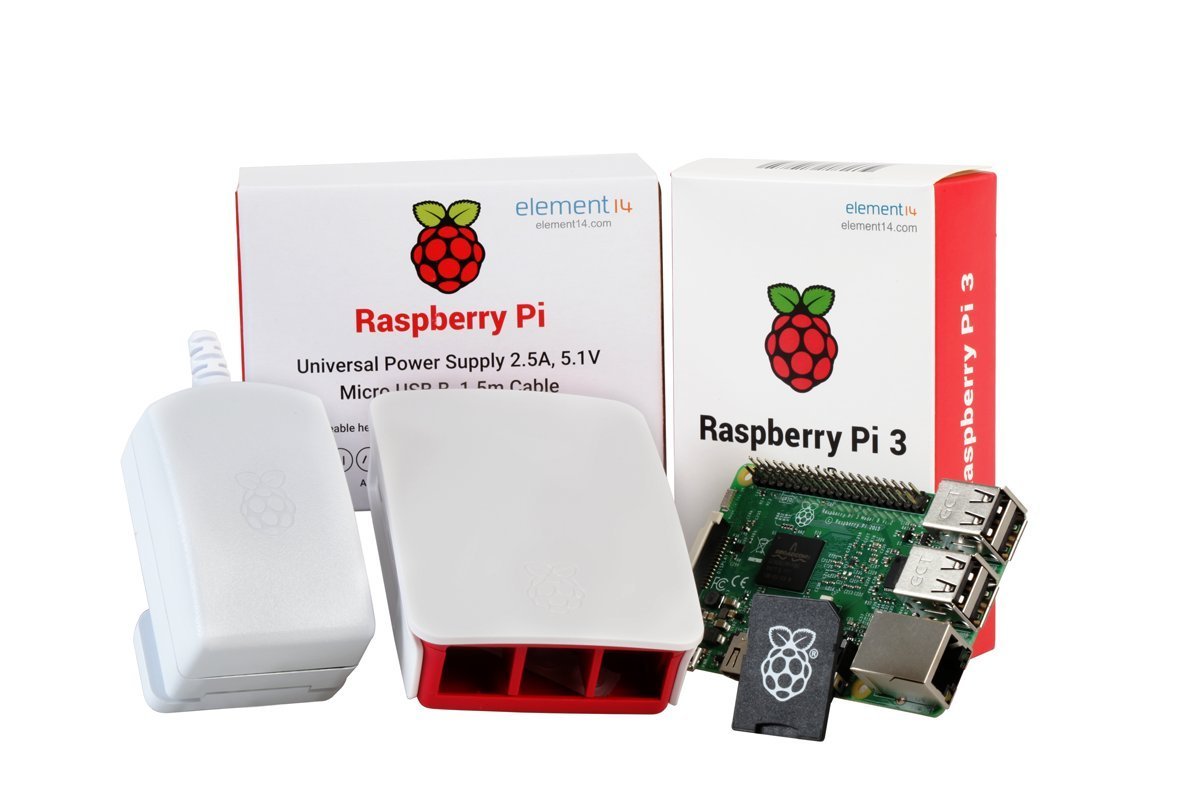
You can get a full Raspberry Pi starter kit for around £50 GBP ($70 USD) and it includes everything you need. The rPi itself, a case, power supply and microSD card. You could go for the newest version of the rPi but I had one lying around in my parts box as I always like to have a spare unit handy for projects just like this!
The first step is to go a grab the latest version of Raspbian from the site, I use the Lite version as you won't need a full desktop setup. Once you have that you can use a tool like Win32DiskImager to write the SD card but I'm using Etcher at the moment. Create the image on the microSD card, connect the new rPi to your network and boot it. You will need to grab the IP address from your router (or connect a monitor) and once you have, SSH to it and login with the default credentials pi:raspberry. Once you're logged in let's get everything up to date with sudo apt-get update followed by sudo apt-get dist-upgrade and once those have completed reboot the rPi with sudo reboot. Once the rPi has rebooted you're good to move to the next steps.
Installing cloudflared
We're not going to use the full potential of cloudflared but it does everything we need. We're going to use it as a DoH proxy and the first task is to get it installed and running. I took a quick skim of the guide here and it's pretty easy to get going on the rPi.
cd ~
wget https://bin.equinox.io/c/VdrWdbjqyF/cloudflared-stable-linux-arm.tgz
mkdir argo-tunnel
tar -xvzf cloudflared-stable-linux-arm.tgz -C ./argo-tunnel
rm cloudflared-stable-linux-arm.tgz
cd argo-tunnel
./cloudflared --version
This should install cloudflared and the version output will be similar to mine at the time of writing which is cloudflared version 2018.4.5 (built 2018-04-09-2155 UTC). All that's left to do is start cloudflared with the right config and I will be using screen to run that for now.
sudo apt-get install screen
screen
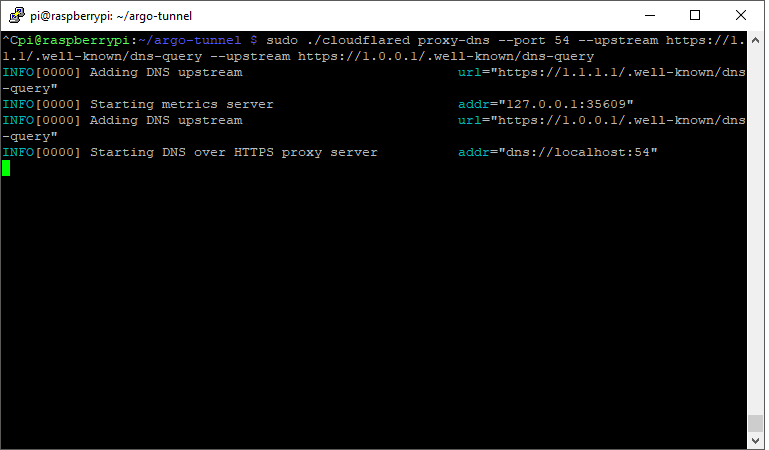
sudo ./cloudflared proxy-dns --port 54 --upstream https://1.1.1.1/.well-known/dns-query --upstream https://1.0.0.1/.well-known/dns-query
That will start a new screen session and start cloudflared inside that. You can use Ctrl+A+D to exit the screen session and leave cloudflared running which should look something like this.
Now that cloudflared is ready to go we need to configure the Pi-Hole to use it and test it out.
Installing and configuring the Pi-Hole
The first step is to install Pi-Hole on your new rPi and all you need is their install command.
curl -sSL https://install.pi-hole.net | sudo bash
Follow the setup process and fill in the values as you're asked along the way. It doesn't matter what default DNS service you use as we will be overwriting it soon. Once the setup is done we only need to make changes to two files after I've looked over the instructions set out by Olier in this blog. First we need to edit a config file and remove the two instances of server.
sudo nano /etc/dnsmasq.d/01-pihole.conf
Comment out both server declarations, #server=1.1.1.1 and #server=1.0.0.1, and replace them with our own server=127.0.0.1#54. After that we need to edit the next file.
sudo nano /etc/pihole/setupVars.conf
In here just comment out the 2 DNS addresses #PIHOLE_DNS_1=1.1.1.1 and #PIHOLE_DNS_2=1.0.0.1. Once that's done you can restart the dnsmasq service with sudo systemctl restart dnsmasq.service and the Pi-Hole will now send DNS requests to cloudflared which is running as our DoH proxy.
Configuring devices to use Pi-Hole
The best way to configure all of your devices to use your new Pi-Hole is to change the settings on your router at home and anywhere else you can. I use Ubiquiti hardware throughout my house and it was just a few clicks to change the settings. In the Settings section under Networks, all I needed to do was edit the network and tell it to use the new Pi-Hole as the DNS server instead.
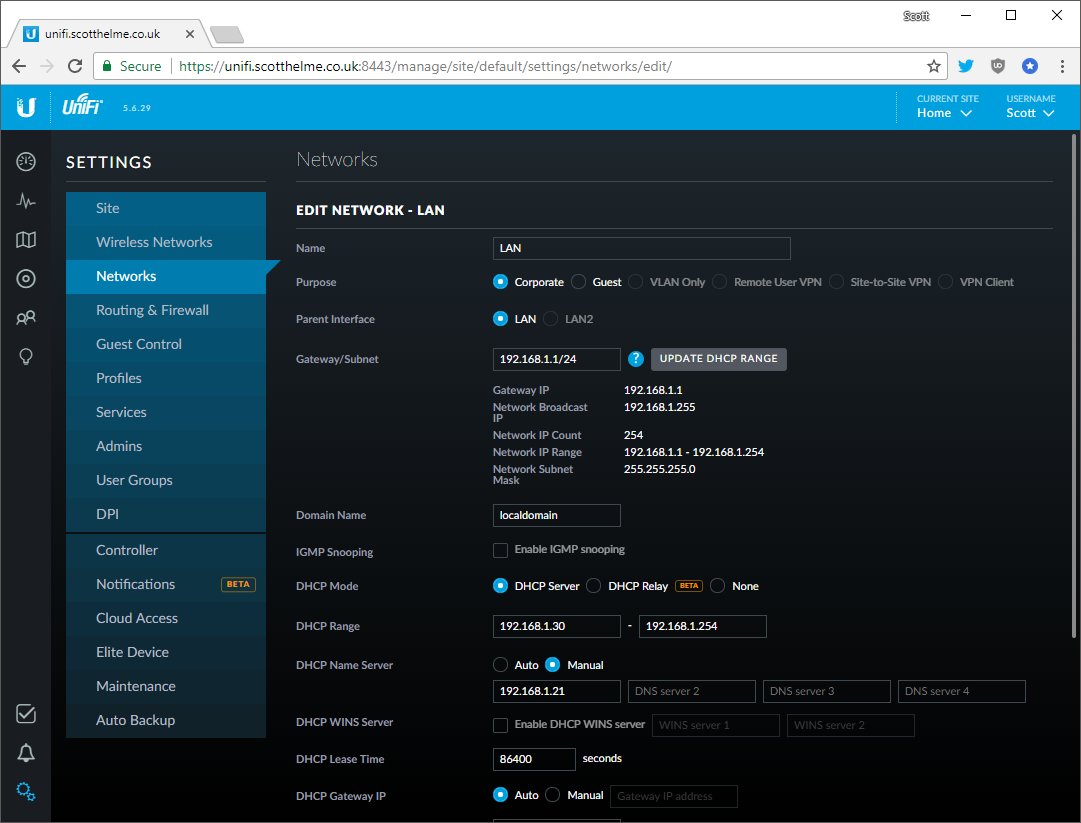
The settings for your particular router or device will vary but this is all that needs to be done. As devices join the network or renew their DHCP leases they will now start to use the Pi-Hole and get all of the benefits it offers.
Run cloudflared as a service
If everything is all setup and running just fine the last step is to make sure cloudflared is always running. To do this we will create a systemd unit file to make sure of that.
sudo nano /etc/systemd/system/dnsproxy.service
[Unit]
Description=CloudFlare DNS over HTTPS Proxy
Wants=network-online.target
After=network.target network-online.target

[Service]
ExecStart=/home/pi/argo-tunnel/cloudflared proxy-dns --port 54 --upstream https://1.1.1.1/.well-known/dns-query --upstream https://1.0.0.1/.well-known/dns-query
Restart=on-abort

[Install]
WantedBy=multi-user.target
This is the unit file from Oliver, mentioned above, and should be all that is needed. To ensure cloudflared runs on startup you can enable it with the following.
sudo systemctl enable dnsproxy.service
Now cloudflared will start on system boot and restart if it crashes meaning it should always be available.
Bonus round
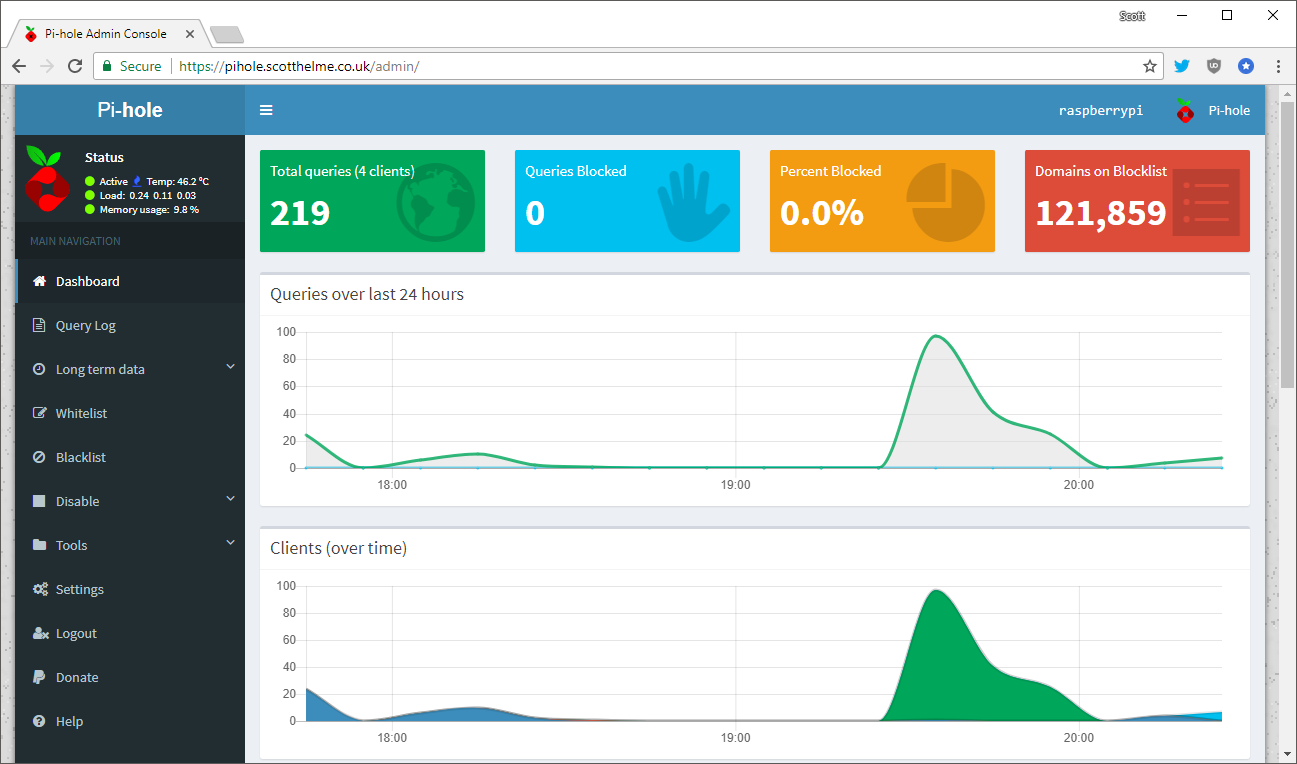
The Pi-Hole is a great bit of kit and has an awesome web interface to control the device, look at stats and all sorts of other cool stuff.
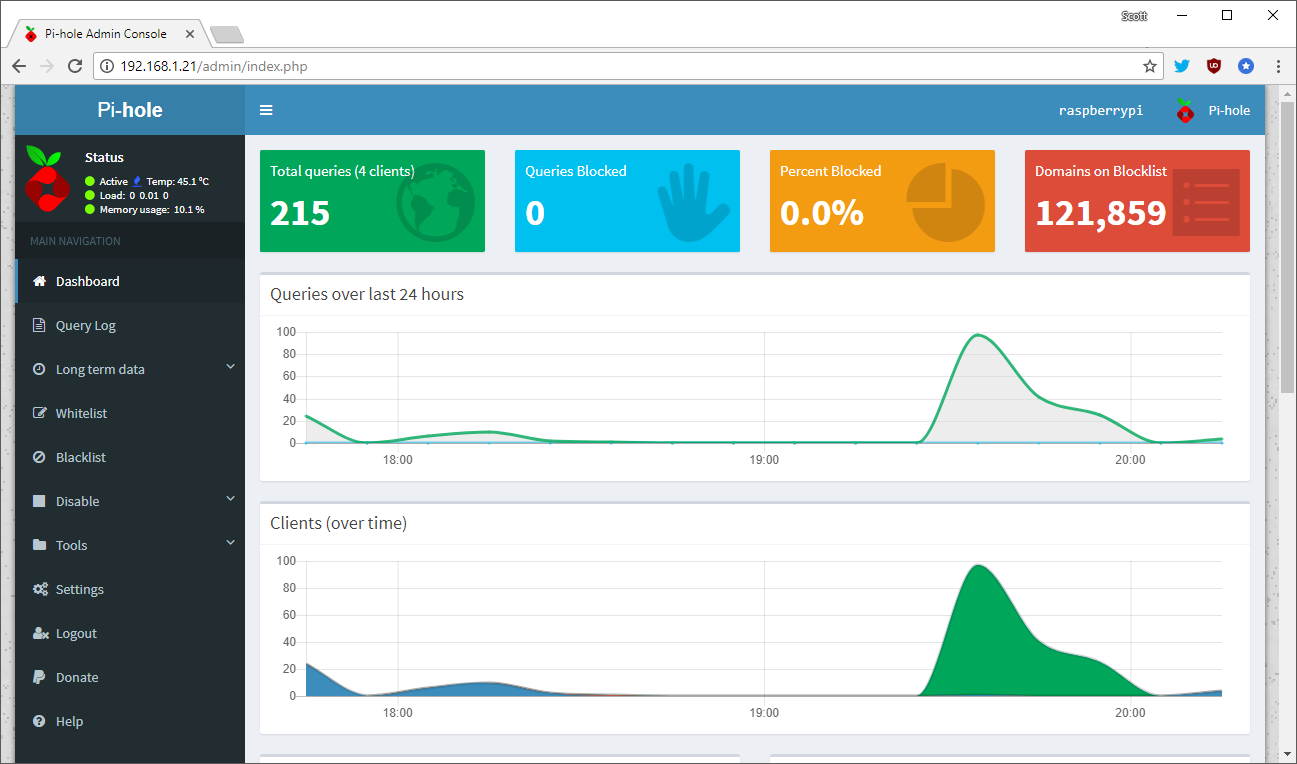
Did you see that? Look again. In the top left. In the address bar. It's.. HTTP... shudder
We have to fix this, we just can't have a device on our network that controls something as important as DNS and not have HTTPS on the web interface! Fortunately it's really easy and I took some pointers from this guide. First of all you need to get yourself a certificate and for that there is the free Let's Encrypt.
![]()
I already had a setup at home for fetching certs but if you need help I have a Getting started with Let's Encrypt! blog and plenty more too. You can of course use any CA you like, but get a cert for the hostname you want to use. Next we need to create the config file for the HTTPS version of the site.
sudo nano /etc/lighttpd/external.conf
In that file you need to paste the following.
$HTTP["host"] == "pihole.scotthelme.co.uk" {
  # Ensure the Pi-hole Block Page knows that this is not a blocked domain
  setenv.add-environment = ("fqdn" => "true")

  # Enable the SSL engine with a LE cert, only for this specific host
  $SERVER["socket"] == ":443" {
    ssl.engine = "enable"
    ssl.pemfile = "/home/pi/conf.pem"
    ssl.ca-file =  "/home/pi/intermediate.pem"
    ssl.honor-cipher-order = "enable"
    ssl.cipher-list = "EECDH+AESGCM:EDH+AESGCM:AES256+EECDH:AES256+EDH"
    ssl.use-compression = "disable"
    ssl.use-sslv2 = "disable"
    ssl.use-sslv3 = "disable"
  }

  # Redirect HTTP to HTTPS
  $HTTP["scheme"] == "http" {
    $HTTP["host"] =~ ".*" {
      url.redirect = (".*" => "https://%0$0")
    }
  }
}
Don't forget to update the first line to your own hostname and create the two files reference in ssl.pemfile and ssl.ca-file. The first one needs to contain the certificate and key file whilst the second need to contain the intermediate certificate. With all of those in place you can now restart the lighttpd service with sudo service lighttpd restart. I don't resolve to my Pi-Hole externally so I created a hosts entry on my PC and MacBook to allow me to navigate to it.
192.168.1.21 pihole.scotthelme.co.uk
With that I can now navigate to the Pi-Hole interface over a secure, HTTPS connection!
Everything is more secure
This setup should help you improve your security in 2 big ways. First of all, your DNS queries are now passing through your nosey ISP all the way to Cloudflare over HTTPS, meaning they can't be monitored, censored or tampered with. The second big improvement here is that everything on your network will now have hostile domains killed at DNS. This means goodbye to ads, trackers and a lot of other nasty stuff too!