
I was recently quite surprised to be introduced to an idea about using Cloudflare for Teams to look after my personal DNS. I've never used Cloudflare for Teams before but after a few minutes I was up and running and will be continuing to use the awesome things that I found.
Cloudflare for Teams
You can read the official site about Cloudflare for Teams which from a quick read offers some pretty awesome features. The single feature I'm going to be talking about today probably falls short of even hinting at what Cloudflare for Teams can do, but it's quick and easy to get started with some serious protections using Cloudflare Gateway, all for free!
Cloudflare Gateway
You can reads the docs about Cloudflare Gateway and I'm going to be linking to them a few times throughout this article, but the Welcome page hints at exactly what I'm going to be doing with Gateway.
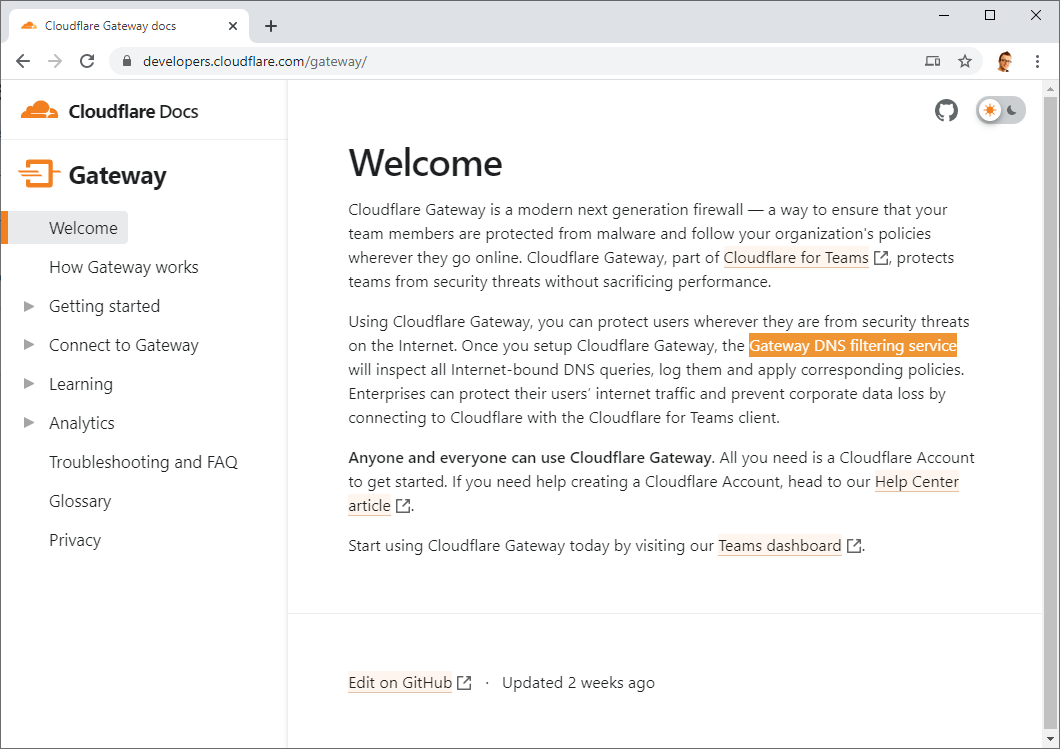
Yep, the "Gateway DNS filtering service" is what I'm going to be using and hooking into for an added layer of protection and monitoring for all of my DNS!
Once you've logged in to Cloudflare for Teams, go to the Gateway menu and then Policies, you need to create a new policy to get started by clicking "Add policy".
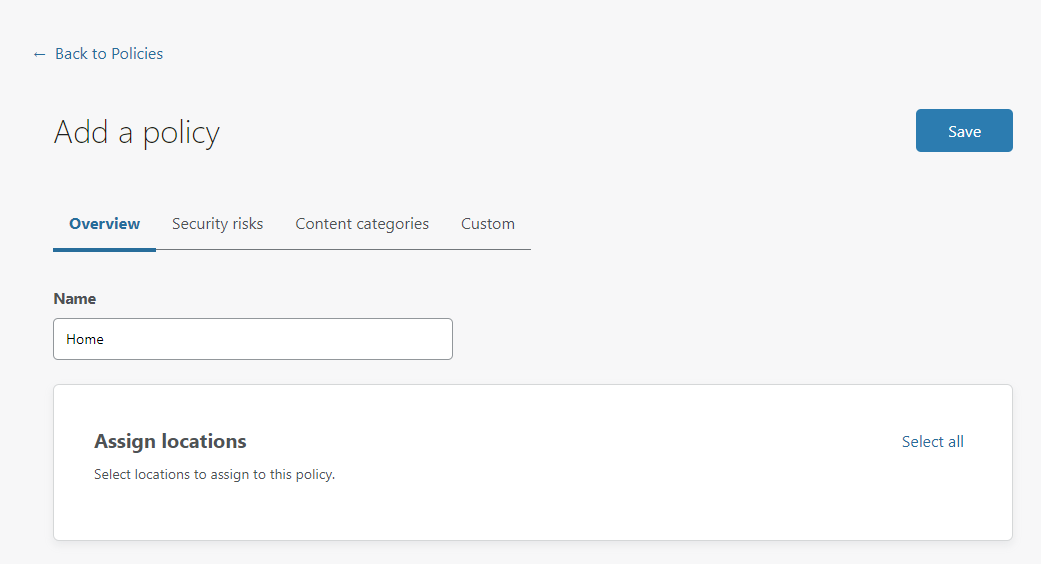
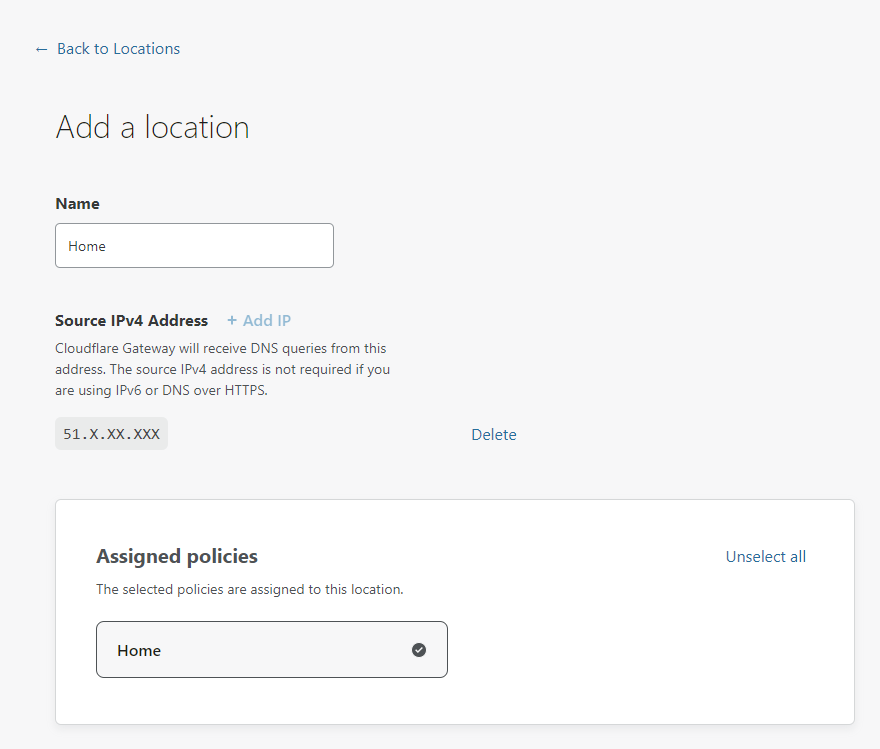
Call the policy anything you like, I'm going with "Home" in my example and for now just hit Save. We will come back later and start to configure and play around with different settings. Next up is to create your Locations, head to the Locations menu and click "Add a location". I'm calling my location "Home" and make sure to delete the source IP address if you see one, we don't want to restrict this location to expect all traffic to be coming from this IP, hit "Delete" to remove it. Finally, assign the "Home" policy we created just a moment ago.
That's it for the basics (yes really!) and now it's time to configure our devices!
Configuring DNS
How you will complete this next section really depends on your setup, but it's all going to be straightforward either way. In the Locations section of Gateway you now have your Home location, created above, that you can expand out and see the required configuration.

There is your DNS server address in IPv4 and IPv6, your DoH endpoint and DoT endpoint, all unique to you. You now need to configure these wherever you would normally configure your DNS servers which could be in your router or in your device itself. For me, I want my entire house to use this endpoint so I'm going to be configuring my Pi-hole to use the DoH upstream so I get encrypted DNS too!
Upgrading my Pi-hole
In my original Pi-hole blog post I walked through setting up the Pi-hole to use DoH for the upstream DNS to encrypt and protect all of my DNS traffic. I was using the generic 1.1.1.1 (Cloudflare) resolver and some fall-backs, but I now need to change those. The service that runs cloudflared needs to be updated, here was the original config:
[Unit]
Description=CloudFlare DNS over HTTPS Proxy
Wants=network-online.target
After=network.target network-online.target

[Service]
ExecStart=/home/pi/argo-tunnel/cloudflared proxy-dns --port 54 --upstream https://1.1.1.1/.well-known/dns-query --upstream https://1.0.0.1/.well-known/dns-query
Restart=on-abort

[Install]
WantedBy=multi-user.target
As you can see, those are the public 1.1.1.1 and 1.0.0.1 addresses but now I'm going to change them to my personal endpoint.
[Unit]
Description=CloudFlare DNS over HTTPS Proxy
Wants=network-online.target
After=network.target network-online.target
[Service]
ExecStart=/home/pi/argo-tunnel/cloudflared proxy-dns --port 54 --upstream https://794qvbl9kq.cloudflare-gateway.com/dns-query
Restart=on-abort
[Install]
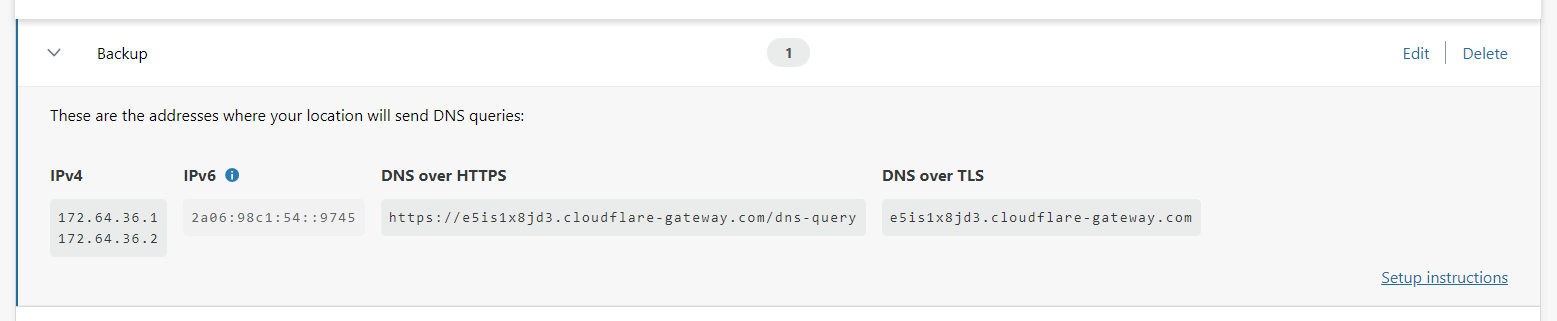
WantedBy=multi-user.targetThis means my upstream DoH provider is still Cloudflare, but now I'm using a personalised endpoint that will link DNS traffic to my account and give me control over it. I also created a second Location in the Gateway dashboard so I had a second, personalised endpoint so I can run my backup cloudflared service against that, as extra protection for one of the services failing:
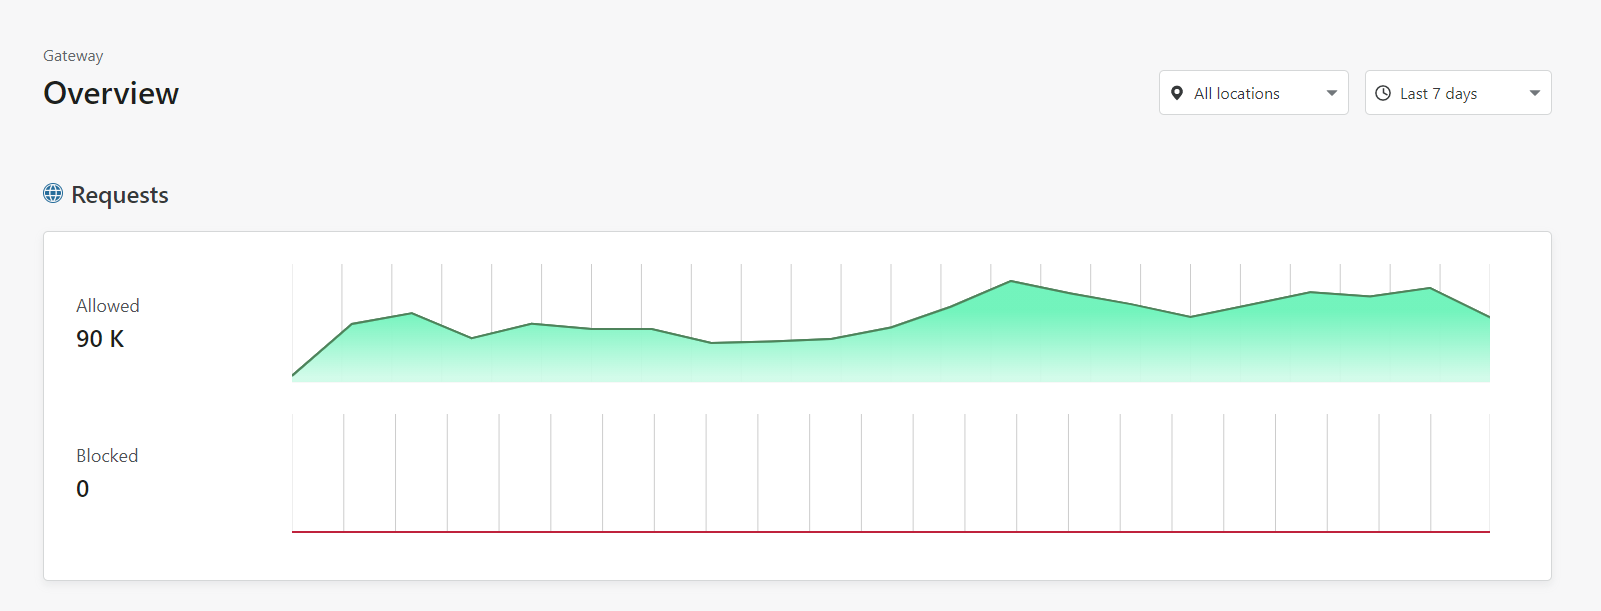
Now, with that new DoH upstream set, I restarted the services to use the new config and within seconds, I had data in my dashboard! My local Pi-hole is now pushing all DNS requests to the new endpoint so I can inspect those requests in my dashboard.
Adding filtering
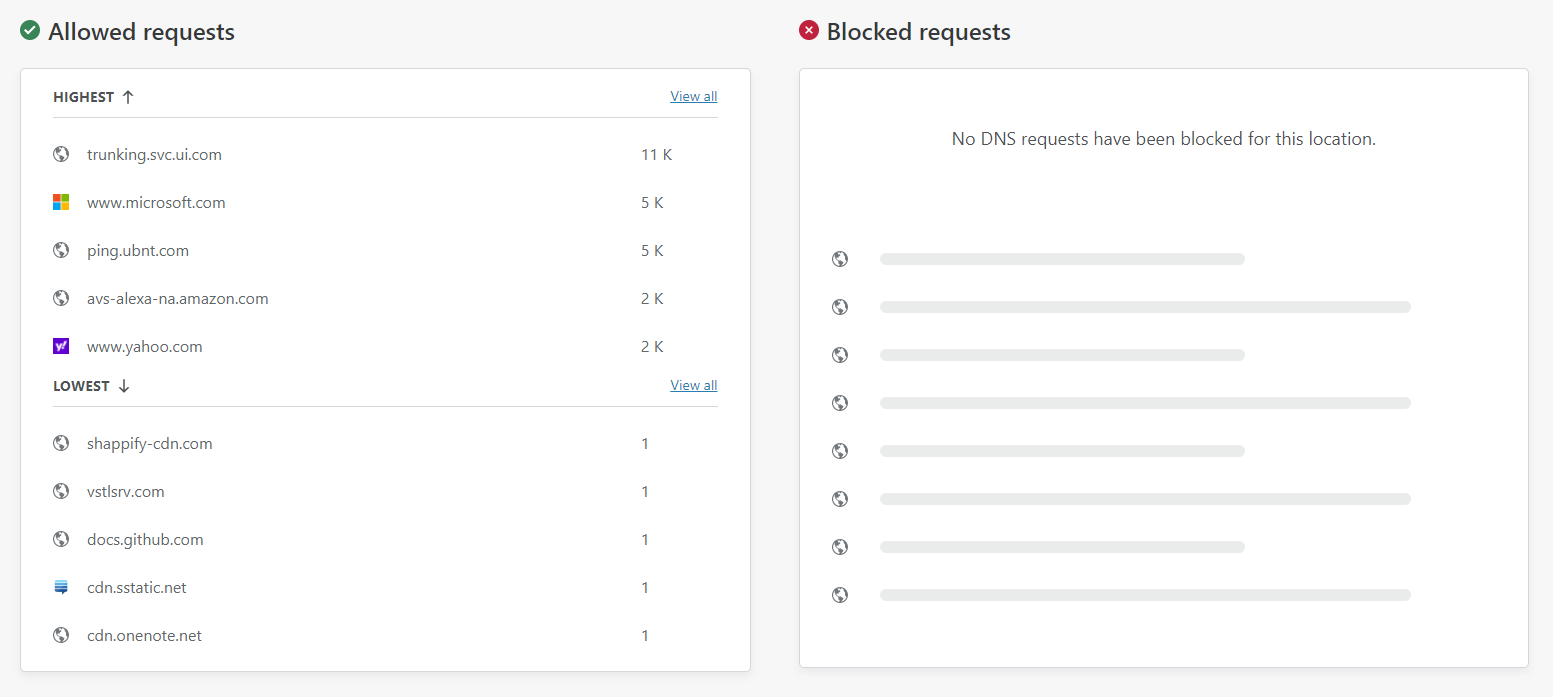
I'm using a Pi-hole on my local network as I've already mentioned, but perhaps you aren't. The filtering built into Cloudflare Gateway will now allow you to take some control of what's happening with your DNS traffic. Here you can see my Allowed requests and no Blocked requests because I haven't configured any filters yet.
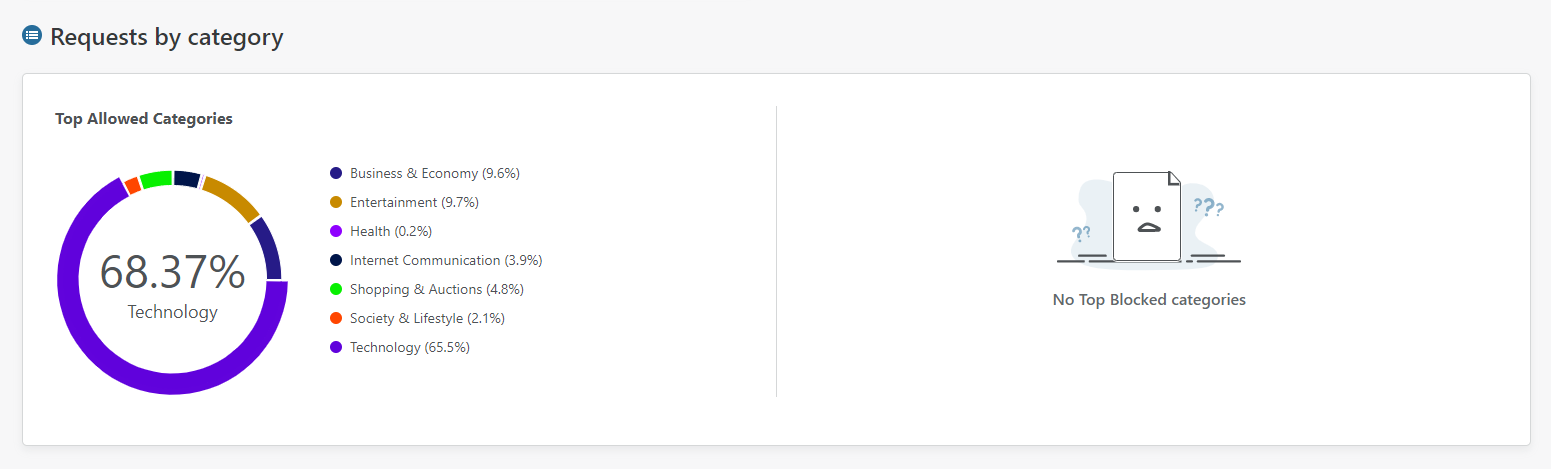
You can also see further information on your DNS traffic like Requests by category.
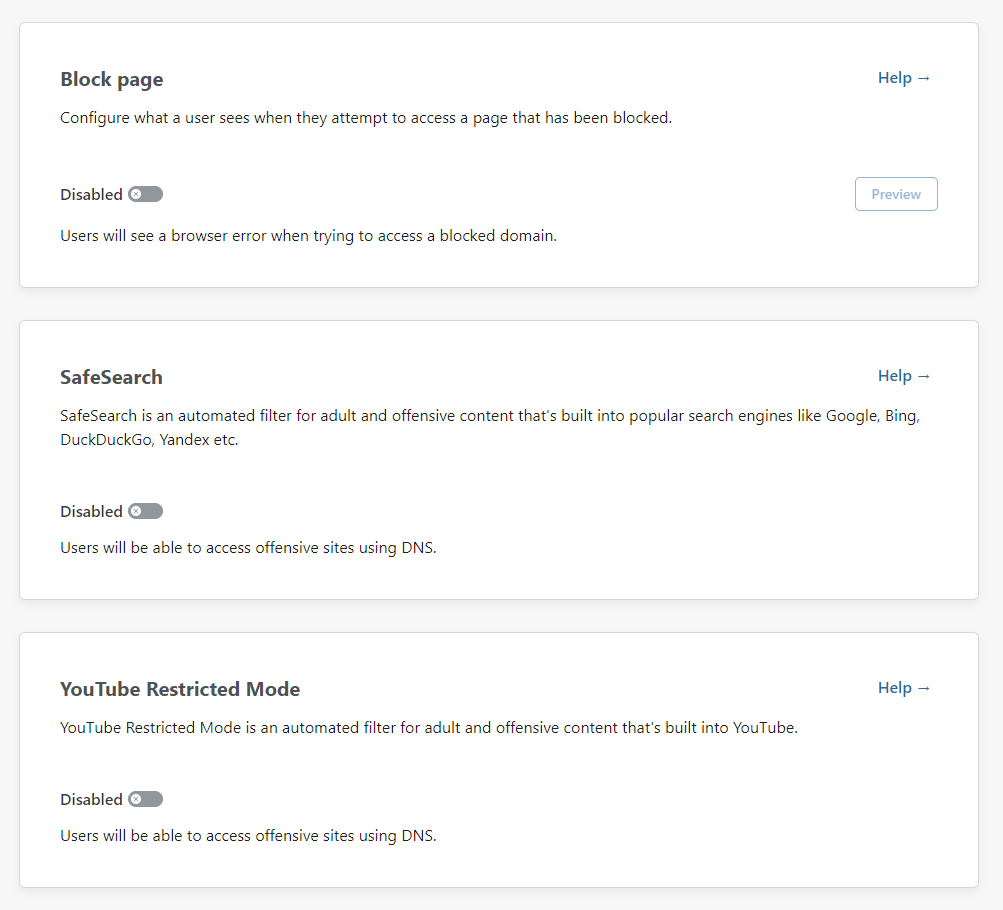
To get started with some filtering though, head to the Policies page and edit your policy. The first 3 filtering options are provided right away and allow you to control a block page that users see if they get blocked, SafeSearch mode for search engines and YouTube Restricted Mode to stop people coming across bad stuff there too.
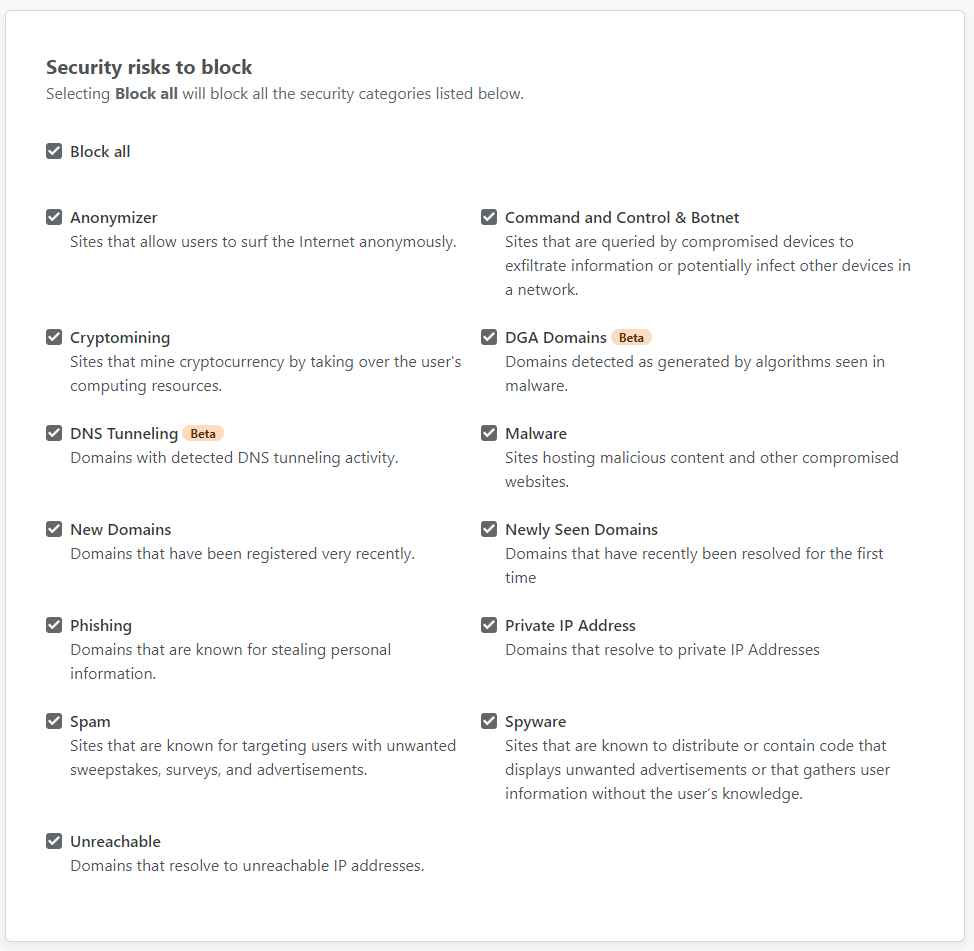
The next tab over is "Security risks" which has a pretty wide range of things to block at your choice.
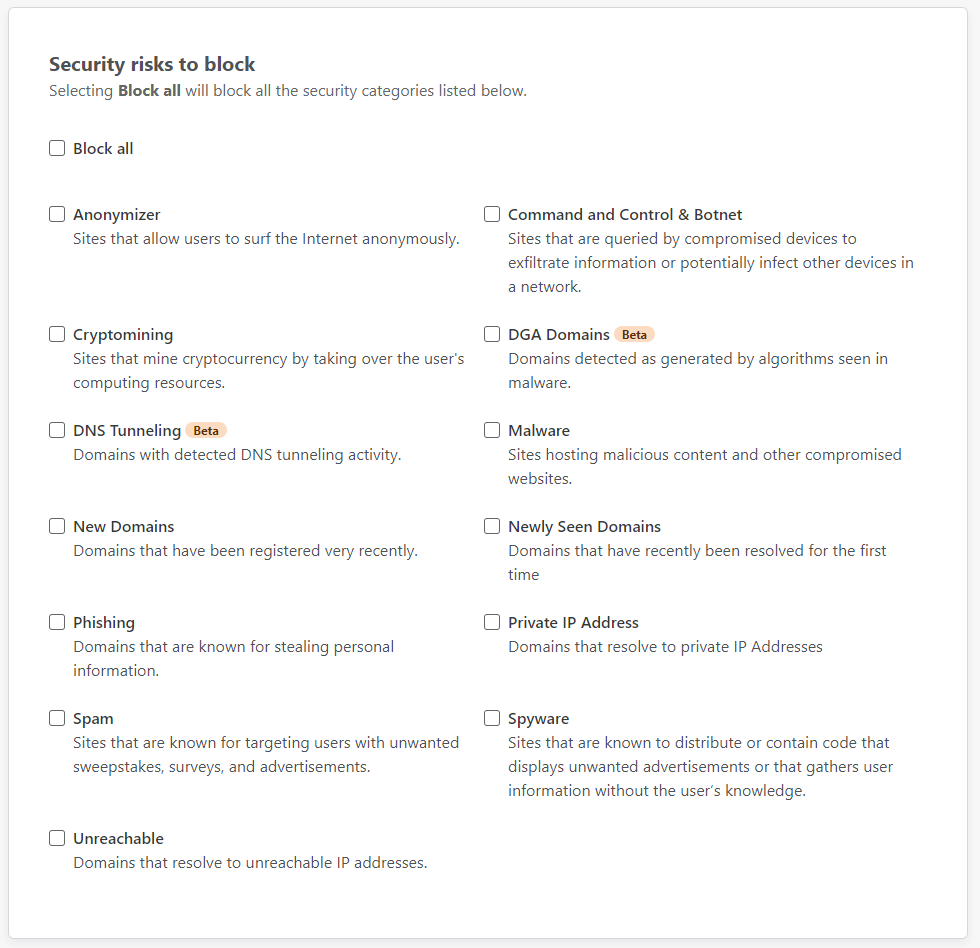
I'm curios to see what new protection I can get from Gateway, so I'm going all in!
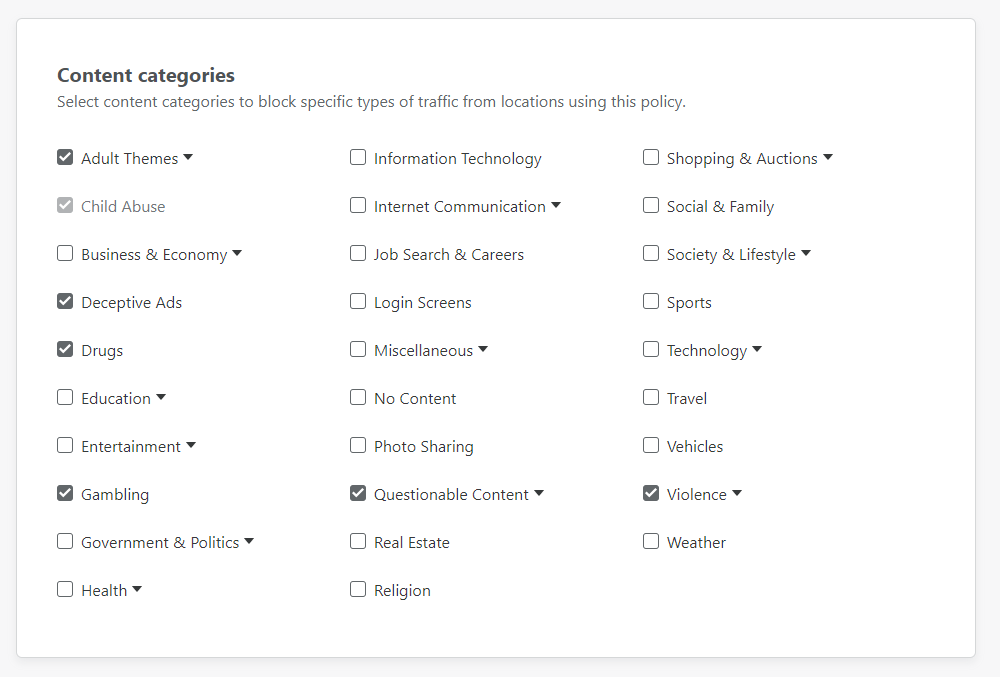
The next tab over is "Content categories" where you can block specific types of content, again at DNS.
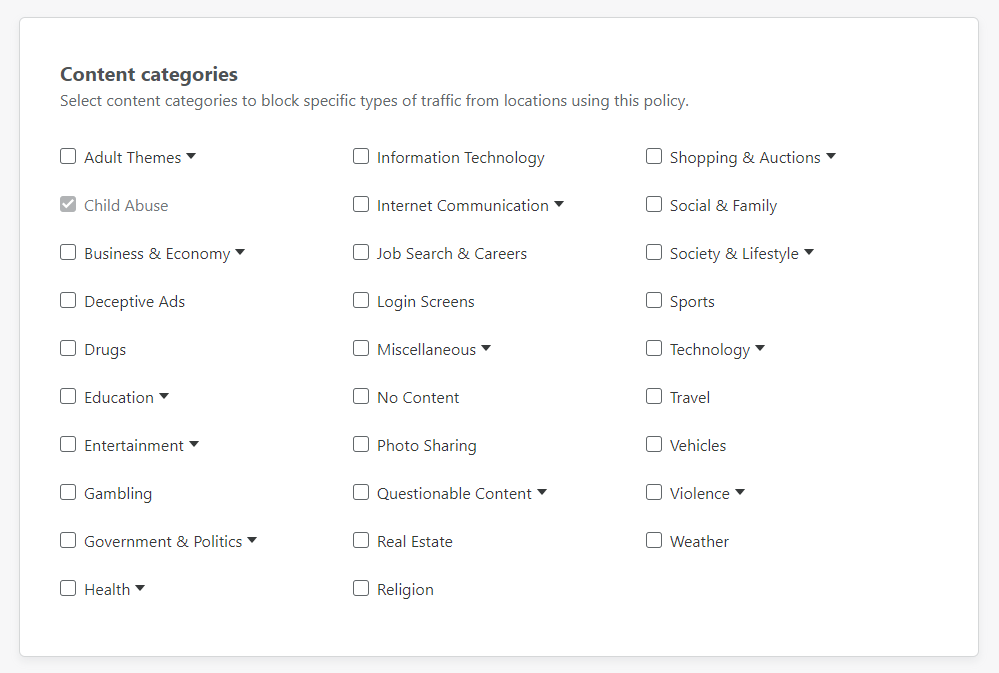
I decided to grab a few obvious ones to see what gets blocked, if anything, and again treat it as a bit of a learning exercise.
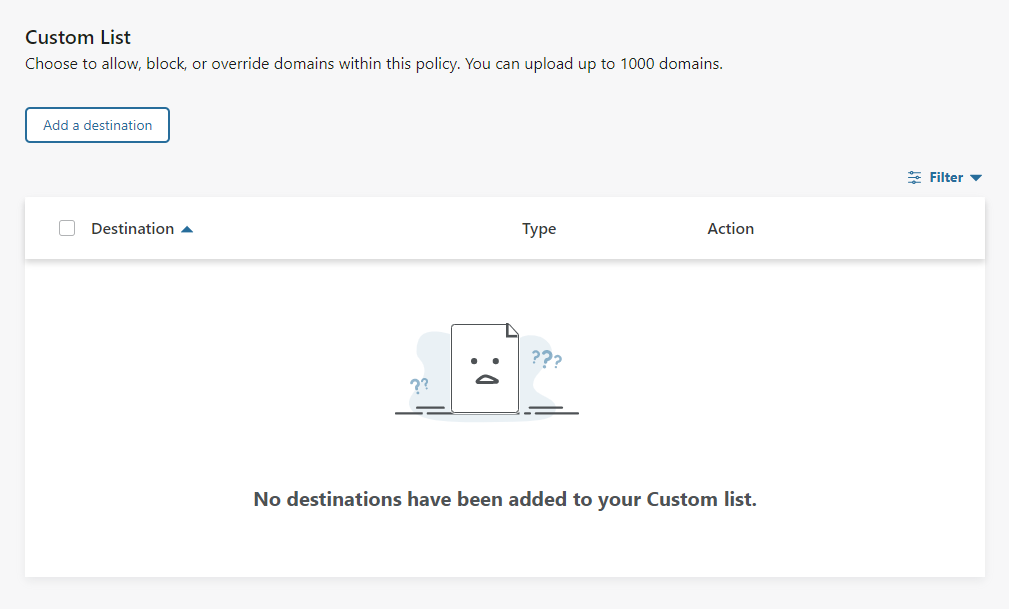
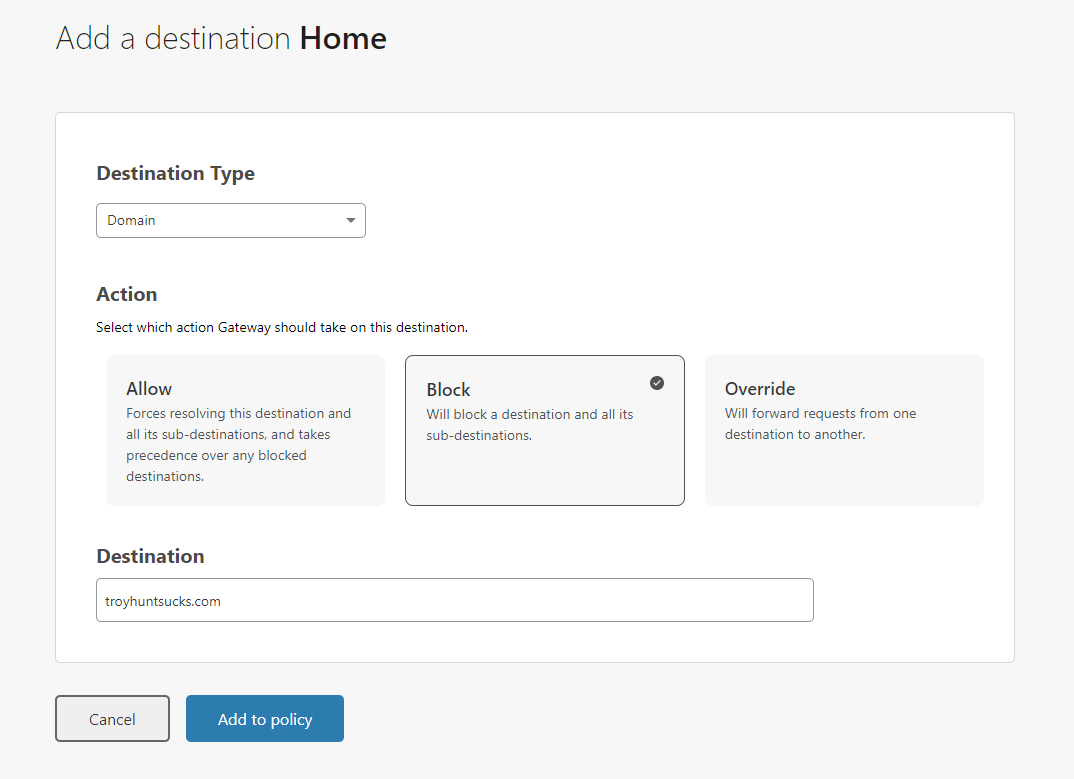
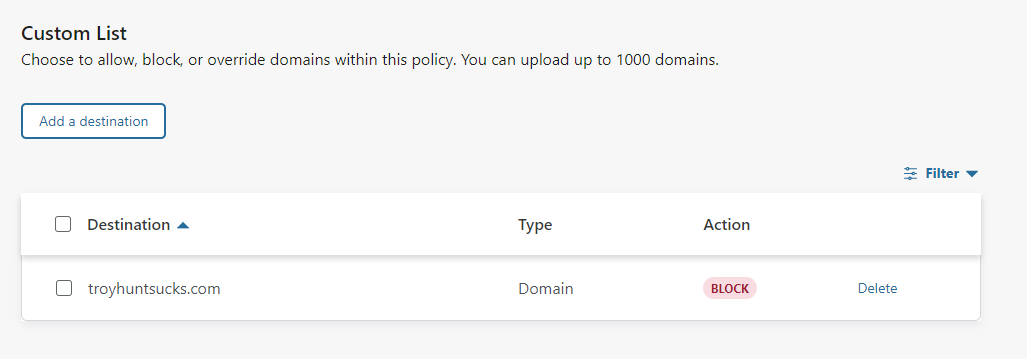
The final tab is "Custom", which allows you to create a custom list of blocked sites for yourself. This is great and something I would do on my Pi-hole but this is opening up some flexible protection to others who might not want to run their own local DNS server!
Of course, we need to try this out, right?!
With that, you now have a lot more control and visibility into your DNS and what's going on with your network.
If you'd like to make your iPhone/iPad/Mac do encrypted DNS all of the time, check my previous blog for details on how to do that. For Android users you check the same blog for your encrypted DNS (DoT) too. For me, this was a great way to get a little more insight and control into my DNS and given that the Cloudflare 1.1.1.1 service was already my DoH upstream, this made absolute sense for me to try it out.
Note: One final thing that may not be relevant for many, but my home network does not allow any outbound DNS/53 traffic so using a DoH upstream by hostname and not IP can be a problem. The Gateway documentation does detail that you can set a static IP (Location -> (expand location) Setup instructions -> Firefox -> Step 8) for your hostname so I'm using one of each of the 2 IP addresses that it resolves to for each of my hostnames: 162.159.36.5 and 162.159.36.20. This means I still don't need to allow any outbound DNS on 53 to resolve the hostnames of the DoH endpoints!