
I can't believe we're on Part 6 of this series now and things are still moving along at an awesome pace! Time to get hands on with a few more electrical items, a little bit of 'hacking' and some more interior modifications.
The Series
You spend the vast majority of your time inside your car when making use of it so it makes sense to spend time on making it a nicer place to be. In this blog we're going to look at a few more interior and comfort features, a couple of tweaks to improve the cosmetics and upgrading the main interface between the driver and the car itself.
Coding new features to the car
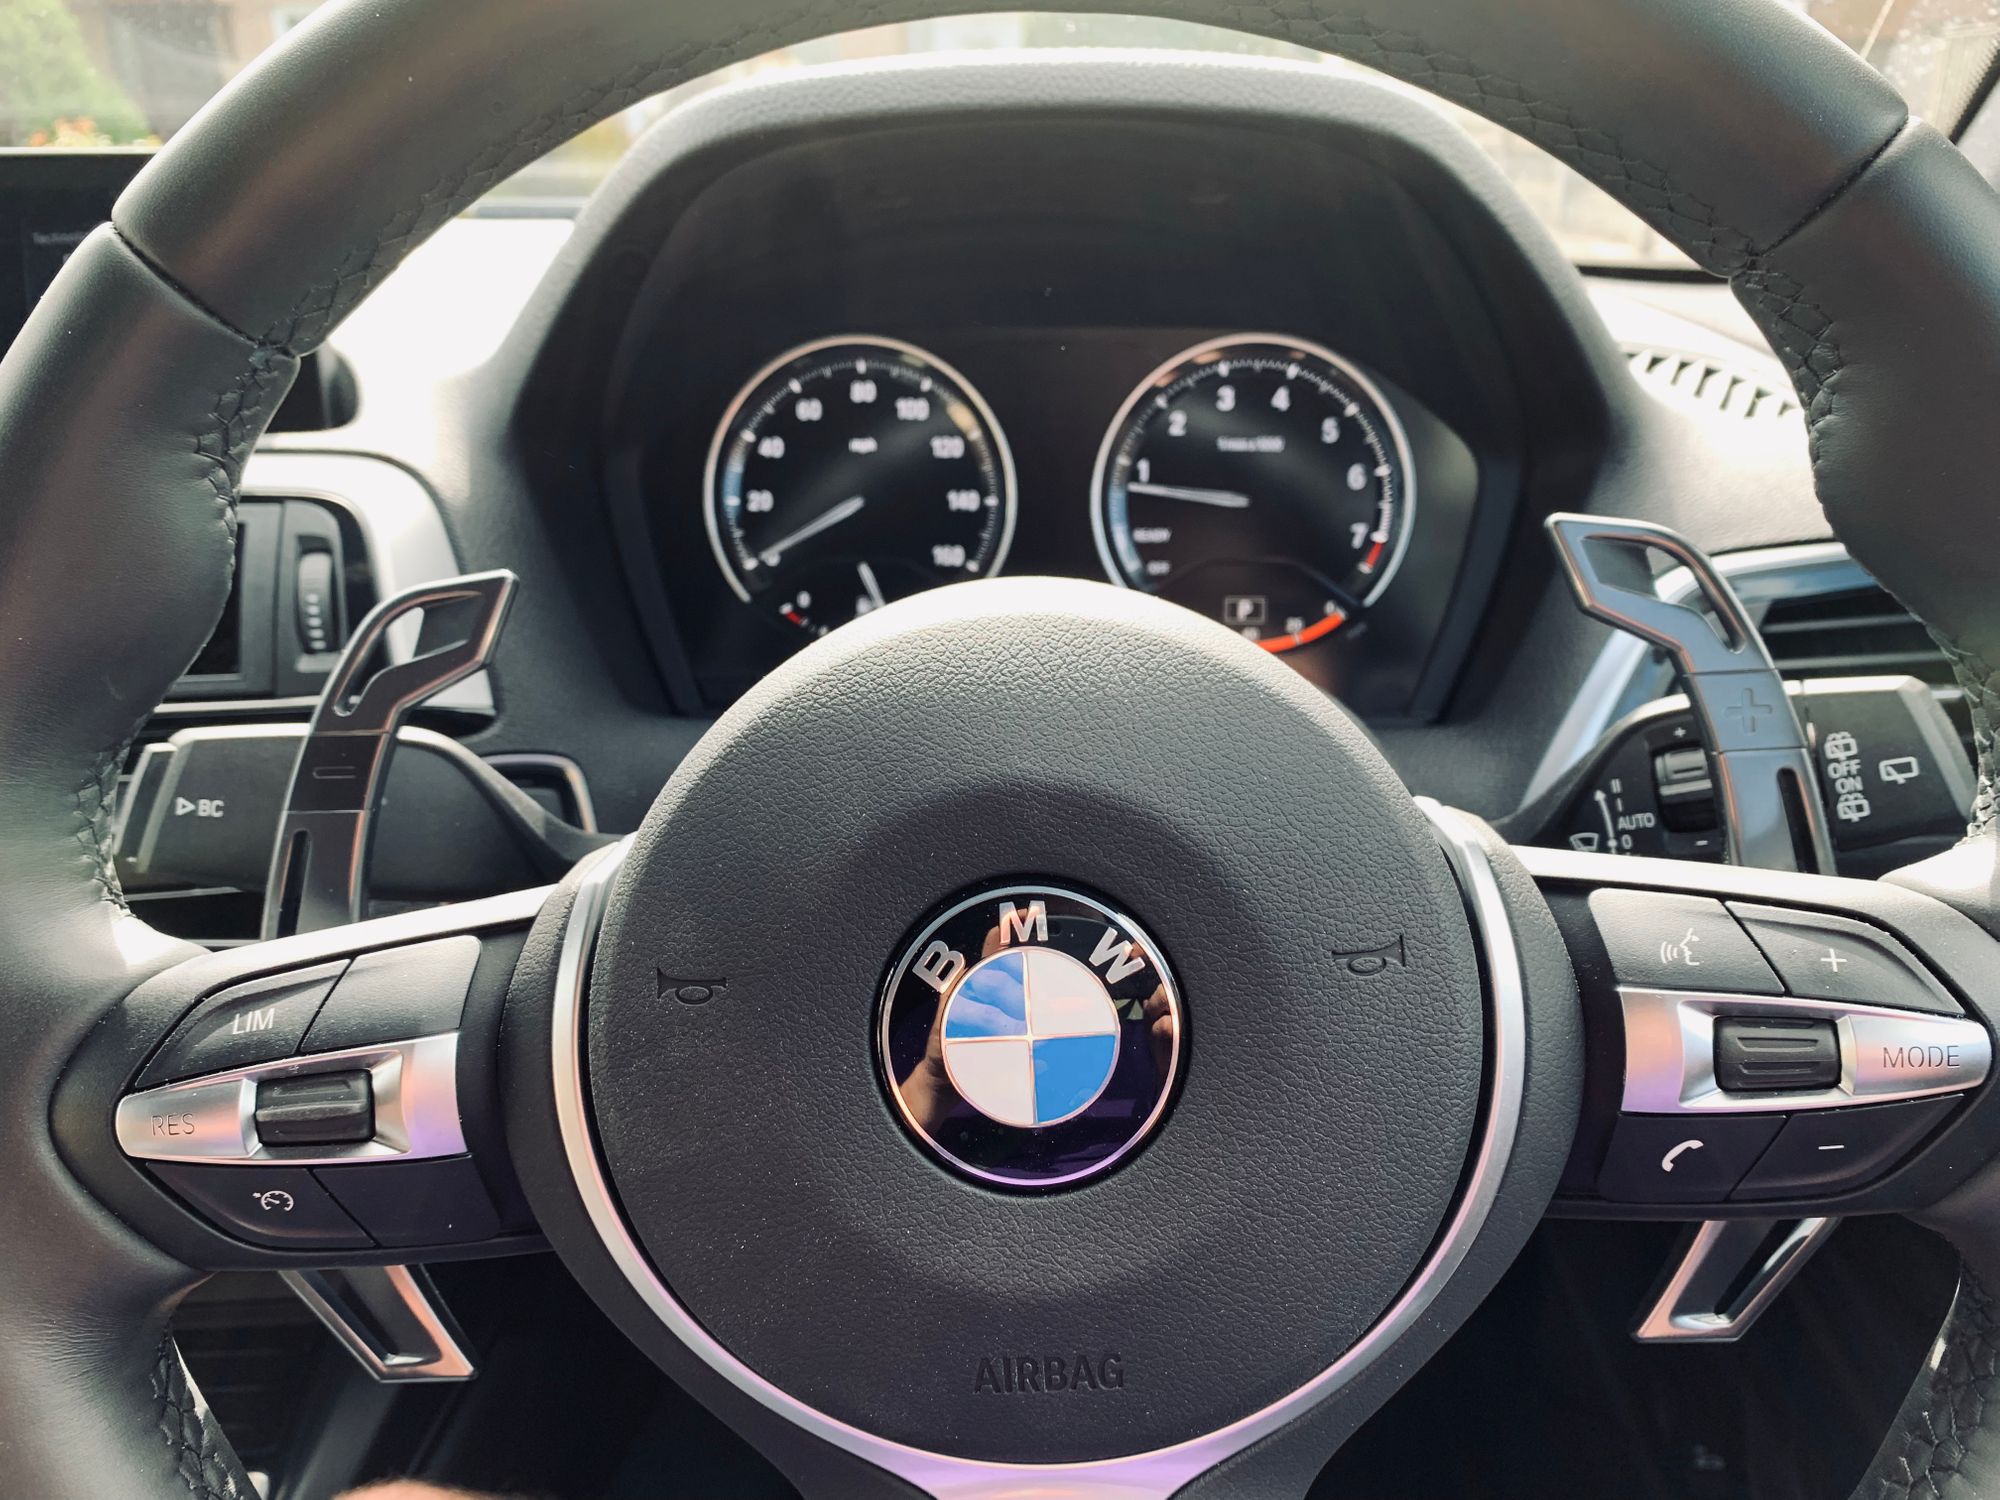
BMW owners may know that many features on a car are enabled (or 'coded') to the car in the factory. Most cars come a bunch of features disabled as they weren't specified on the car from the factory when it was originally purchased. These disabled features are controlled by software and as such you can enable certain features down the line if you know how. One of the things I like to do is change the aesthetics of the interior and it's surprisingly easy to do with little effort and not a lot of money. The ECUs and modules in each car are usually generic and for example when you start the car the startup animation on the screen may say "BMW 1 Series" or "BMW 3 Series", but it's usually just a choice from a menu in the factory and all of the controllers have the various animations built in to simplify production. As a result, you can configure your car to use different startup animations and the same goes for various other things like the styling on menu systems. Different models in the range may have different layouts or colours, but the controller has all of them loaded in and which one to use is a simple configuration option that can be changed. Take the sports gauges on my car as standard, here they are.
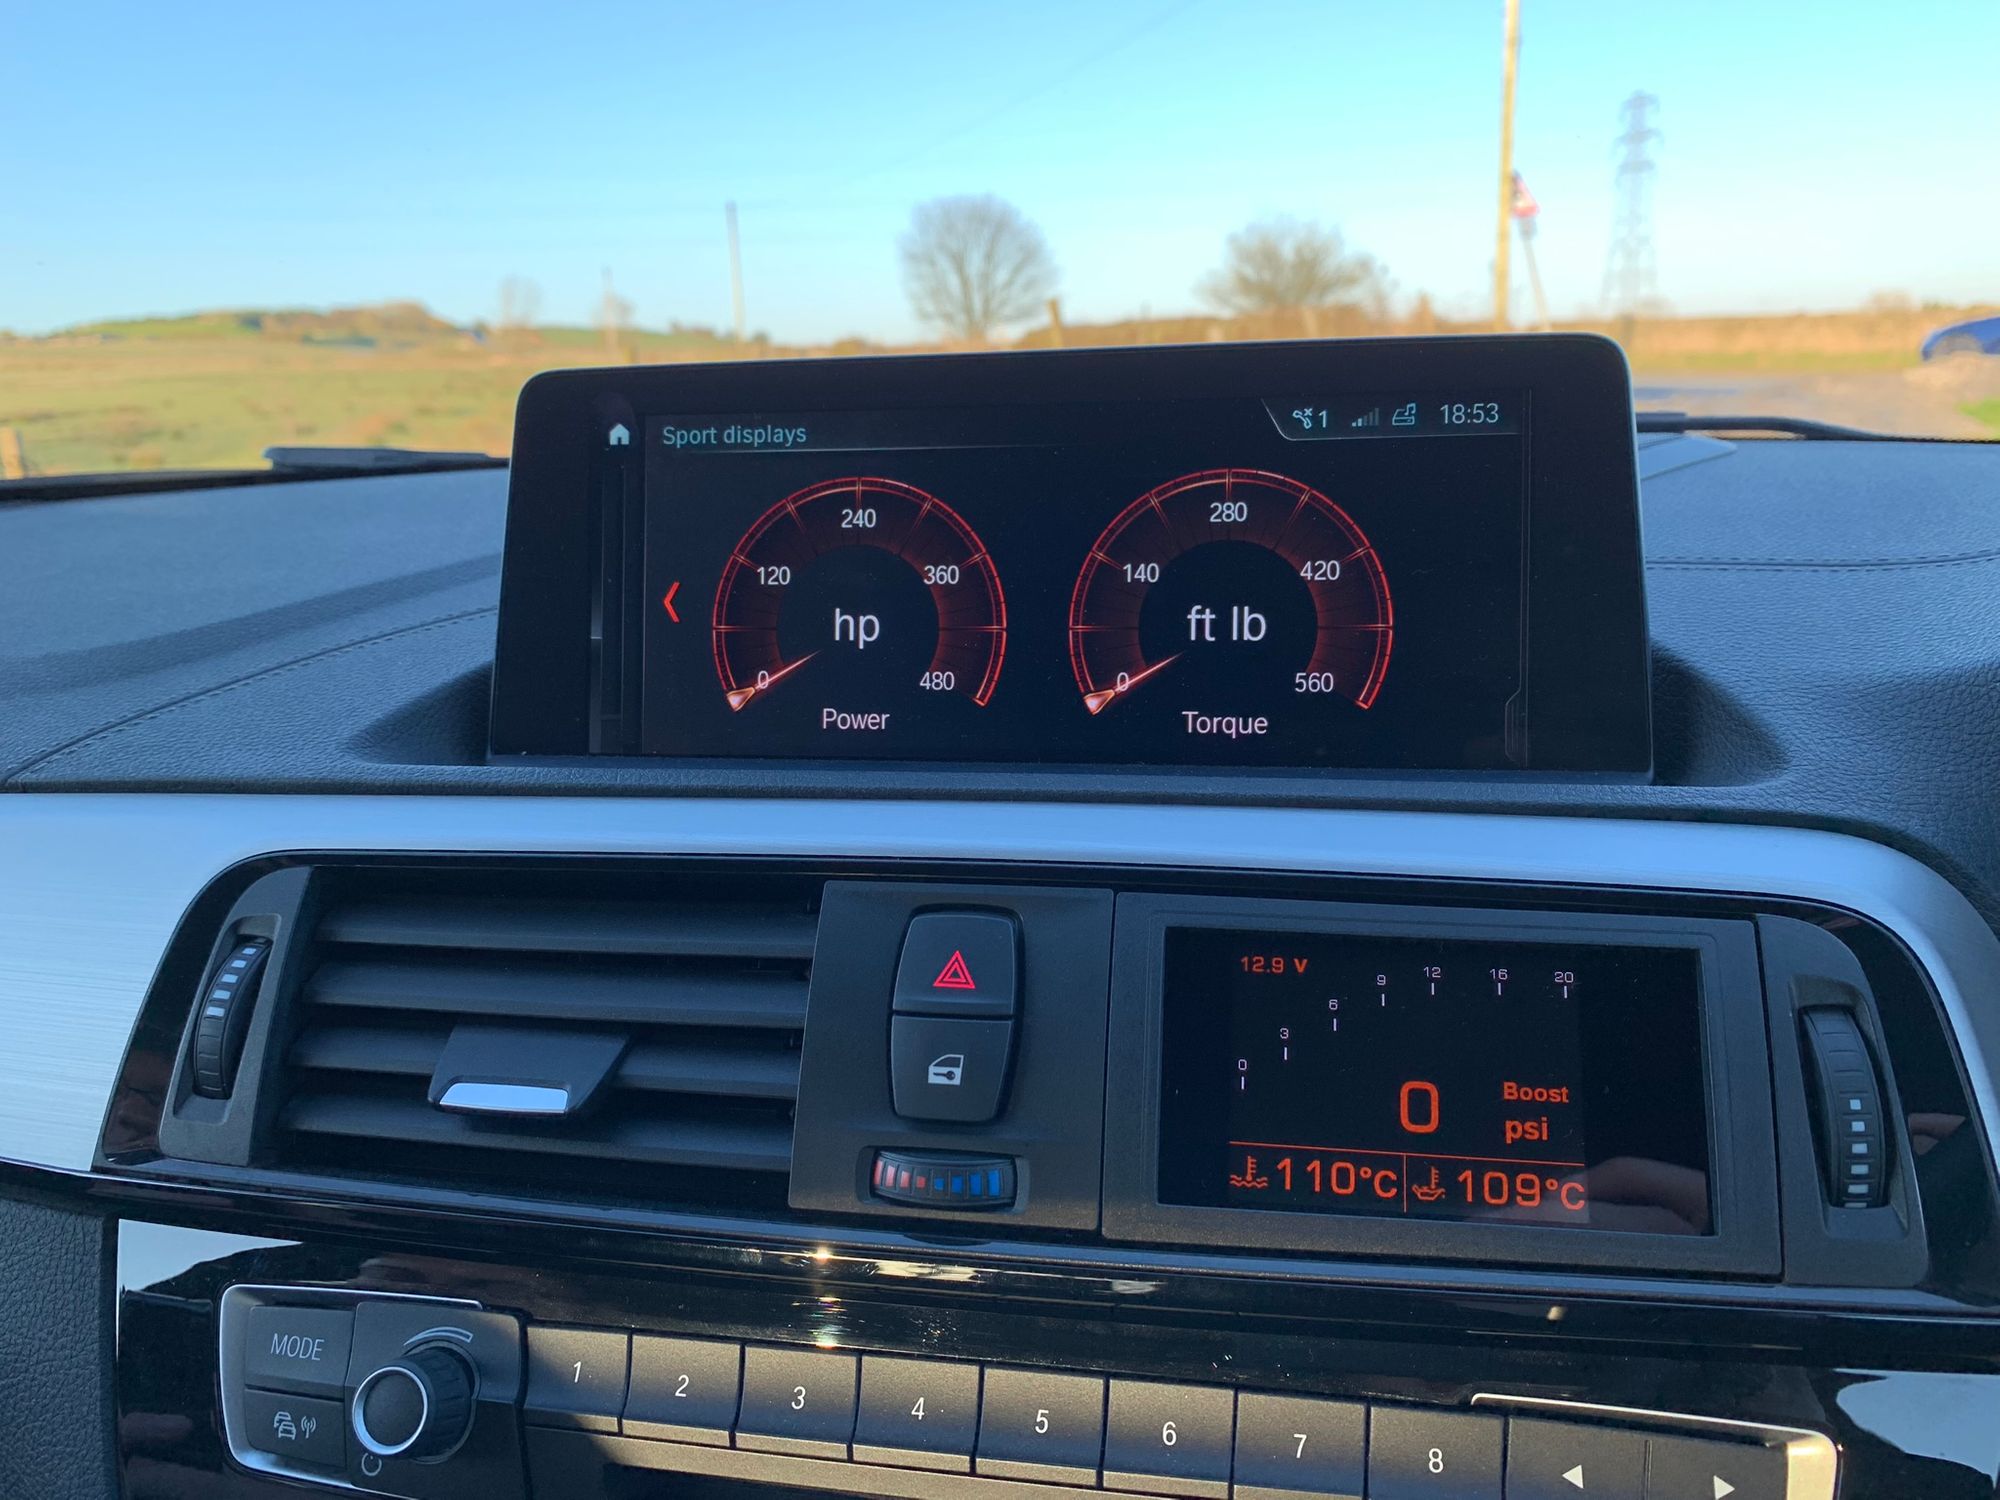
Now, they look OK, there's nothing particularly wrong with them, but look at the other style that's available from another model in the BMW range.
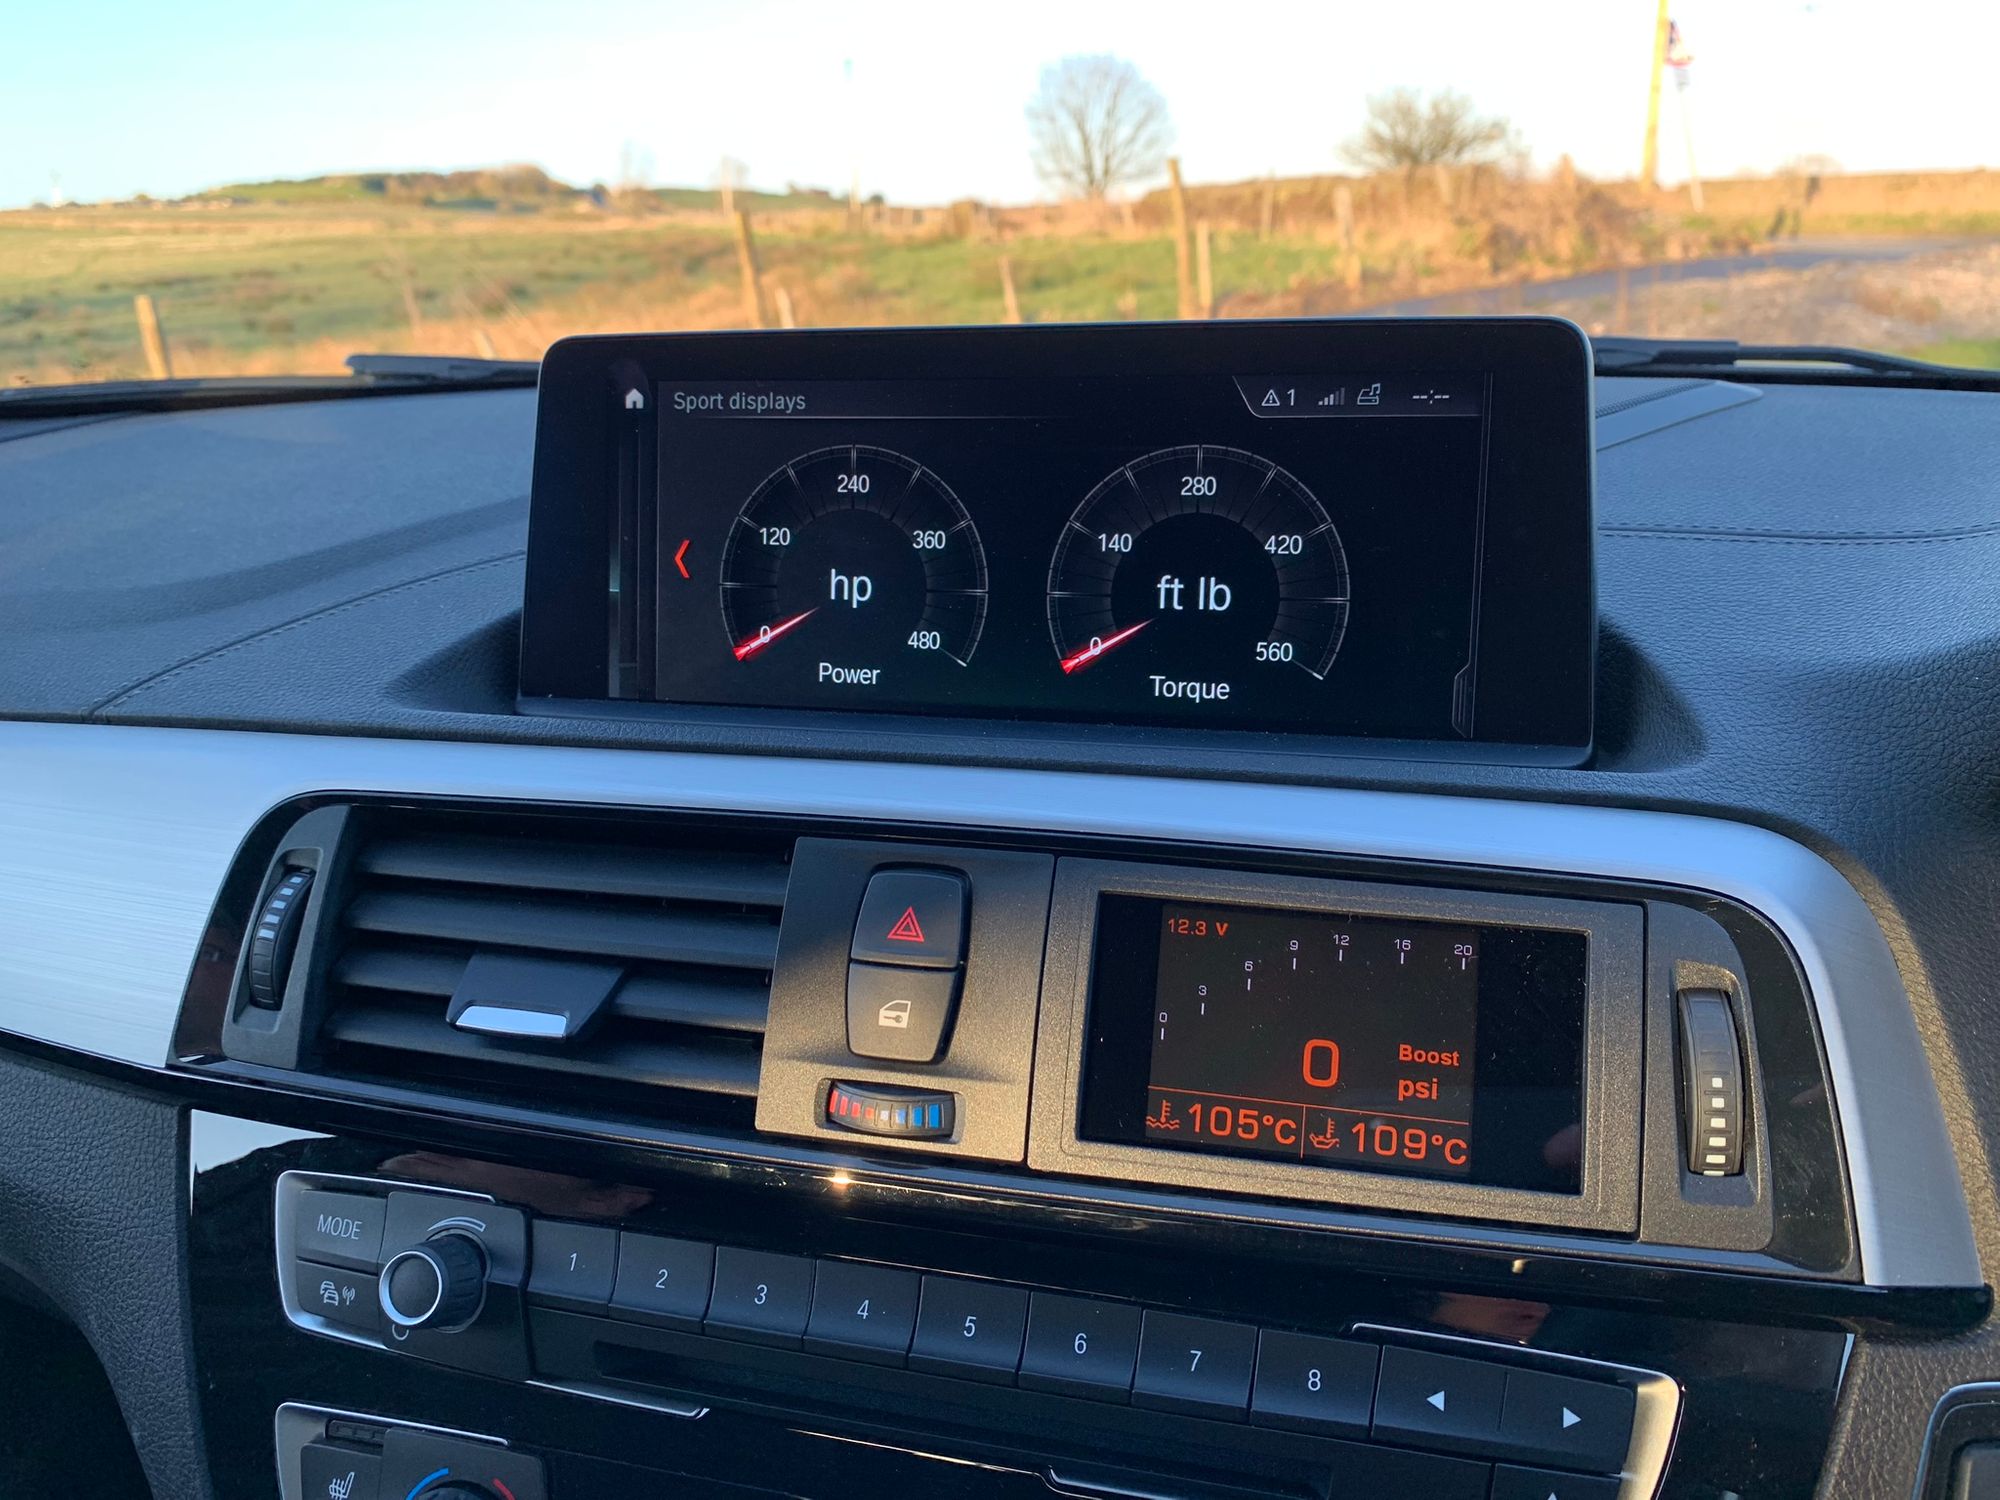
The new sports dials look a lot cleaner and I much prefer the white/silver dials with the red needles instead of the more traditional orange look. I also coded in a new startup animation from one of the M series cars that looks loads better than the 1 Series startup animation. Finally, I tweaked the instrument cluster in a few subtle ways too so it was more to my liking. To get started all you need is a compatible OBD tool and an app, for which I chose BimmerCode.
Other options that I coded in are that the wing mirrors now fold automatically when the car is locked, which seems like it should just be enabled all the time?! If not, this should just be an option in the BMW menu system somewhere, it really feels like you shouldn't need to buy an app and a cable/tool to do this! Some more touches include the door handle lights now coming on in reverse, so you have some light on the kerb side when parking, and a few tweaks of the daytime running light brightness so they are now a little more powerful and are on all the time. Again, all things that you should be able to configure in the standard menu system, but you can't! This is also only a fraction of what you can do too. You can even go far as to control the temperature of the heated seats in various modes if it's not to your liking!
MMR Performance Aluminium Paddle Shifters
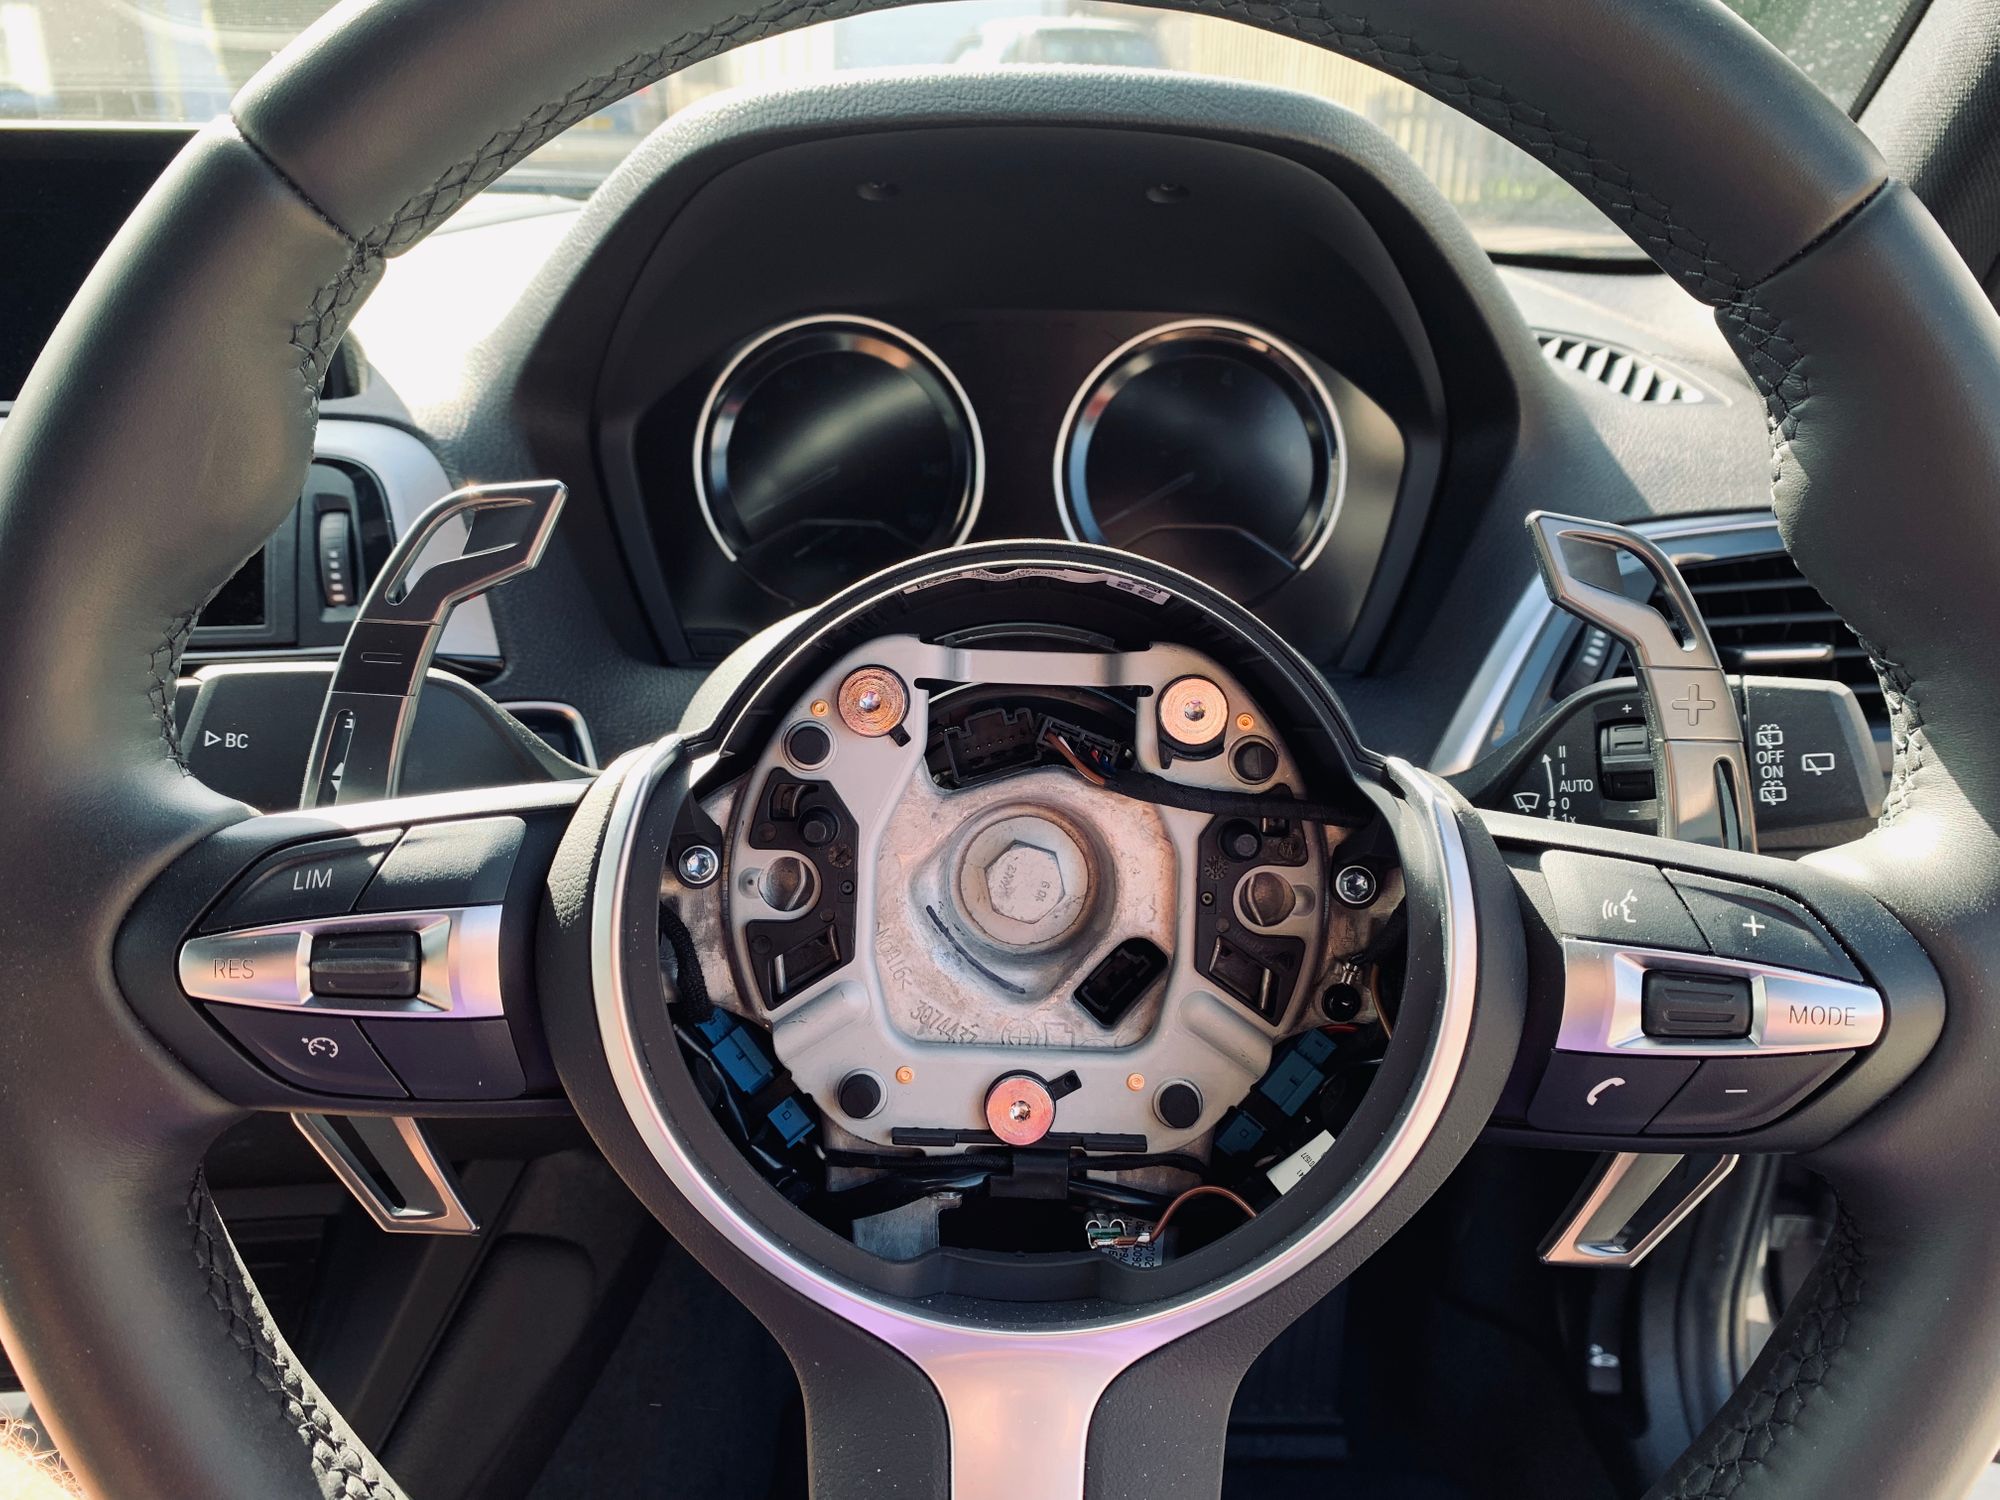
Focusing further on the interior and I wanted to change the paddle shifters on the back of the steering wheel. As I mentioned in earlier posts my car was the automatic transmission model and with that comes the manual paddle shifts on the back of the steering wheel. The standard ones kind of look OK, but there was a lot of room for improvement. They were also plastic which really seemed like a cheap idea and they should really be made out of a better material. The final problem I had with them was that they were so small. If you were driving the car in manual mode then you were very limited on where you could place your hands on the steering wheel and still reach the shifter paddles. To remedy all of these problems I went for a set of MMR Performance Paddle Shifters that are made from aluminium, giving a much more premium feel, and are also much larger meaning you can reach them a lot easier with your hands in various locations. Here's a comparison shot when I was halfway through fitting with the new MMR shifter on the left side and the original one on the right side.
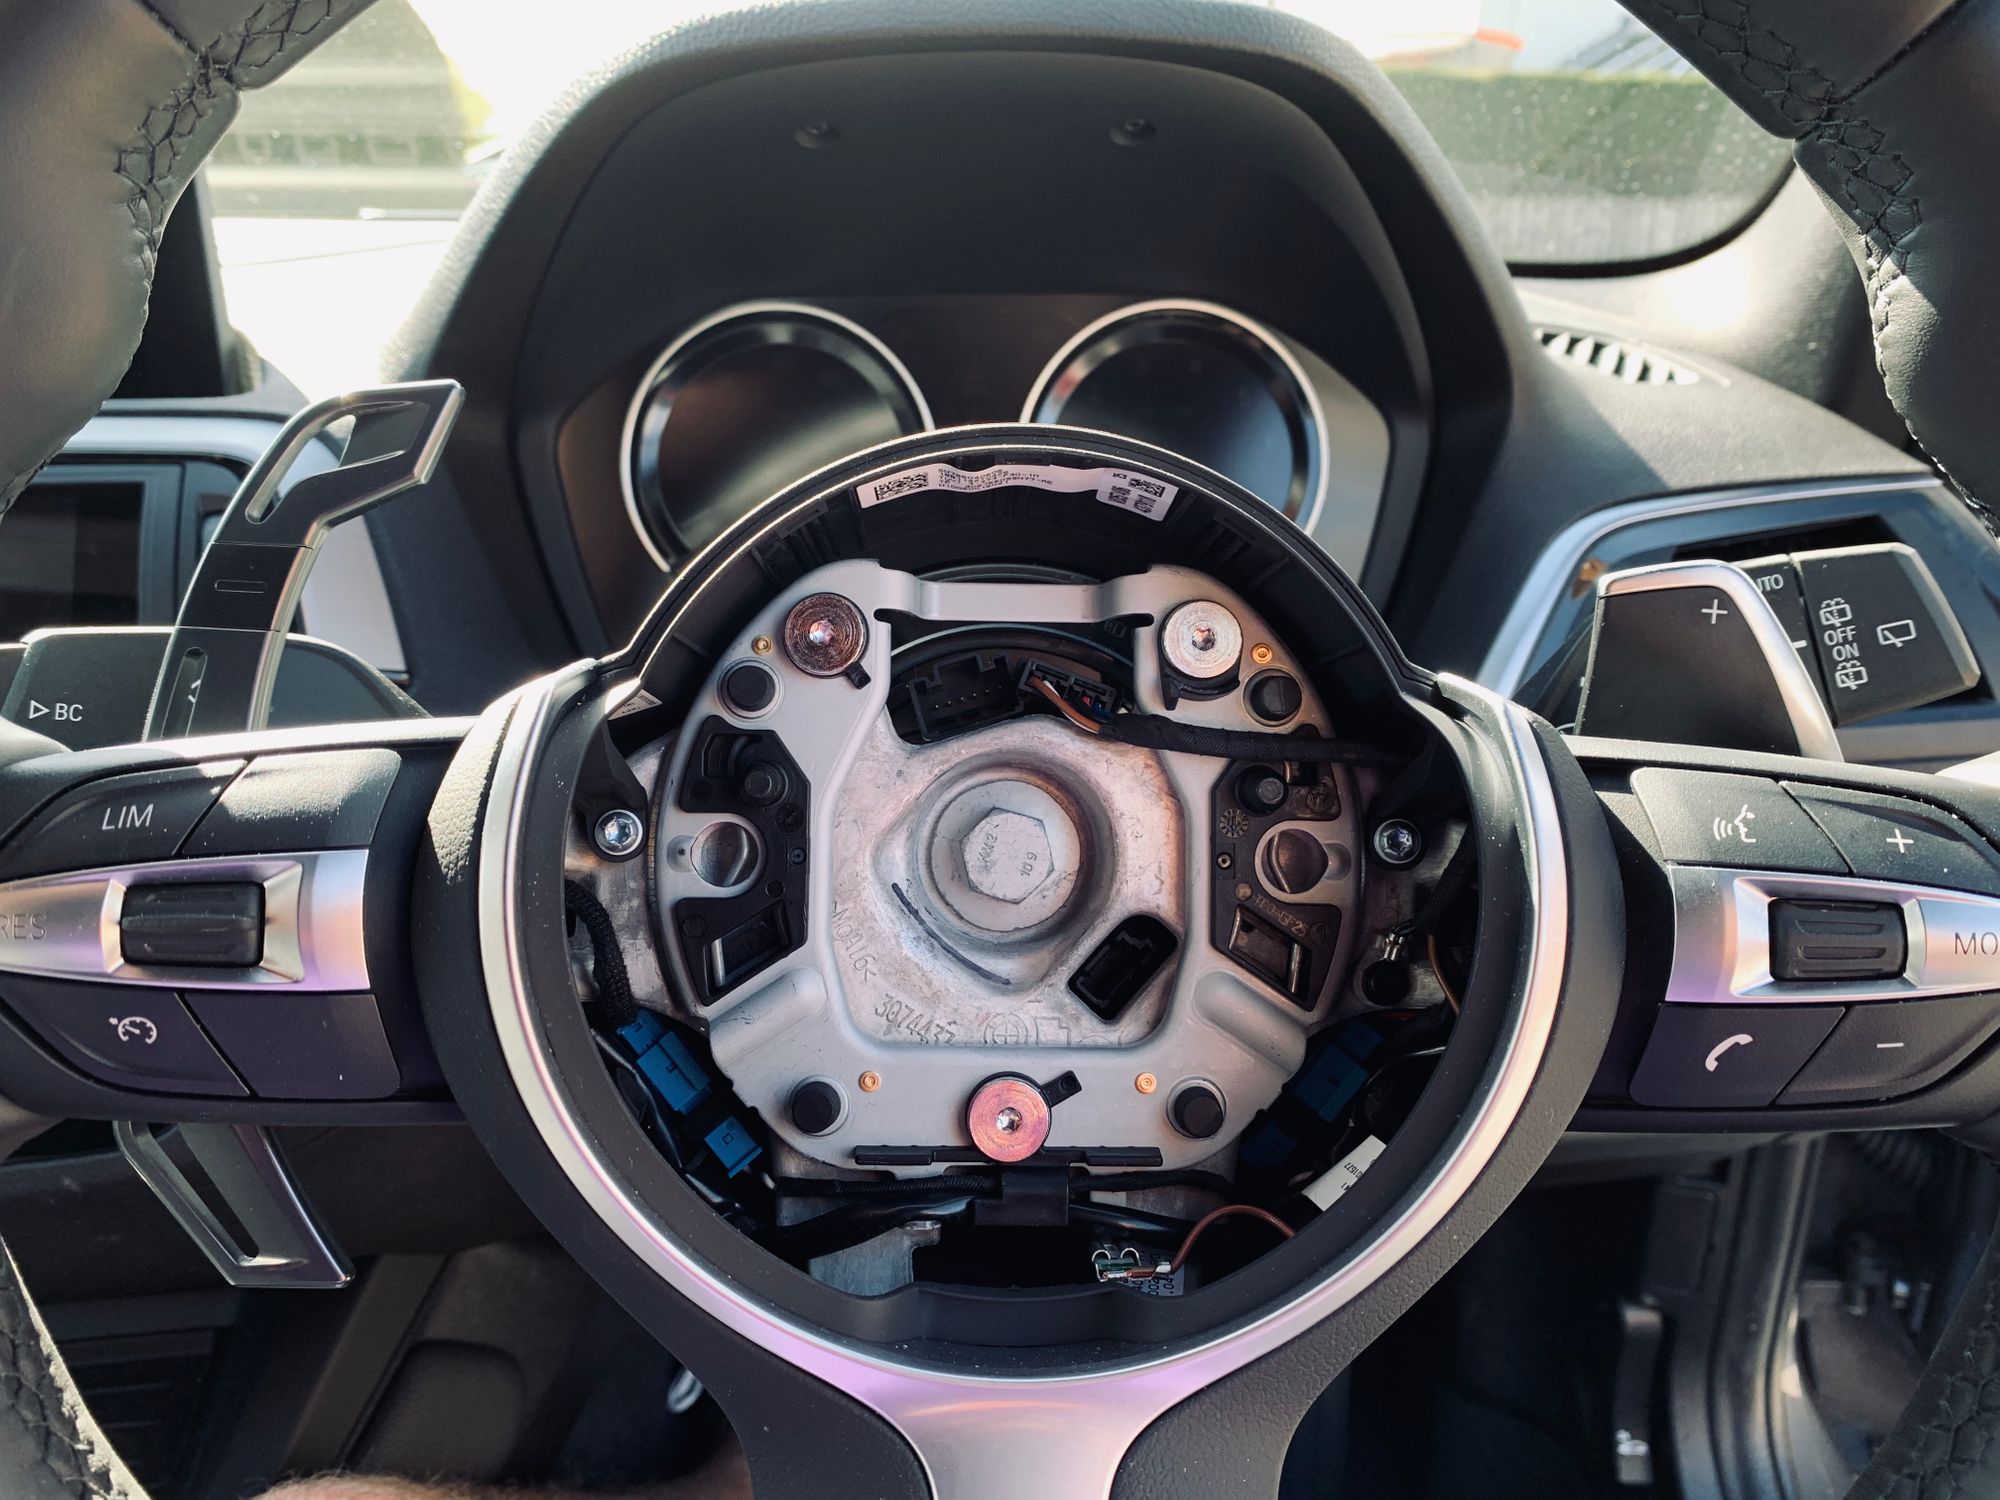
You can see the MMR one does look a heap better, it extends much higher than the original shifter and you can see the original shifter has no presence in the bottom half of the steering wheel while the MMR one does. As I mentioned the aluminium feels a lot better than the plastic and is more solid making it much more tactile when using the shifter too. All in all, I'm very happy with them.
Fitting was super easy and they are a direct replacement for the OEM shifter paddles. You need to disconnect the battery because we're removing the airbag and swap the paddles over by removing a couple of little screws on the inside of the steering wheel. The whole thing took me about 30 minutes from start to end.
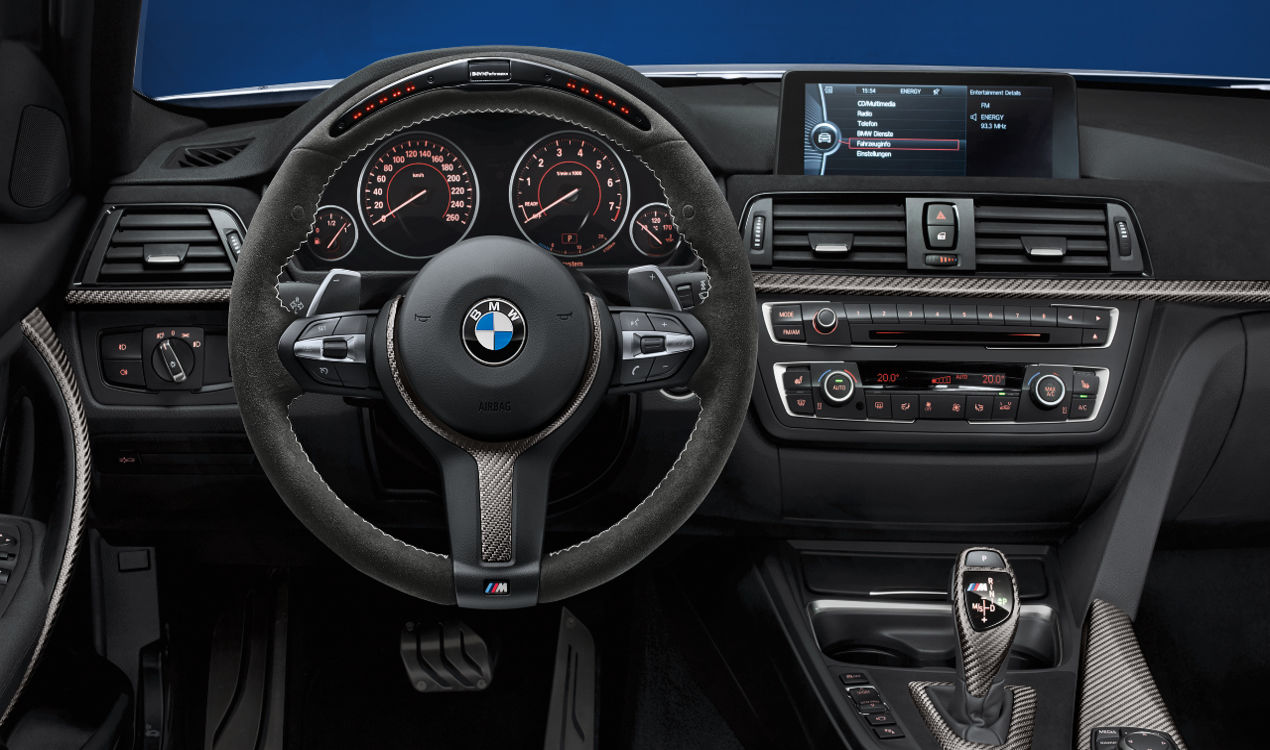
BMW M Performance Steering Wheel
The new paddle shifters were a great upgrade and they highlighted that the steering wheel and shifters are the main interface between me and the car. These are the things that you are always going to use when driving the car and it was worth upgrading them. Given that it was worth upgrading them, I know that some higher model BMWs came with different steering wheels and one in particular had caught my eye. BMW sell the M Performance Steering Wheel which is a very nice piece of kit and comes wrapped in Alcantara with an optional race display too! I took a look at a couple of cars at the local dealership that had both of them fitted from the factory and decided to pull the trigger. My local BMW dealership had two shipped over from BMW Germany, one of them had the race display and one of the ones without the race display!
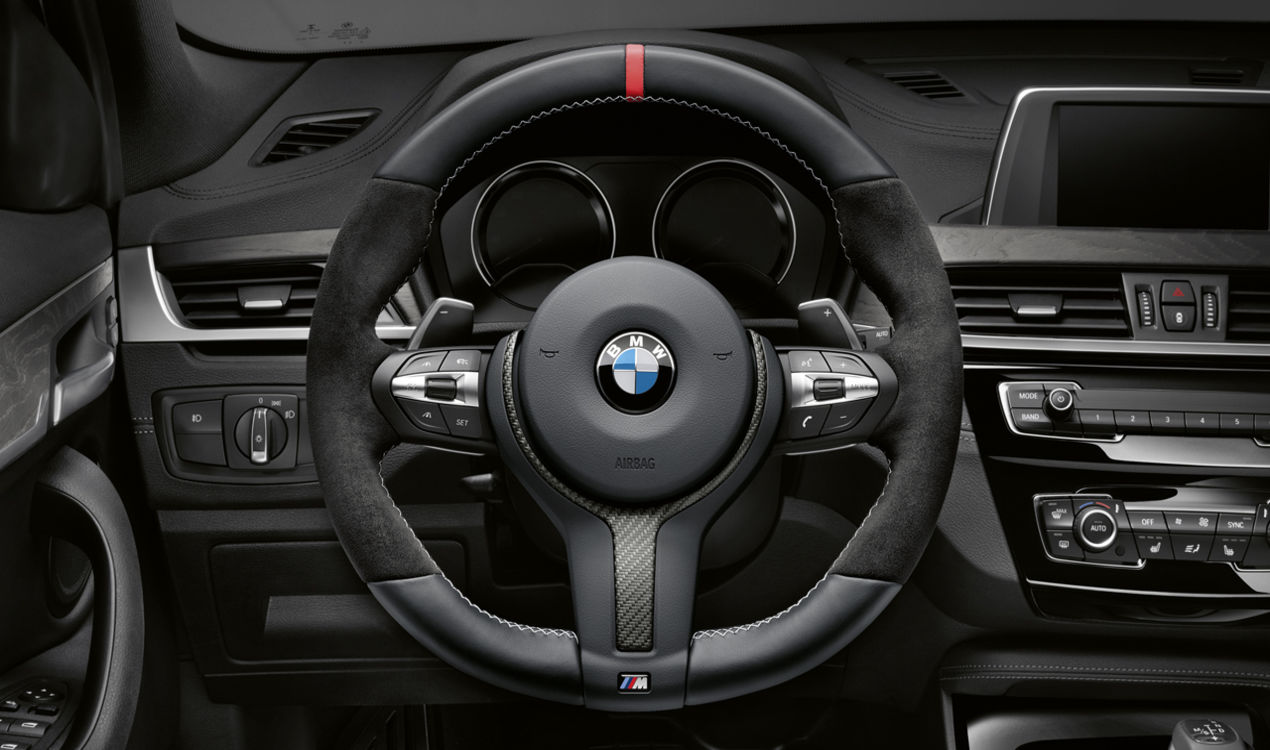
Now the one with the race display does look a lot cooler and who doesn't want those F1 style shift lights right there on the steering wheel?! That said, the one with the race display was almost twice as expensive as the one without. You can see the wheel without the display here at £700 and the one with the display here at £1,300. It was a tough call, but it really wasn't... 😎
The display can be customised to show one of countless different pieces of information from temperatures to pressures and lap times to G force but the best thing has to be those shift indicator lights!
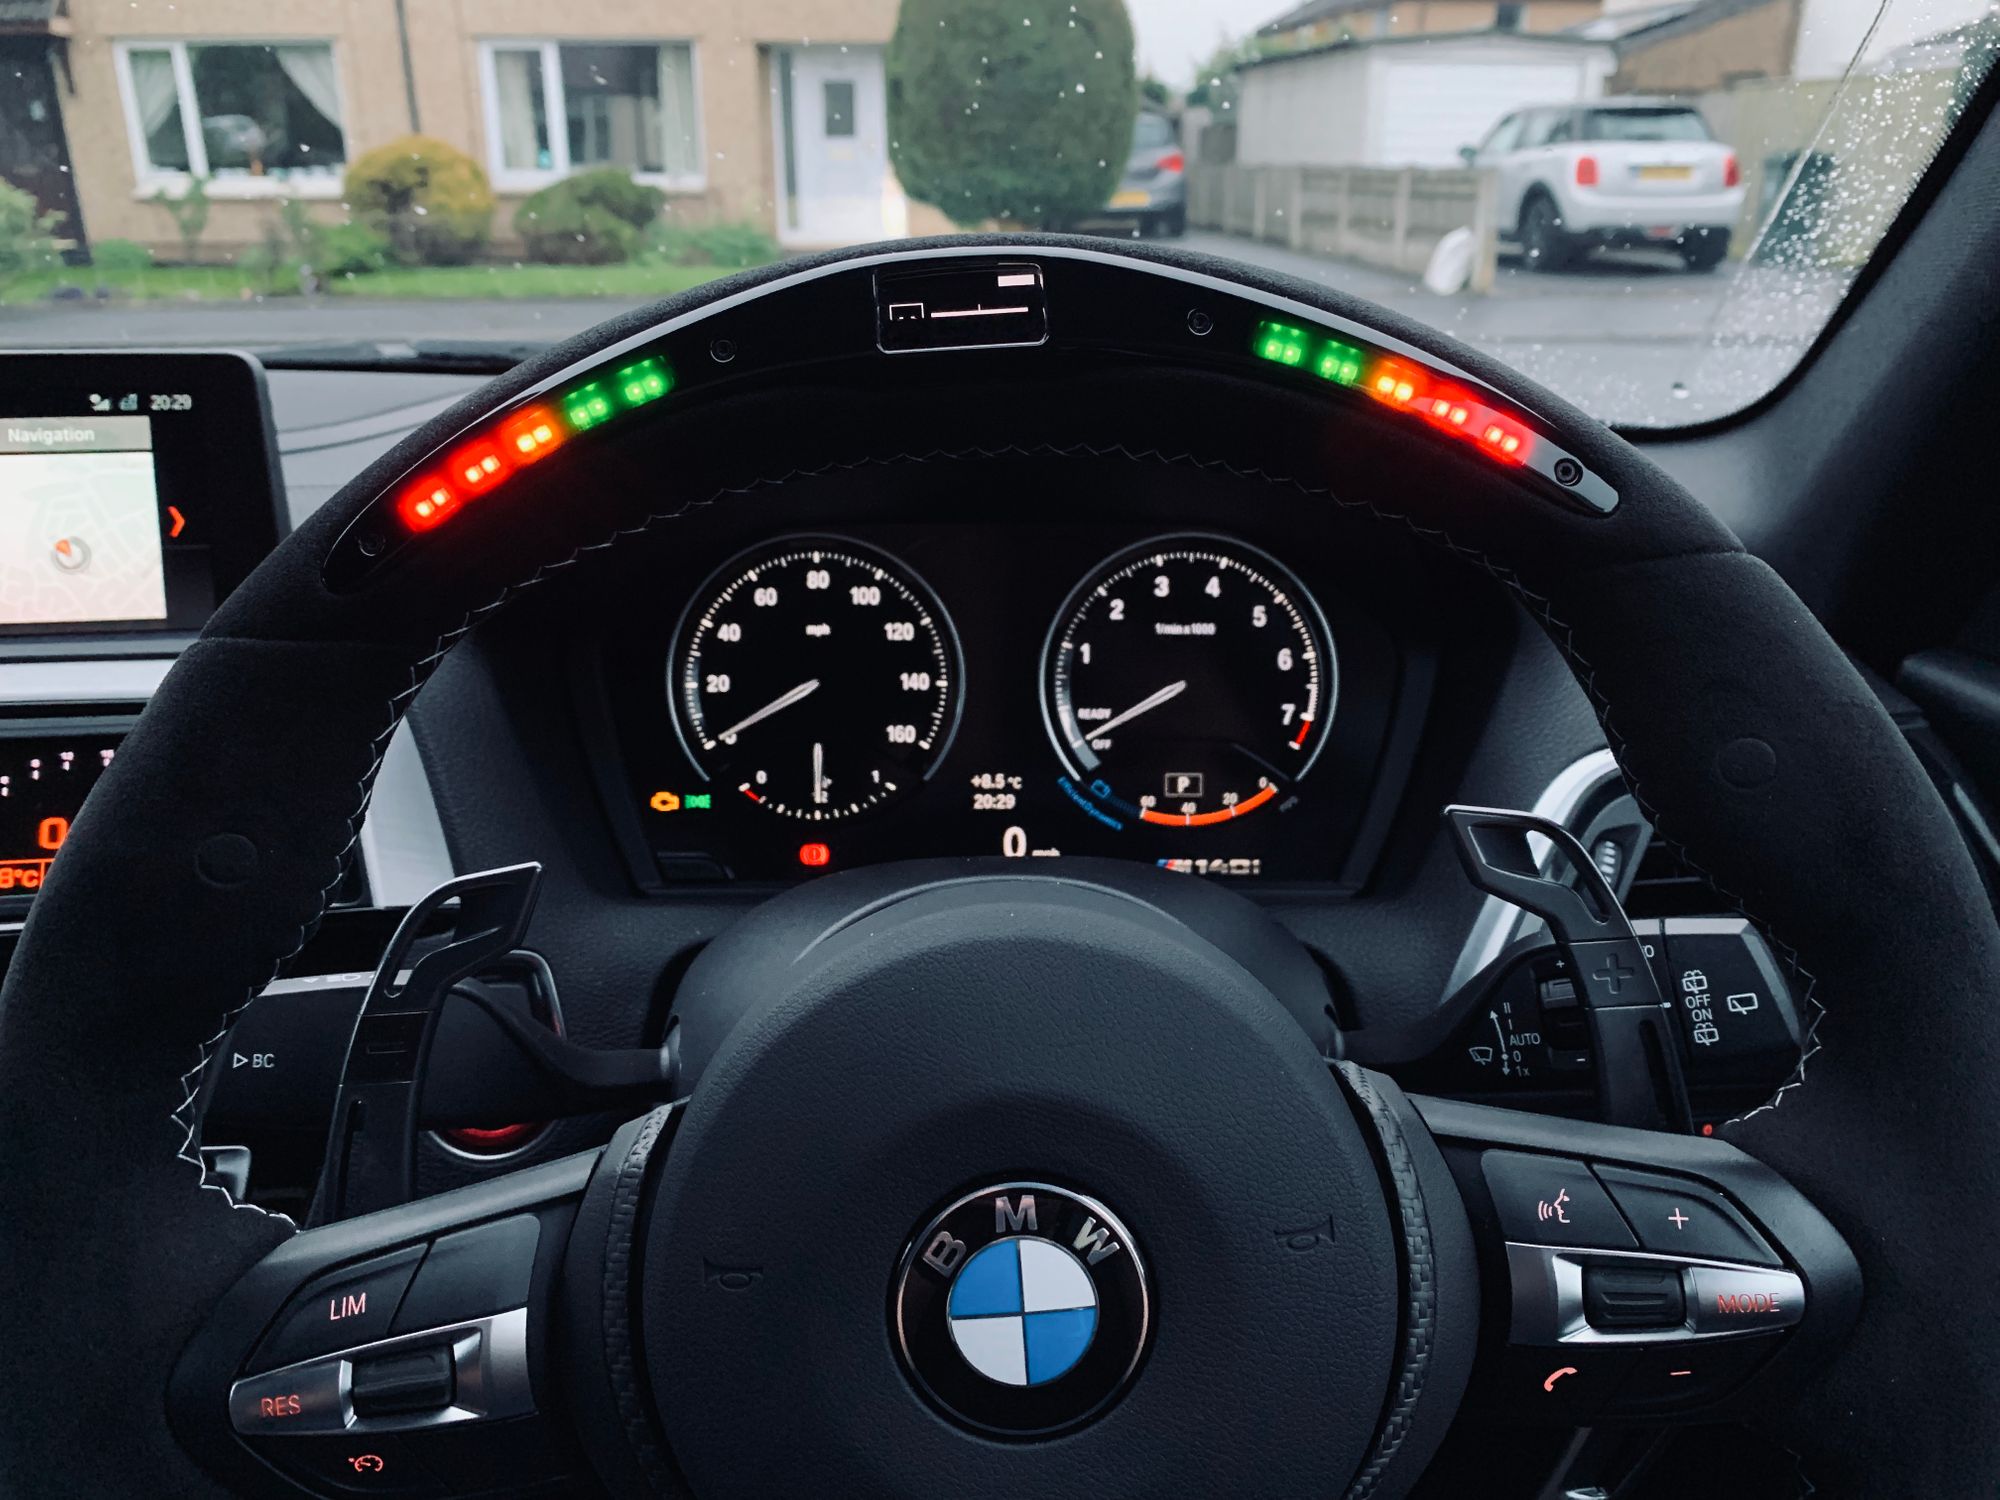
As you're driving and building the revs the shift lights fill up the bars in green, yellow and red and then flash red when it's time to shift up. Likewise on the downshift you can tell if you're shifting down too aggressively as it'll flash at you and let you know the revs were too high when you dropped a gear. On top of the lights and display which are really cool, the wheel itself is a lot better to hold with the Alcantara wrap being more comfortable and offering a lot more grip. It's the single thing that you're holding the entire time you're in the car so it makes sense to have it feel really nice and it certainly does.
CosmeticTweaksFinalFinal(1)
Yeah OK, maybe I have a problem, but I just can't help myself! I loved the orange colour on the new brake calipers from Part 5 and the contrast they had against the dark theme on the car was really appealing. I wanted to carry the orange theme a little more through the car and sometimes, adding a little, subtle dash of colour can make a really big difference.
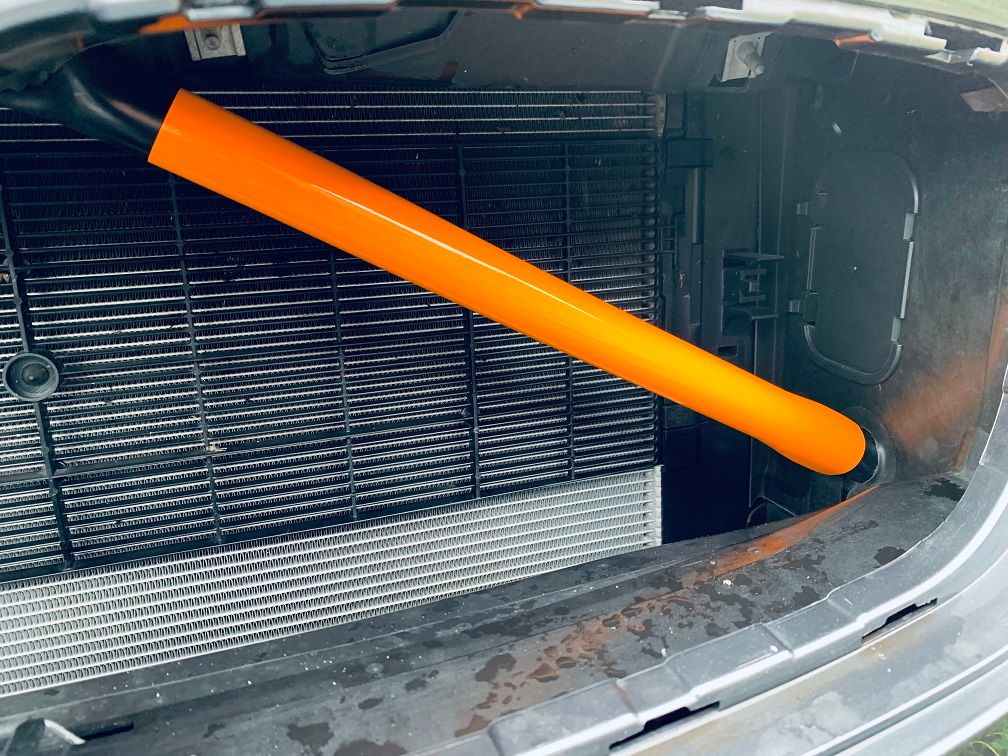
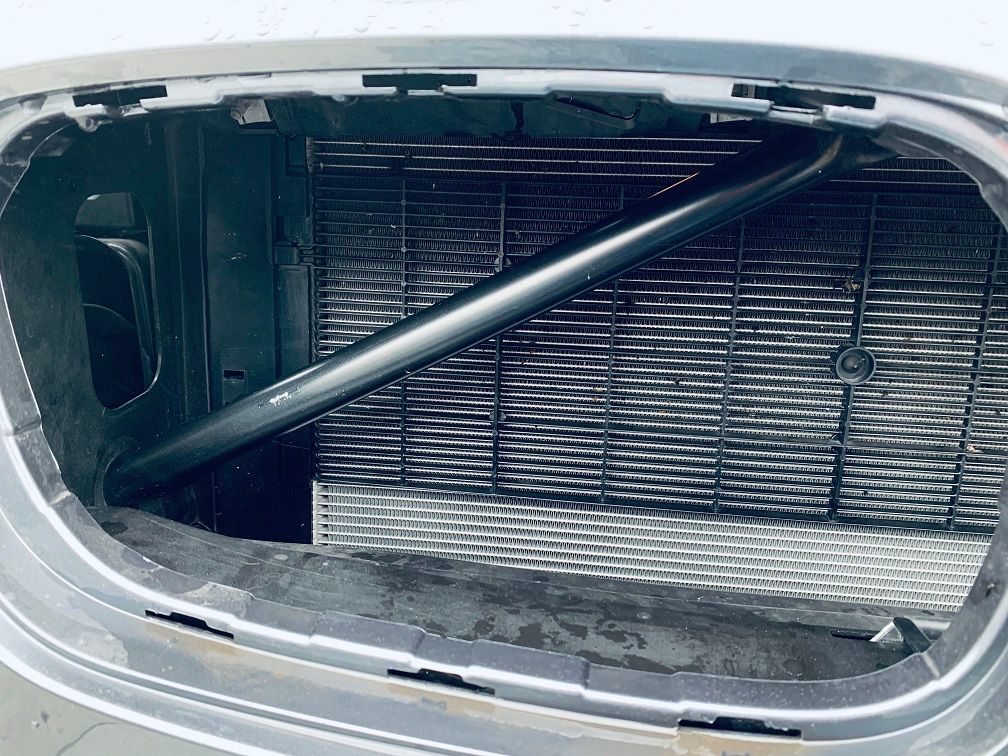
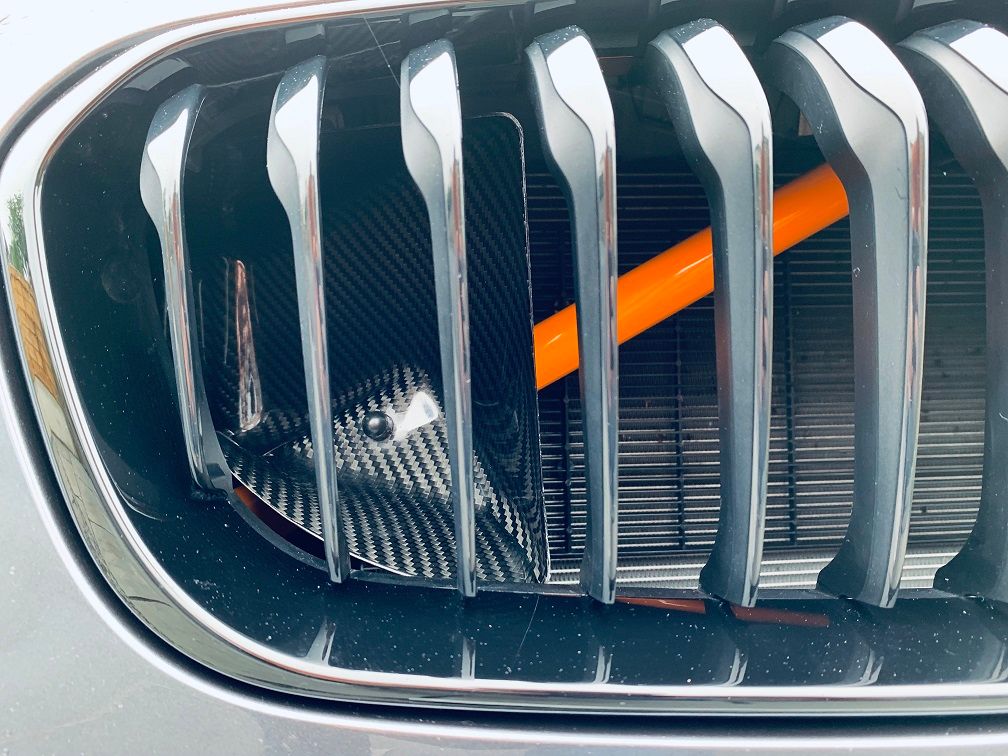
The first step I wanted to take was the 'crash bars' behind the kidney grilles. You may have noticed these kind of diagonal bars that form a triangle shape behind the grilles and they are painted black as standard, I guess to try and hide their appearance as much as possible. Well, they won't be hidden for much longer! I went to a local vinyl shop and explained what I was trying to wrap and the colour I wanted, referring to the brake calipers. They had a dig around in the shop and handed me a small off cut of matching orange vinyl and didn't even charge me for the piece which was a bonus! I took it home and popped the kidney grilles out to give it a go and here is a side by side comparison of a standard crash bar in black and the new orange look.
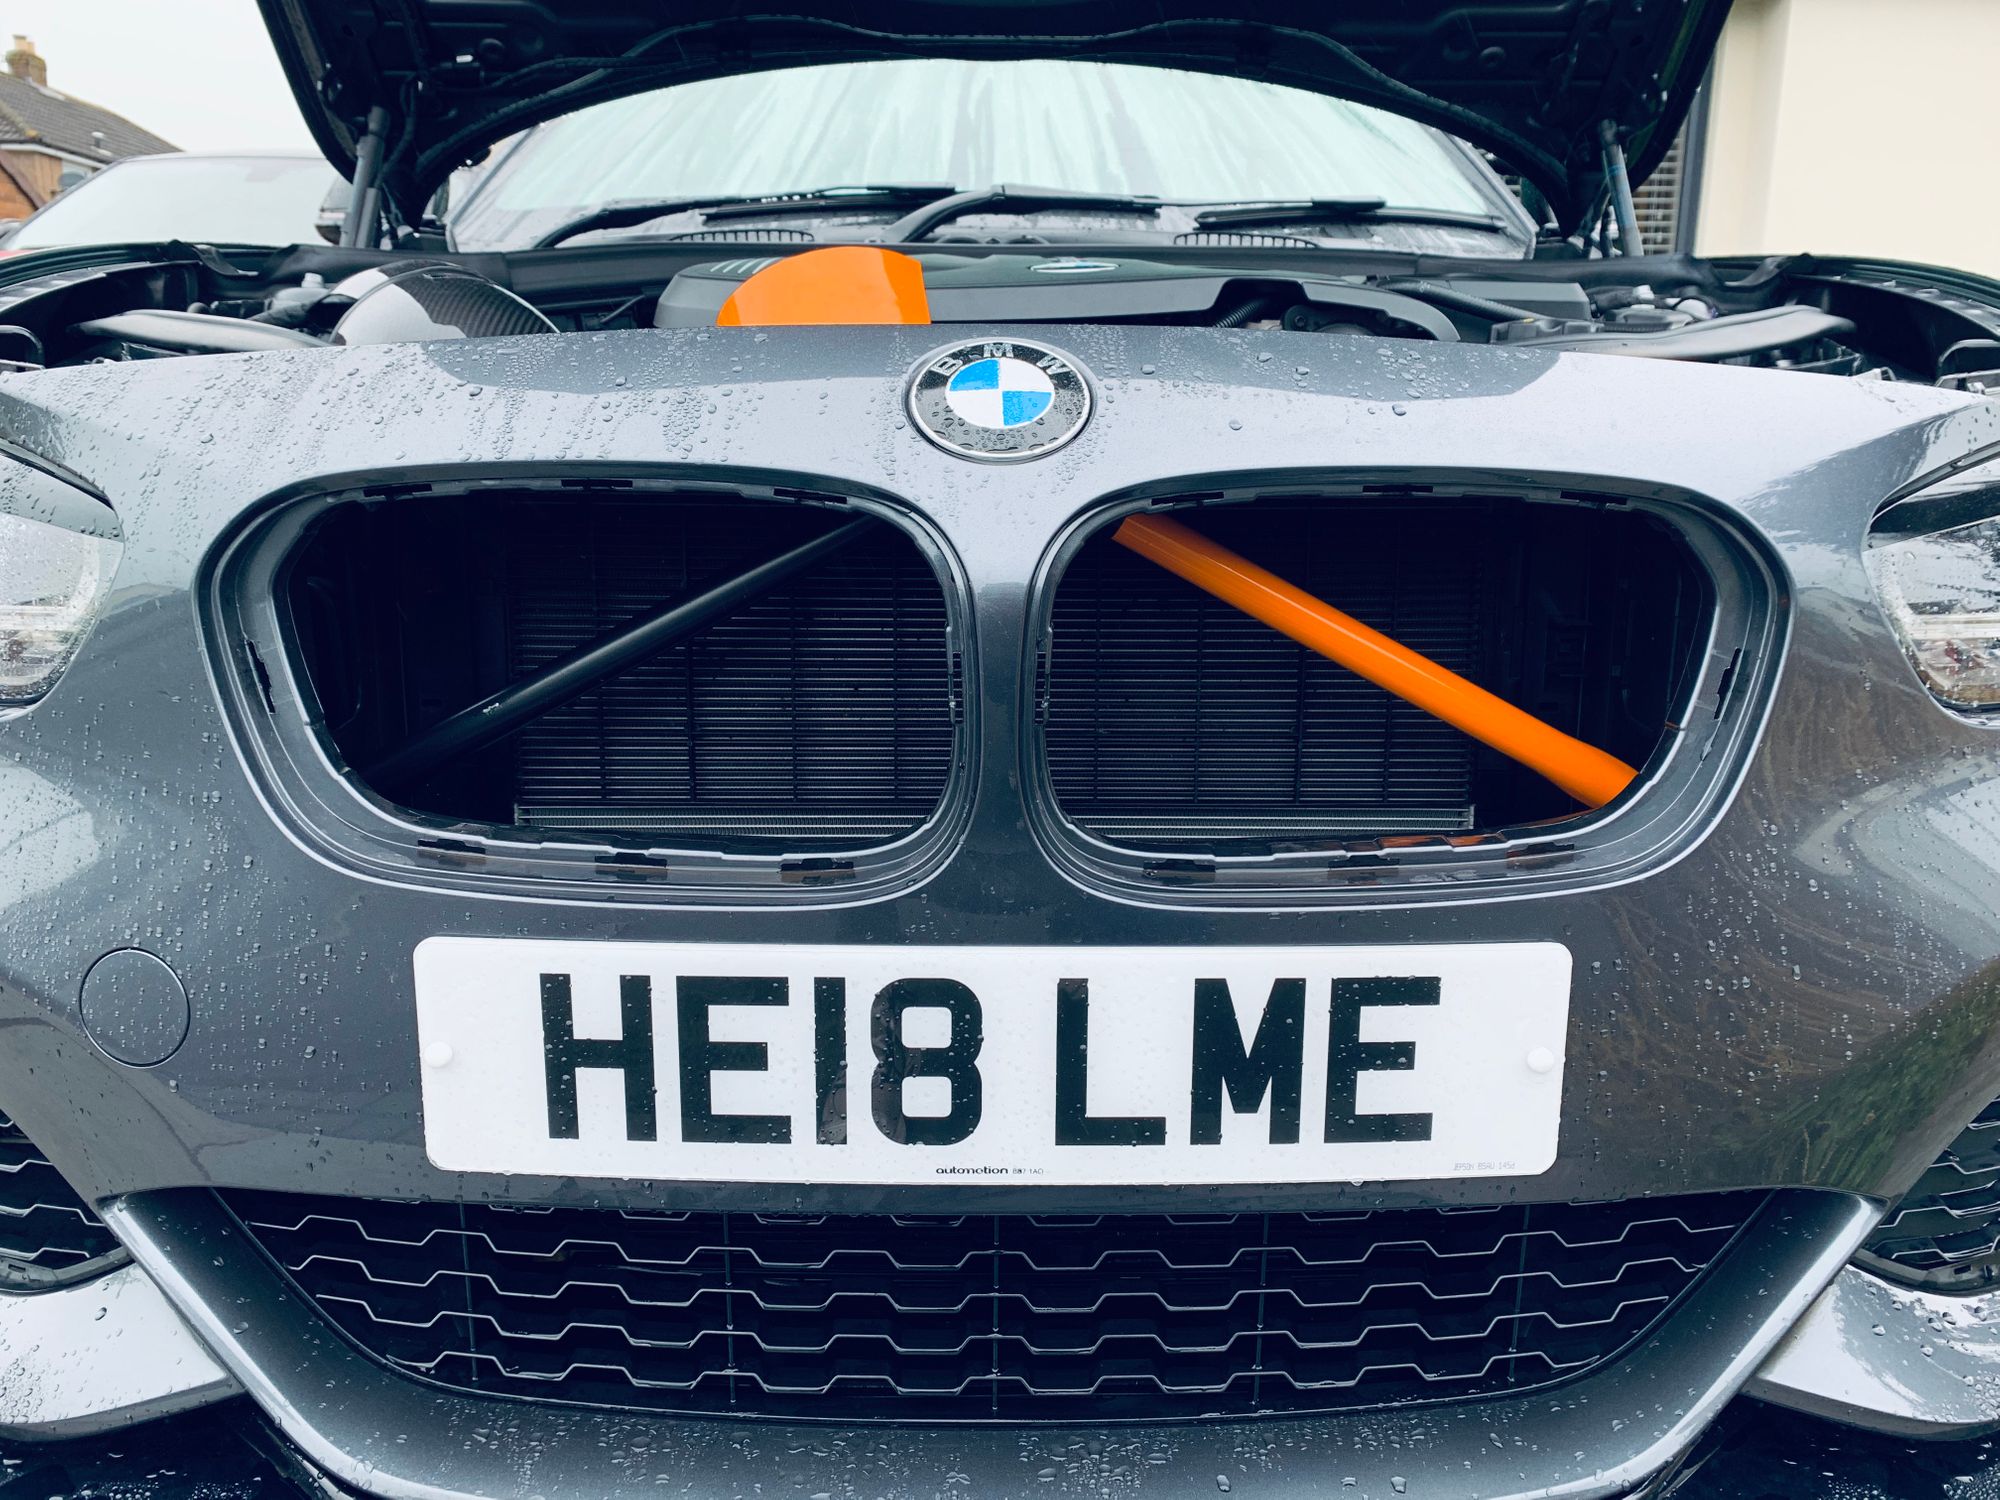
That's the first bar done and all I've had to do is pop the grilles out, clean up the dead bugs off the crash bar, cut a long strip of the orange vinyl and wrap it around. All in this was probably a 30 minute job and it makes quite a noticeable difference from the front of the car. Here's the finished job.
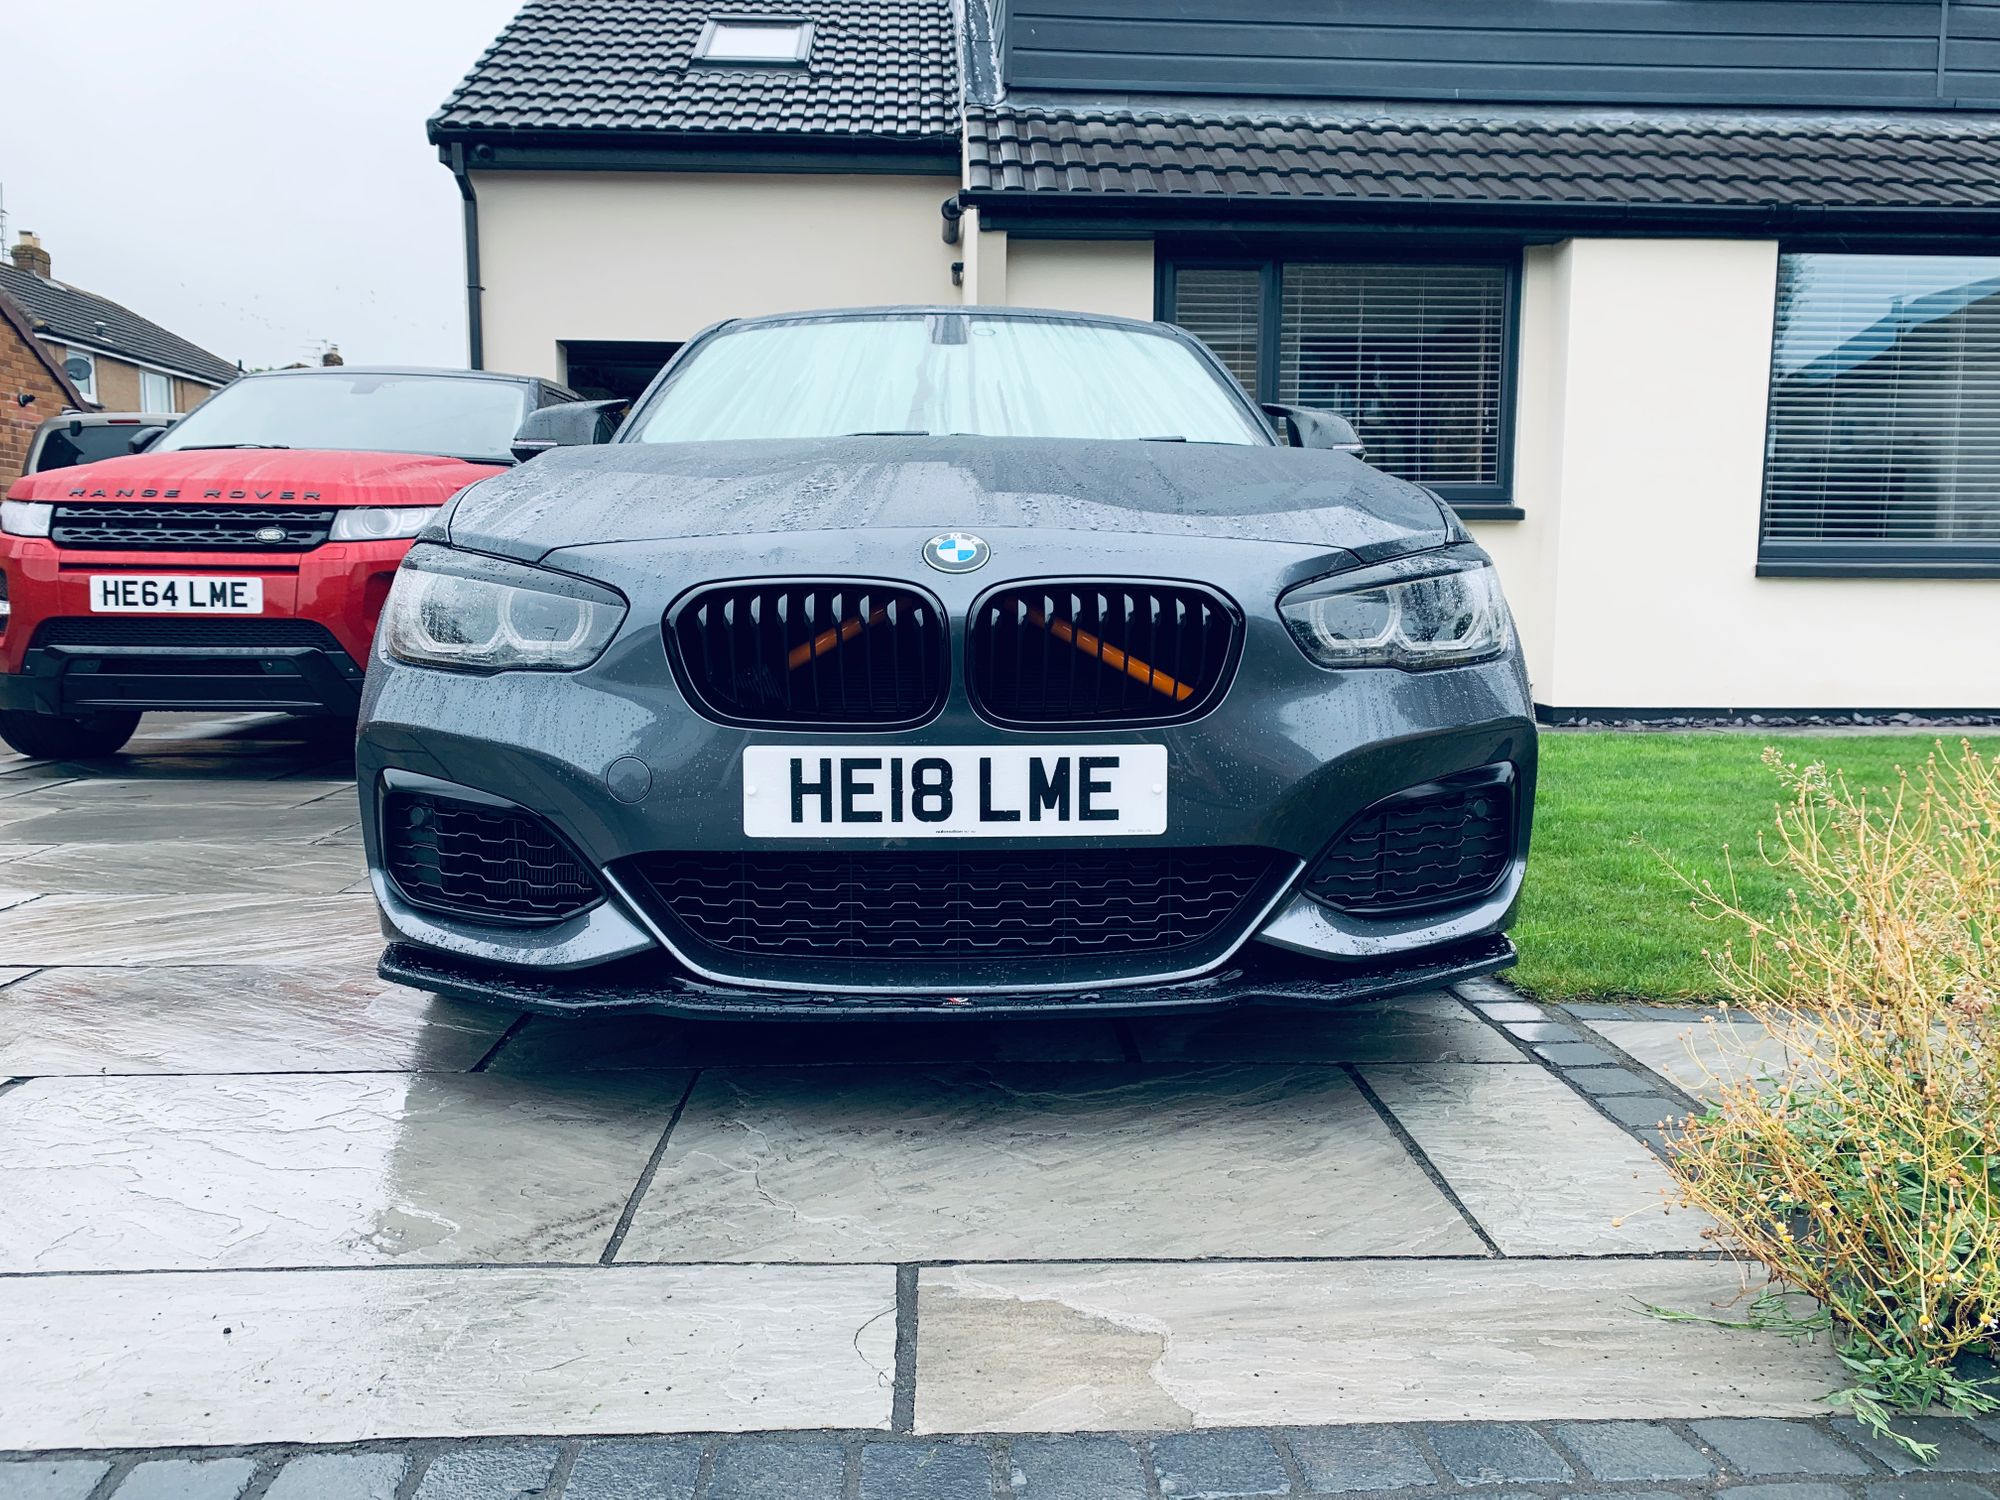
This is the first hint of orange introduced to the car after the brake calipers and I have to say I liked it. The lack of symmetry is caused by the cold air scoop from the Eventuri intake mentioned back in Part 2 but if anything, the asymmetry draws a little more attention to the modification. Here's a close up of each crash bar to see just how easy it is to get in and install the wrap.
On that last photo there you can also see an opening in the side which is a panel I removed to install a part of the Eventuri intake. This 'scoop' catches cold air from the front of the car and forces it down a pipe through that hole and into the engine bay where the intake filter housing is. This gives the car a nice feed of cold air and you can see the front of the carbon fibre scoop here.
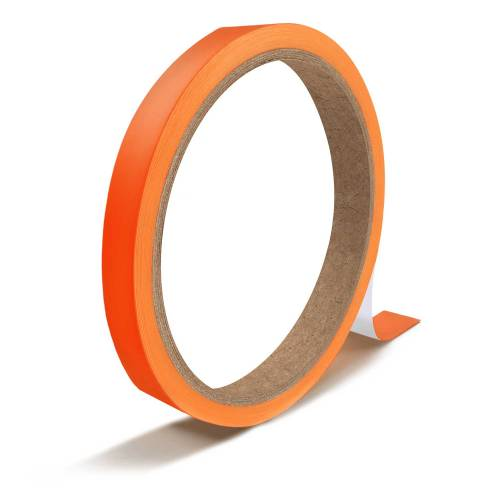
Given how much I liked the addition of this orange, the next step was more orange! I had an idea about a pinstripe around the lower skirts/splitters on the car that could work or could look terrible. There's only one way to find out and at £5 ($6) it wasn't a big loss if it didn't look good. I bought a roll of 5mm orange pinstripe tape and placed a single stripe of orange around the body kit on the bottom of the car.
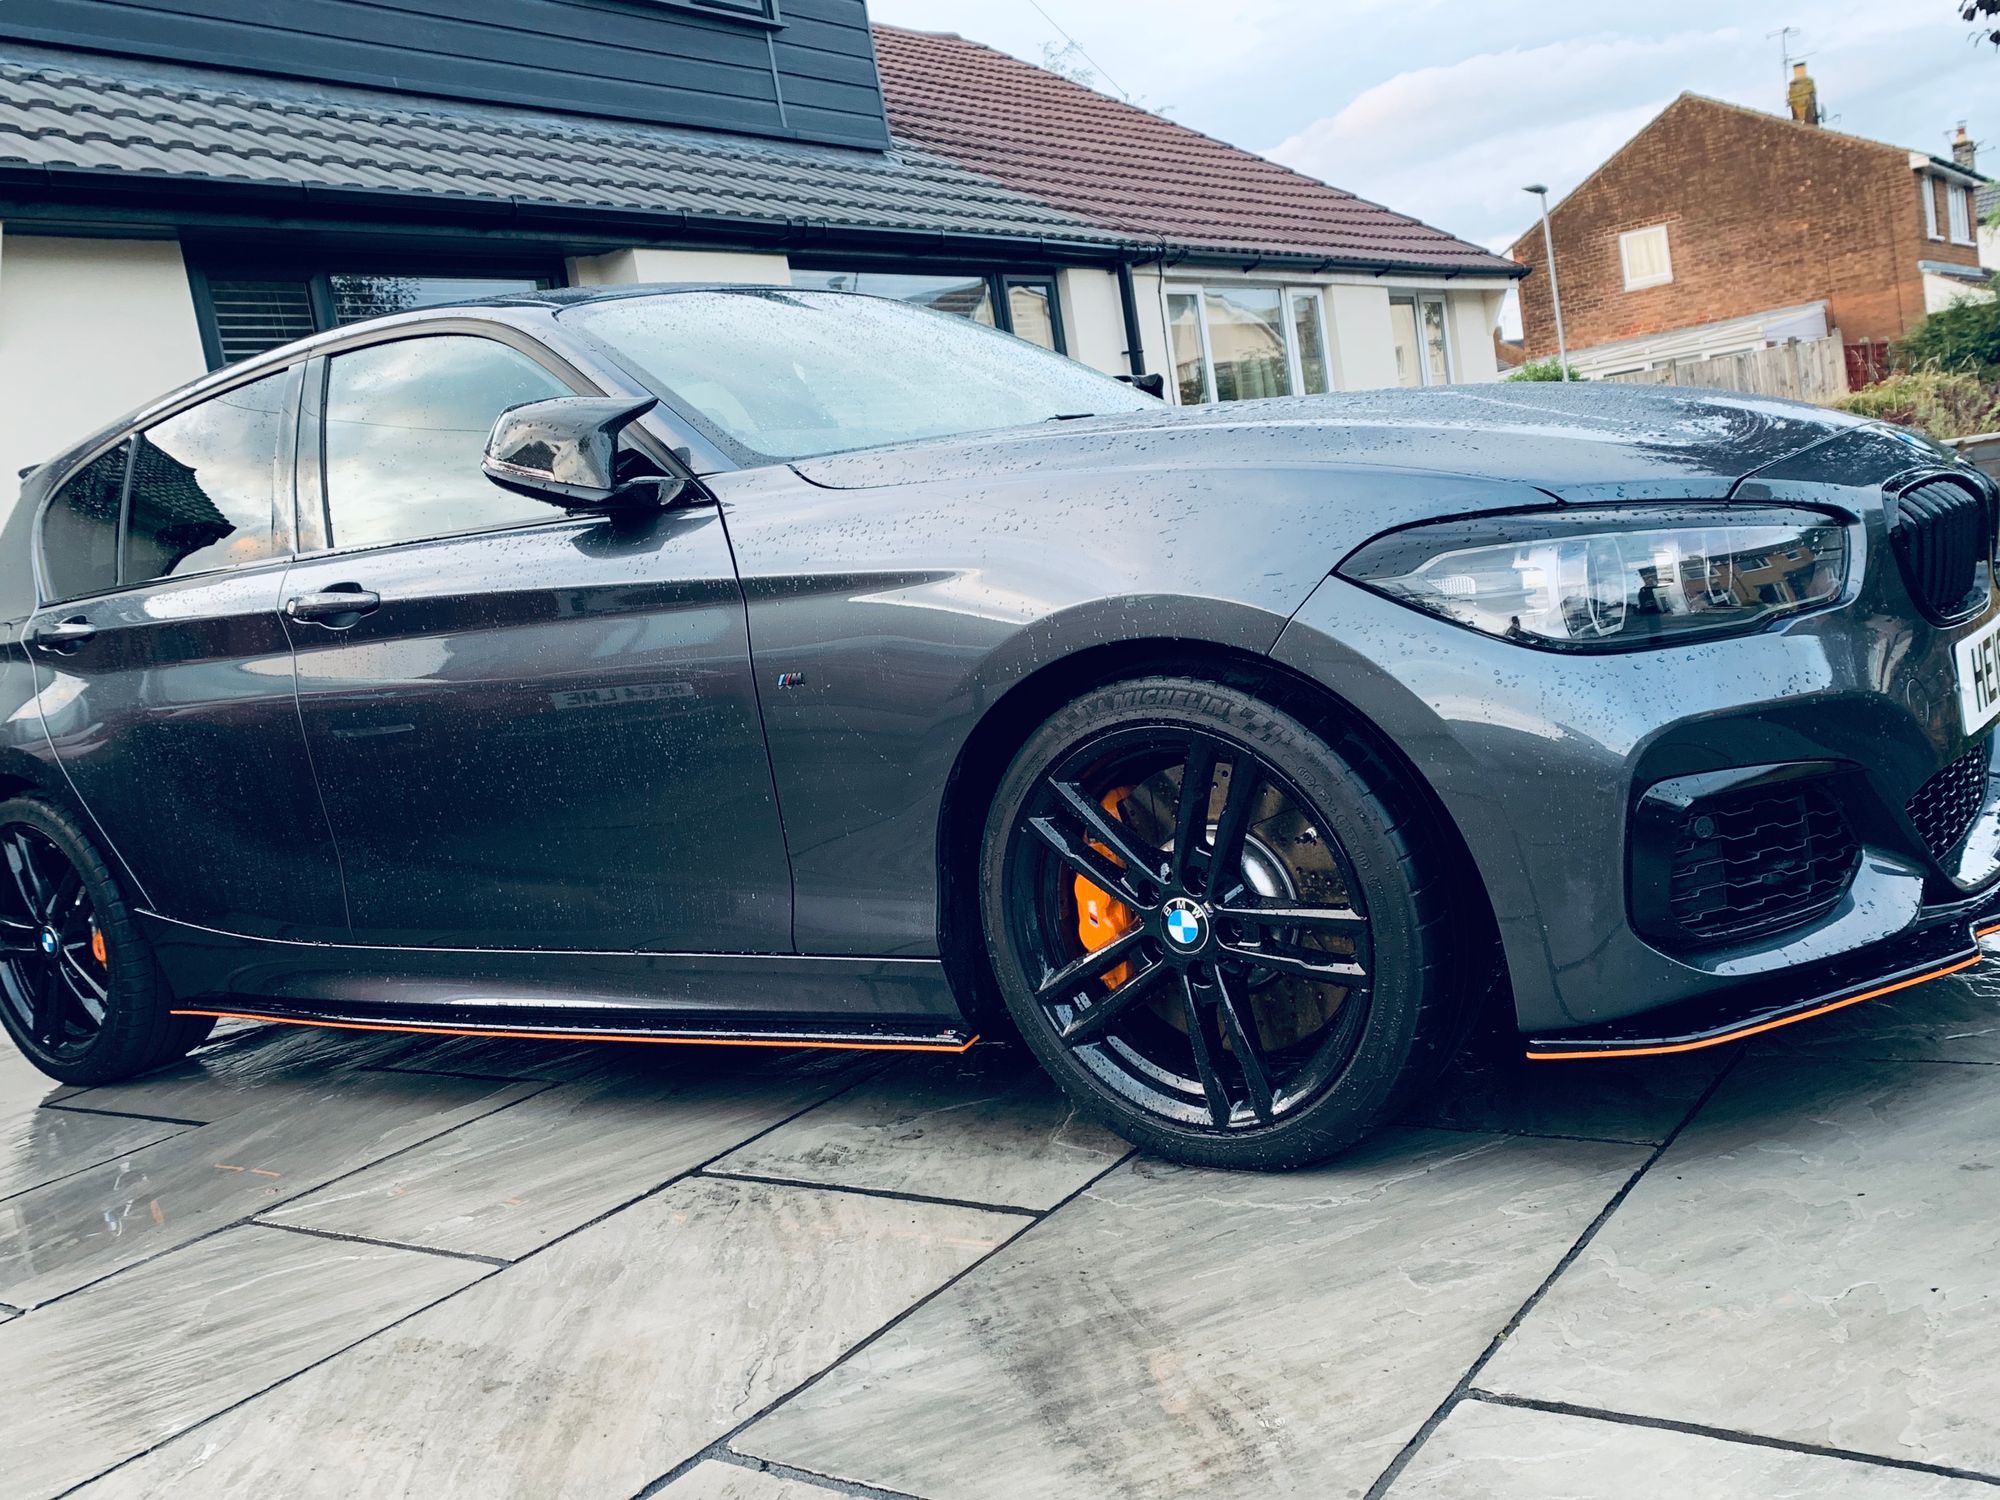
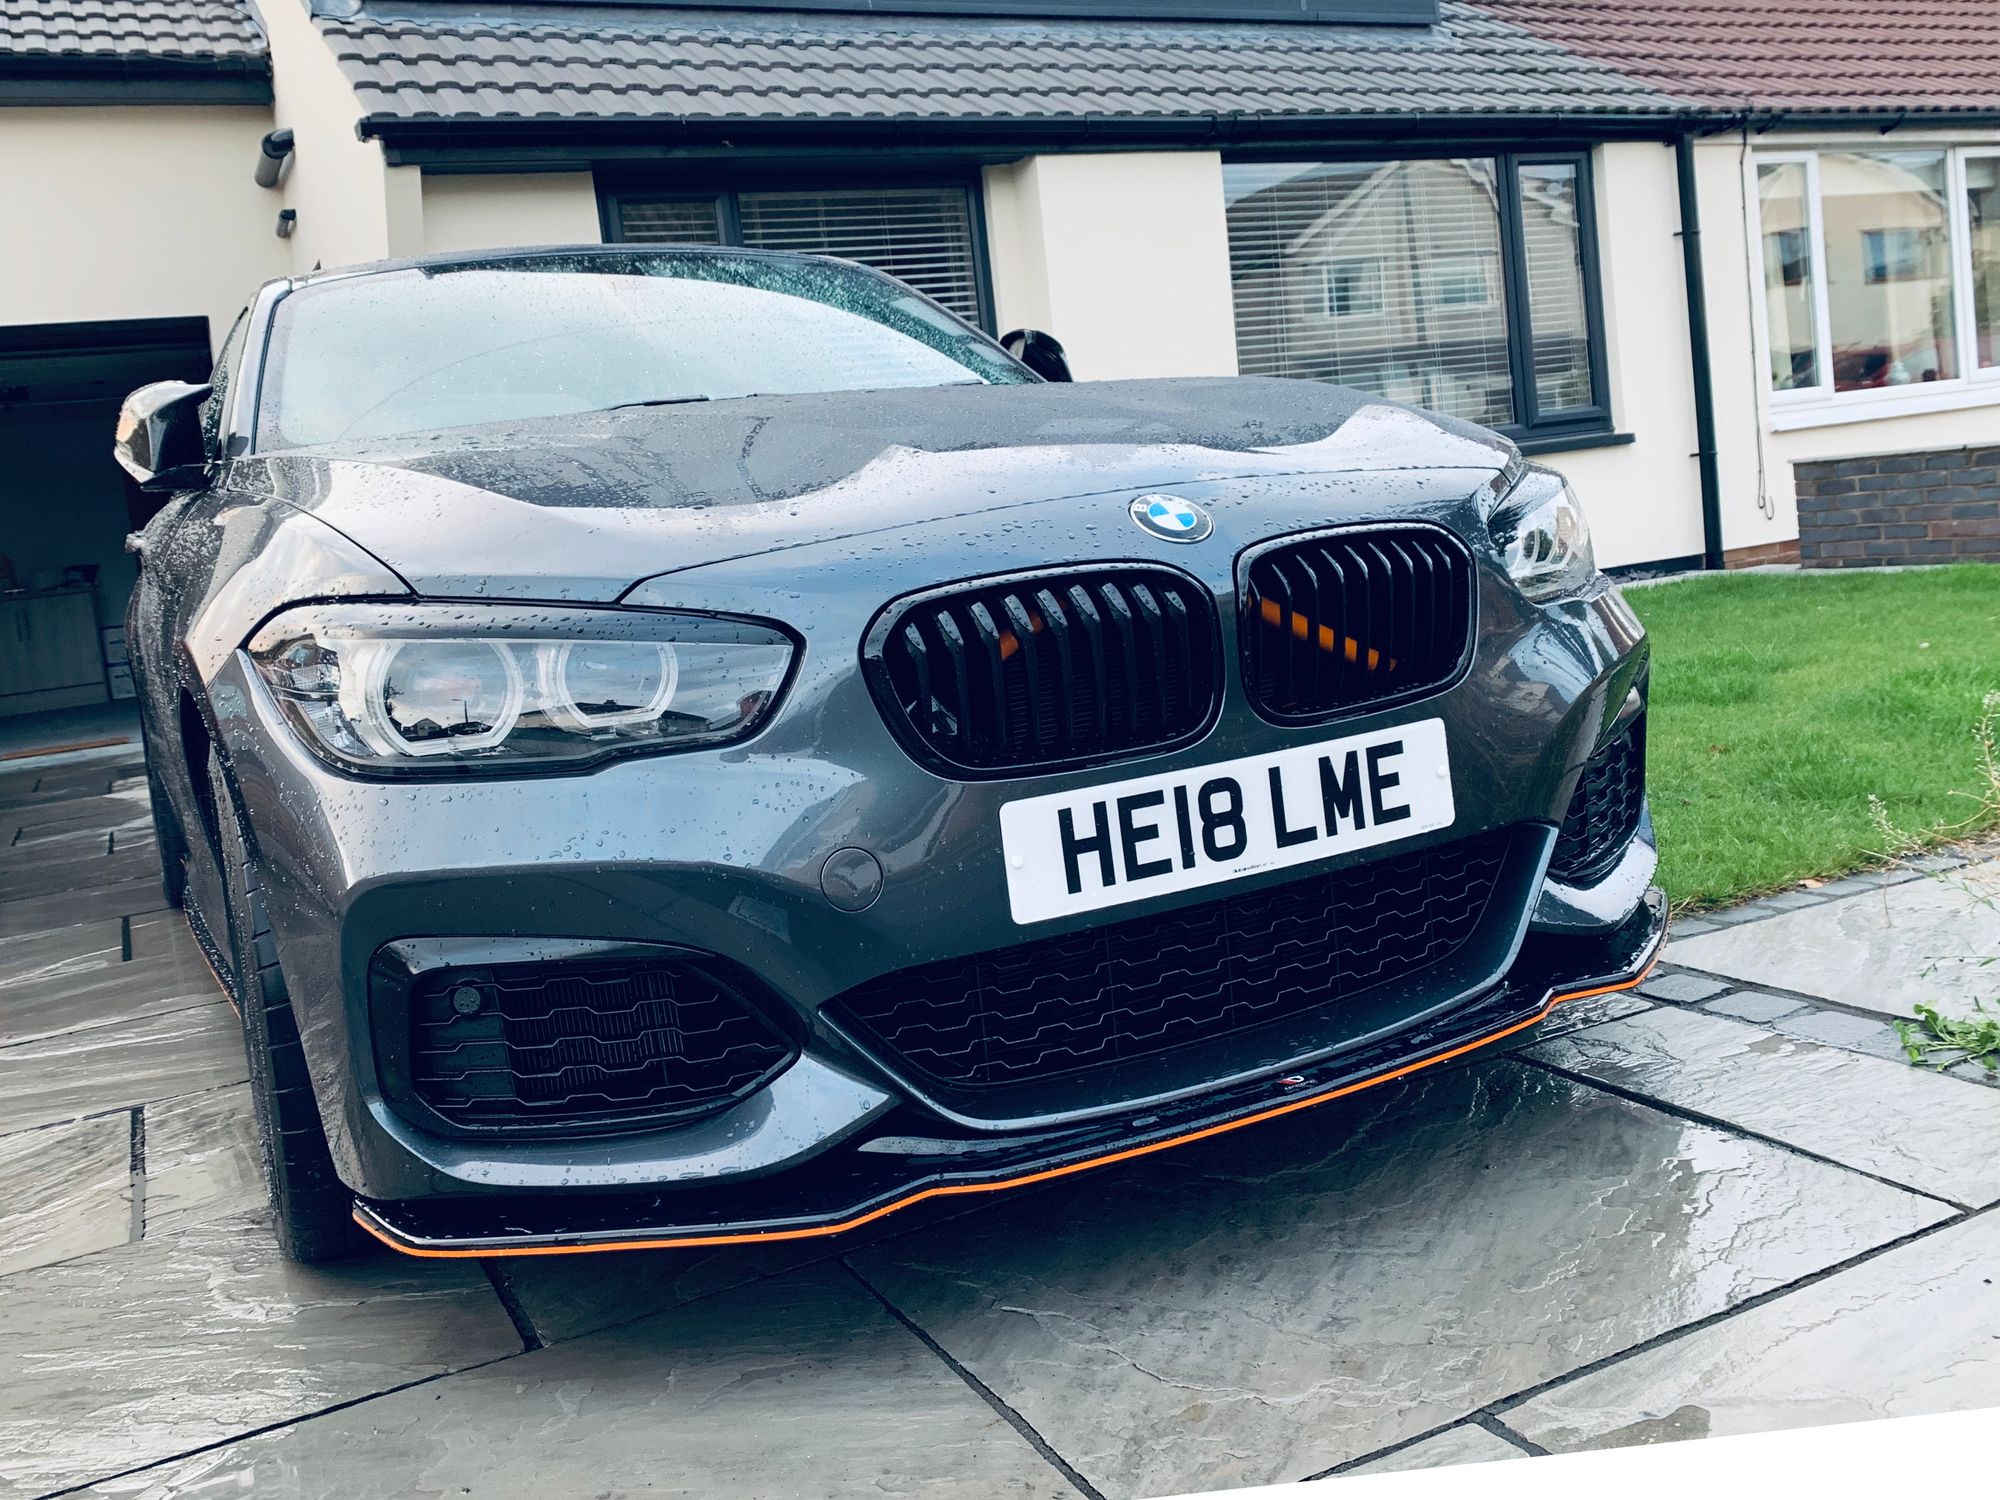
I'm positive there will be mixed opinions about this (this is the Internet after all) but whilst I make up my own mind, I'll be leaving them on the car to see if they grow on me (update, I love them and they're still on the car). It was a super cheap modification to do and makes a really big difference to the car, those are my favourite kind of mods. One thing's for sure though, nobody else has a car that like it. 😎
Puddle Lights
Ok, so last thing for this blog and it's another minor cosmetic tweak that makes a nice difference. My wife's car has a feature that I really like and wanted to replicate on my car. When you open the door it has puddle lights like a lot of cars do, but rather than just a light to illuminate the ground and see what you're stepping on (or avoiding stepping in), it projects a little picture of the car too.
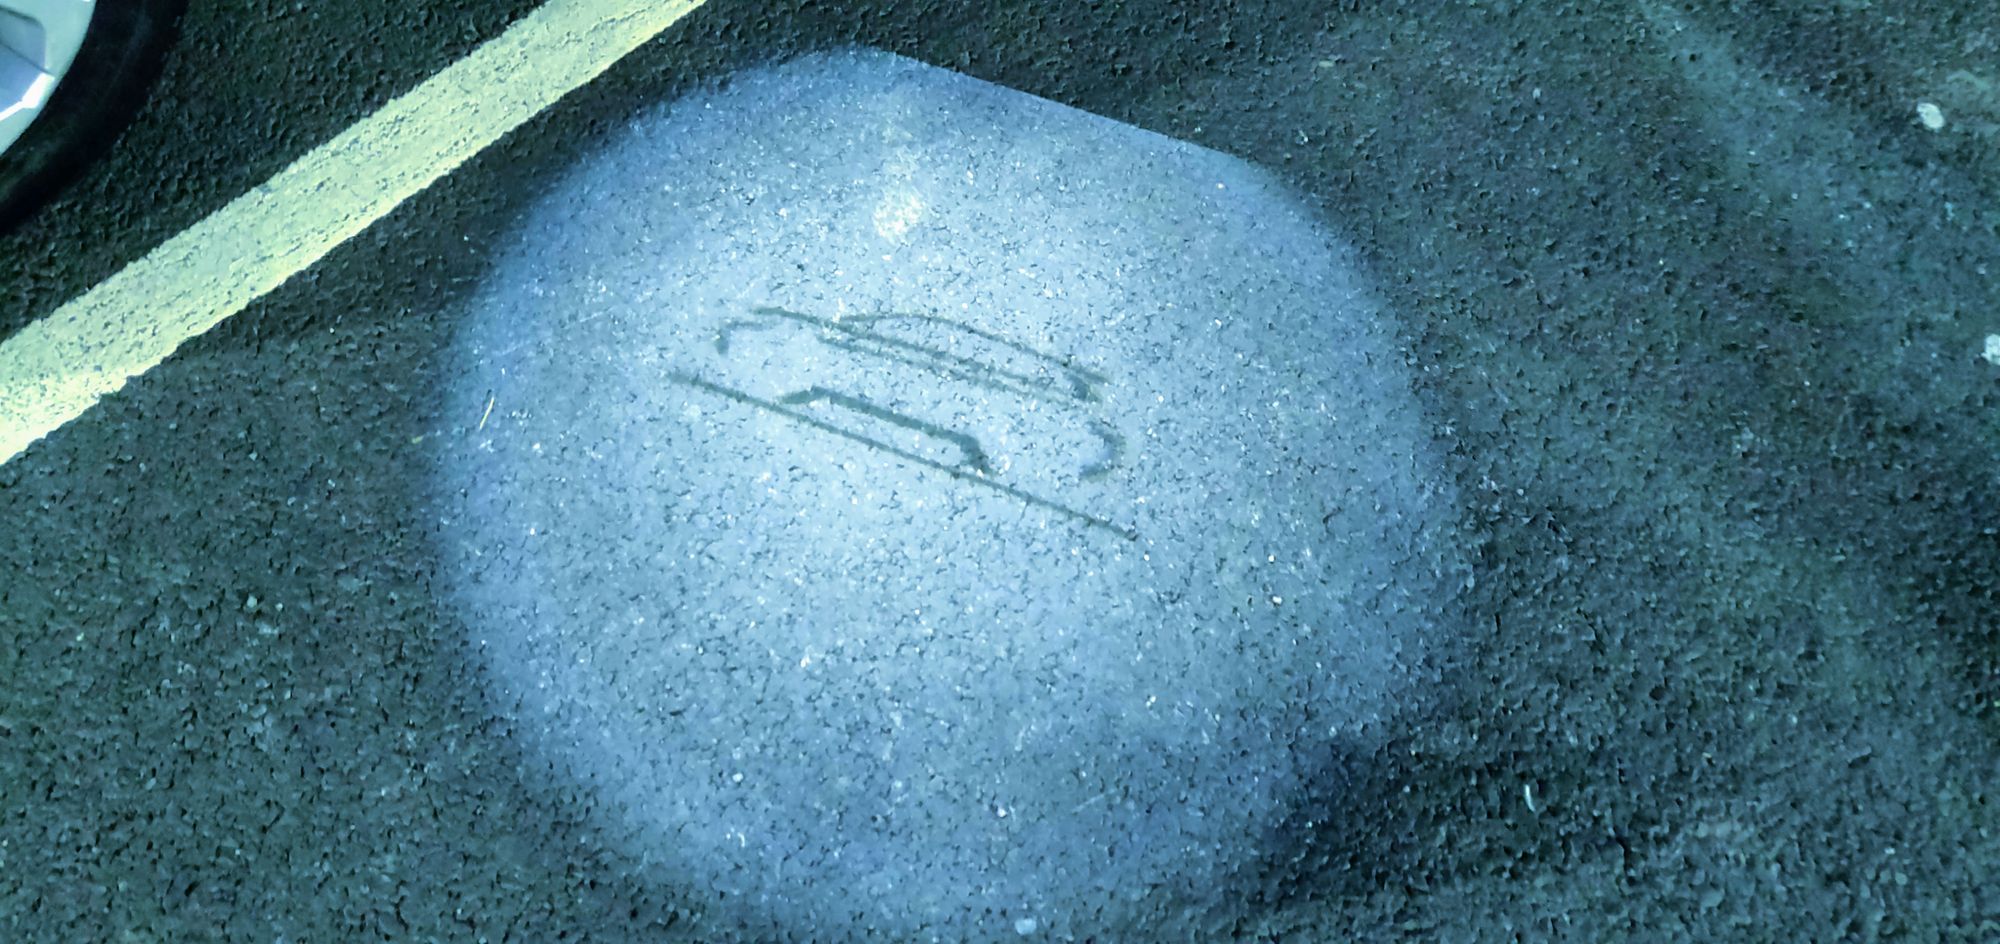
That's the outline of a Range Rover Evoque and I do like the idea that it's somehow relevant to the car and just a thoughtful cosmetic touch. My car just had lights to illuminate the ground... Clearly this has to be rectified!
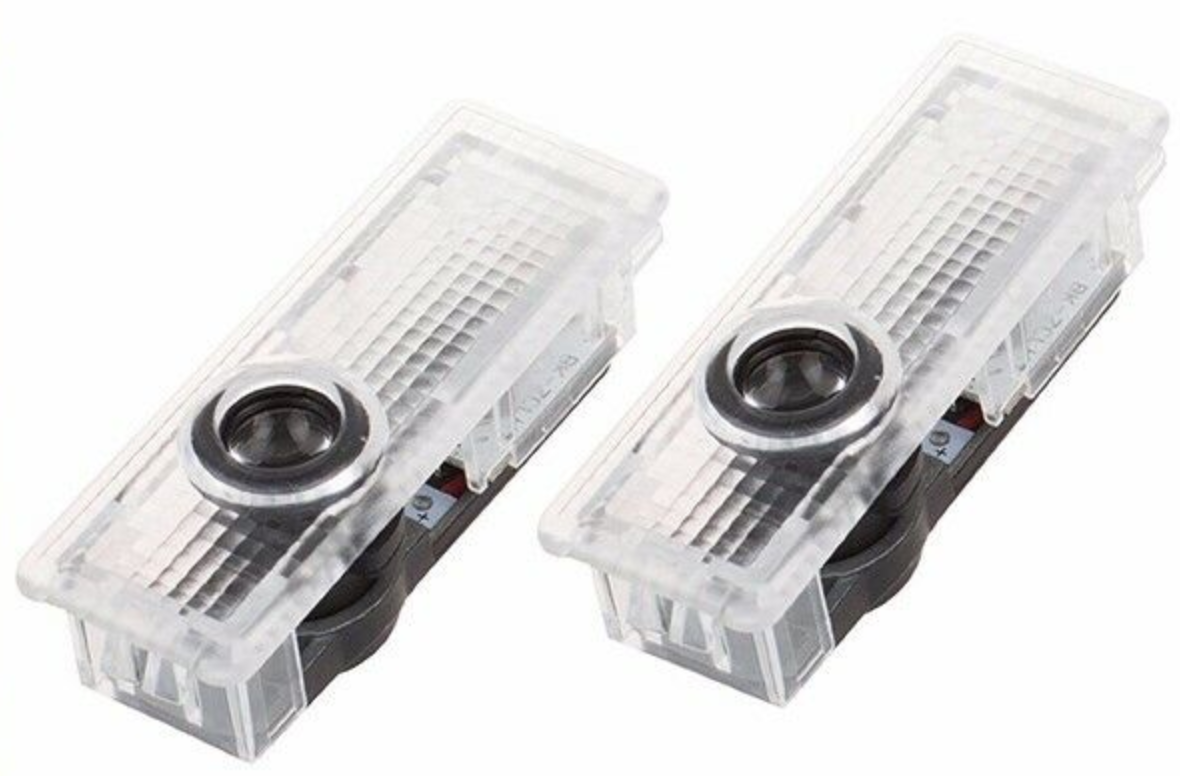
The kit to do this is only £20 - £30 and they are a direct replacement for the original light units in the bottom of the door. All you have to do is lay on the ground, pop the original units out of the bottom of the door that are held in by a clip and then pop the new units in there.
Once installed the lights work exactly as they did before except now they project whichever logo you chose on the ground too!
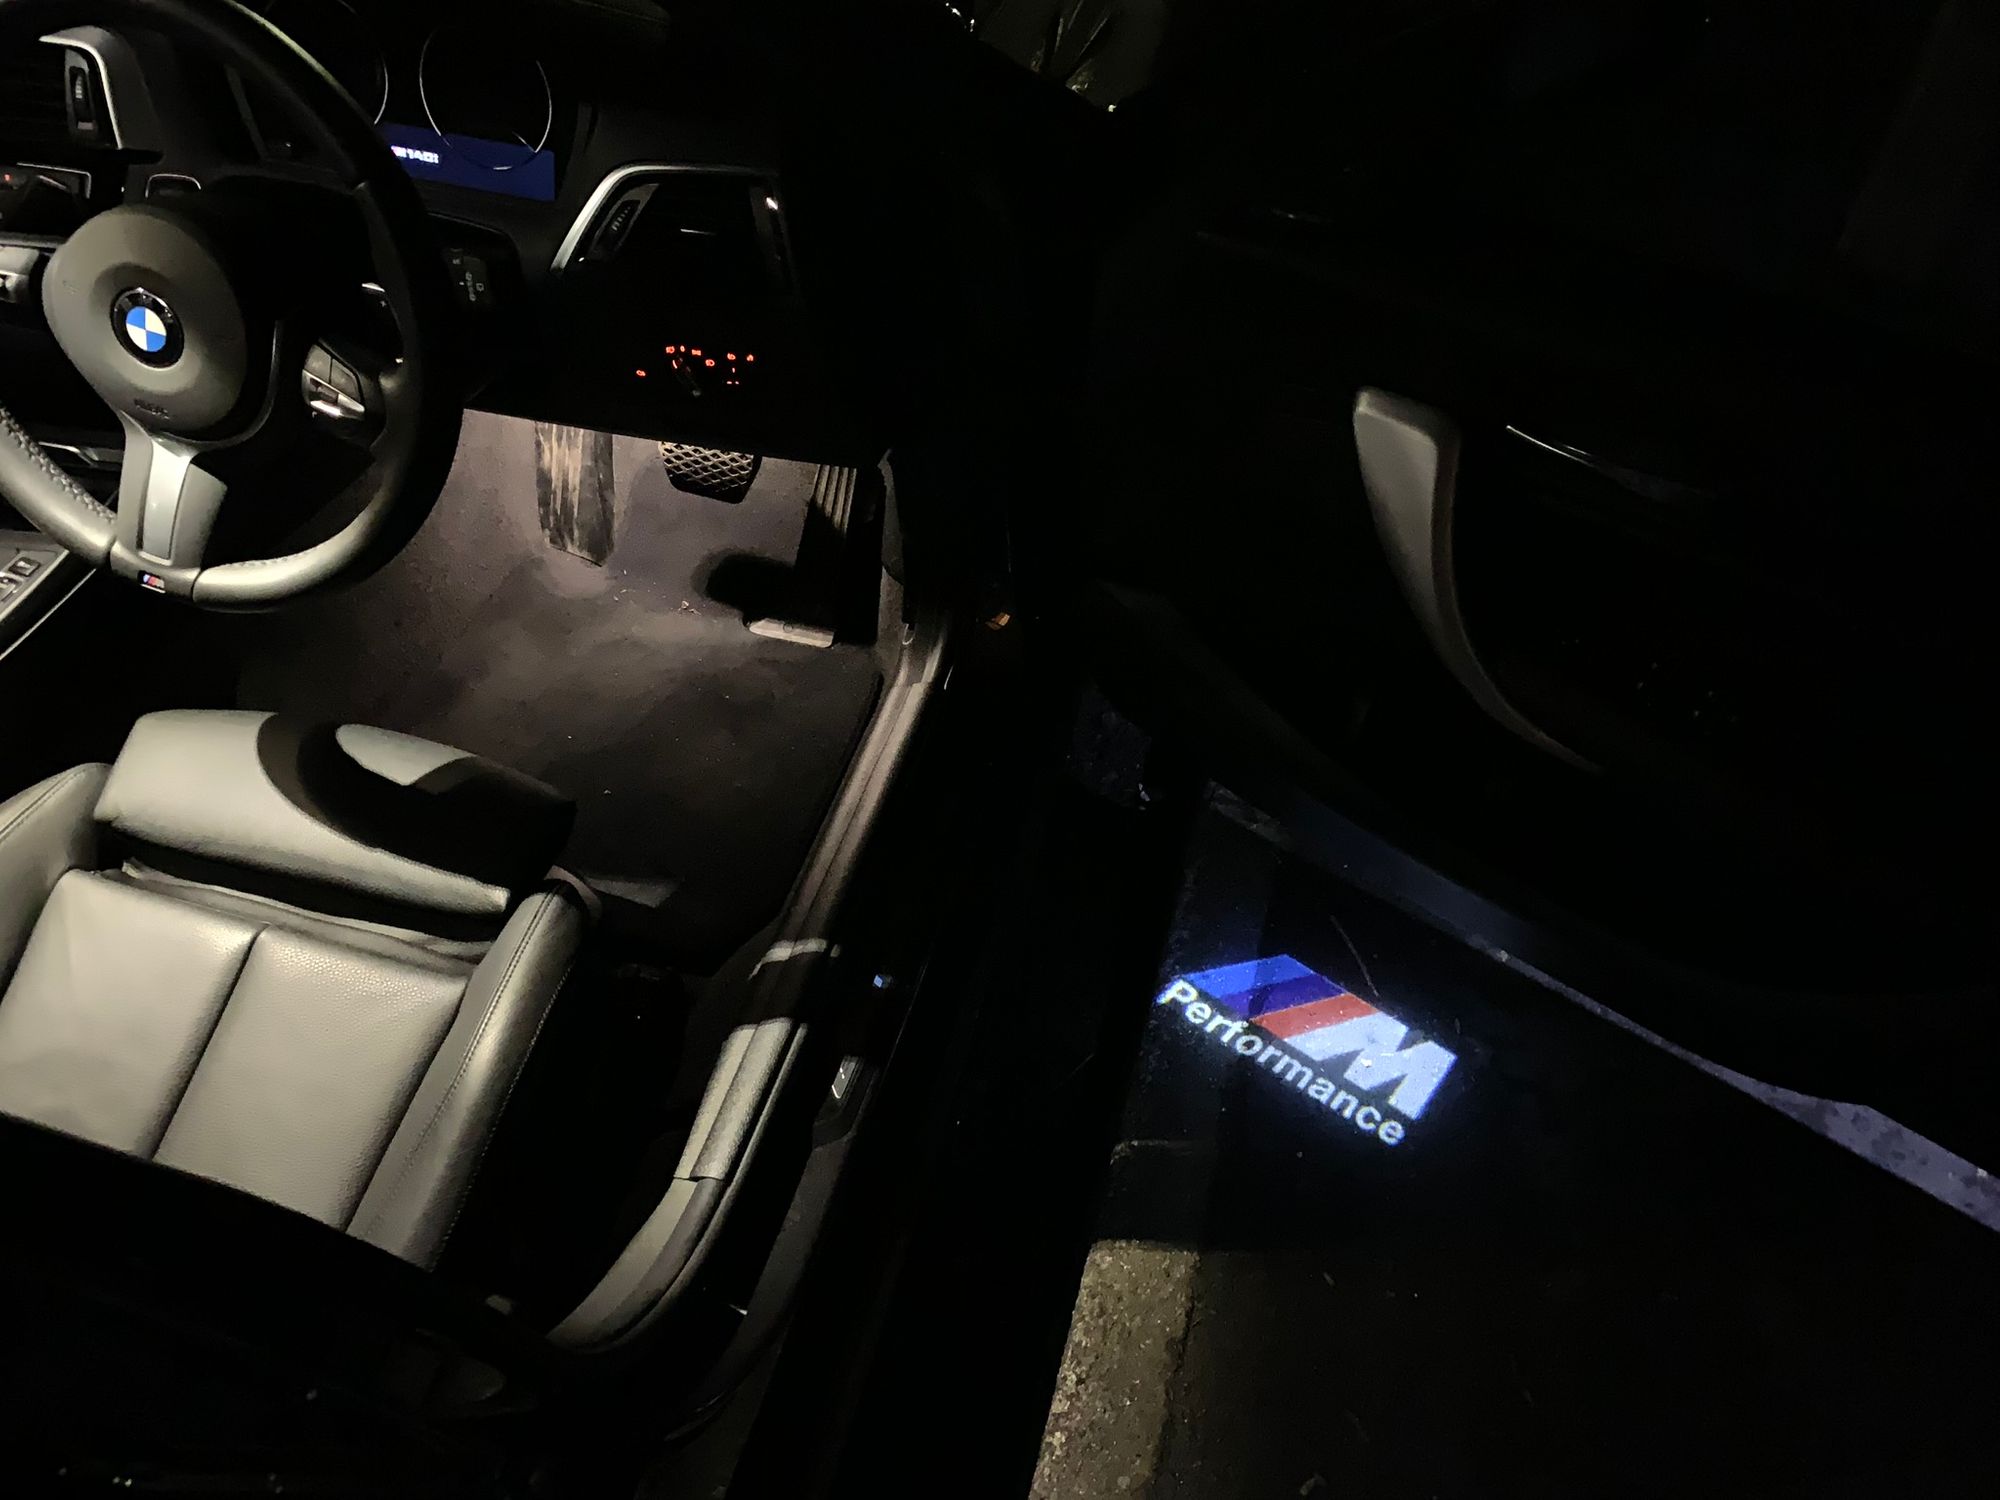
Just a little touch and obviously only visible at night, but there it is.
More to come!
Spending time on the interior was really worthwhile and I love the new steering wheel and paddle shifters. The exterior cosmetic tweaks also give the car a lot more character and came without spending any real money at all. It just goes to show it's not always about spending money but personalising the car is the aim here and I'm really happy with the results.
Parts
Here's the list of parts used in Part 6 and where you can get them:
MMR Performance Paddle Shifters
BMW M Performance Steering Wheel with Race Display
View all of the other blog posts here: The BMW M140i Project Series