
I took a bit of a break from writing up my work on the M140i but I'm back and there are a few things I want to cover! This post is going to cover some more aesthetic work and some customisations I've done to personalise the car a little more.
The Series
The last few blog posts in the series have been quite heavy hitting with things like ethanol fuel blending, methanol injection and a pretty long and technical blog post on reading data logs. For this post though, things will be noticeably more lightweight, but that's not to say they aren't important. It's one thing to be modifying a car to make it go faster, but for me at least, personalisation is a huge aspect of working on my car as I adapt it to be more to my personal tastes.
Carbon Fibre and Alcantara
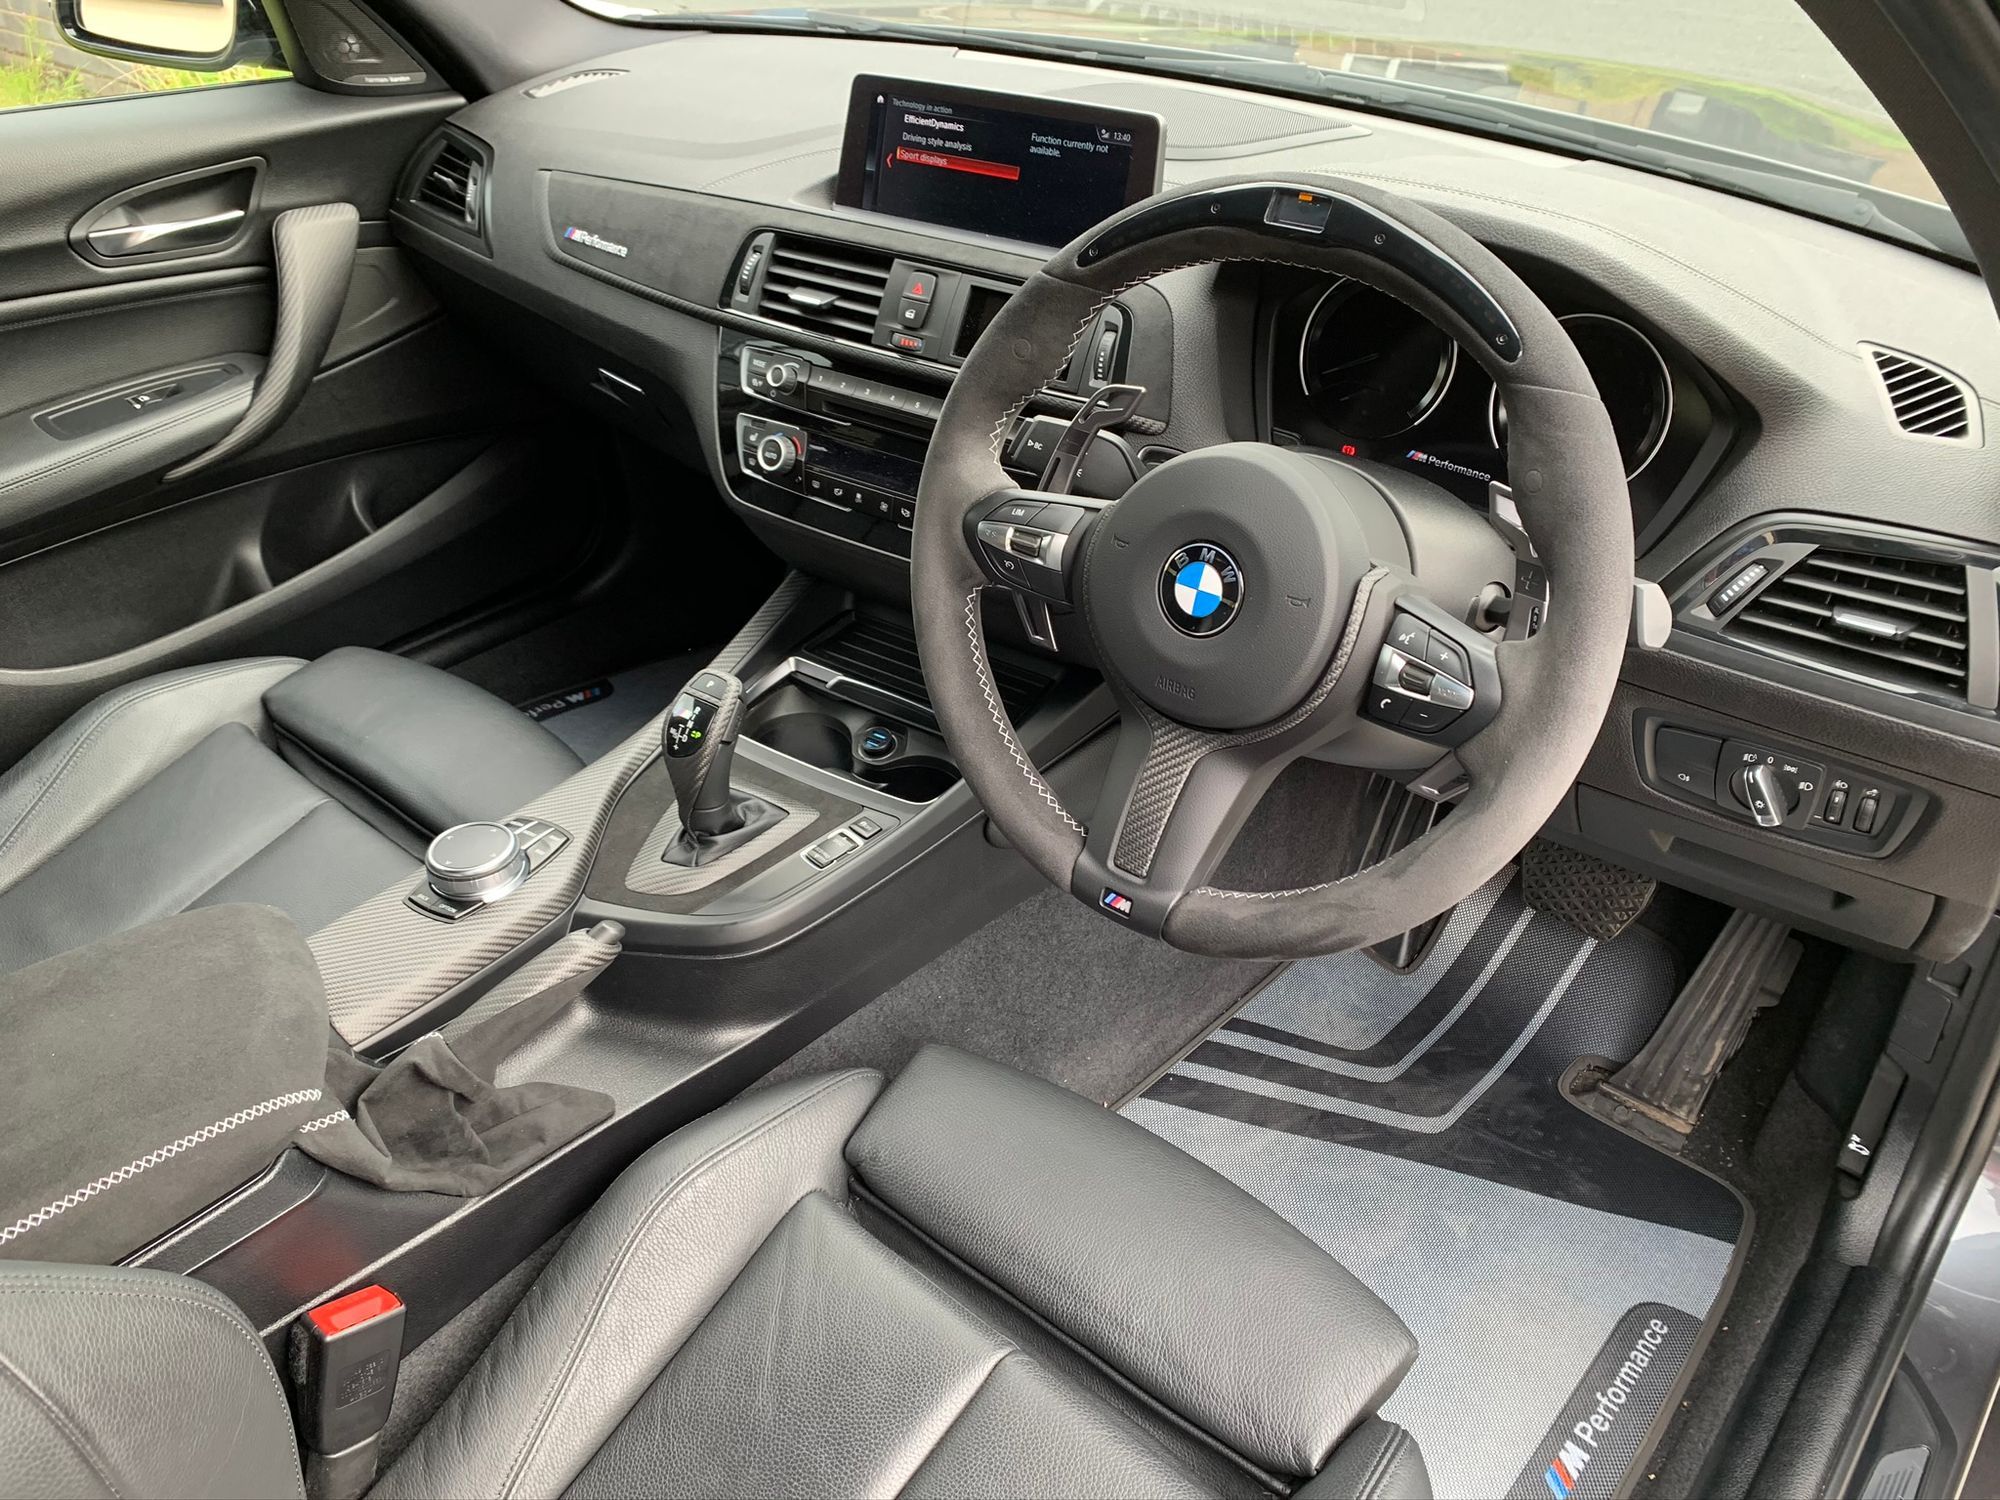
Two amazing materials that are going to be featuring a lot more prominently in my interior, which I'm quite happy about! I decided to switch to the BMW M Performance interior and go all out, with a full conversion.
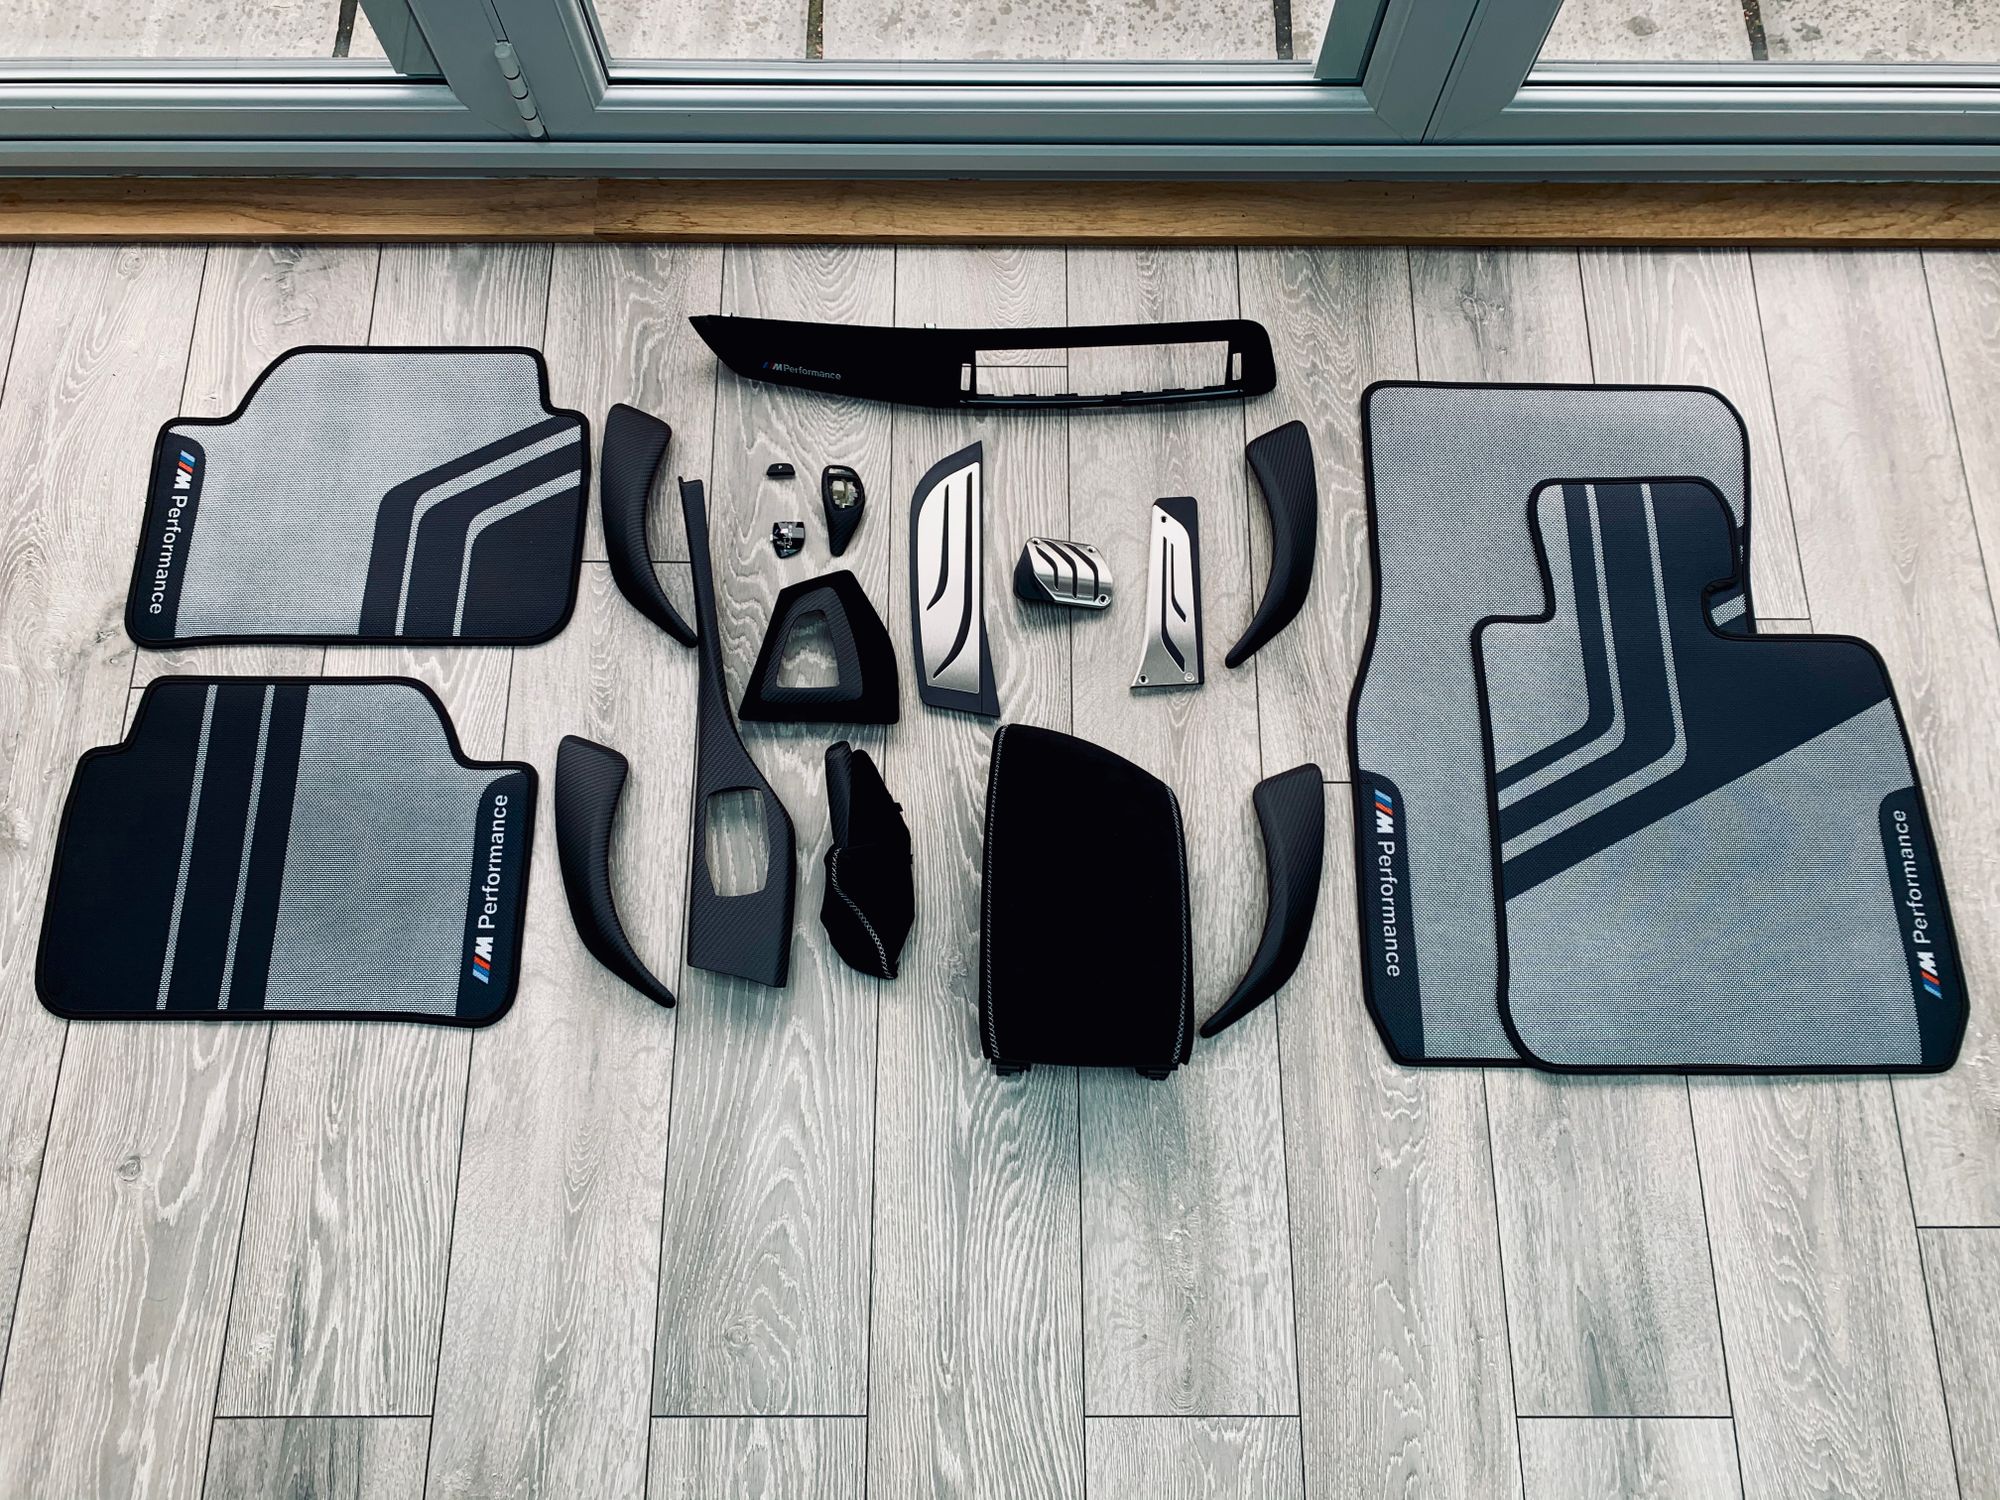
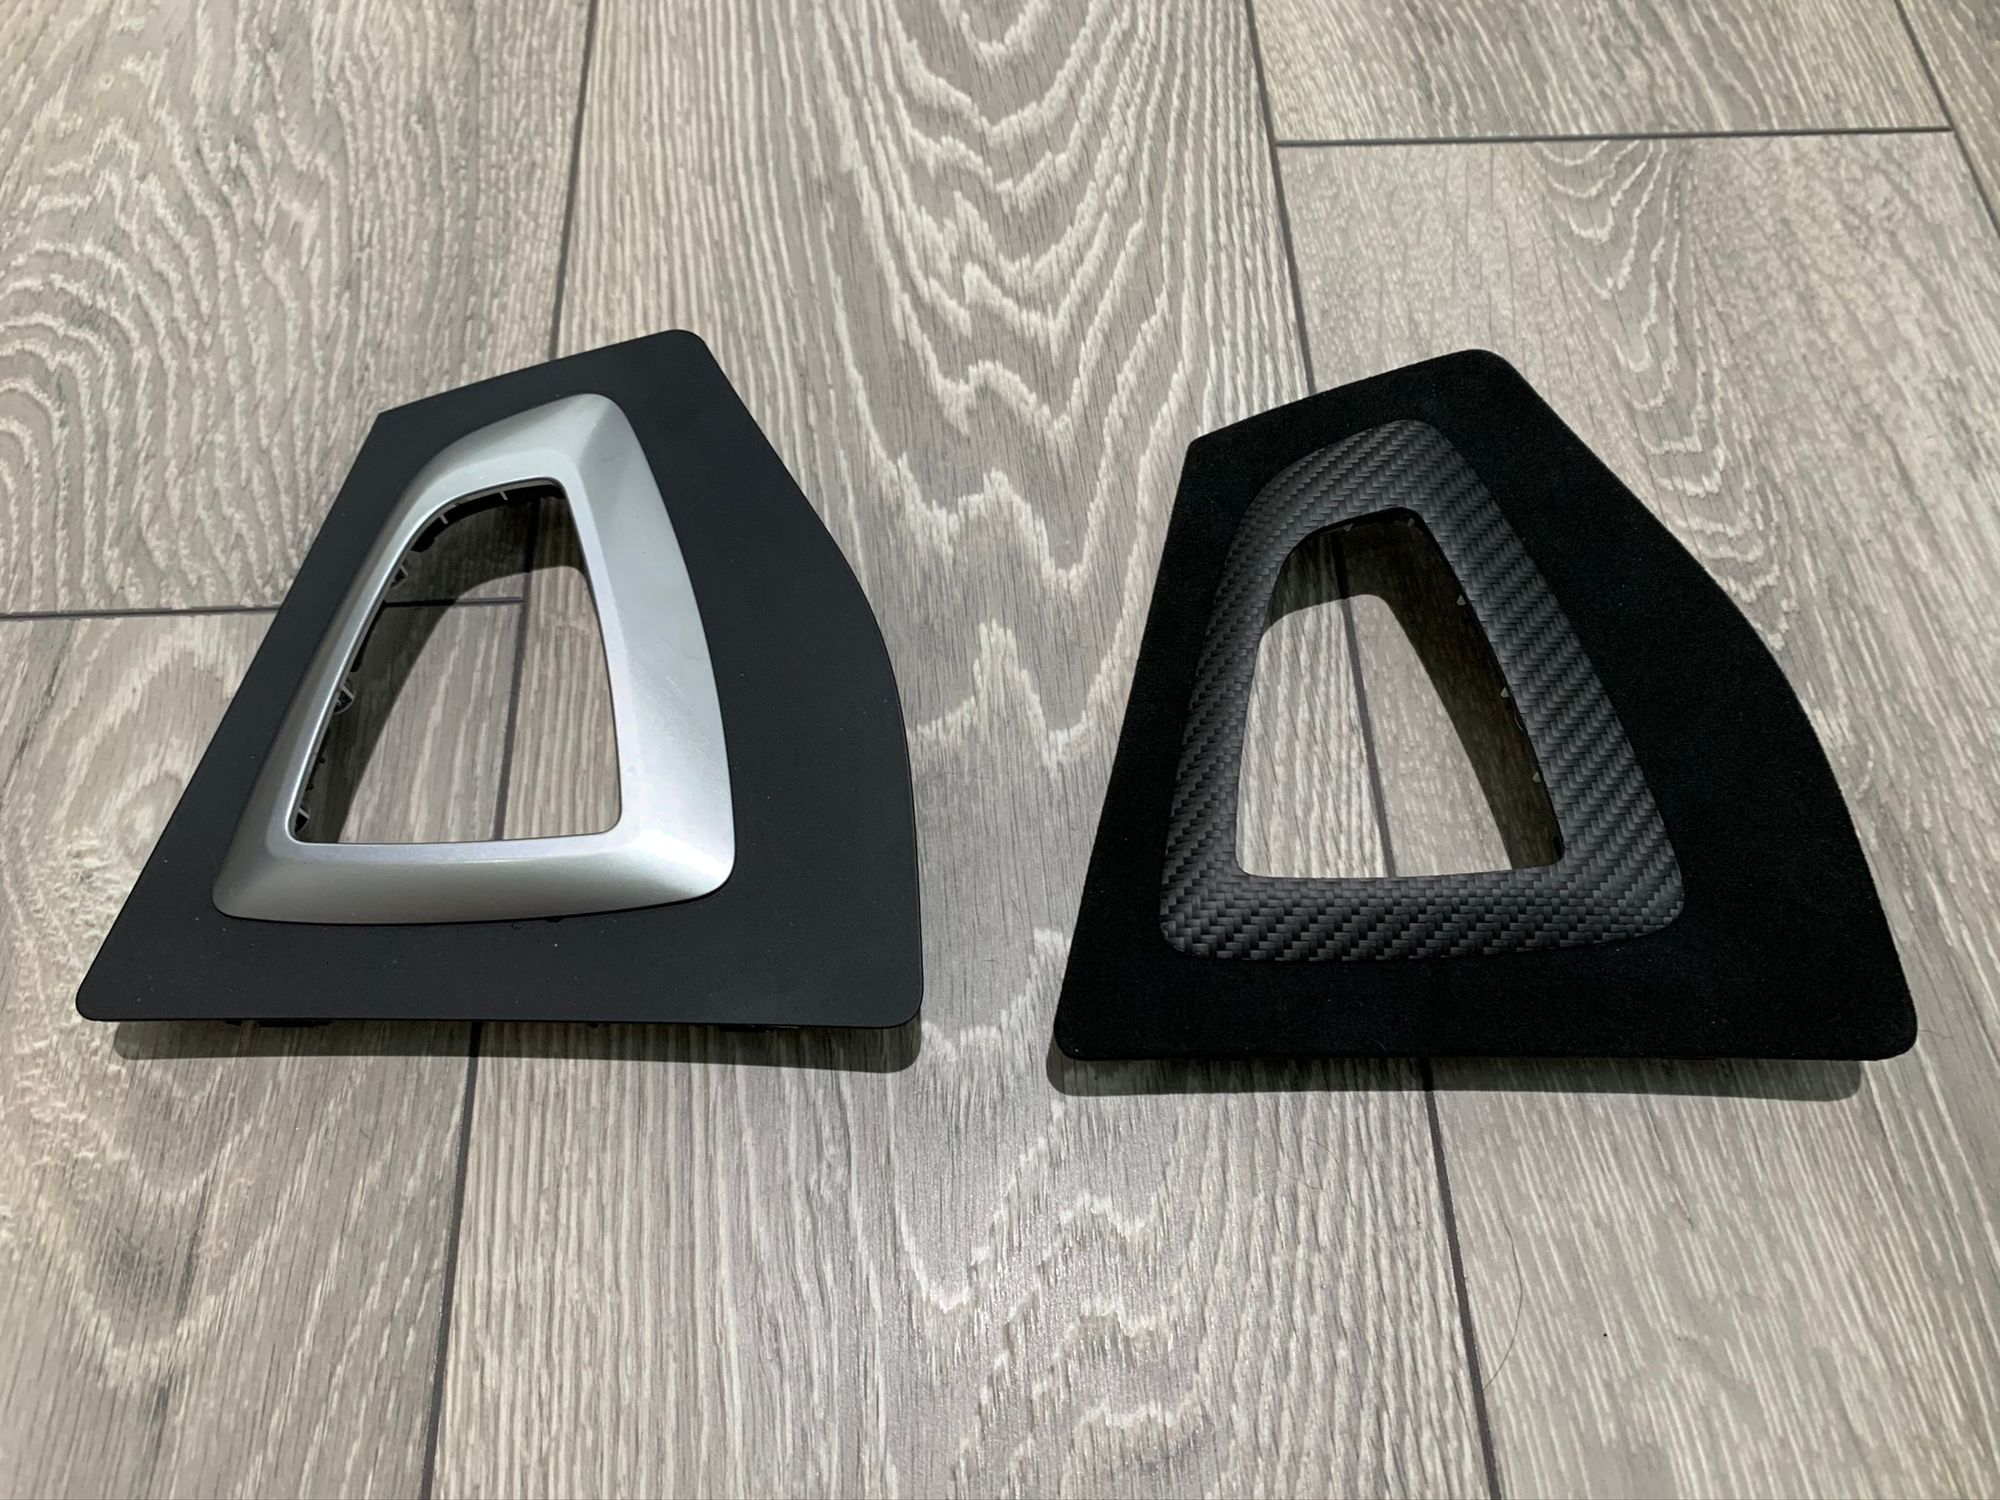
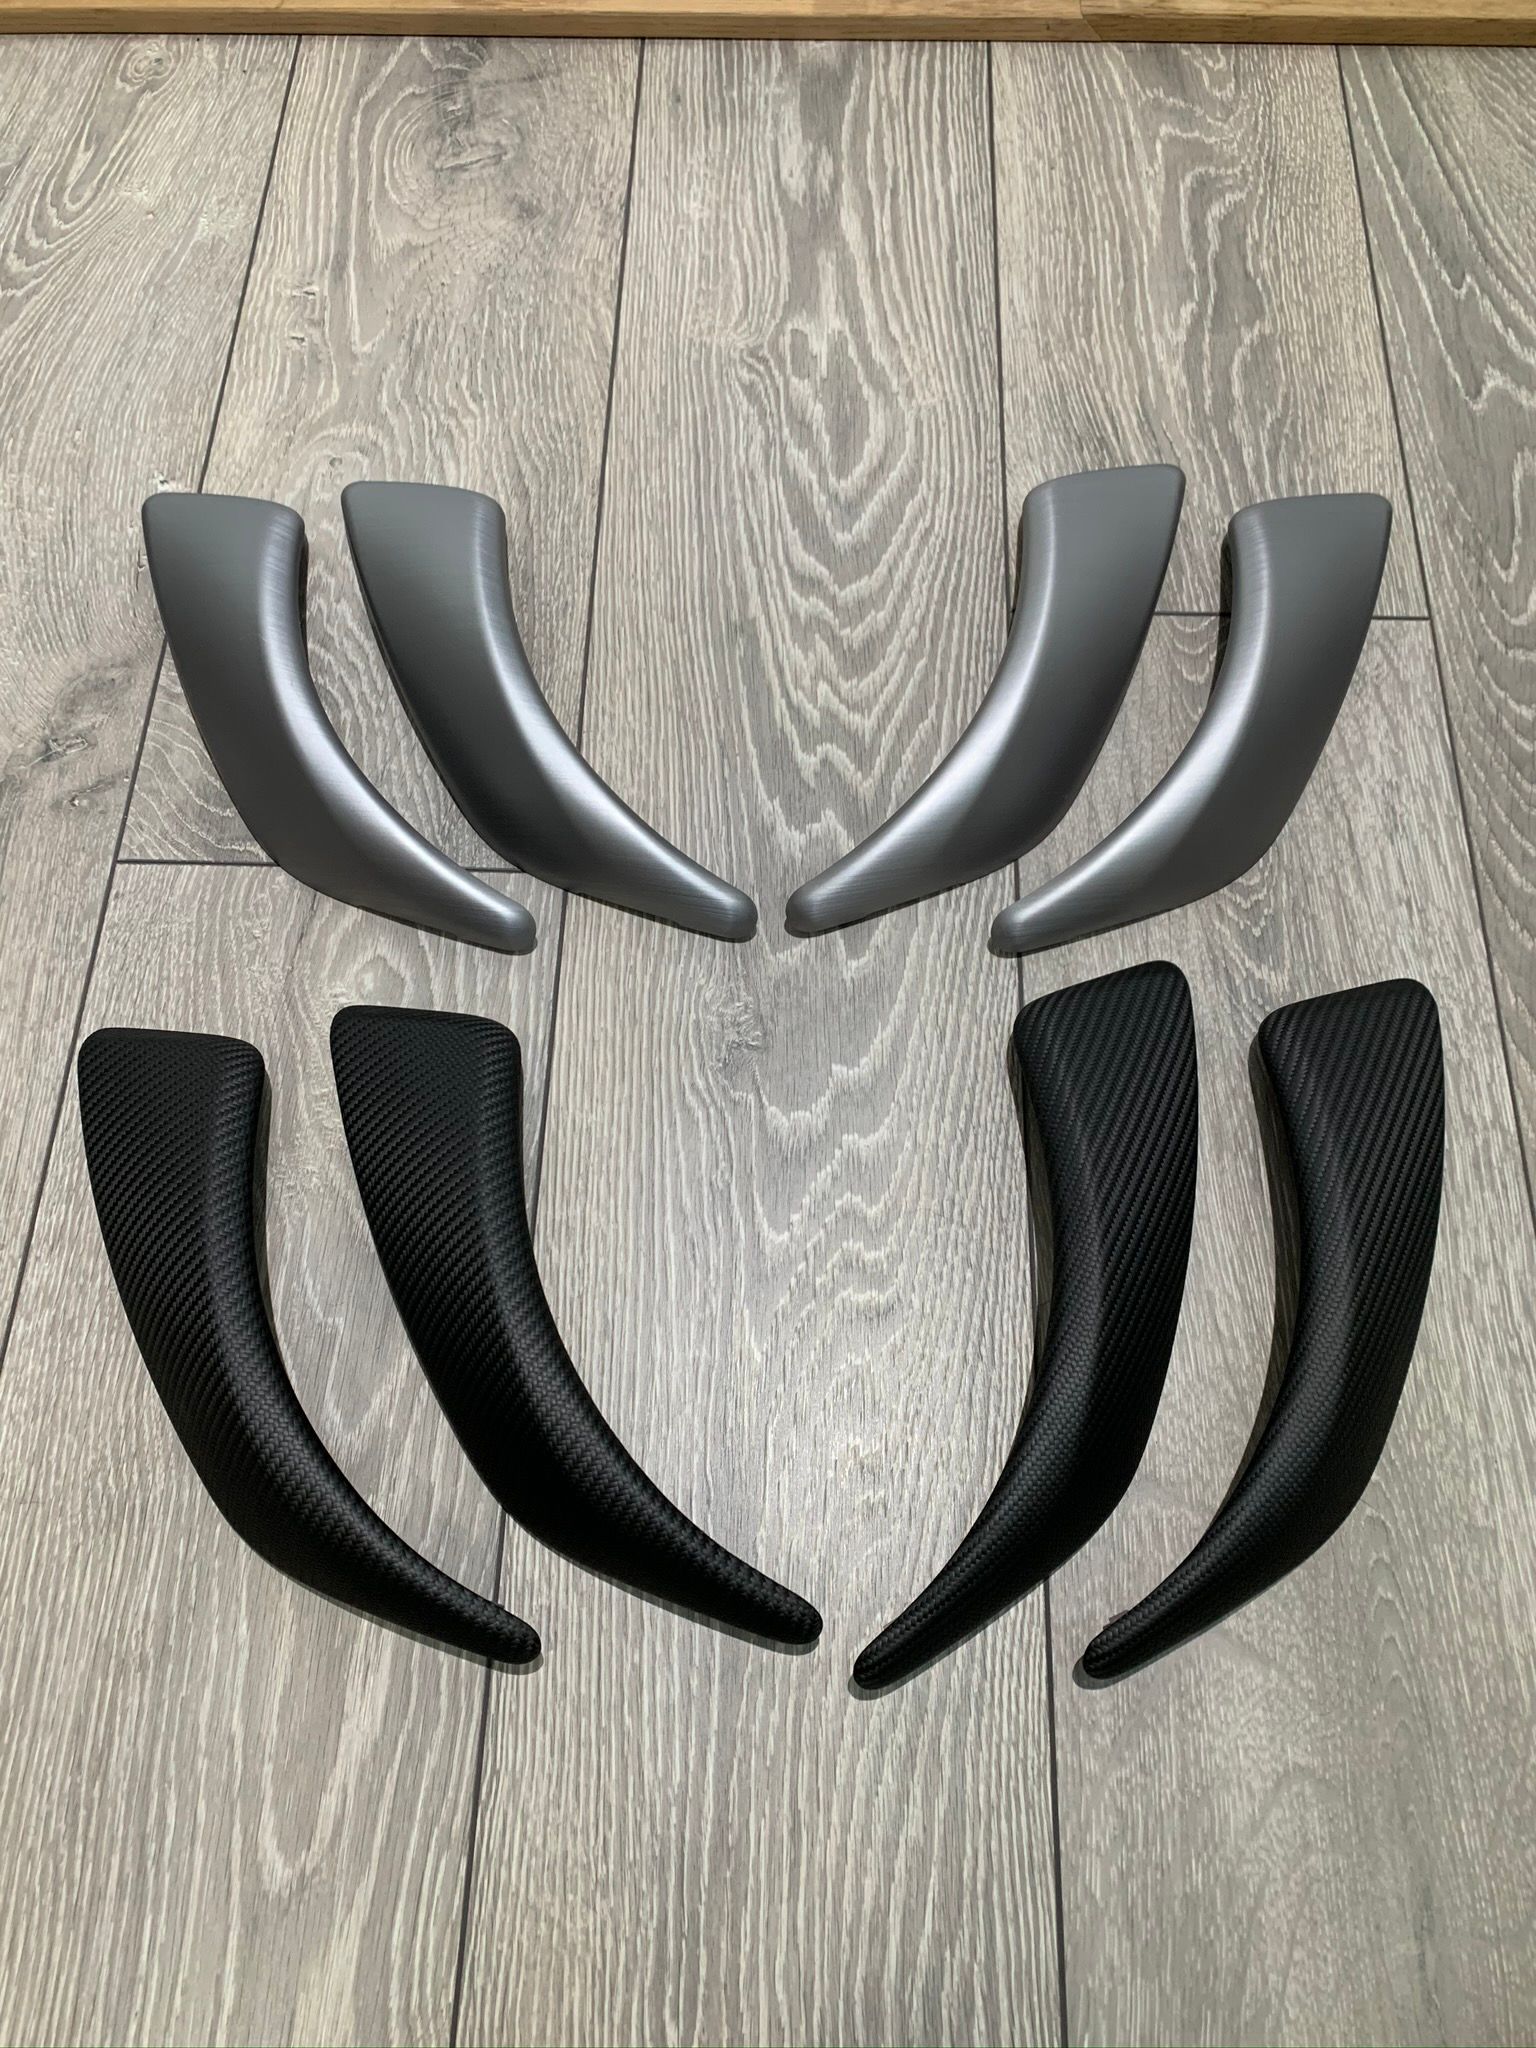
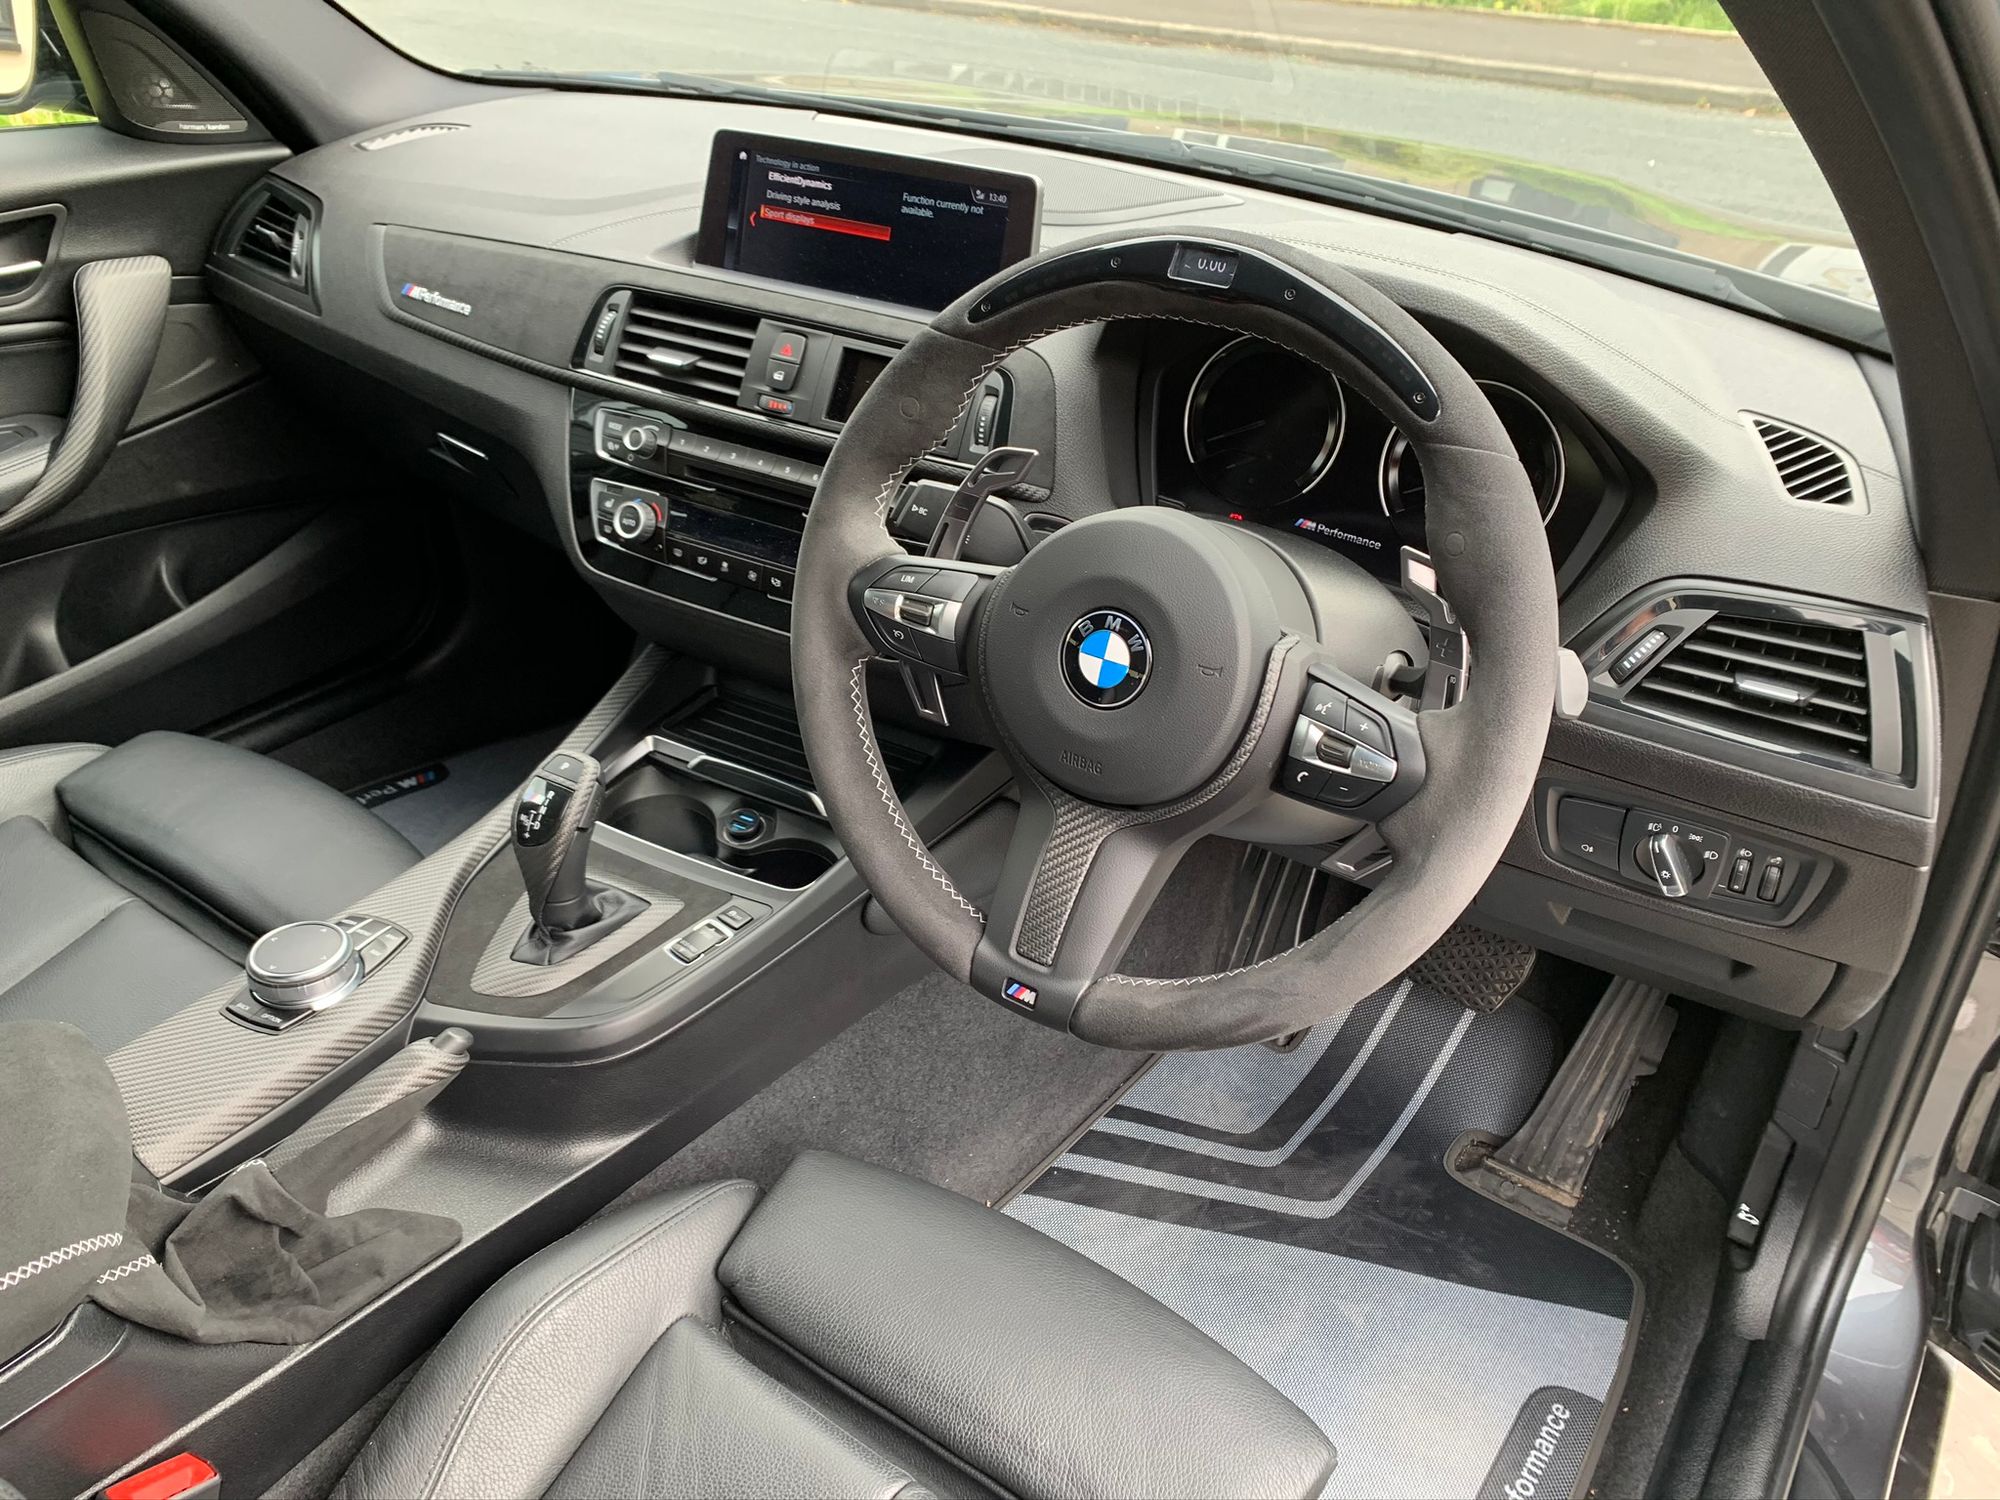
This includes everything from the dashboard trim to the armrest, the door handles, the handbrake, foot pedals, floor mats and even the gear surround! Here are the first set of items that are easy enough to swap over.
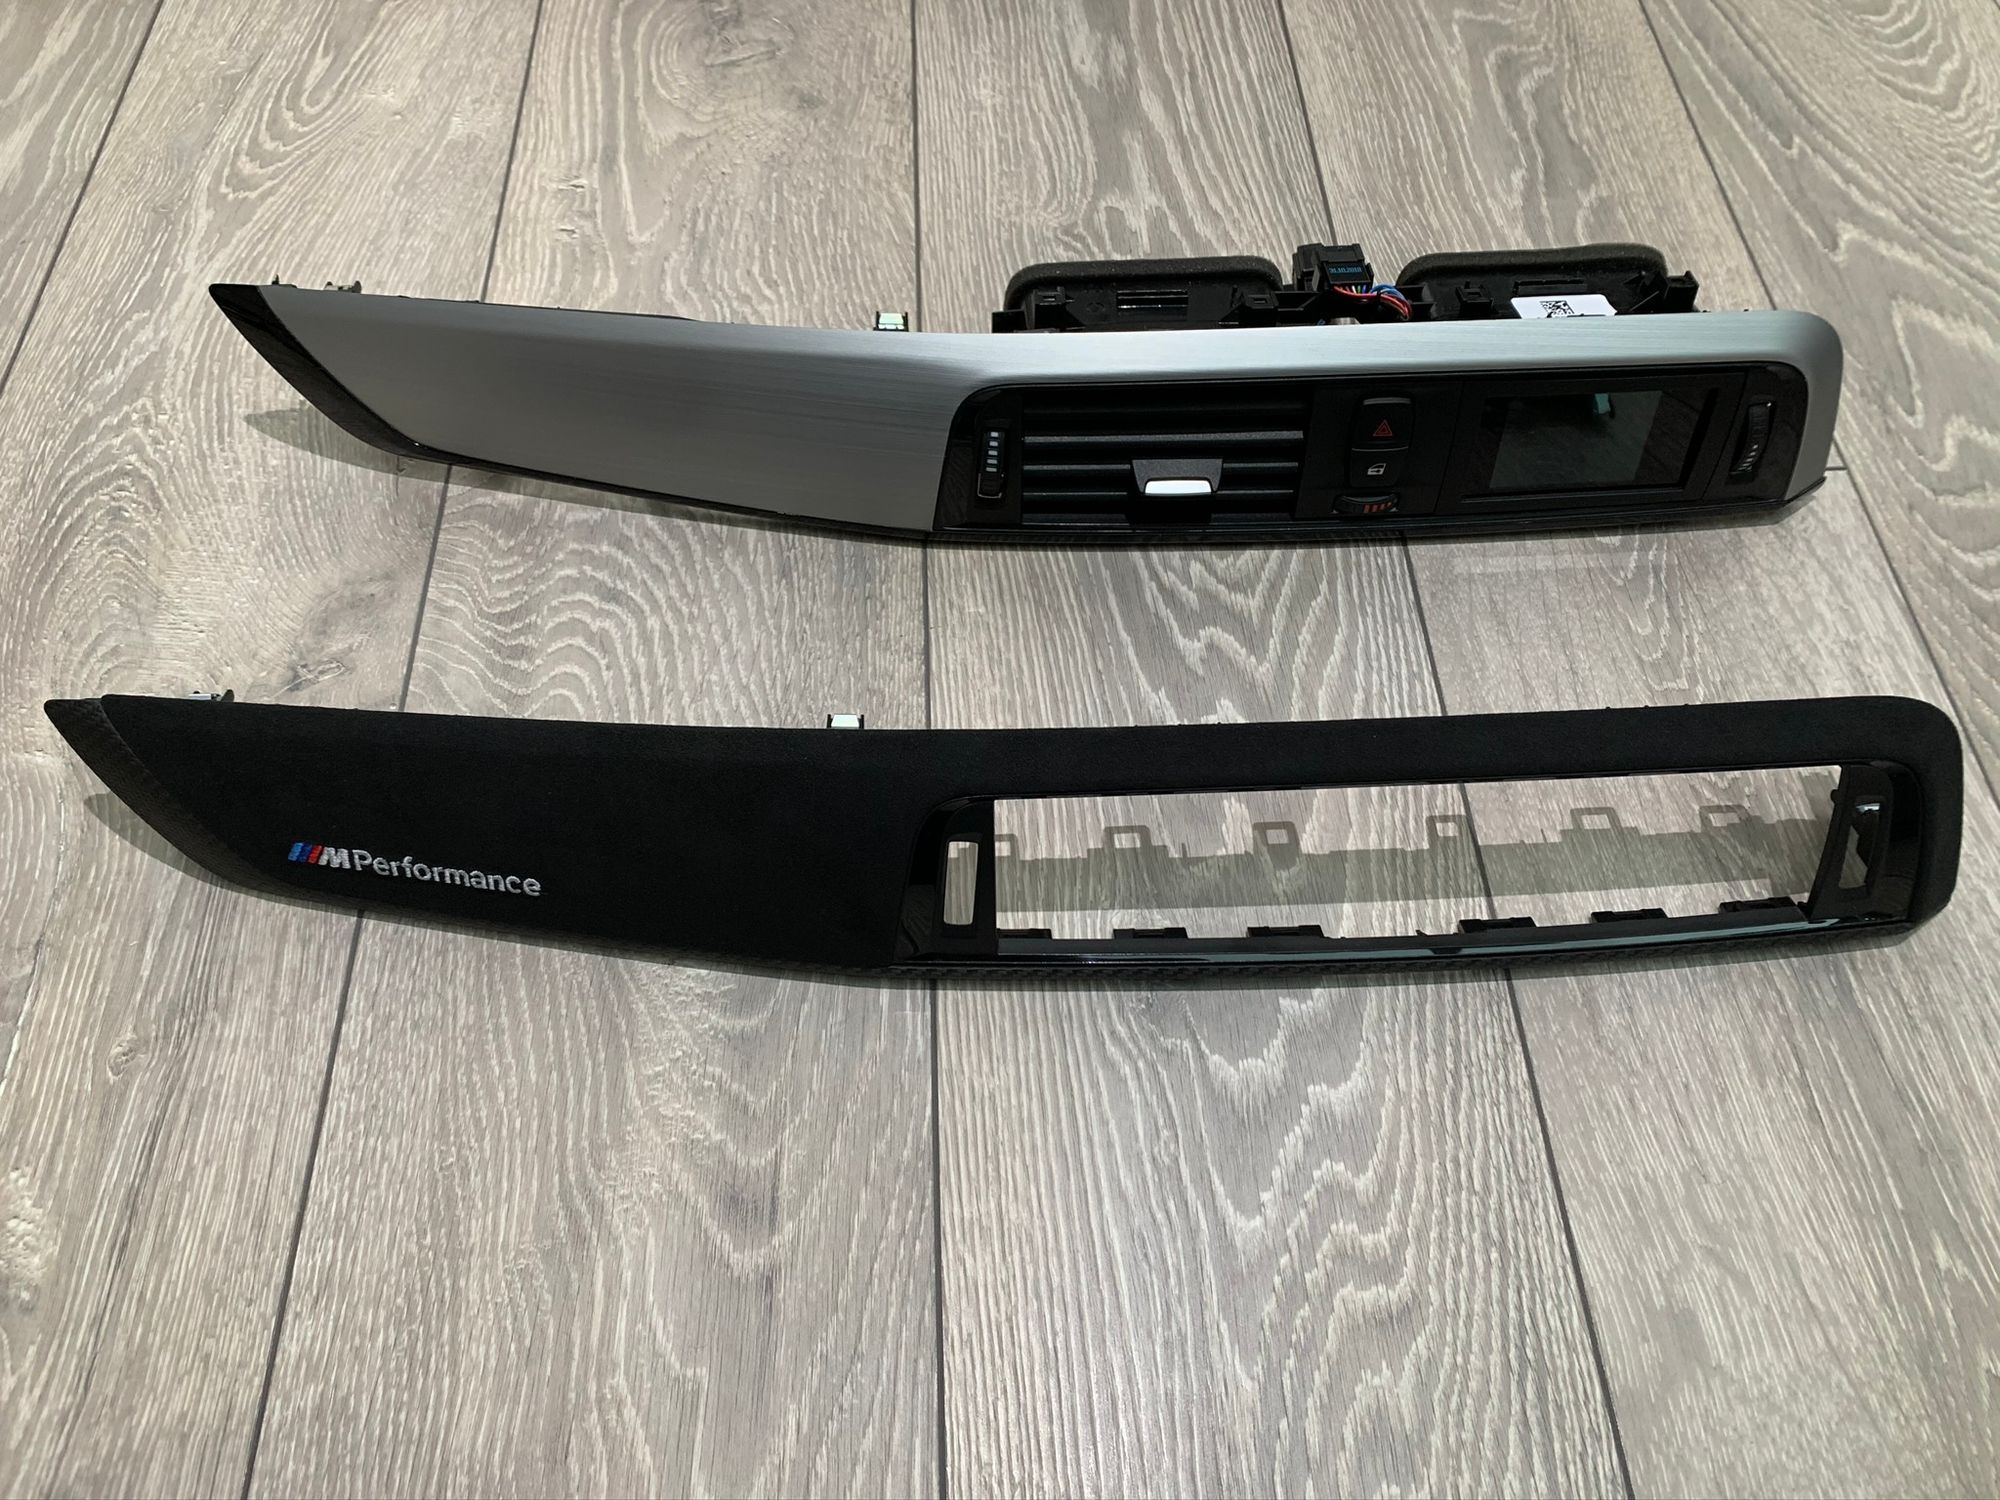
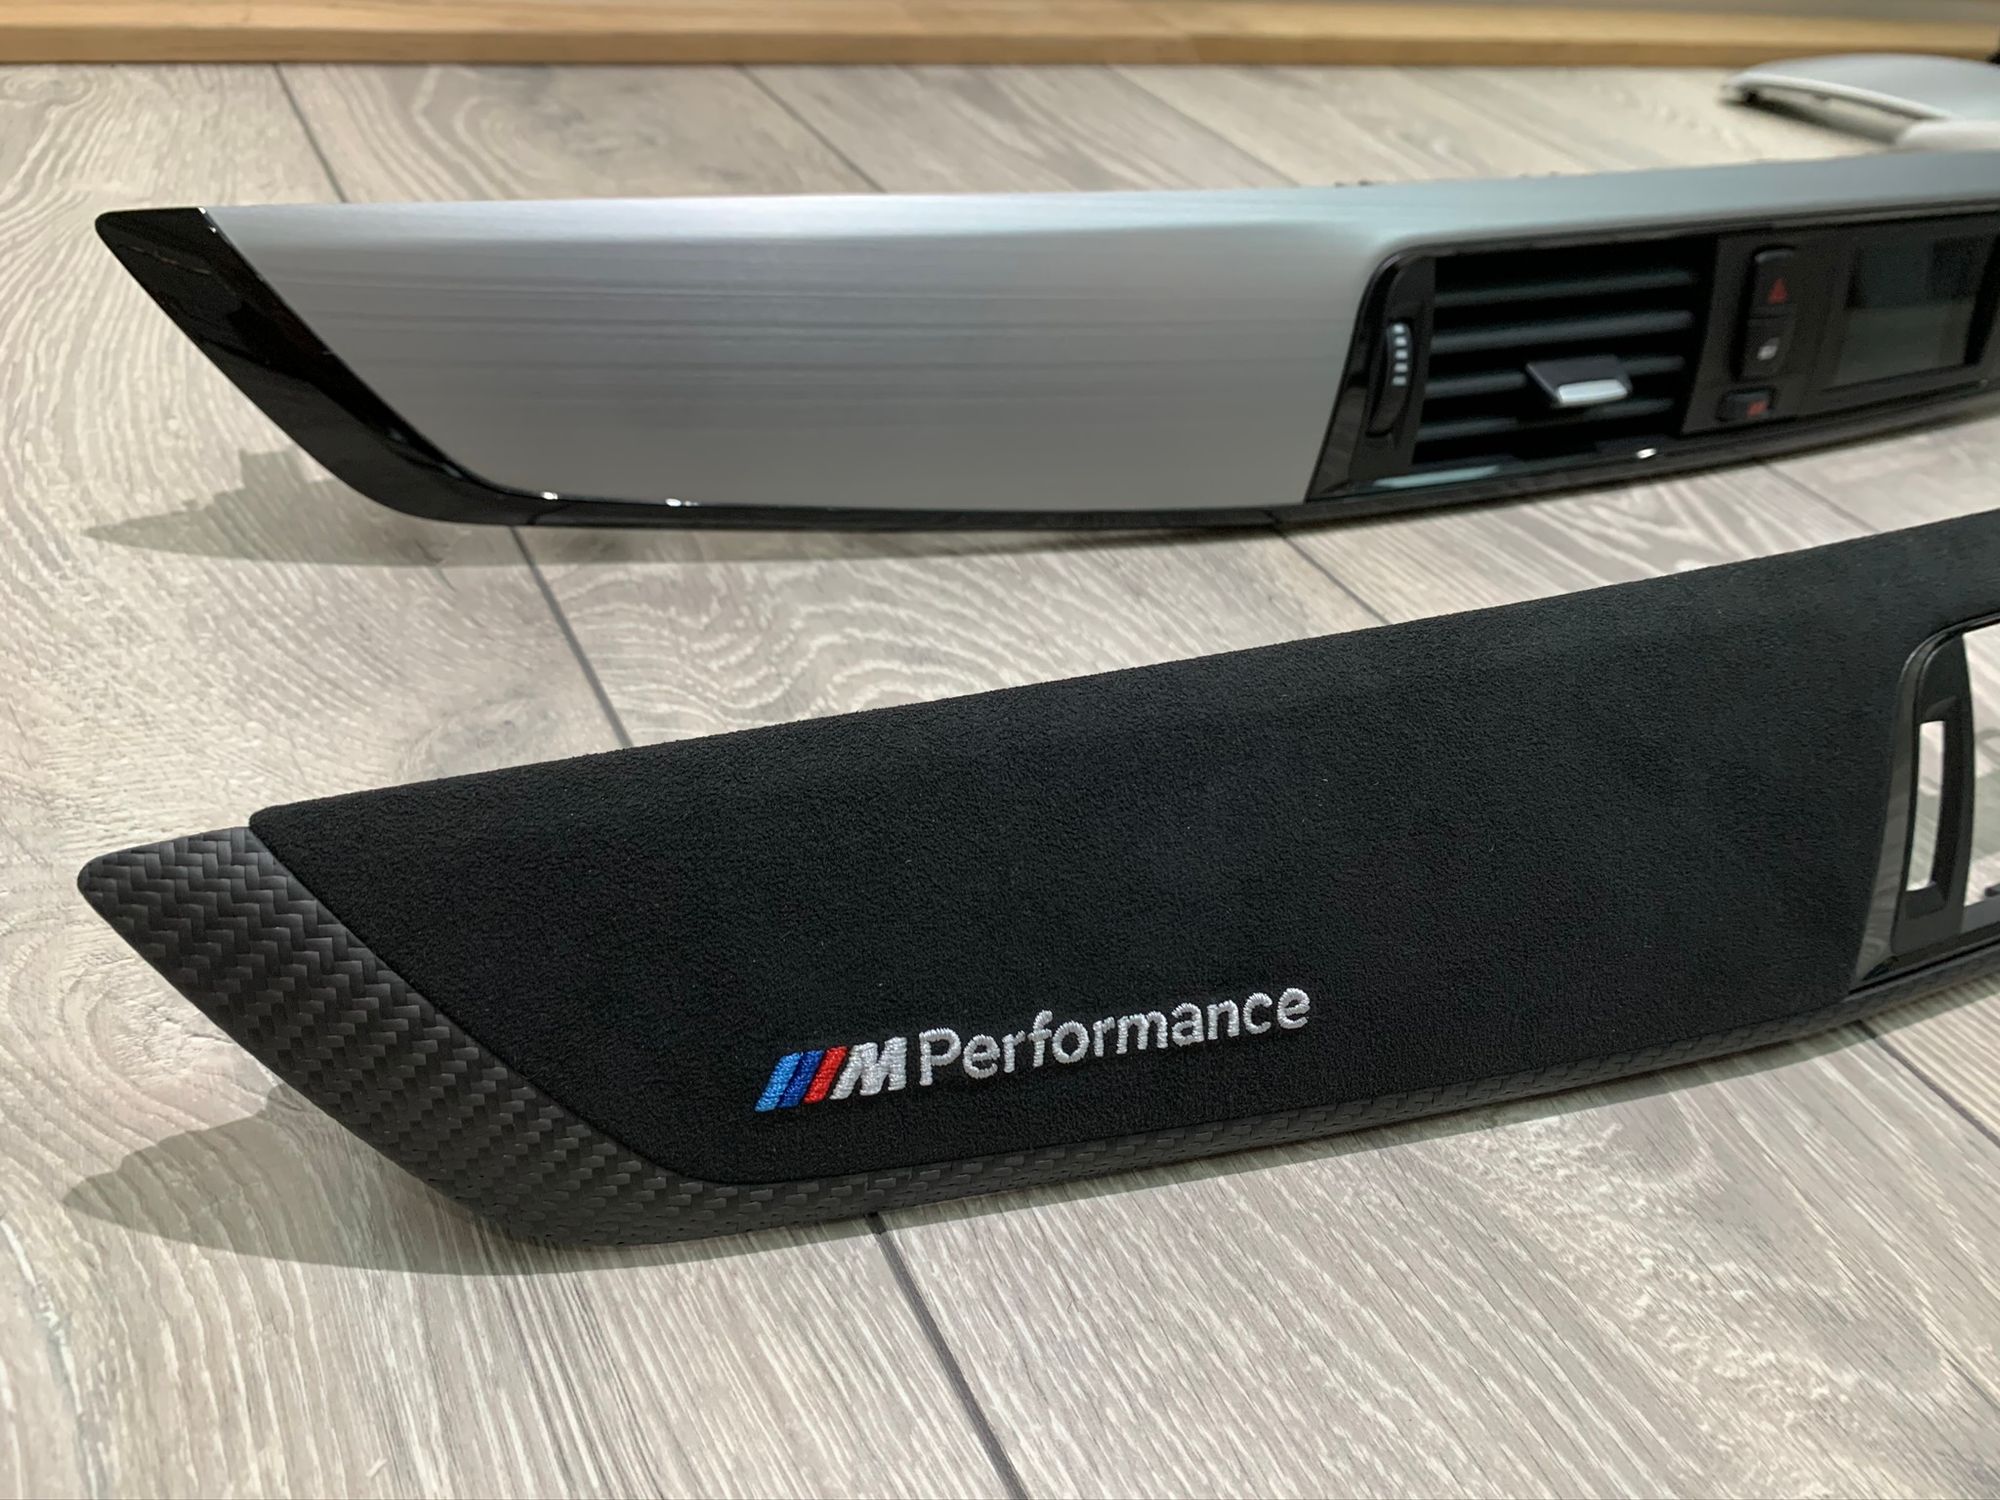
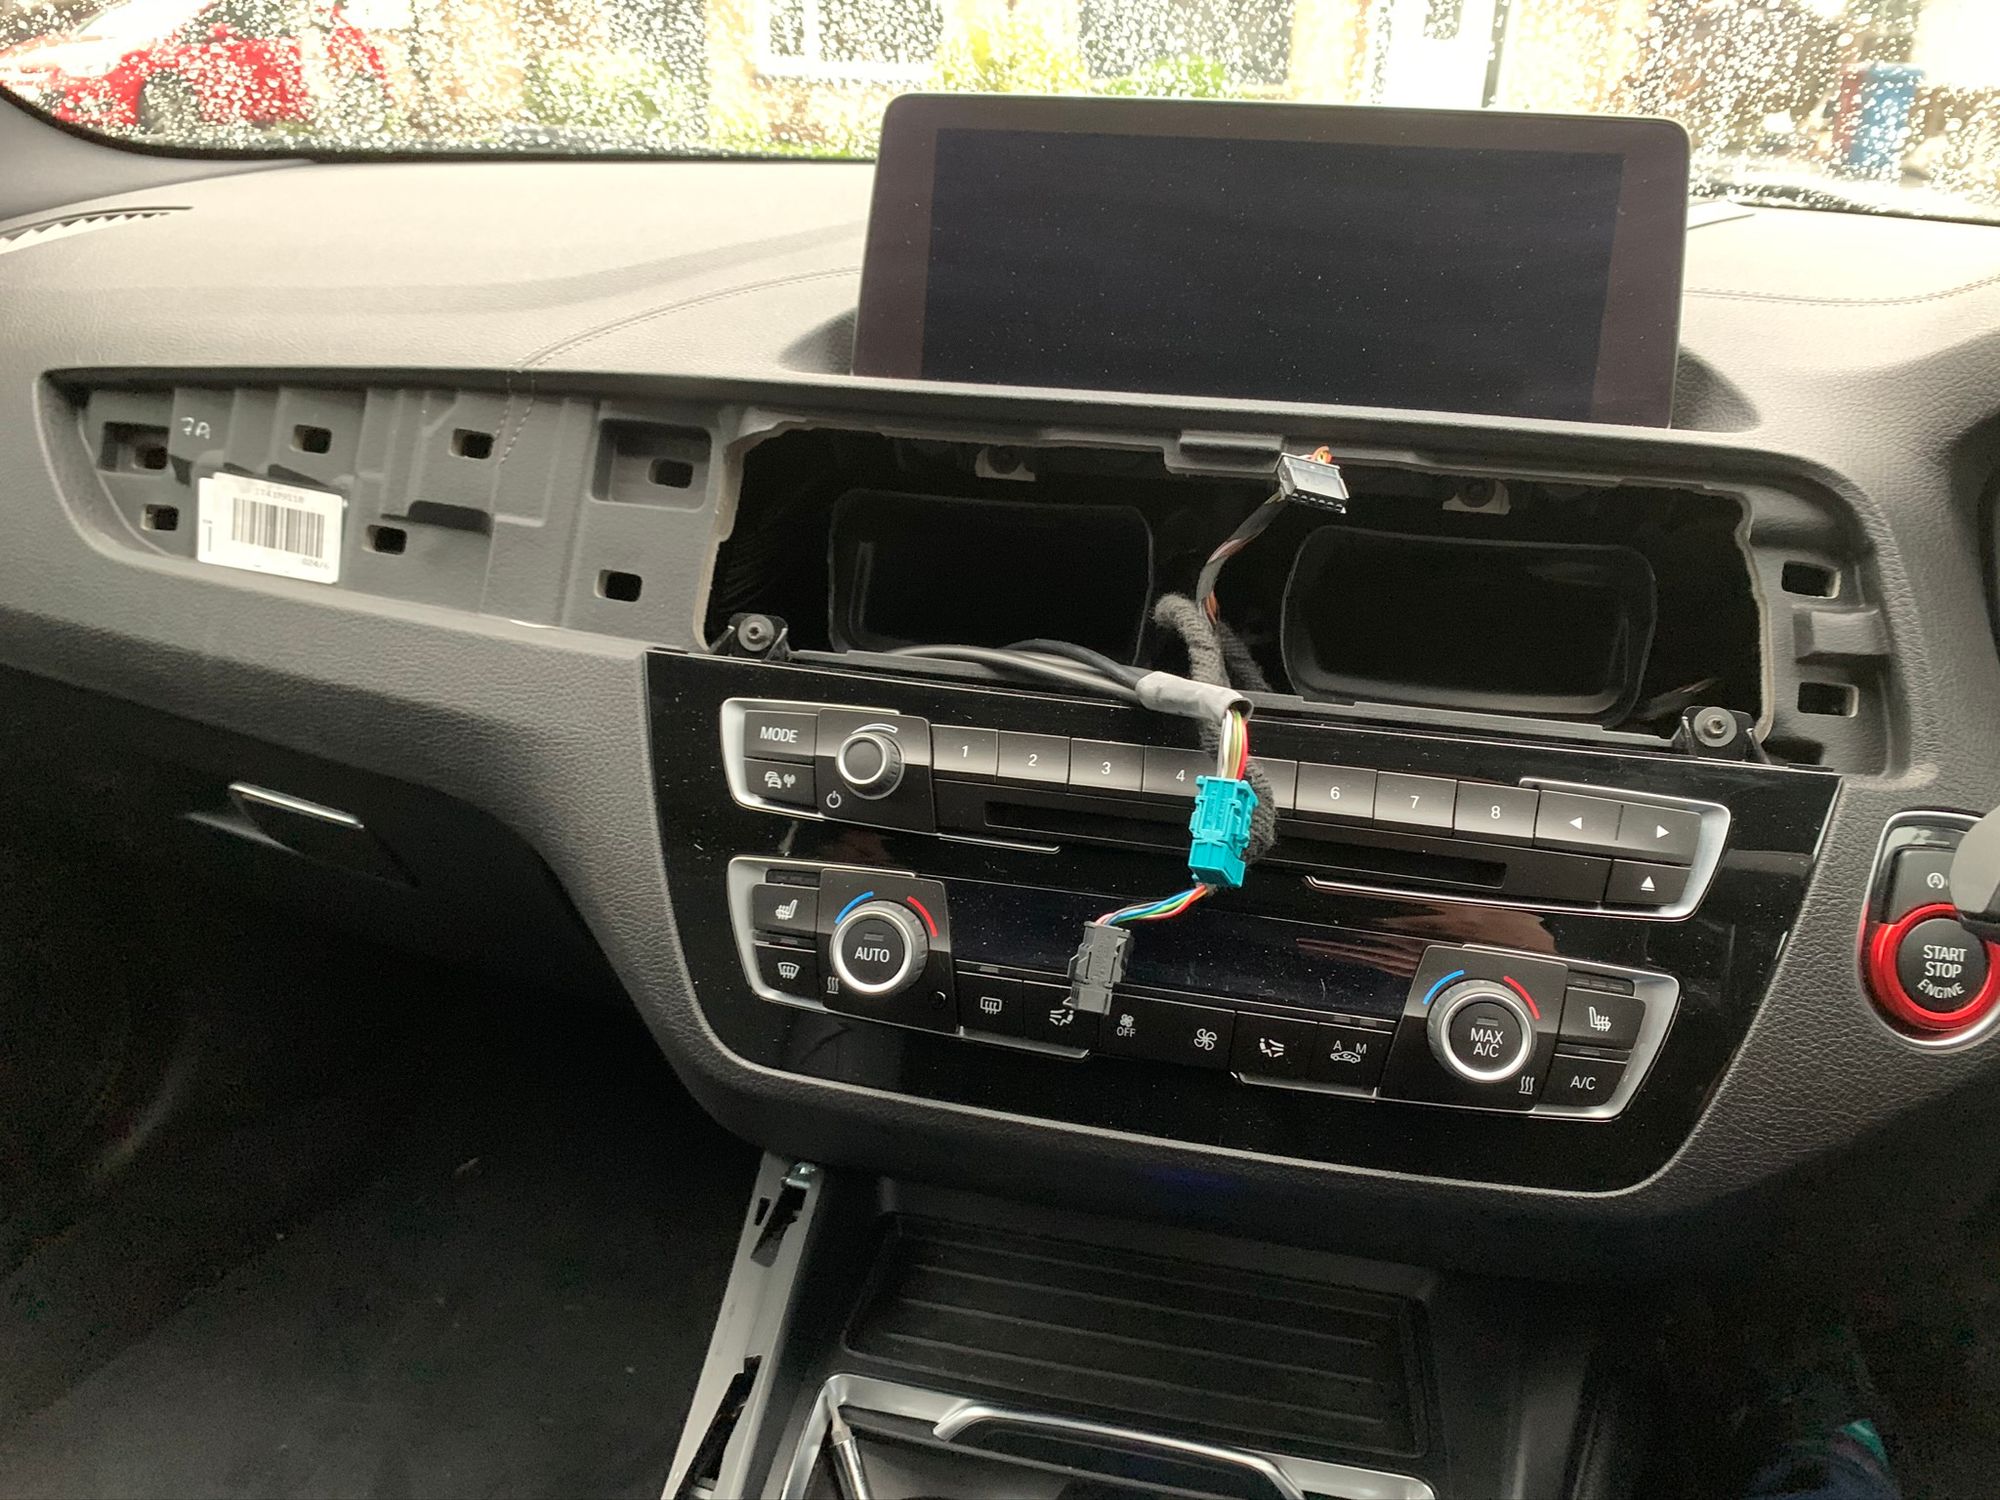
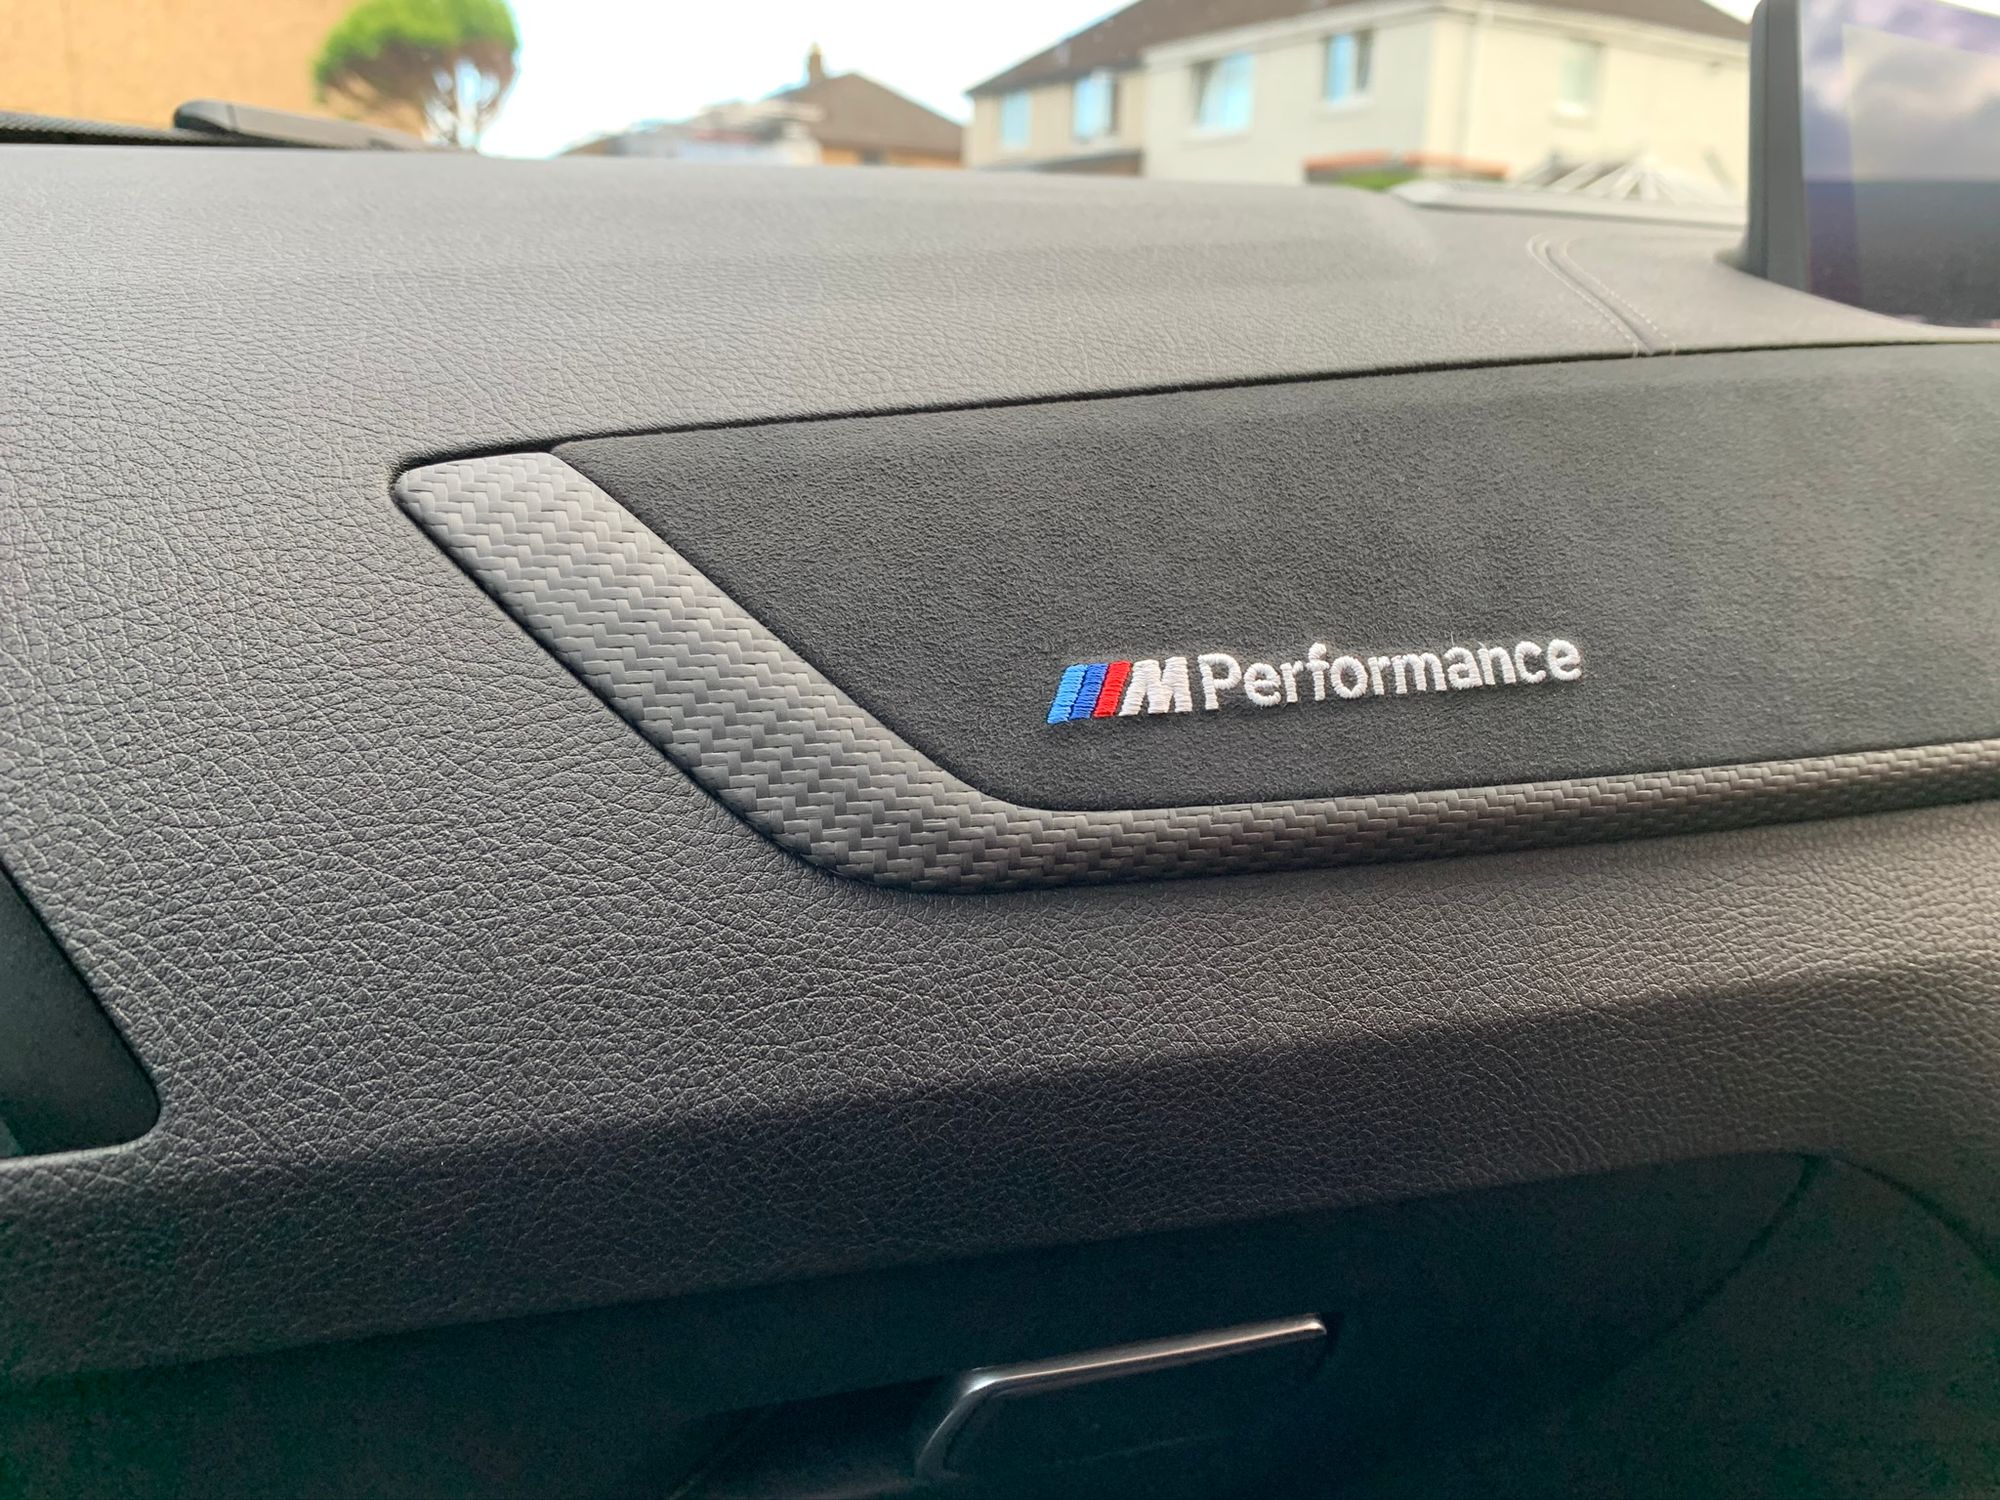
The dashboard trim simply pops out and is replaced by the new version. Going from brushed aluminium and gloss black on the existing one, the new one has the BMW M Performance logo stitched on the beautiful Alcantara and is made of carbon fibre!
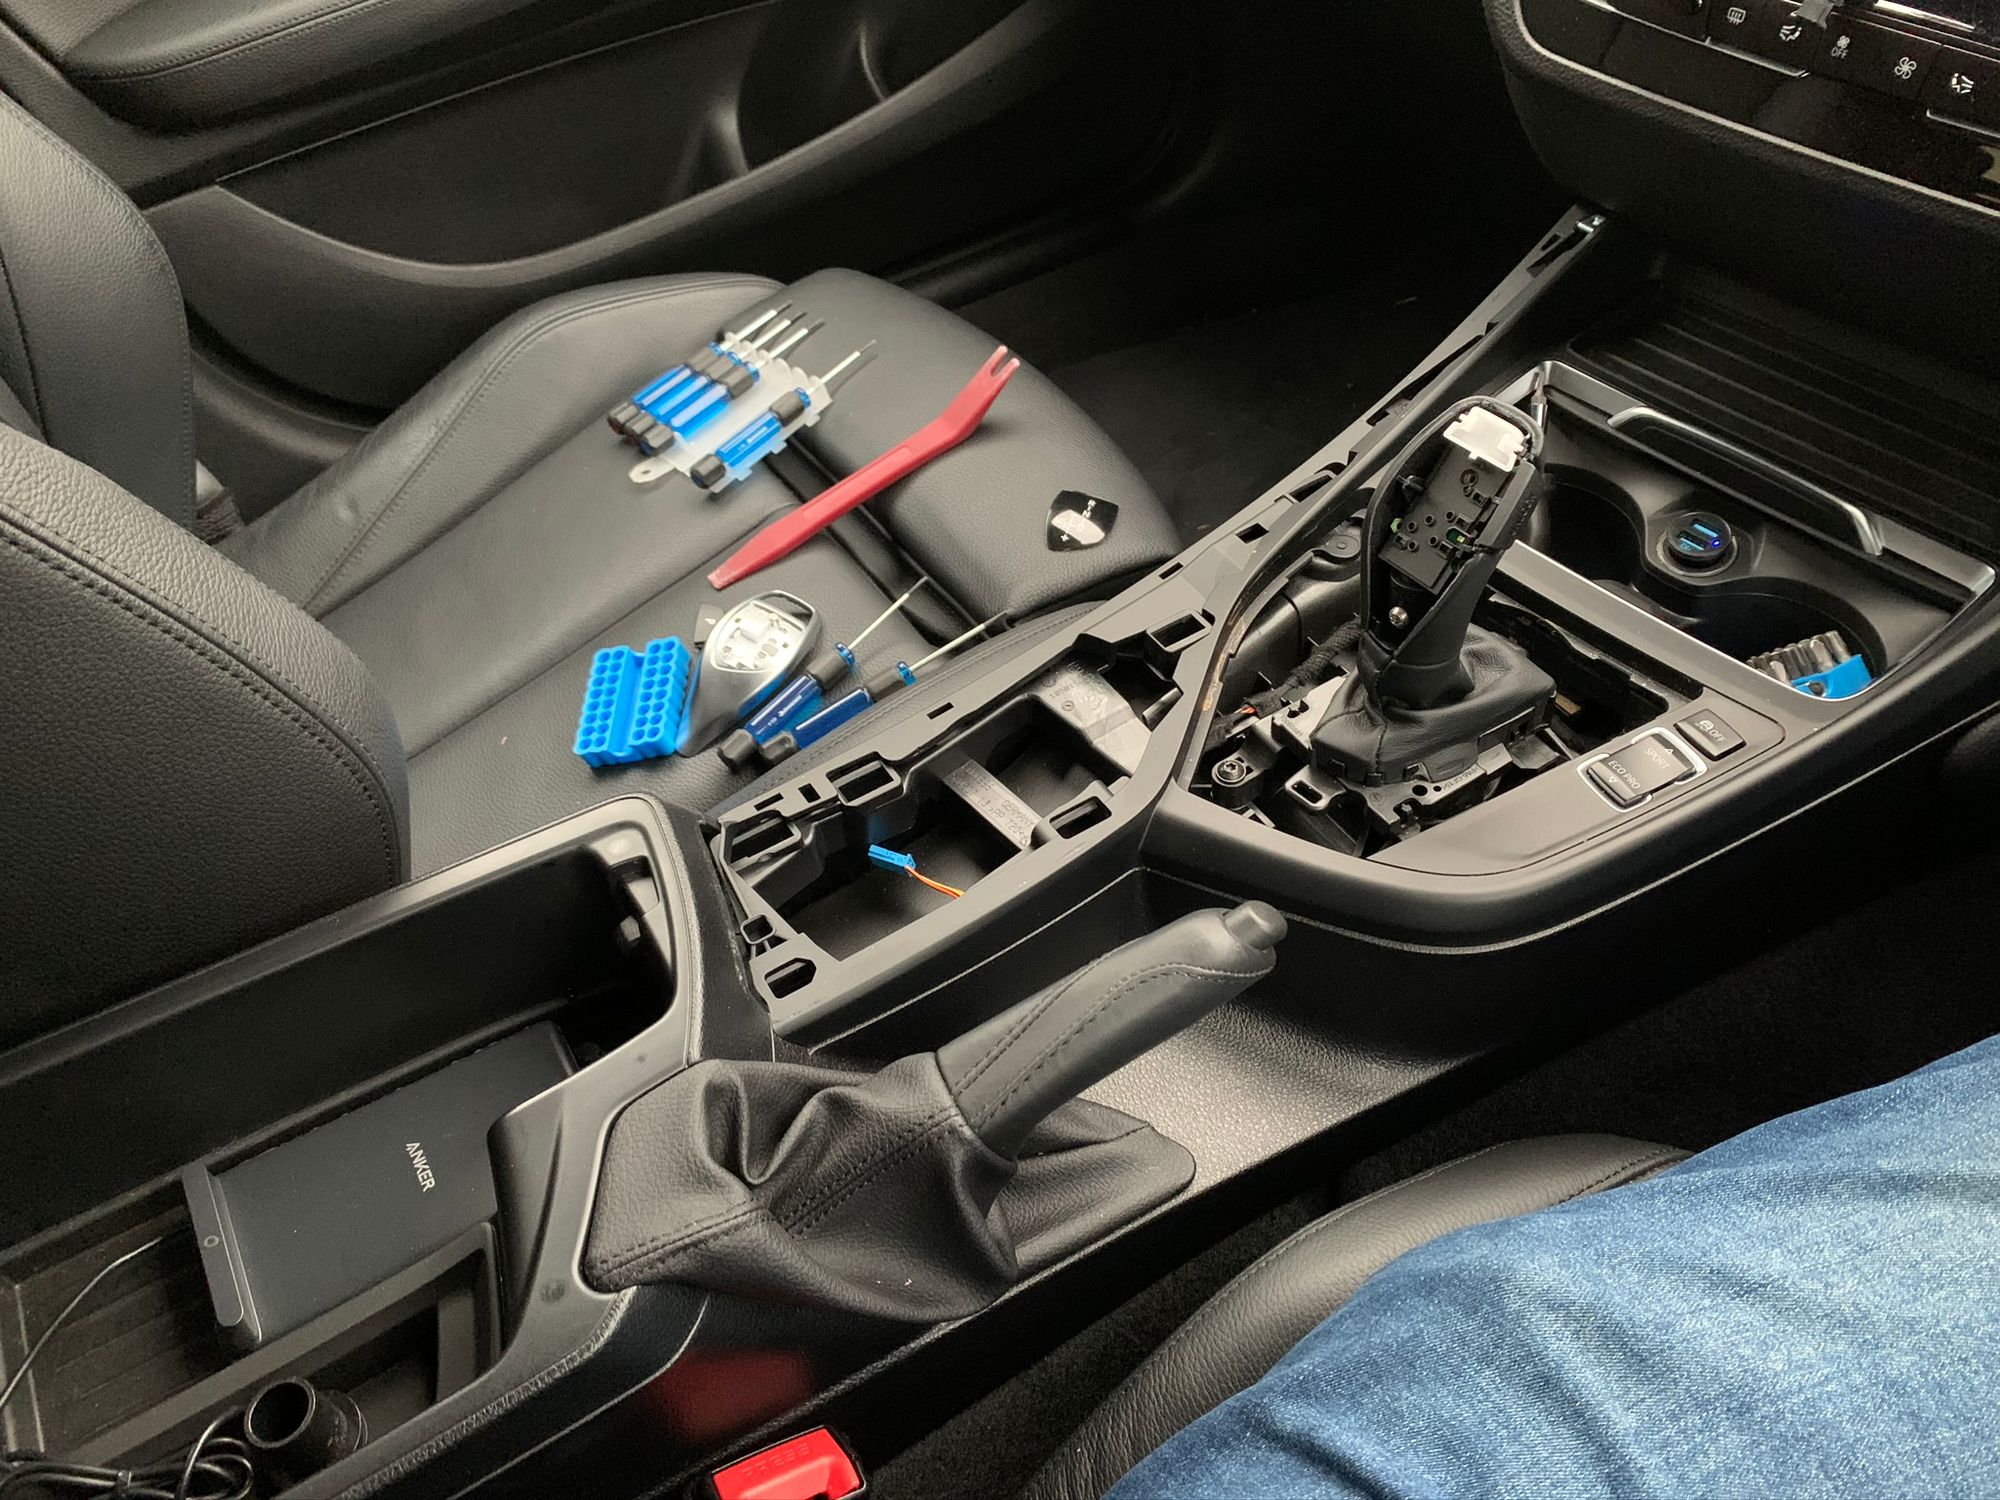
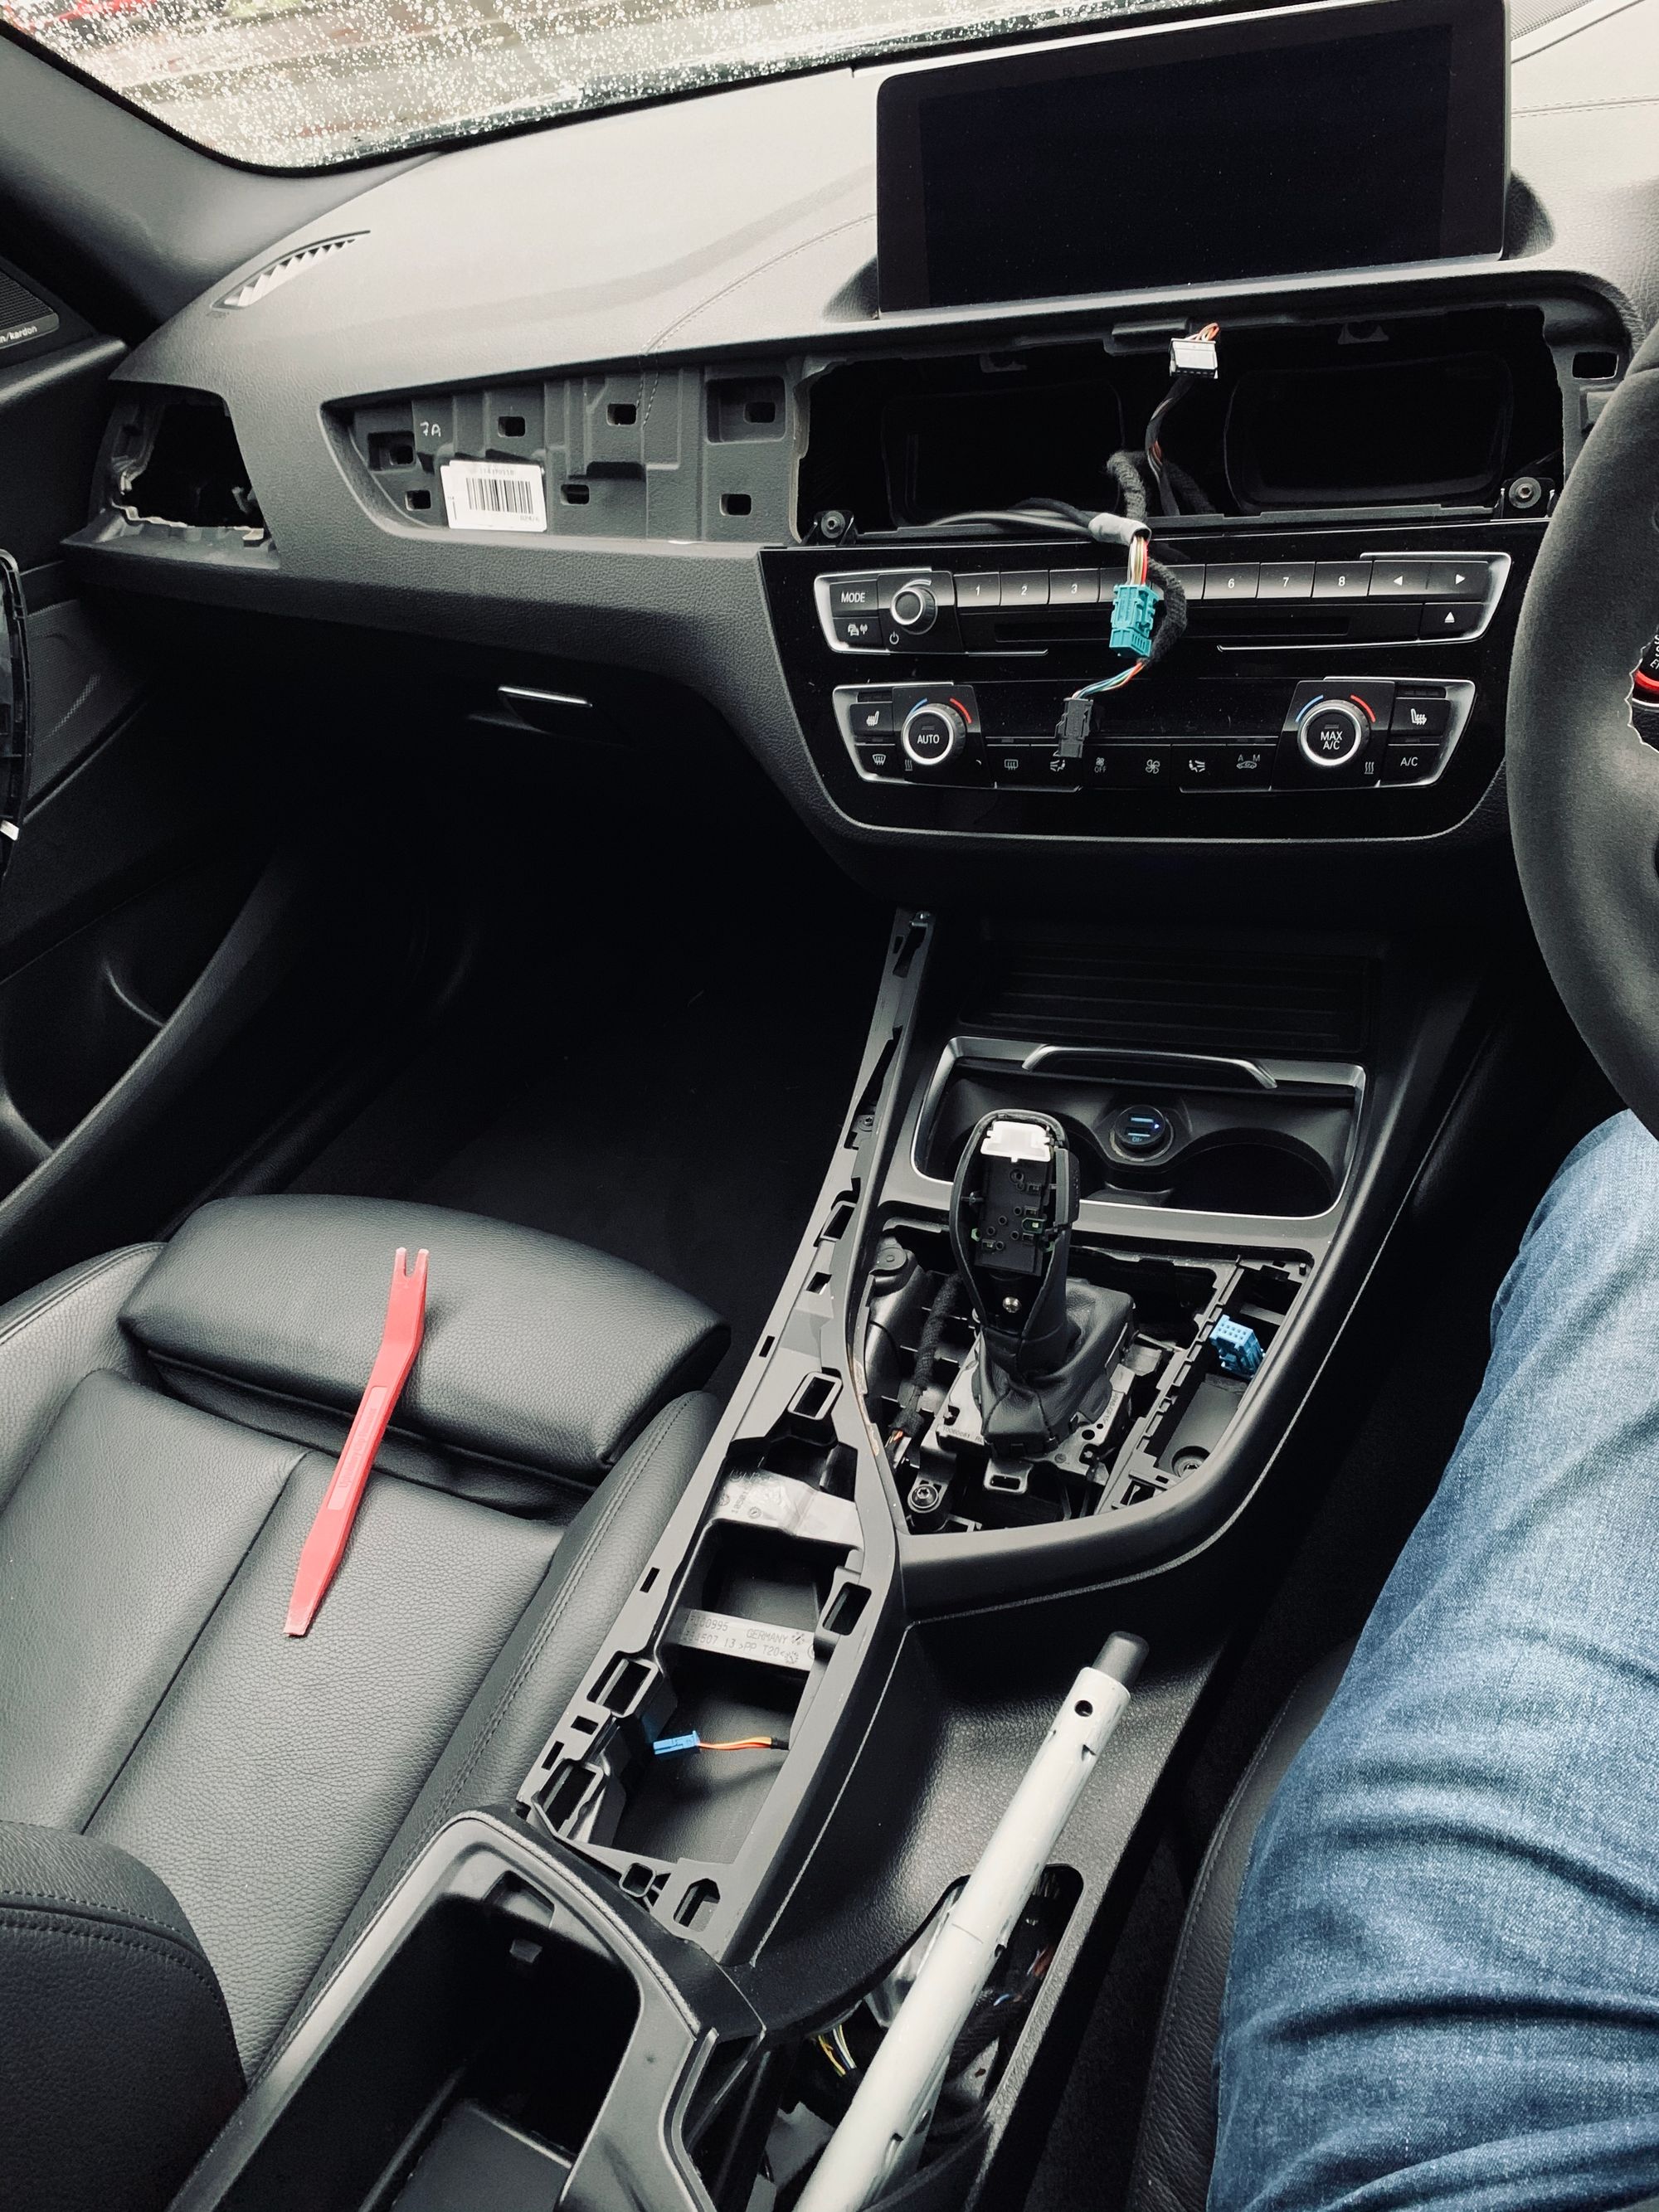
Next up was the trim items in the centre console which included the armrest, centre console trim, gear shifter and handbrake!
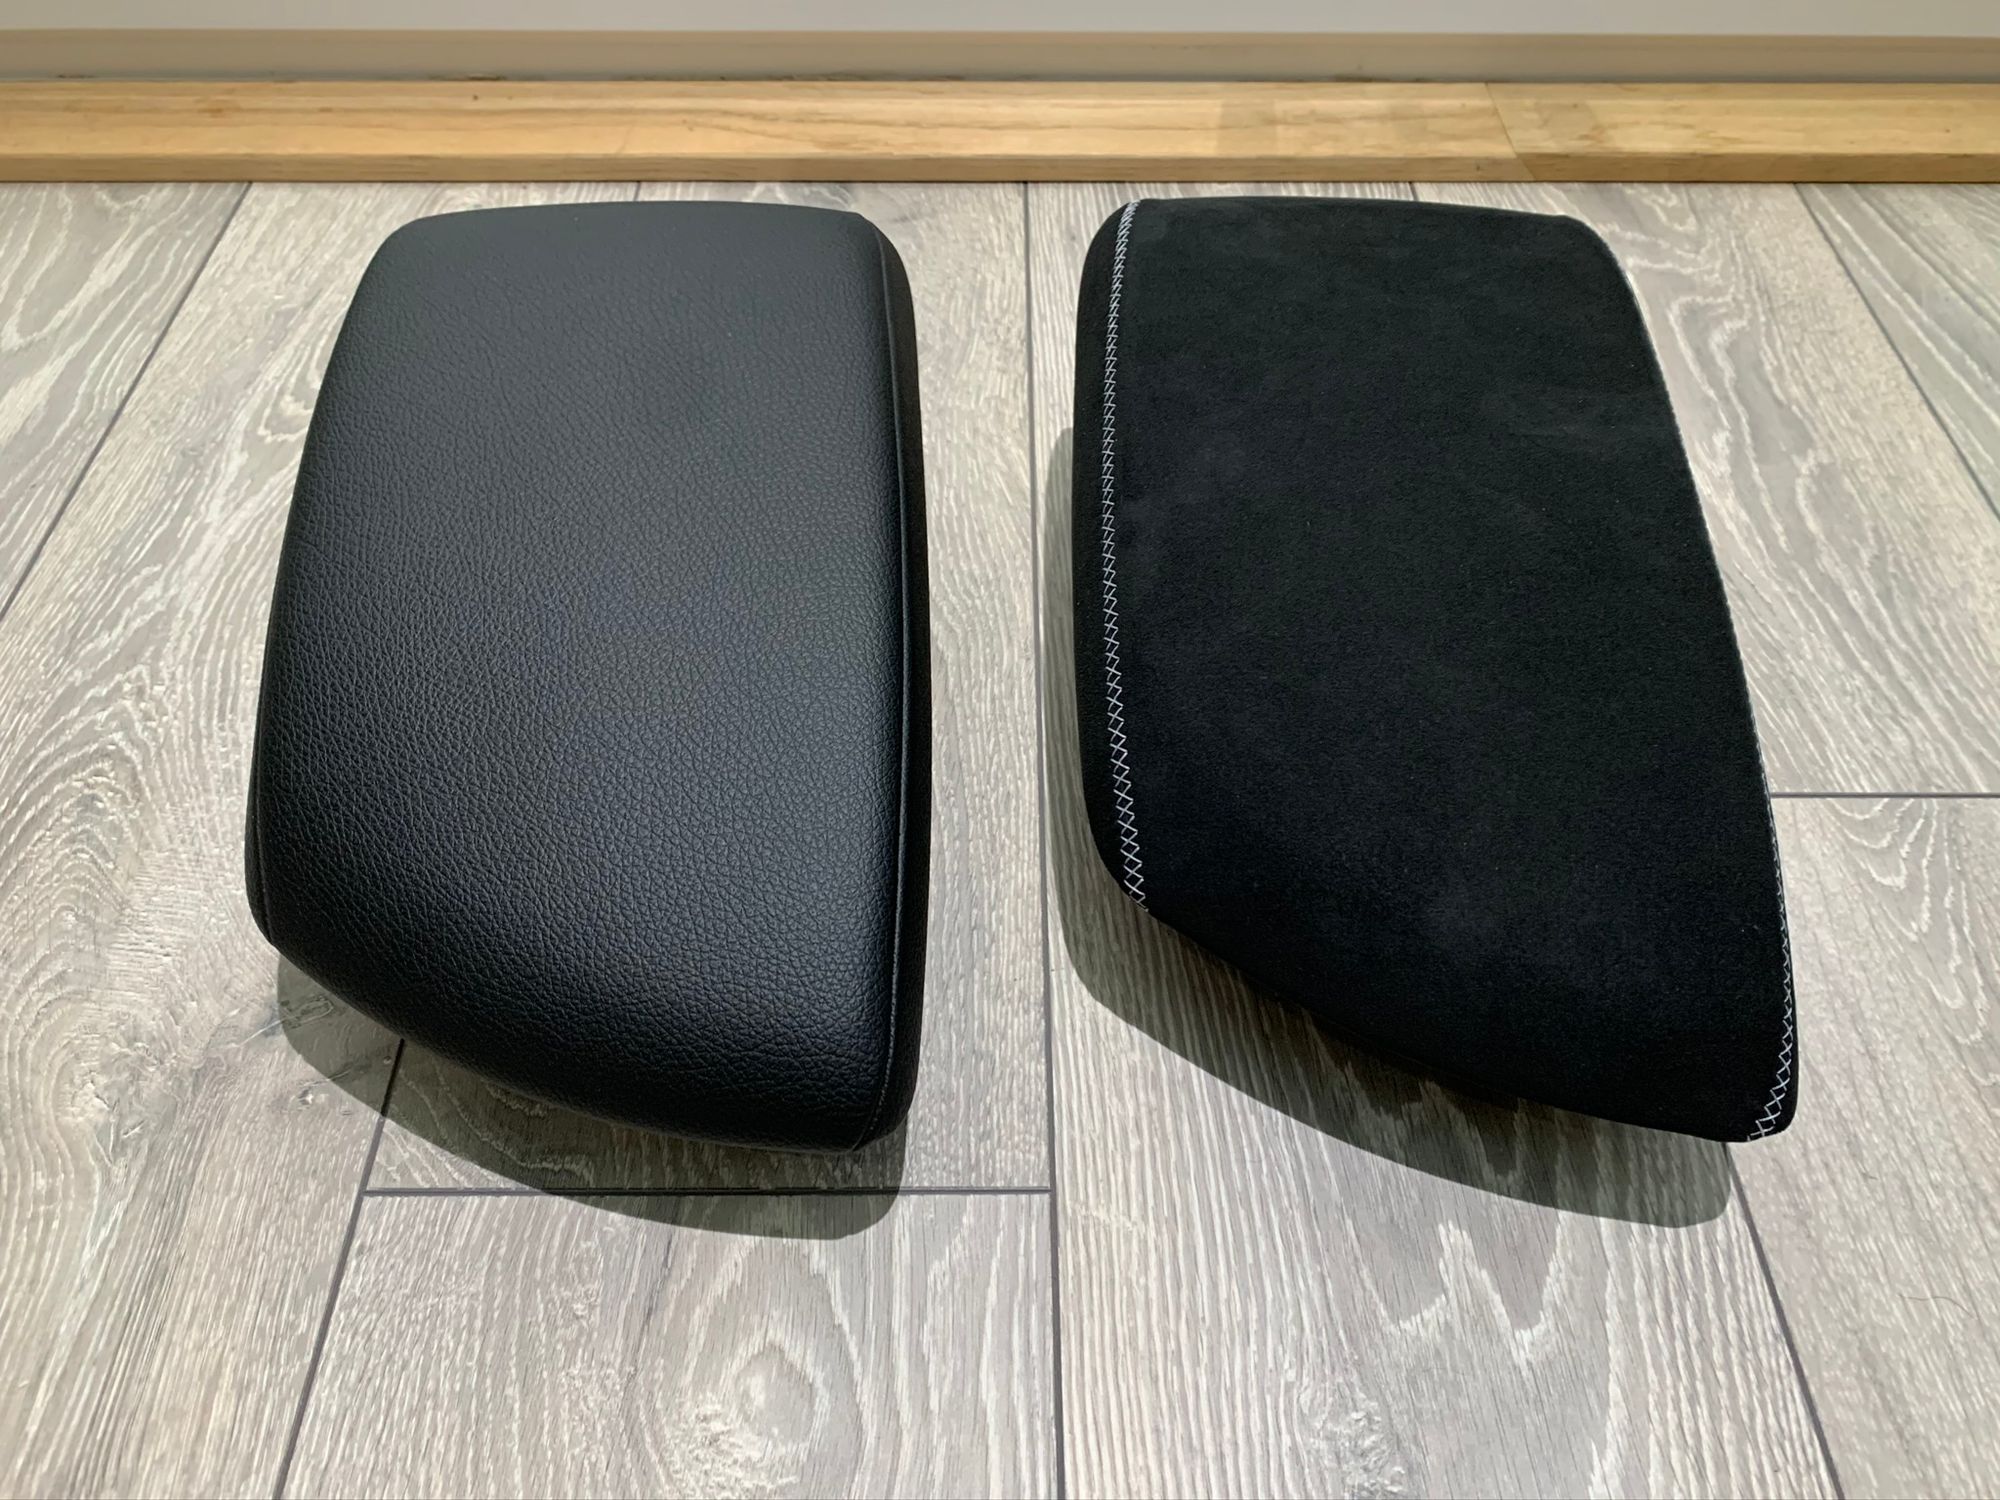
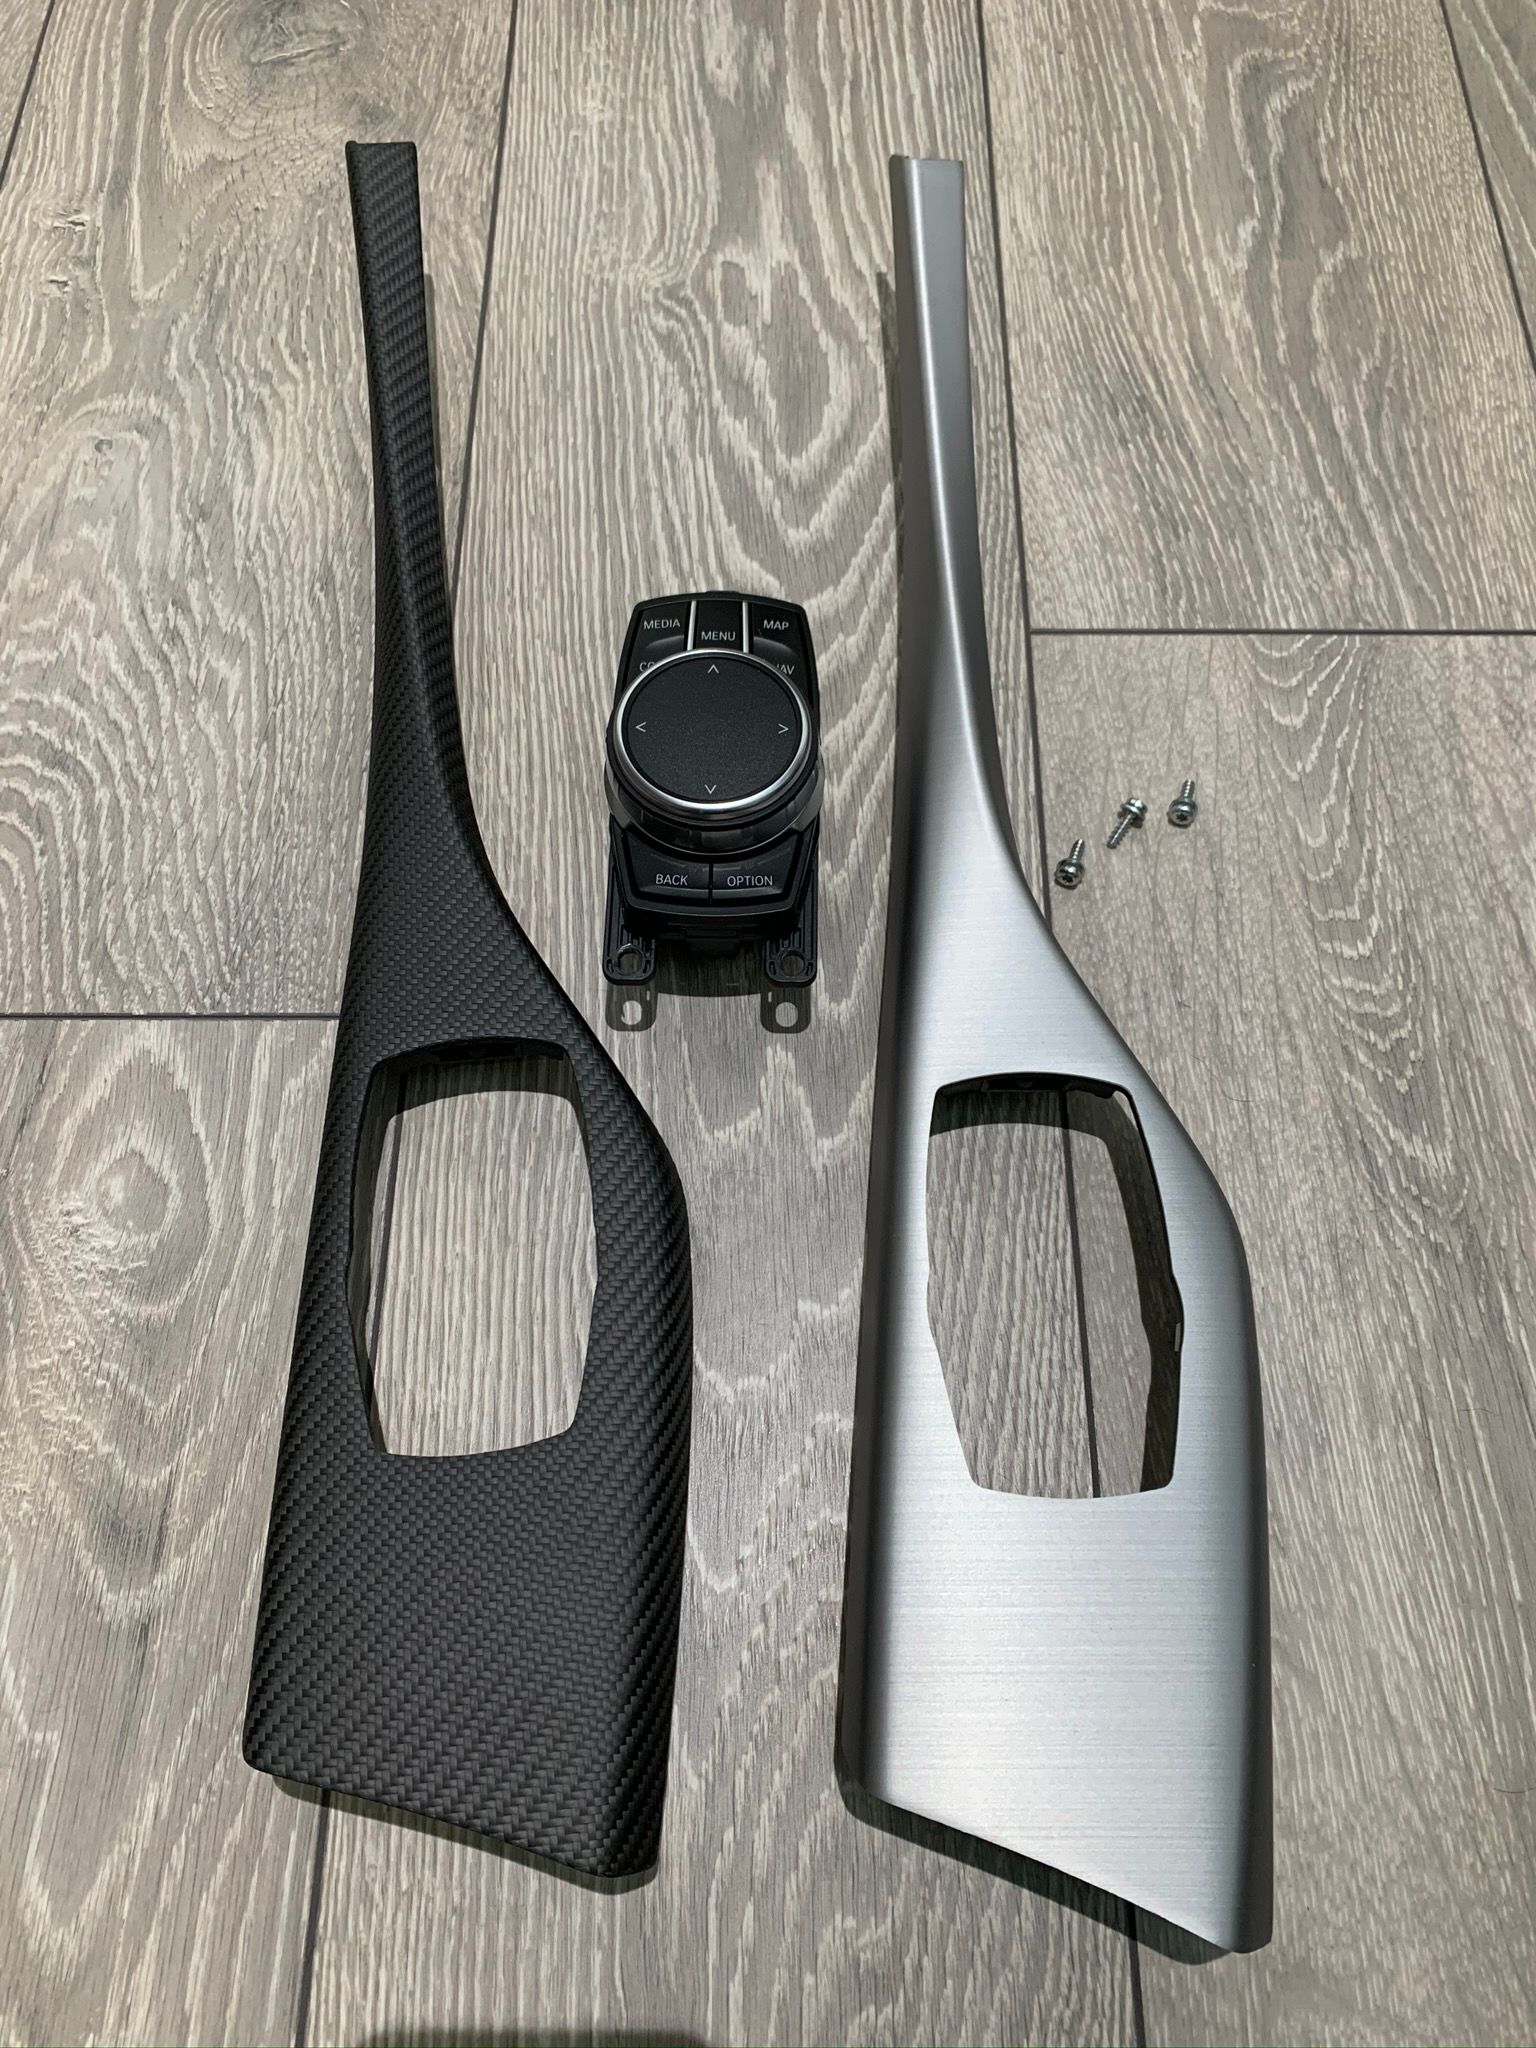
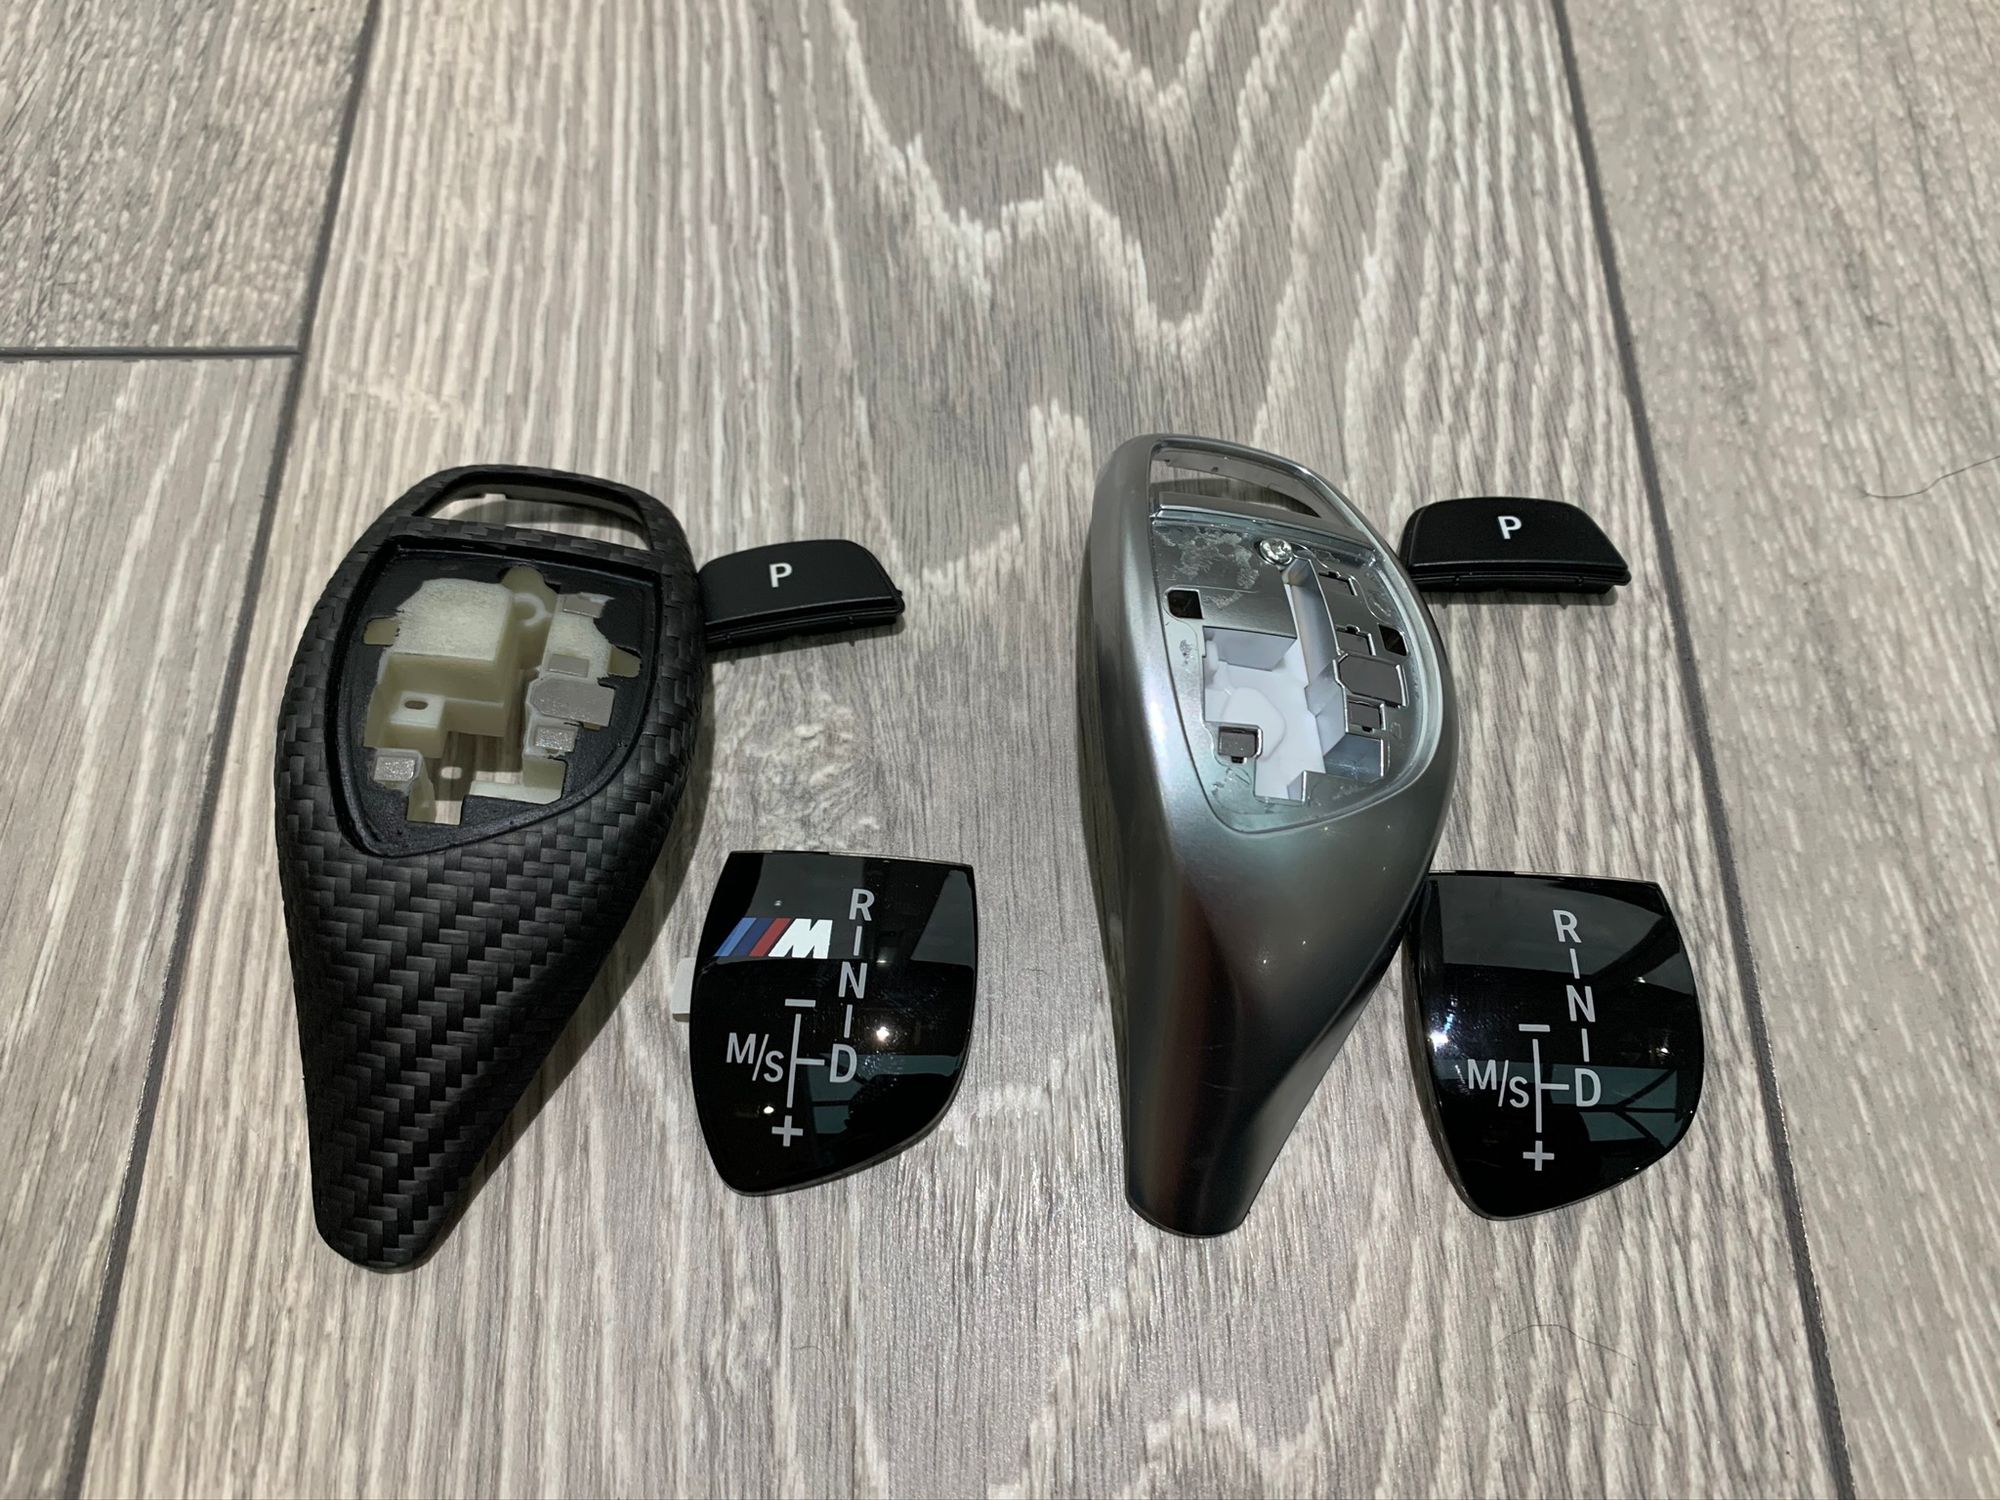
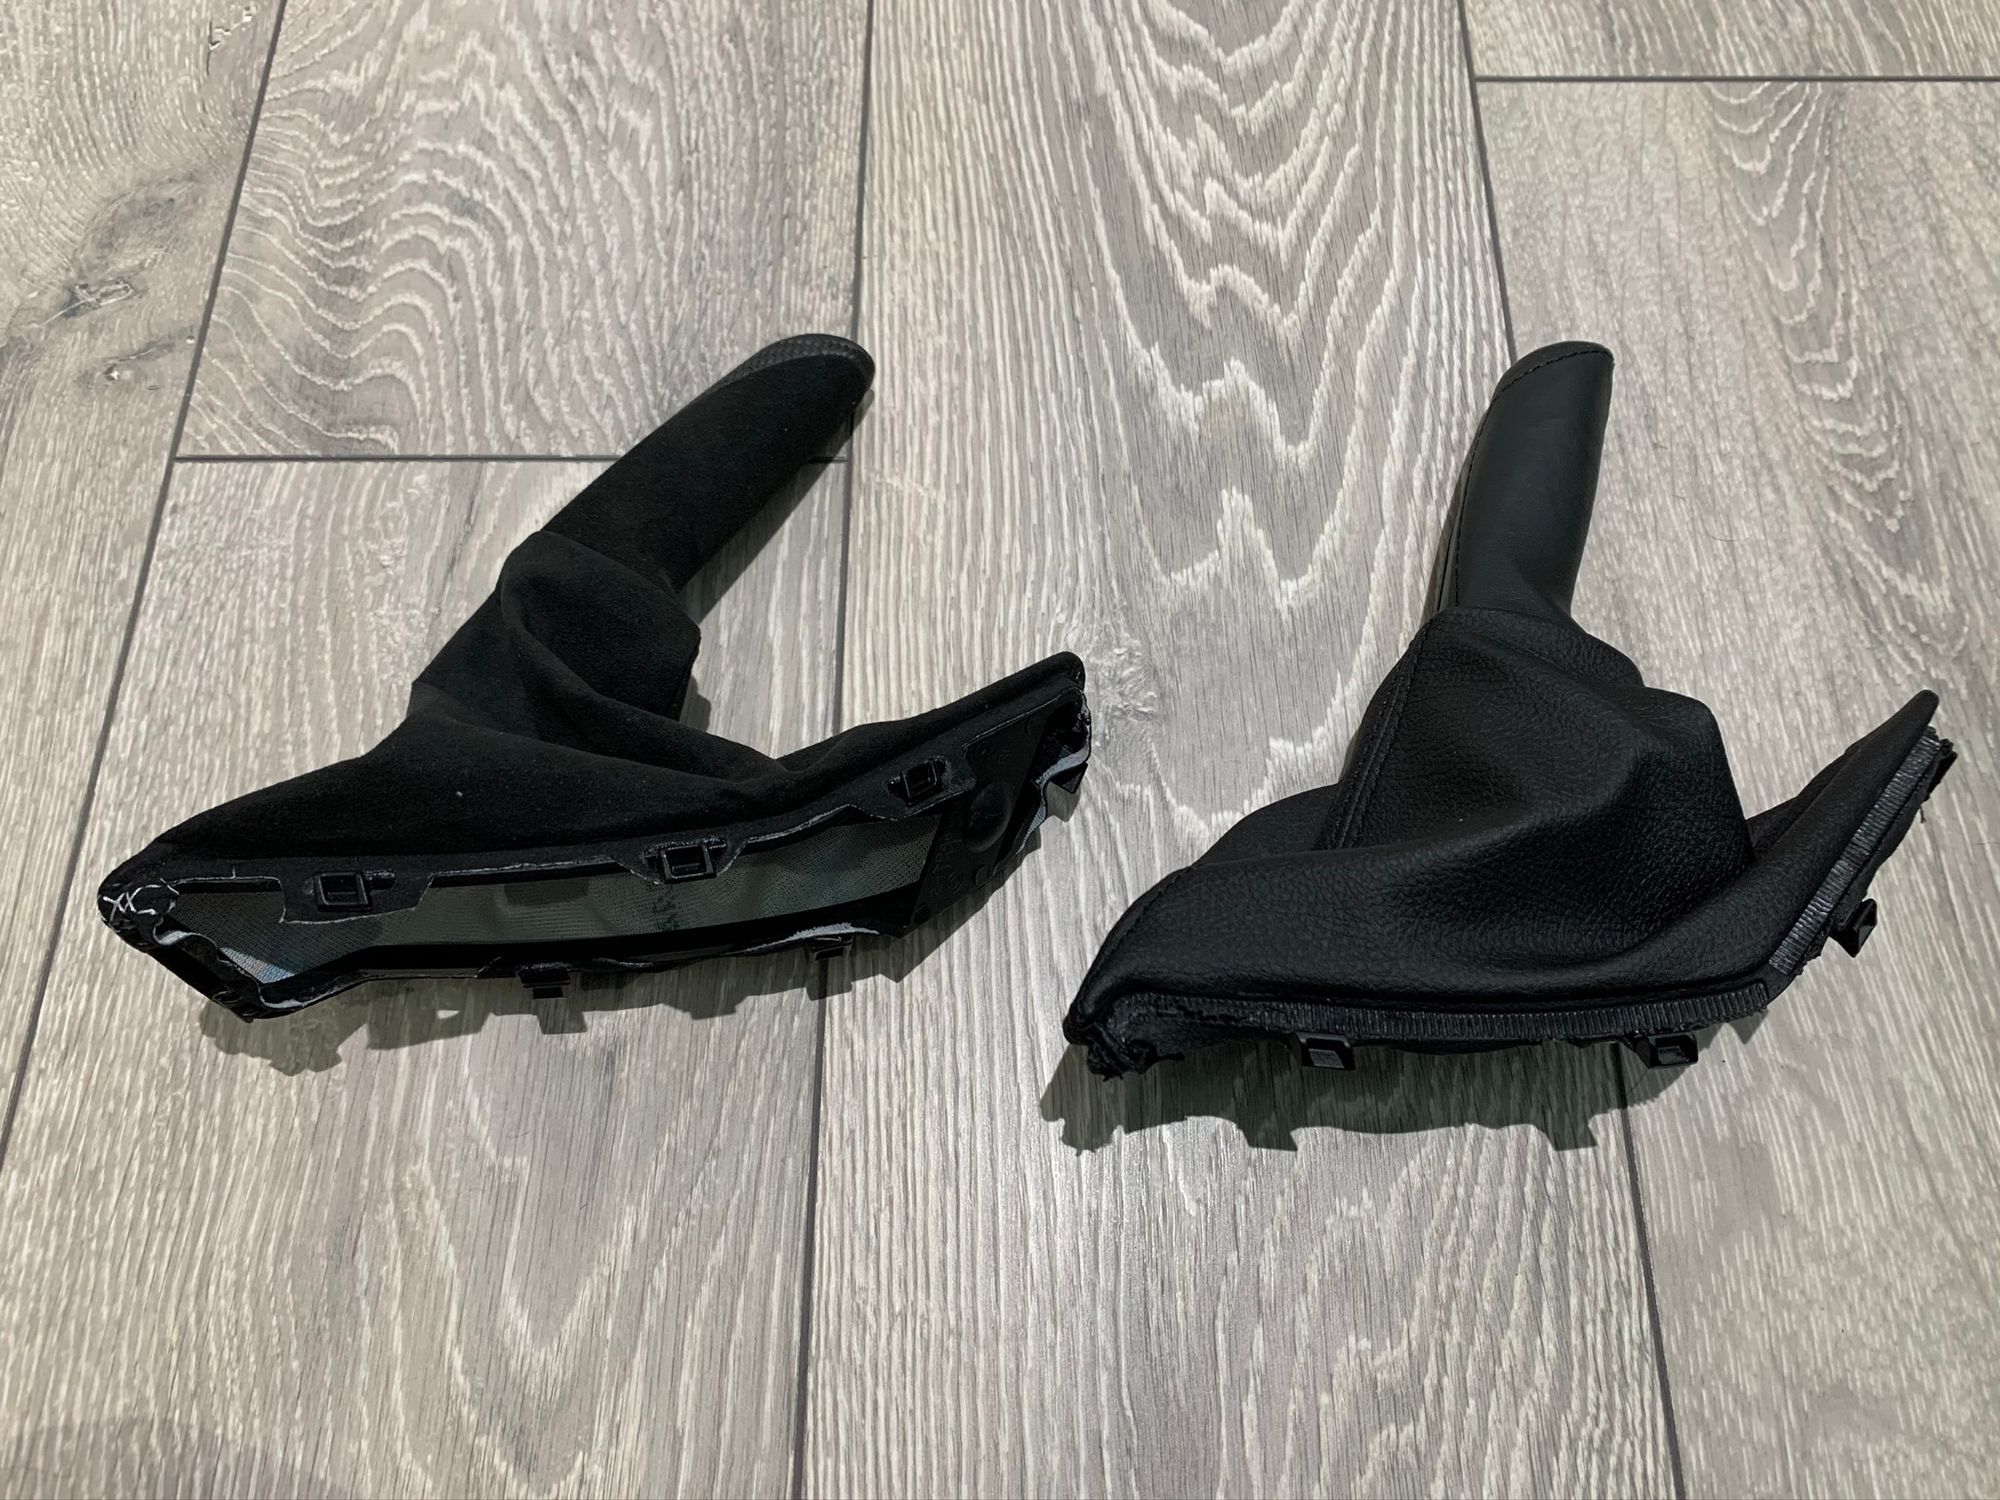
These are all clip out and clip in replacement items that were done in a matter of minutes! It's pretty scary to pull and tug on some of these items to get the spring clips to release, but there are plenty of videos on YouTube showing how best to do it and I didn't break a single thing.
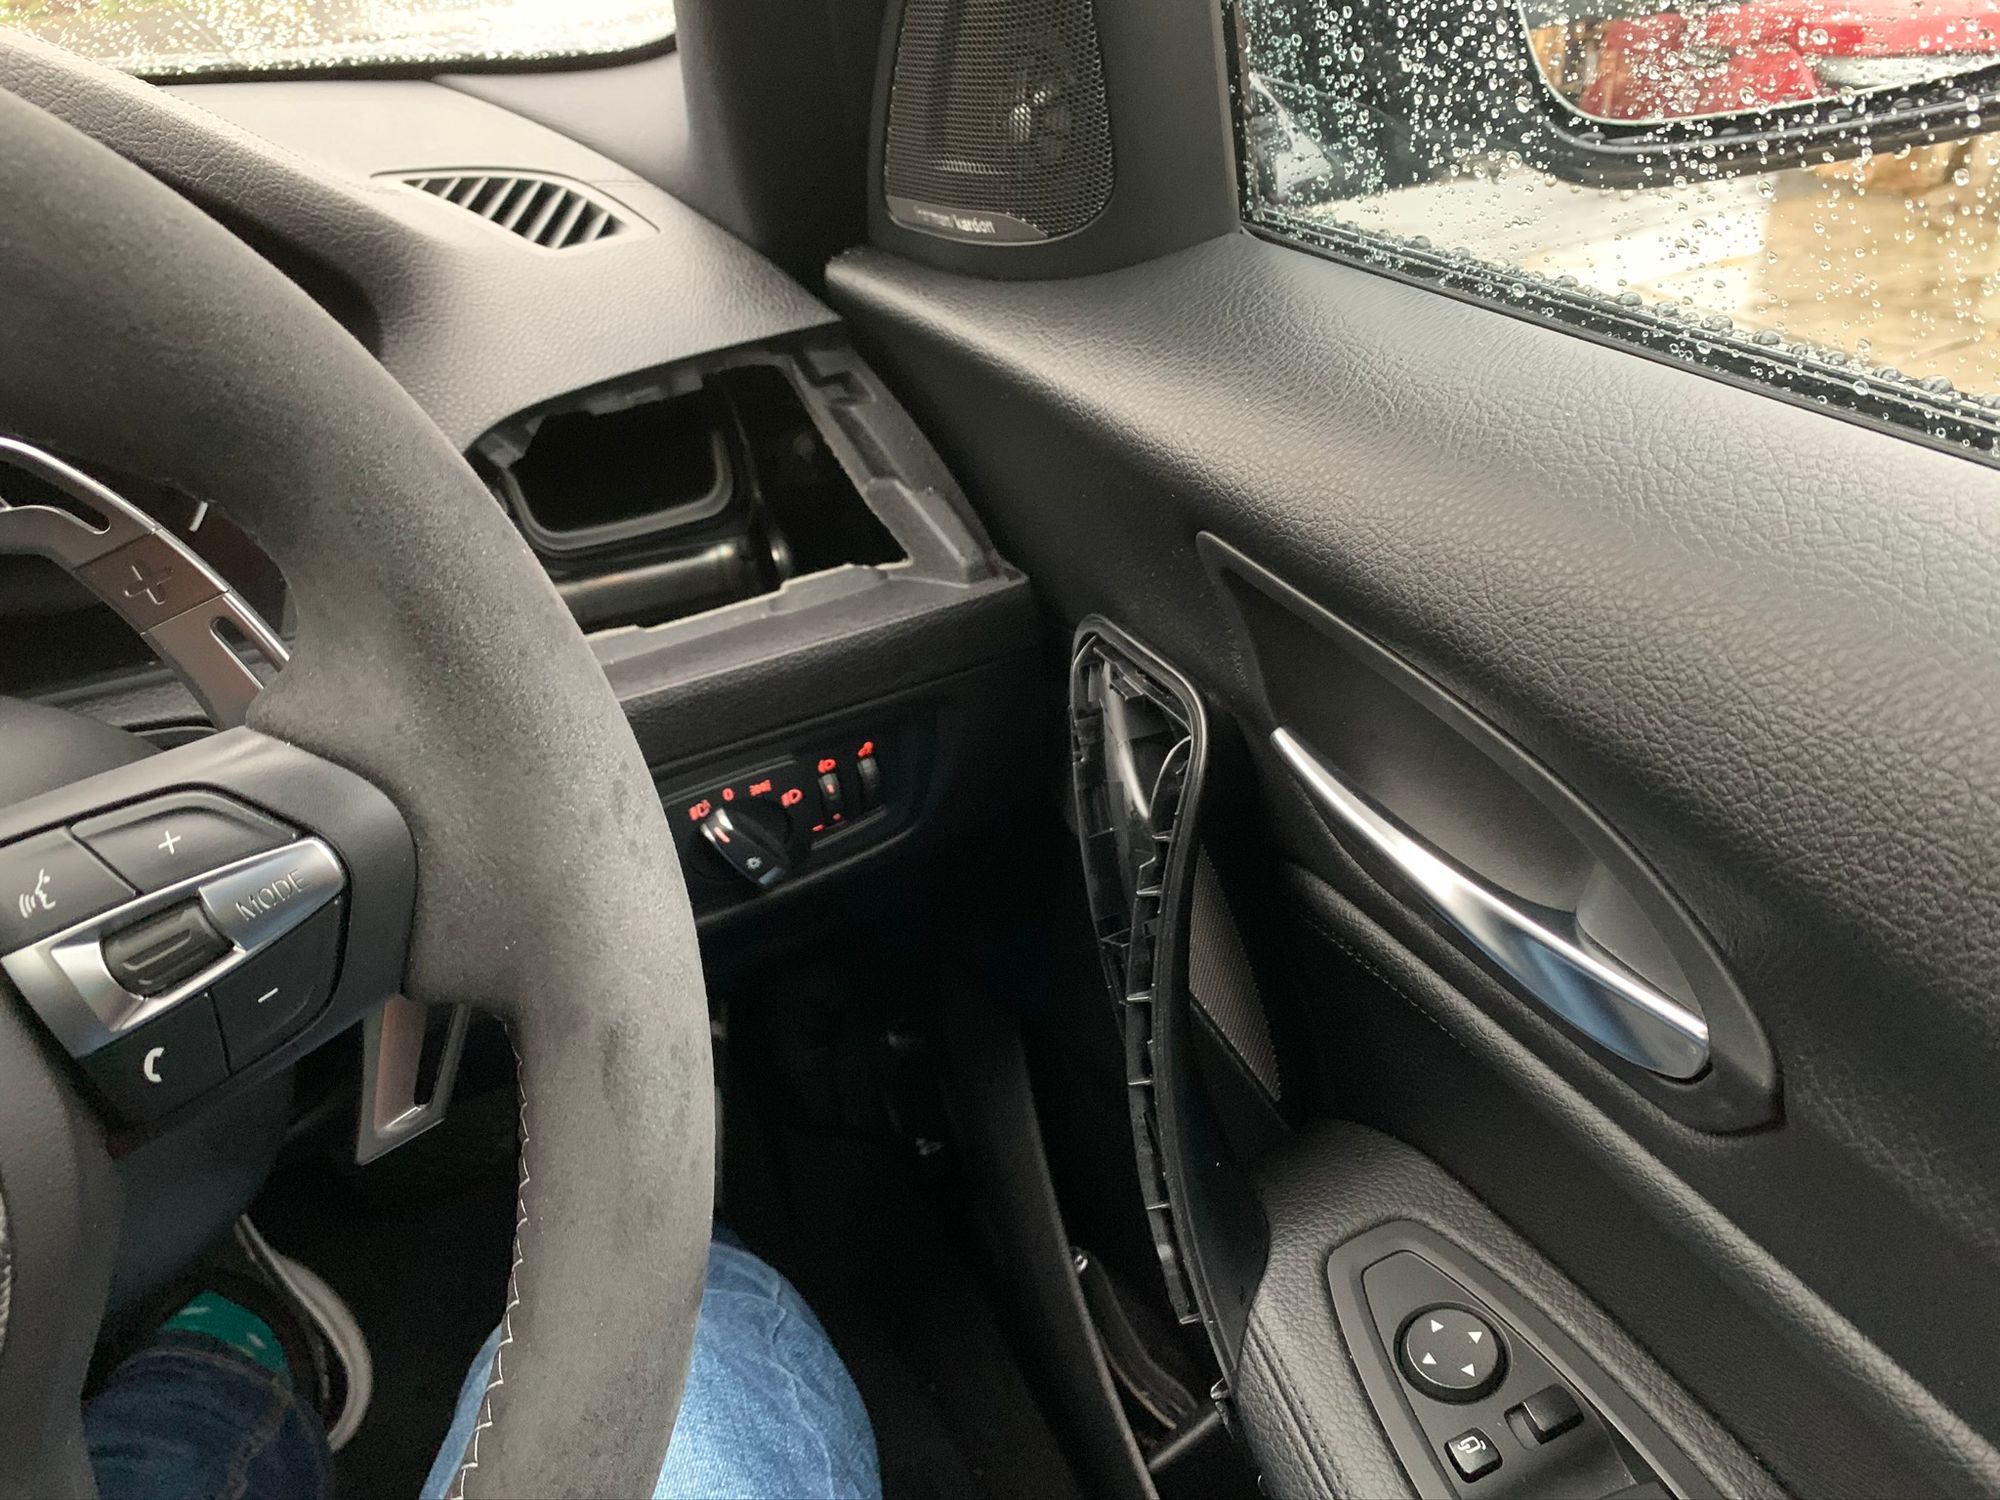
The final item in the list was the door handles, which were, again, a super simple clip out and clip in replacement. If you feel on the bottom edge of the handle there's a little hole to get your finger in and pop the first clip off, then just go around the outside and pop the rest.
These trims items aren't going to make any difference to performance or handling, they're not going to make the car lighter, but they look awesome and the make the cabin a far better place to spend my time!
Those with a keen eye may have also noticed one additional change I made which was to remove the vents on the outer sides of the car and paint them. I didn't like the silver trims around them so they were masked up and sprayed over in satin black.
I think this fits a lot better with the new interior and it was really easy to do too. A spray paint can and some masking tape costing £3($5) is a great way to make some cheap improvements!
More shadow for the Shadow Edition
My car is an M140i Shadow Edition which is a special trim level from BMW where certain items come darker than usual from the factory. I wanted to take the 'Shadow Edition' theme a littler further and tint the rear lights on the car to reduce how punchy the red plastic at the rear end is. You often see people 'tinting' or 'smoking' their lights, and it can be way overdone to the point it looks ridiculous, but as with everything on this project I wanted to find that balance where it's enough to be different but not too much as to look stupid! I have to say though, the car does look a bit odd without any rear lights or diffuser!..
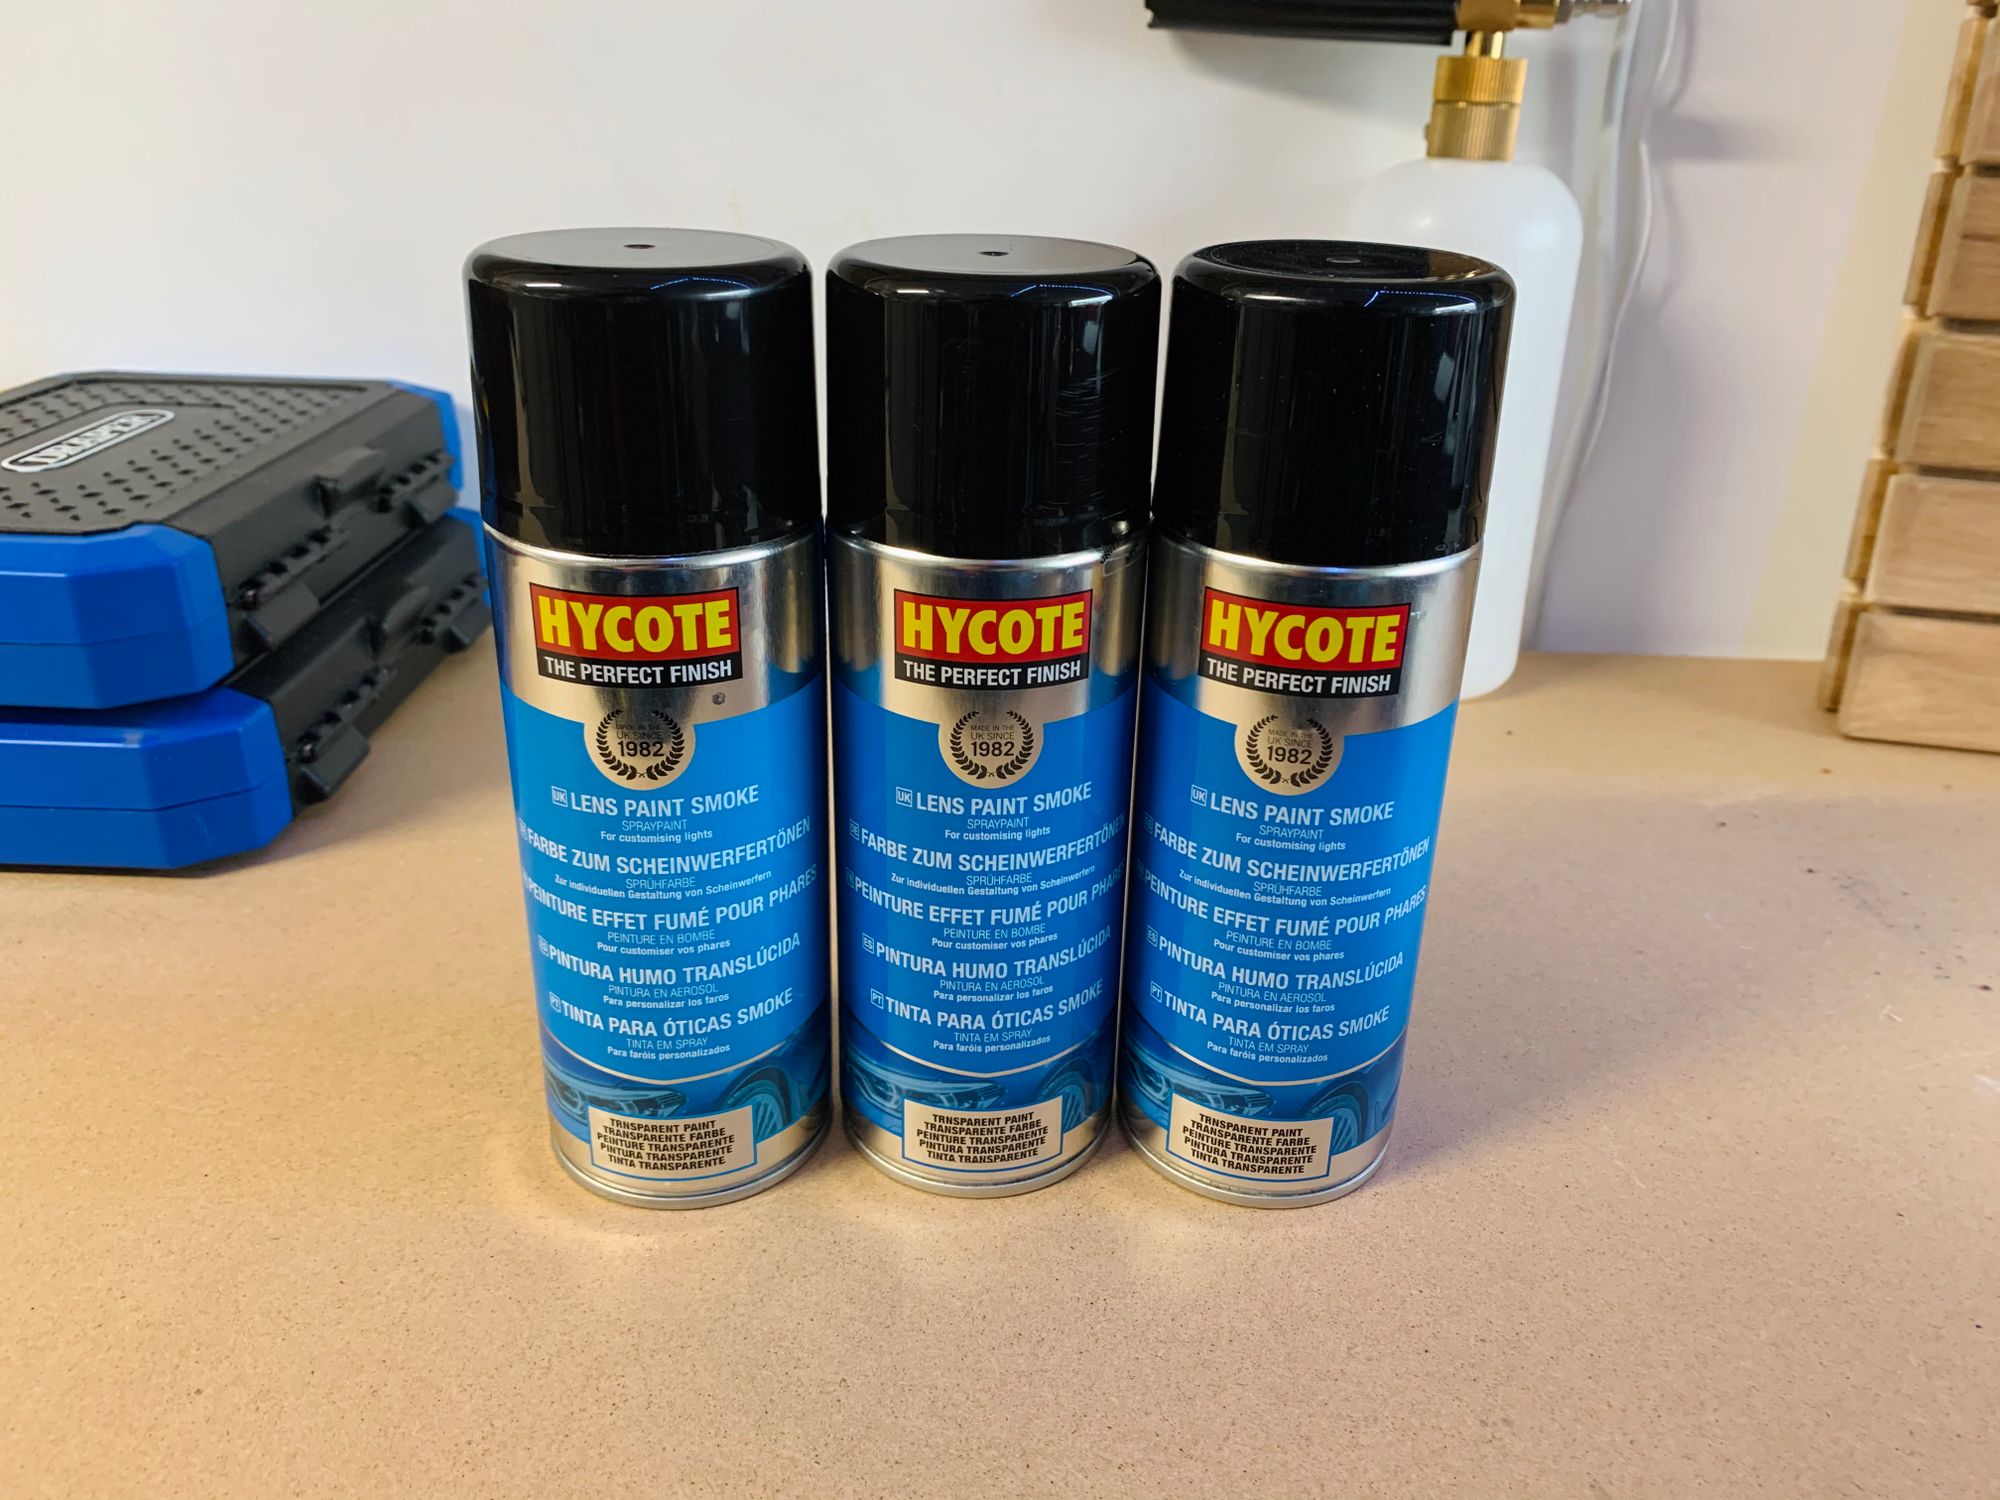
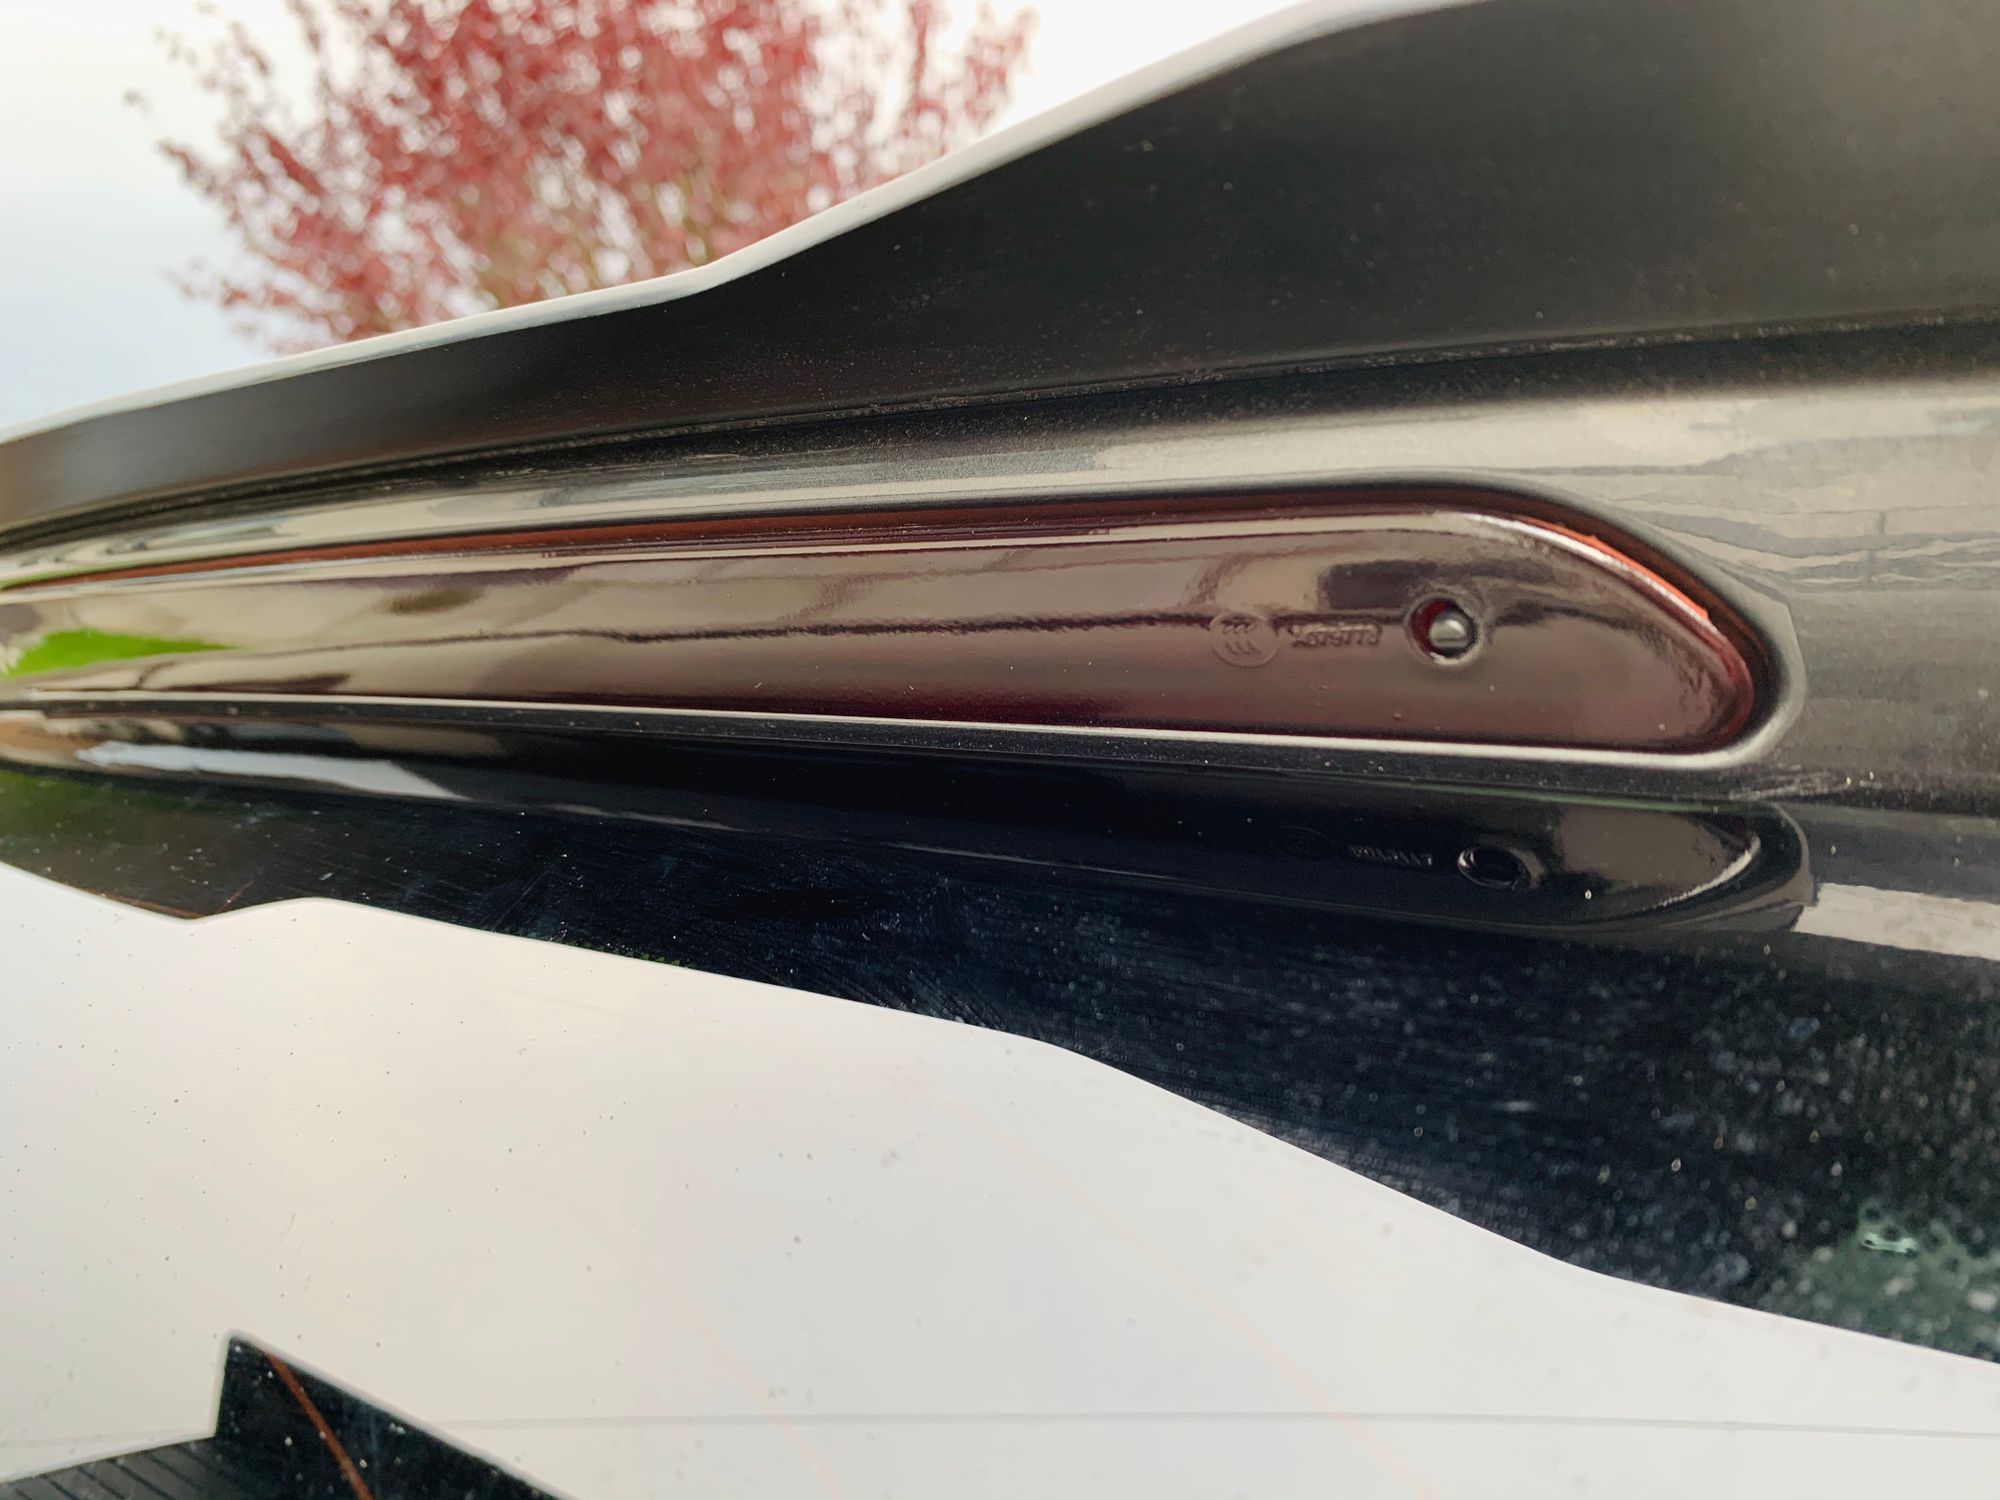
I took out the rear lights, the rear diffuser because it houses the rear reflectors, the high-level brake light and the indicators on the wing mirrors. Once they're all out they need a really good clean with isopropyl alcohol to make sure they're ready to receive a layer of the tint which is often just lacquer with a bit of paint mixed in. This is the one I used from Hycote that comes in a rattle can.
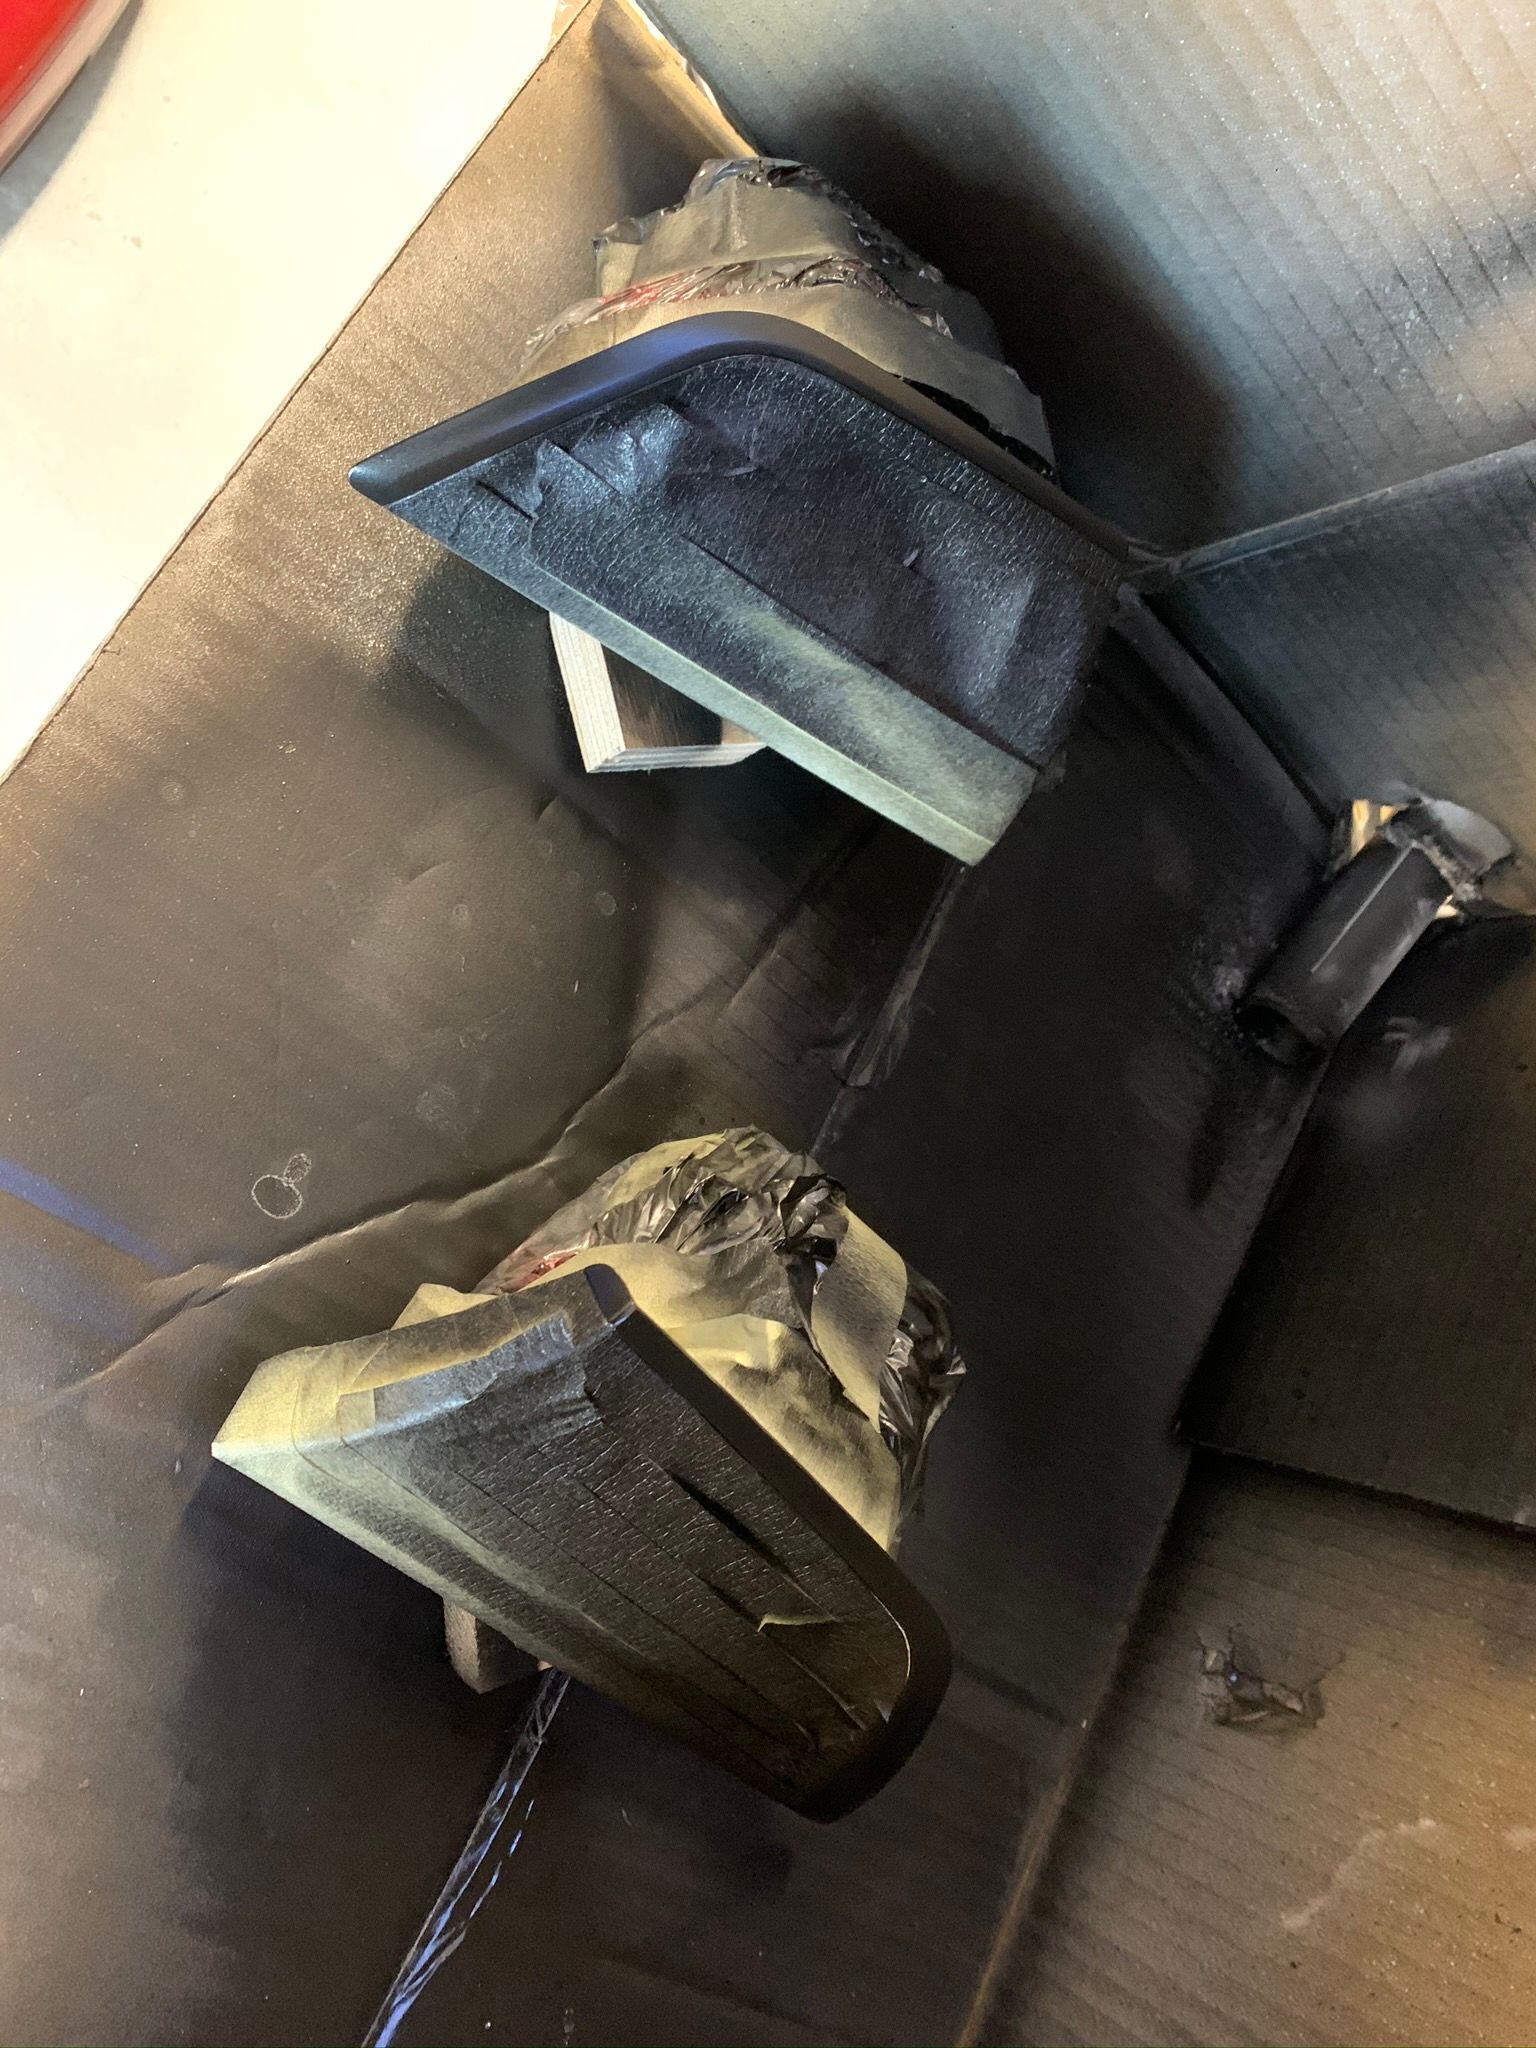
The items all need to have even coats so that one thing doesn't end up darker than the other so they went into my spray booth (carboard box with an old vacuum cleaner for extraction) in the garage for their first coat!
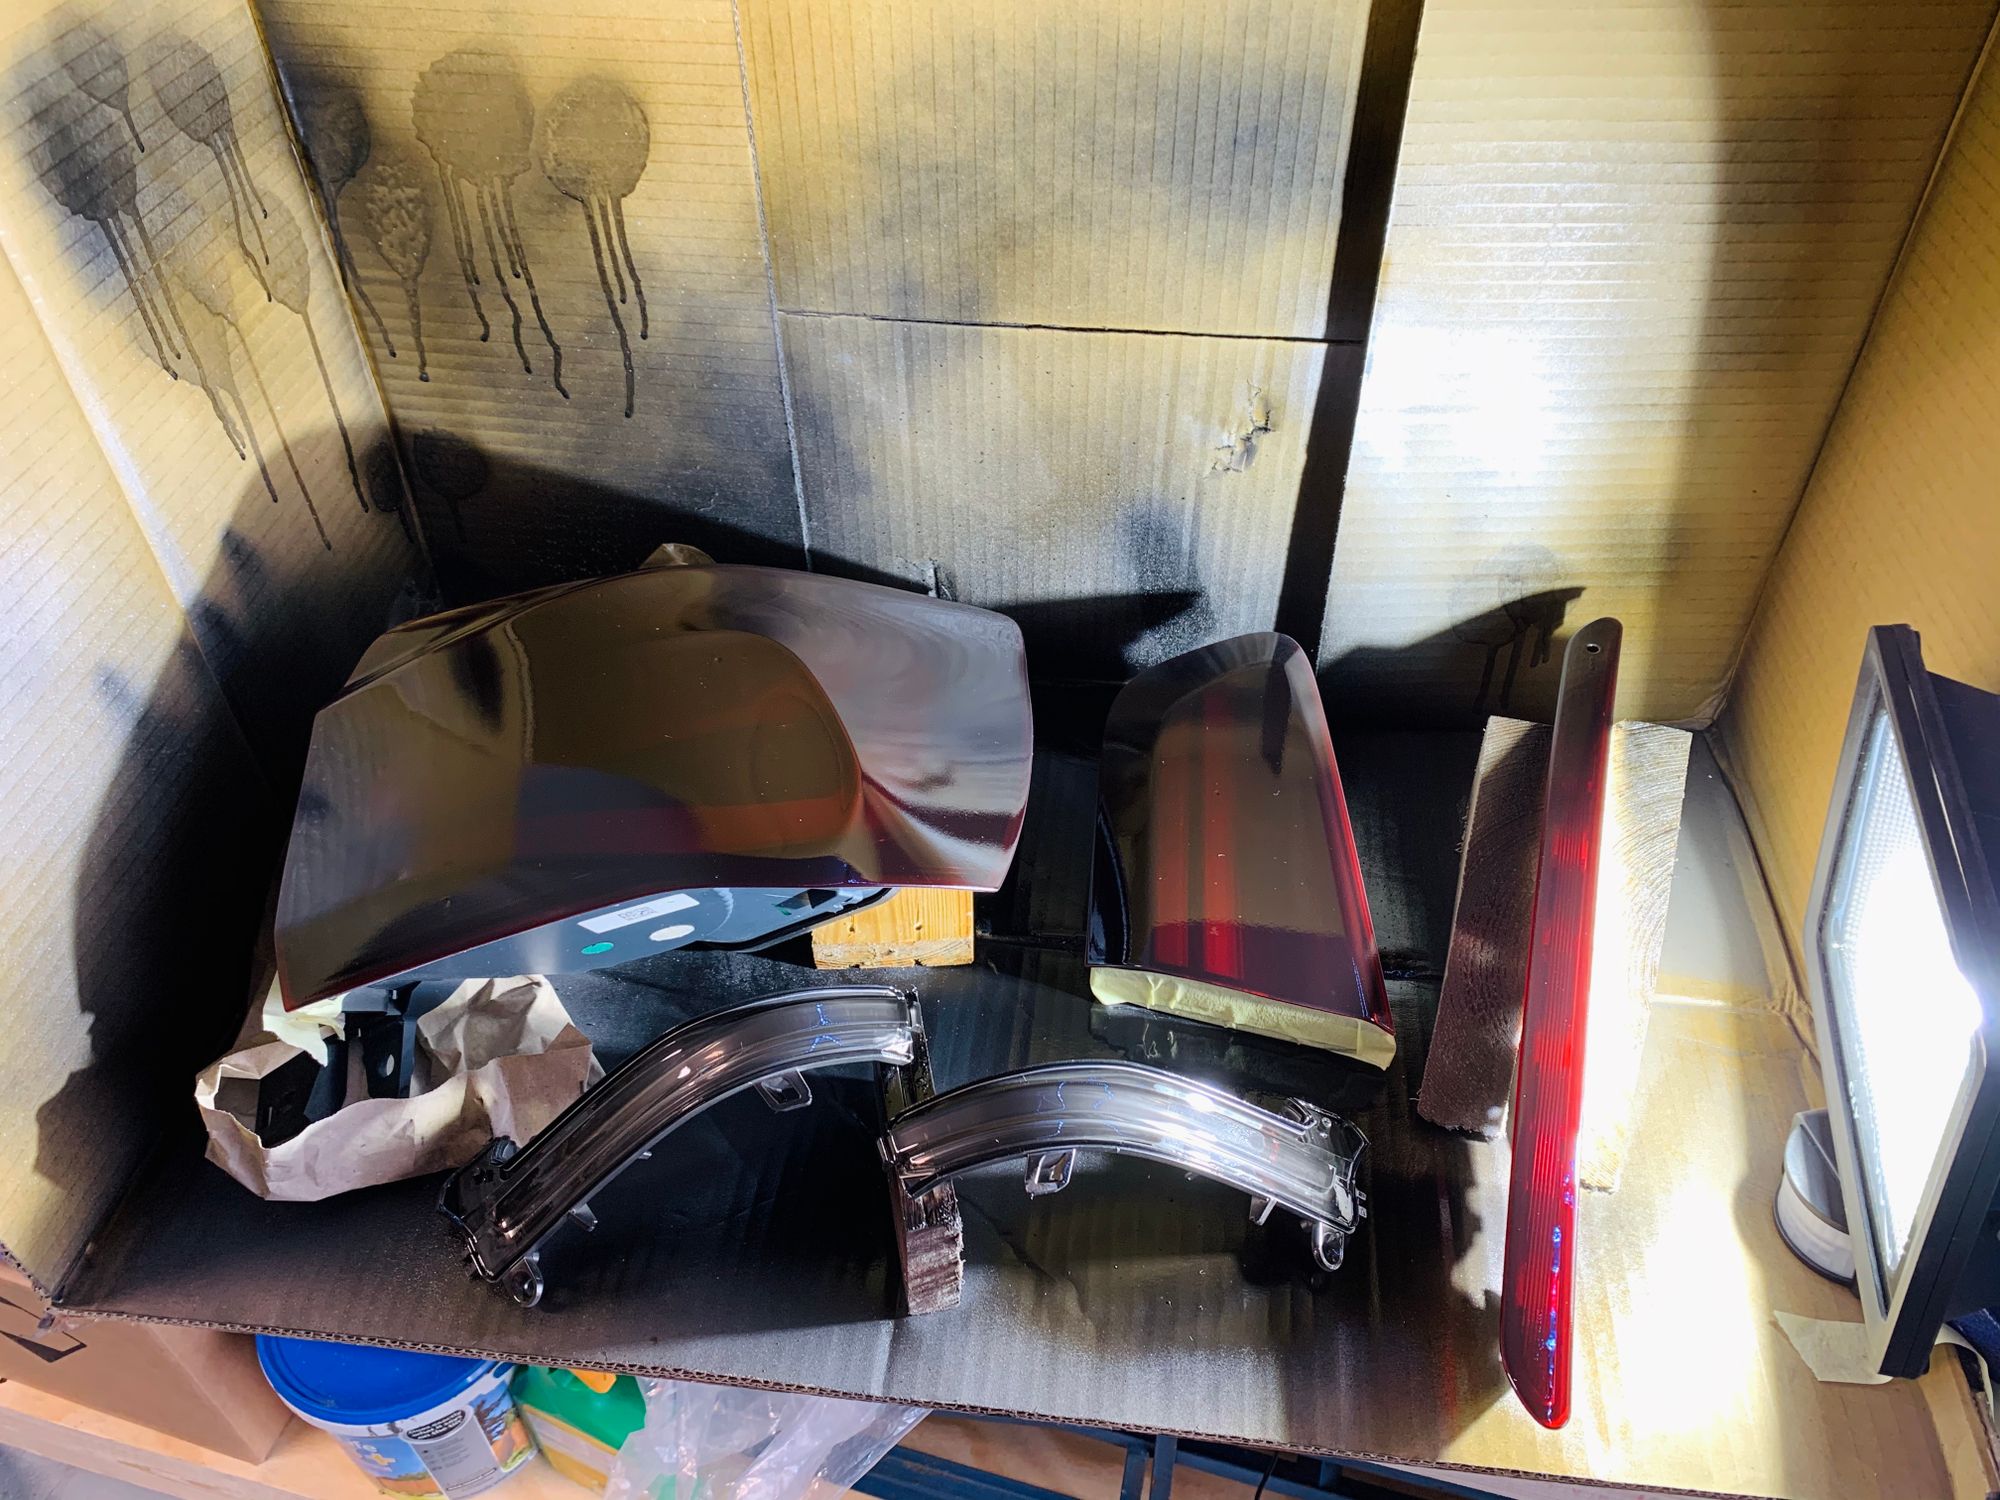
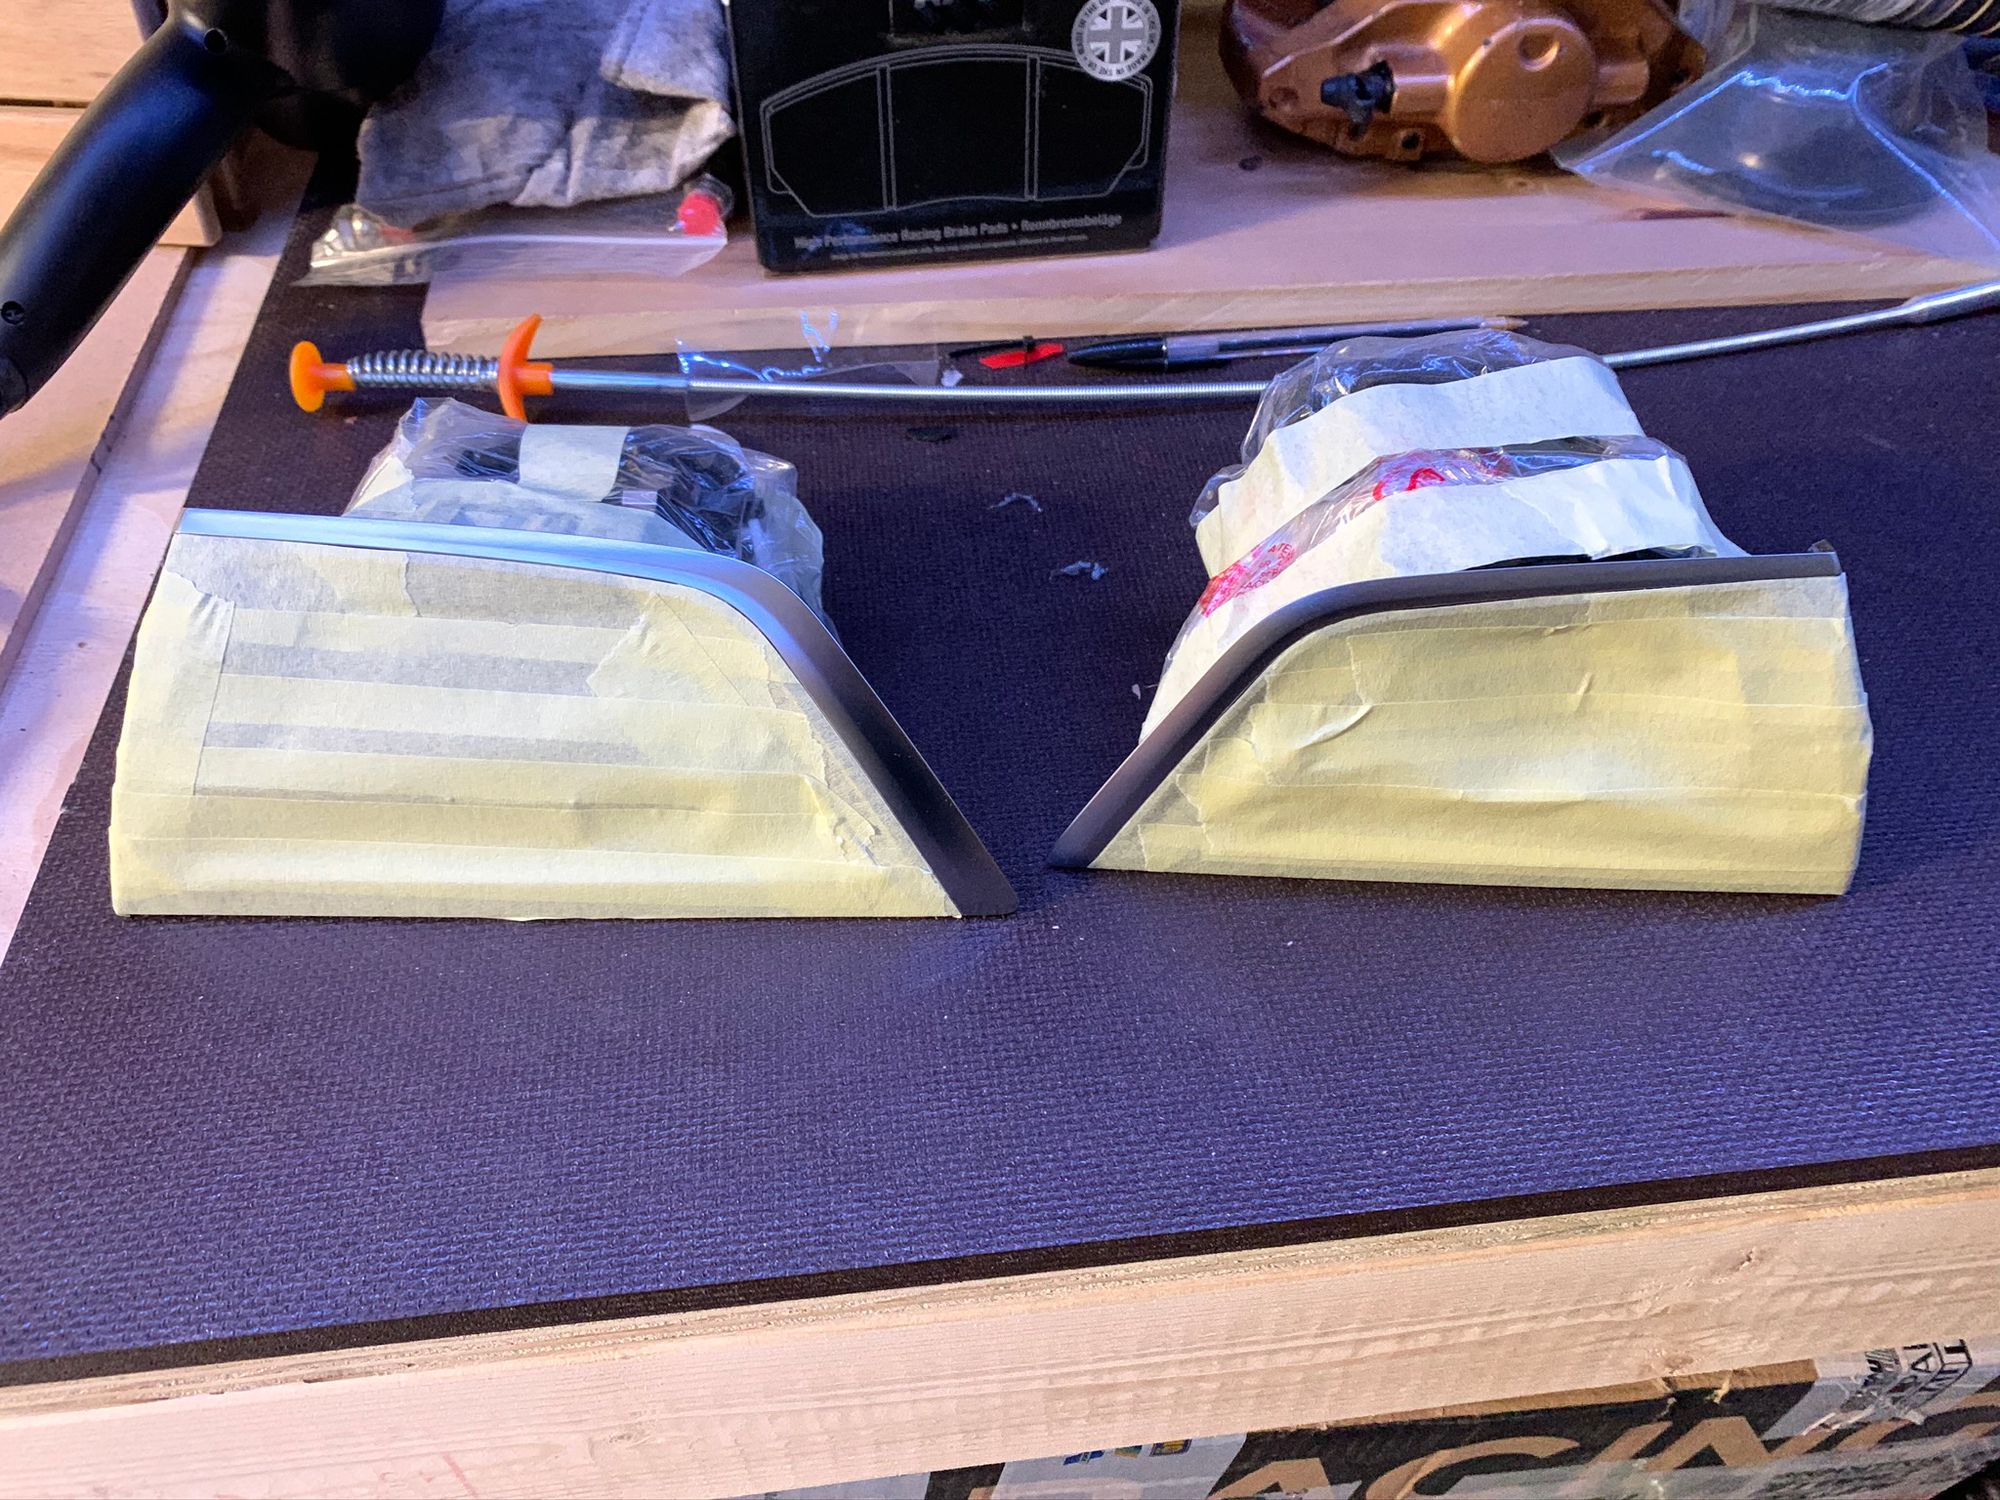
In order to make sure I didn't go too dark and end up making it look bad, I did a single coat at a time and checked it against the original by placing the item back on the car. Here you can see the original light on the left and the one on the right has a single coat of tint on.
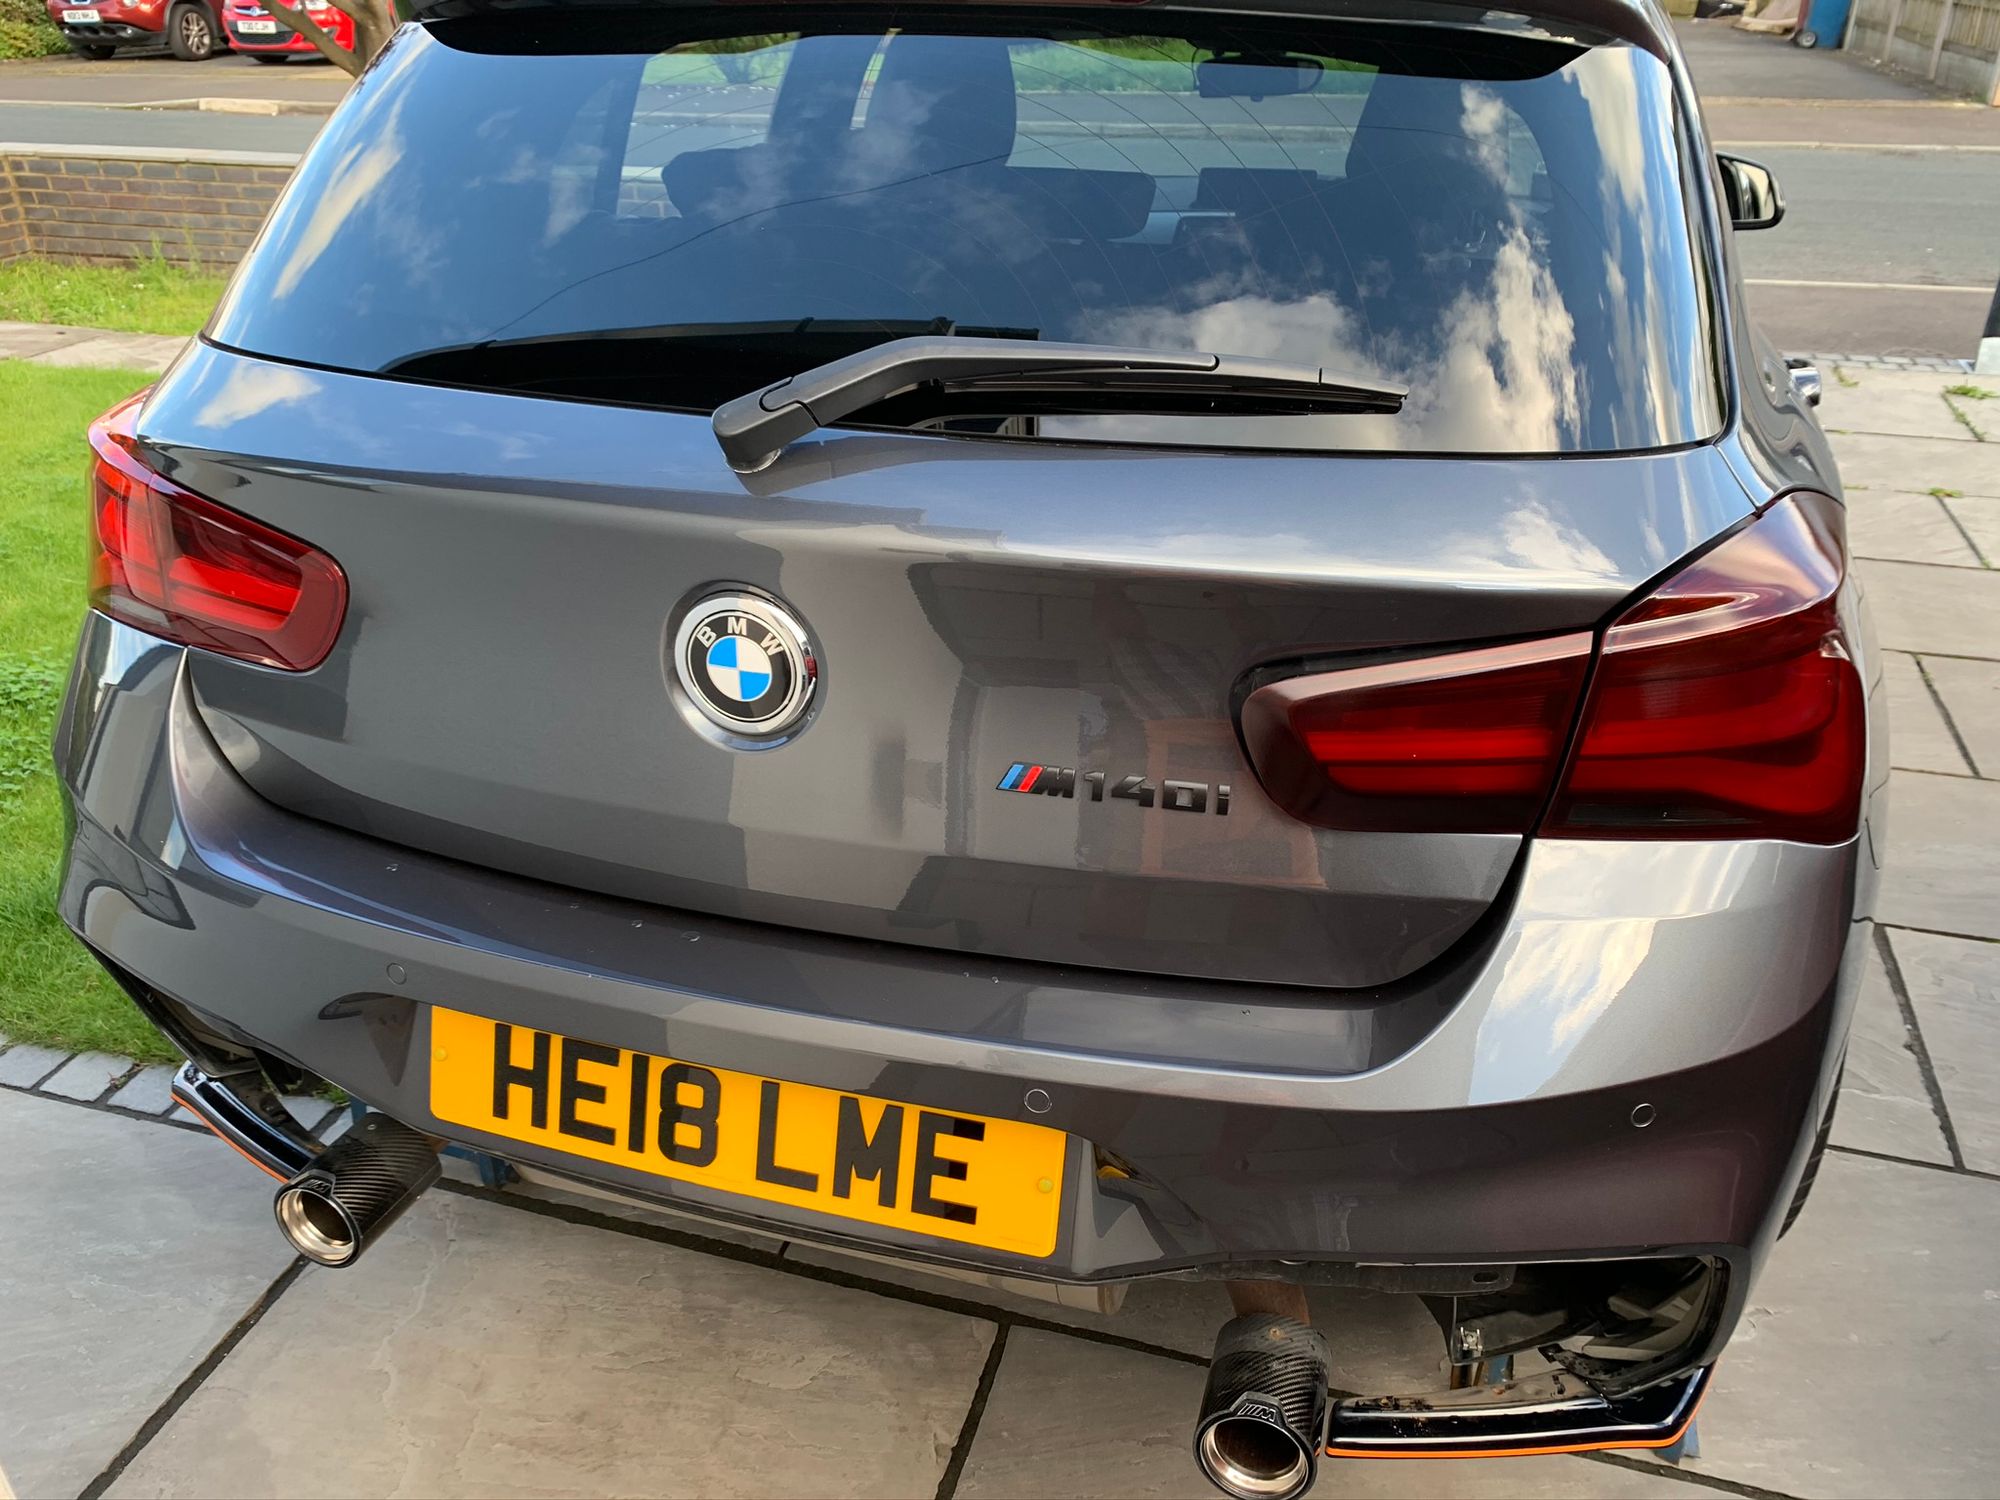
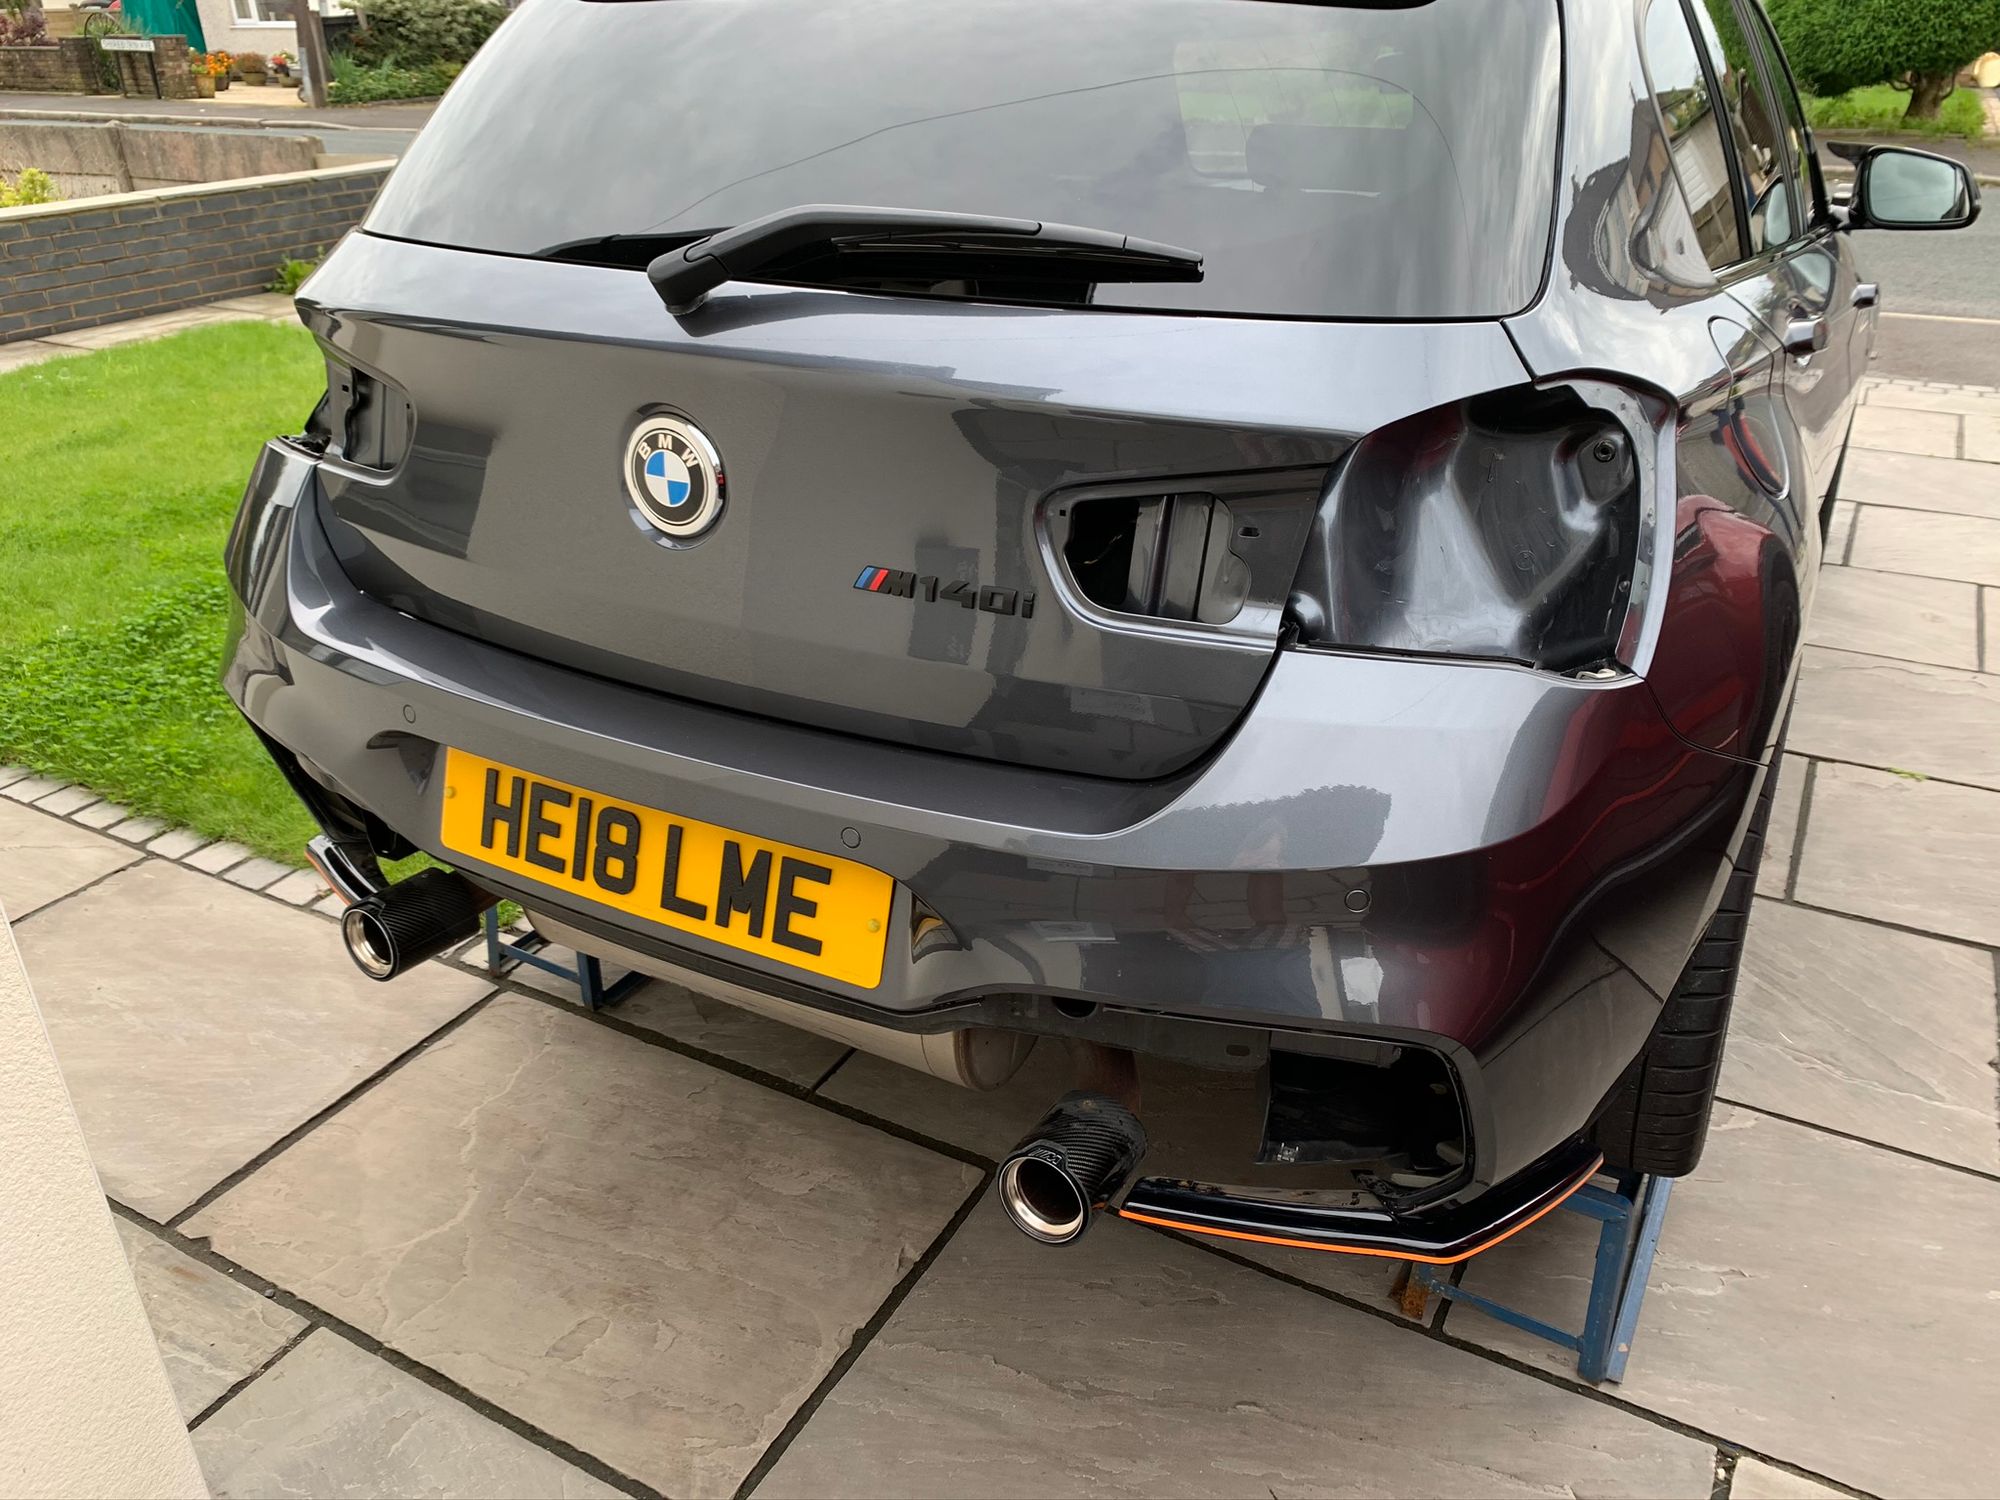
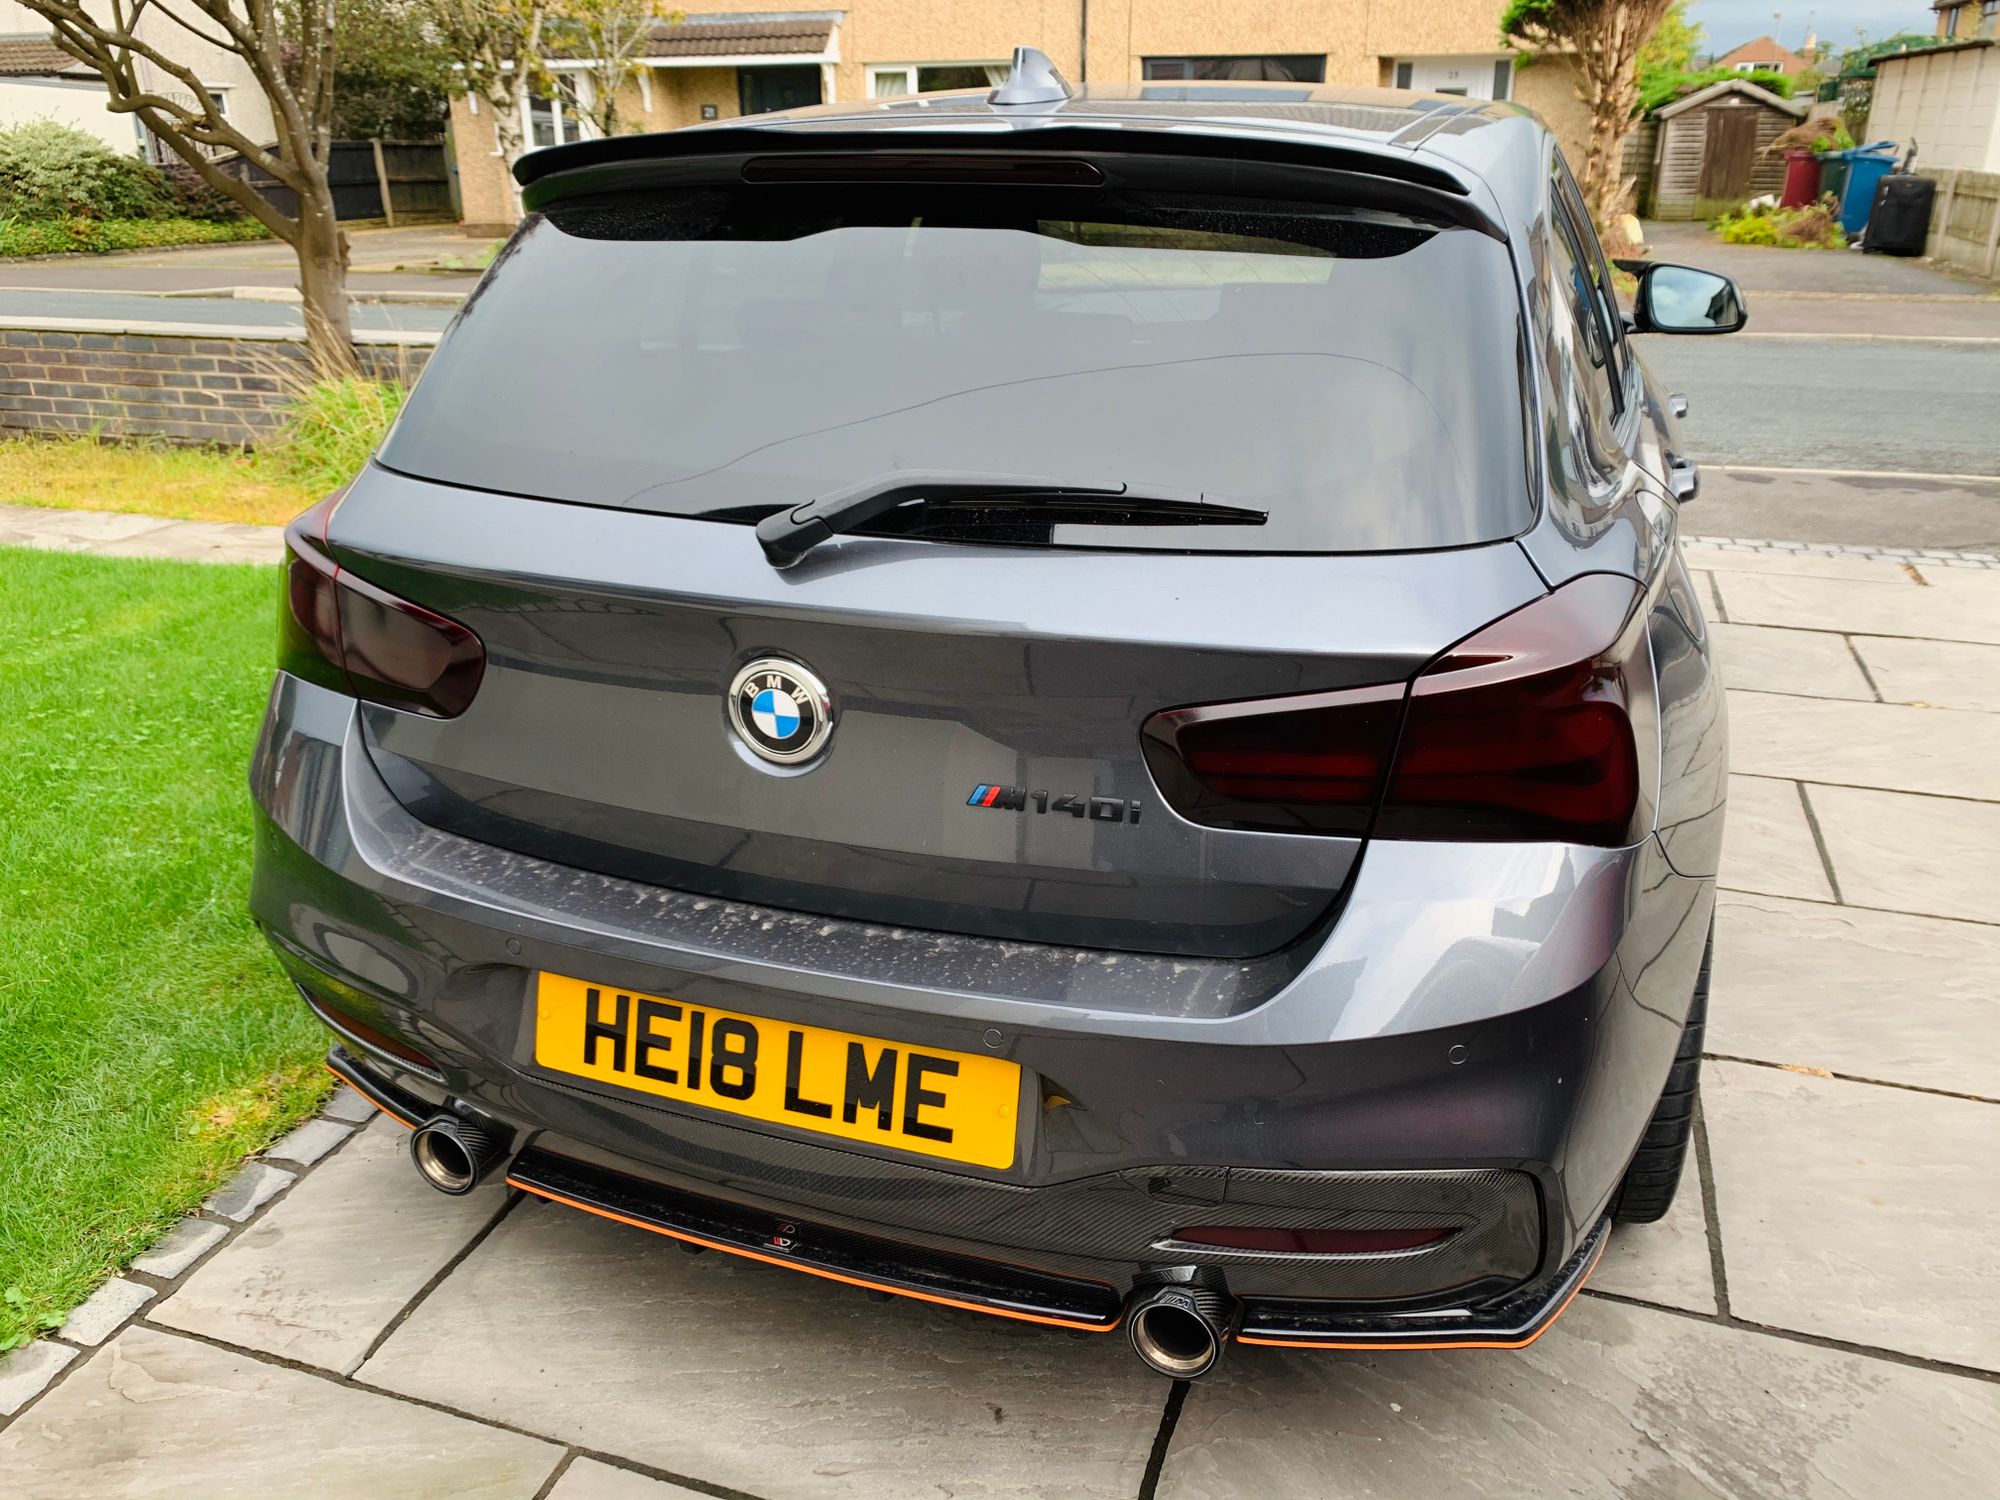
Being careful about tinting them too much is not just an aesthetic thing, there are legal limits here in the UK on how much you're allowed to affect the light output, so I have to make sure I don't make the local law enforcement even more unhappy with me... In the end, I think I struck a nice balance between form and function and here you can see the final result on a typically English summer's day.
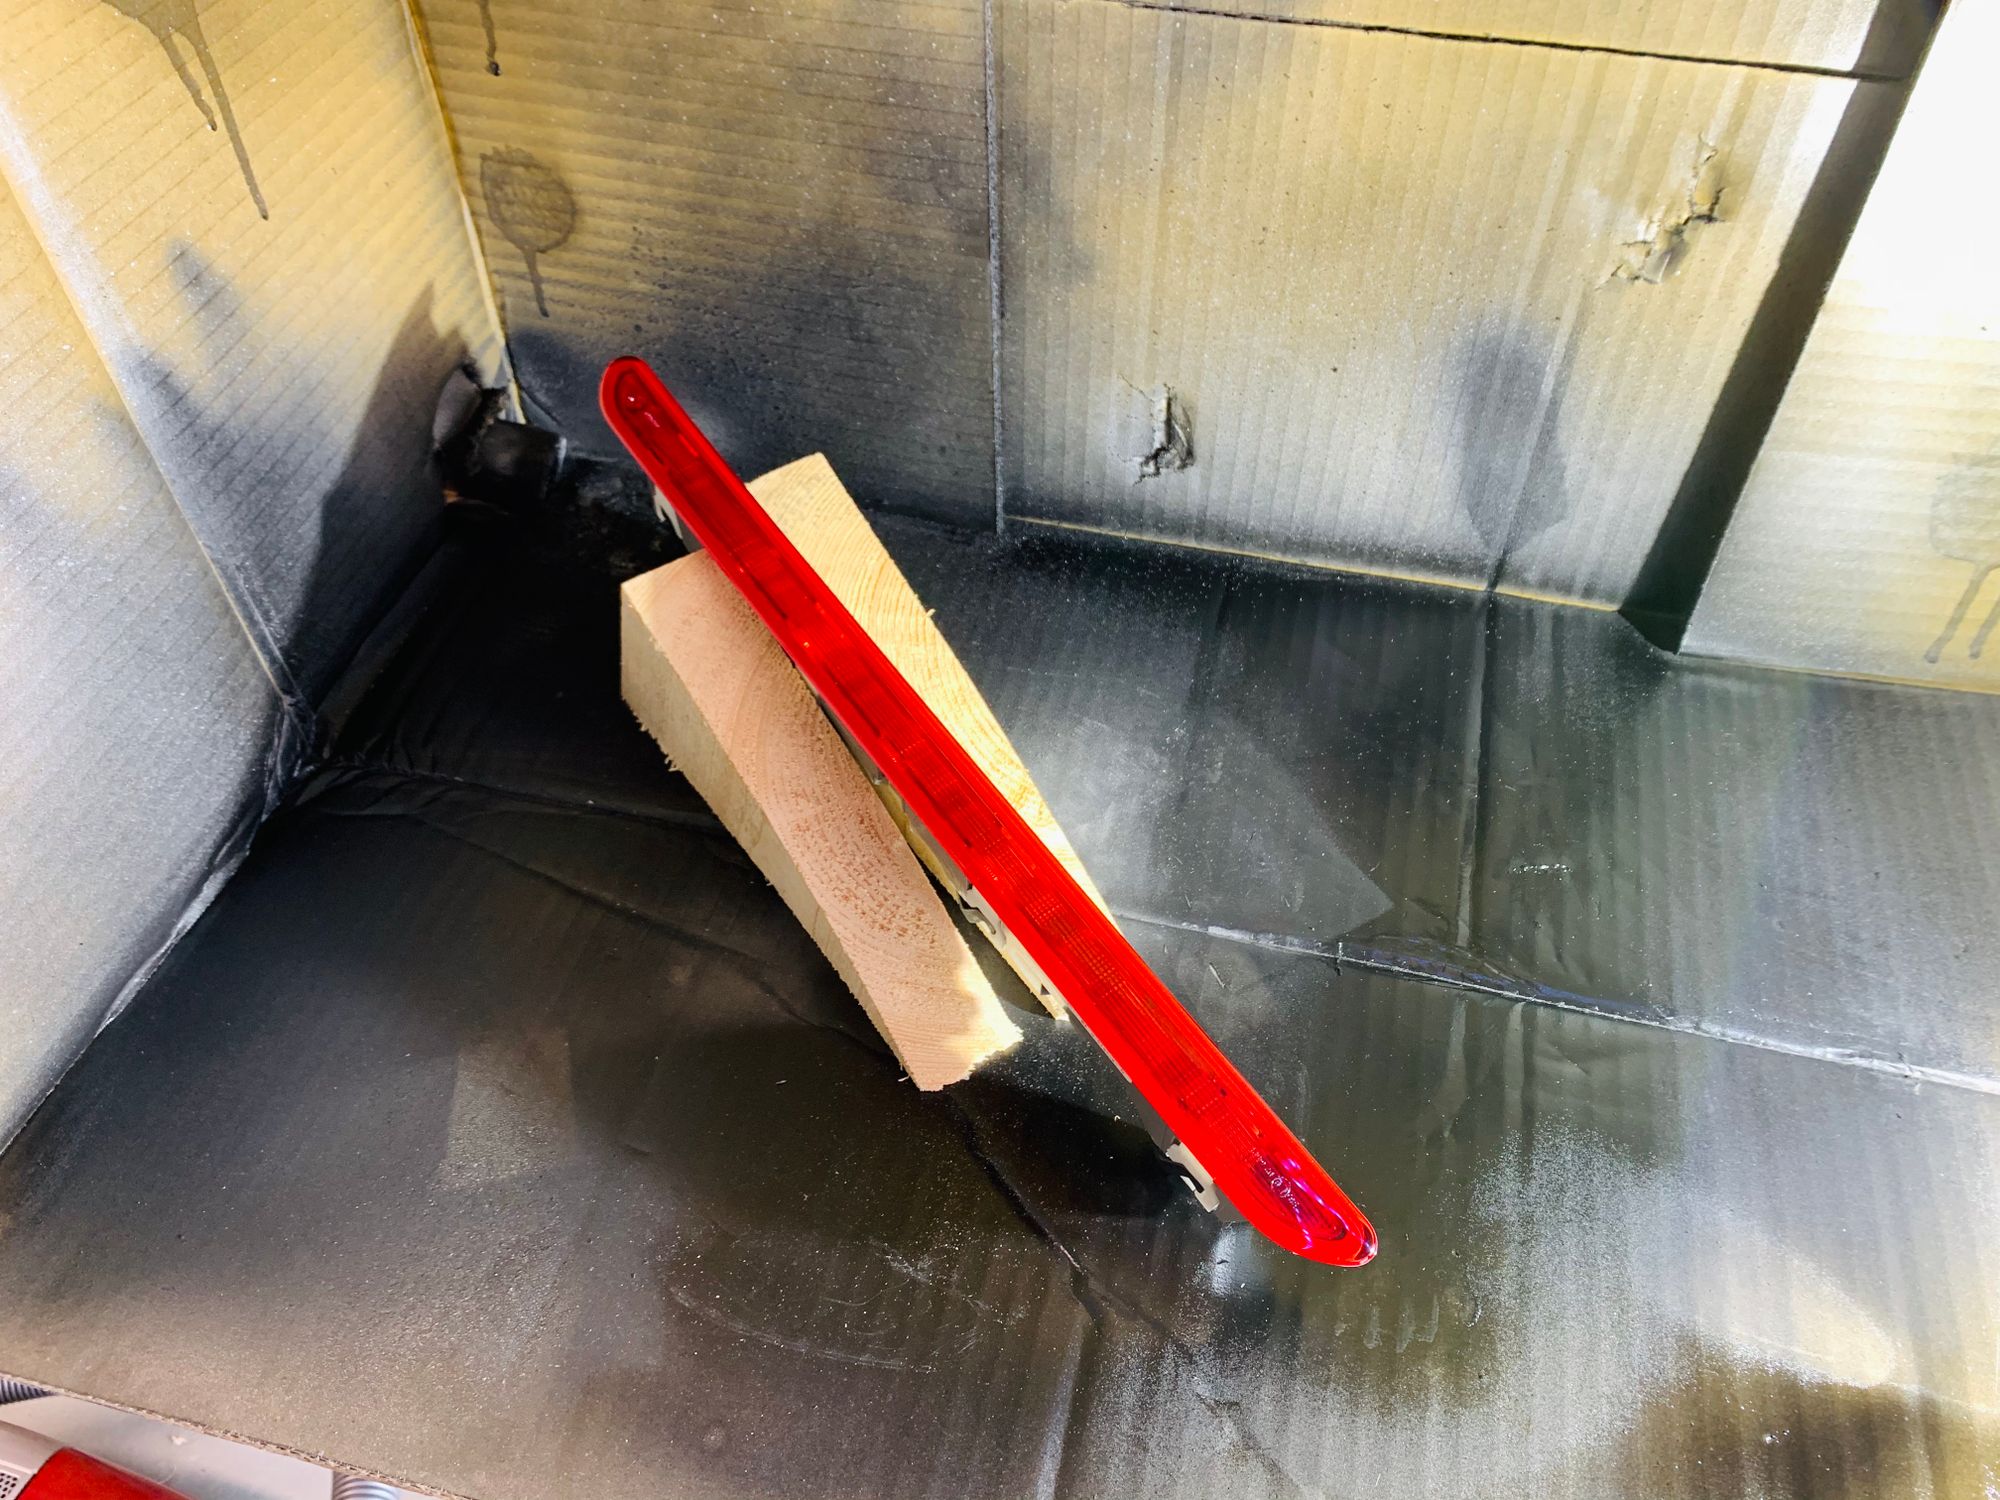
If you look closely in that photo you will notice that I broke my high level brake light whilst trying to get it out. I get the feeling it wasn't really designed with removal in mind, or if you were removing it that it would be because it was broken and you could rip it out anyway. I had to grab a new one from BMW and spray it! Fortunately it was a cheap enough part and another valuable learning experience.
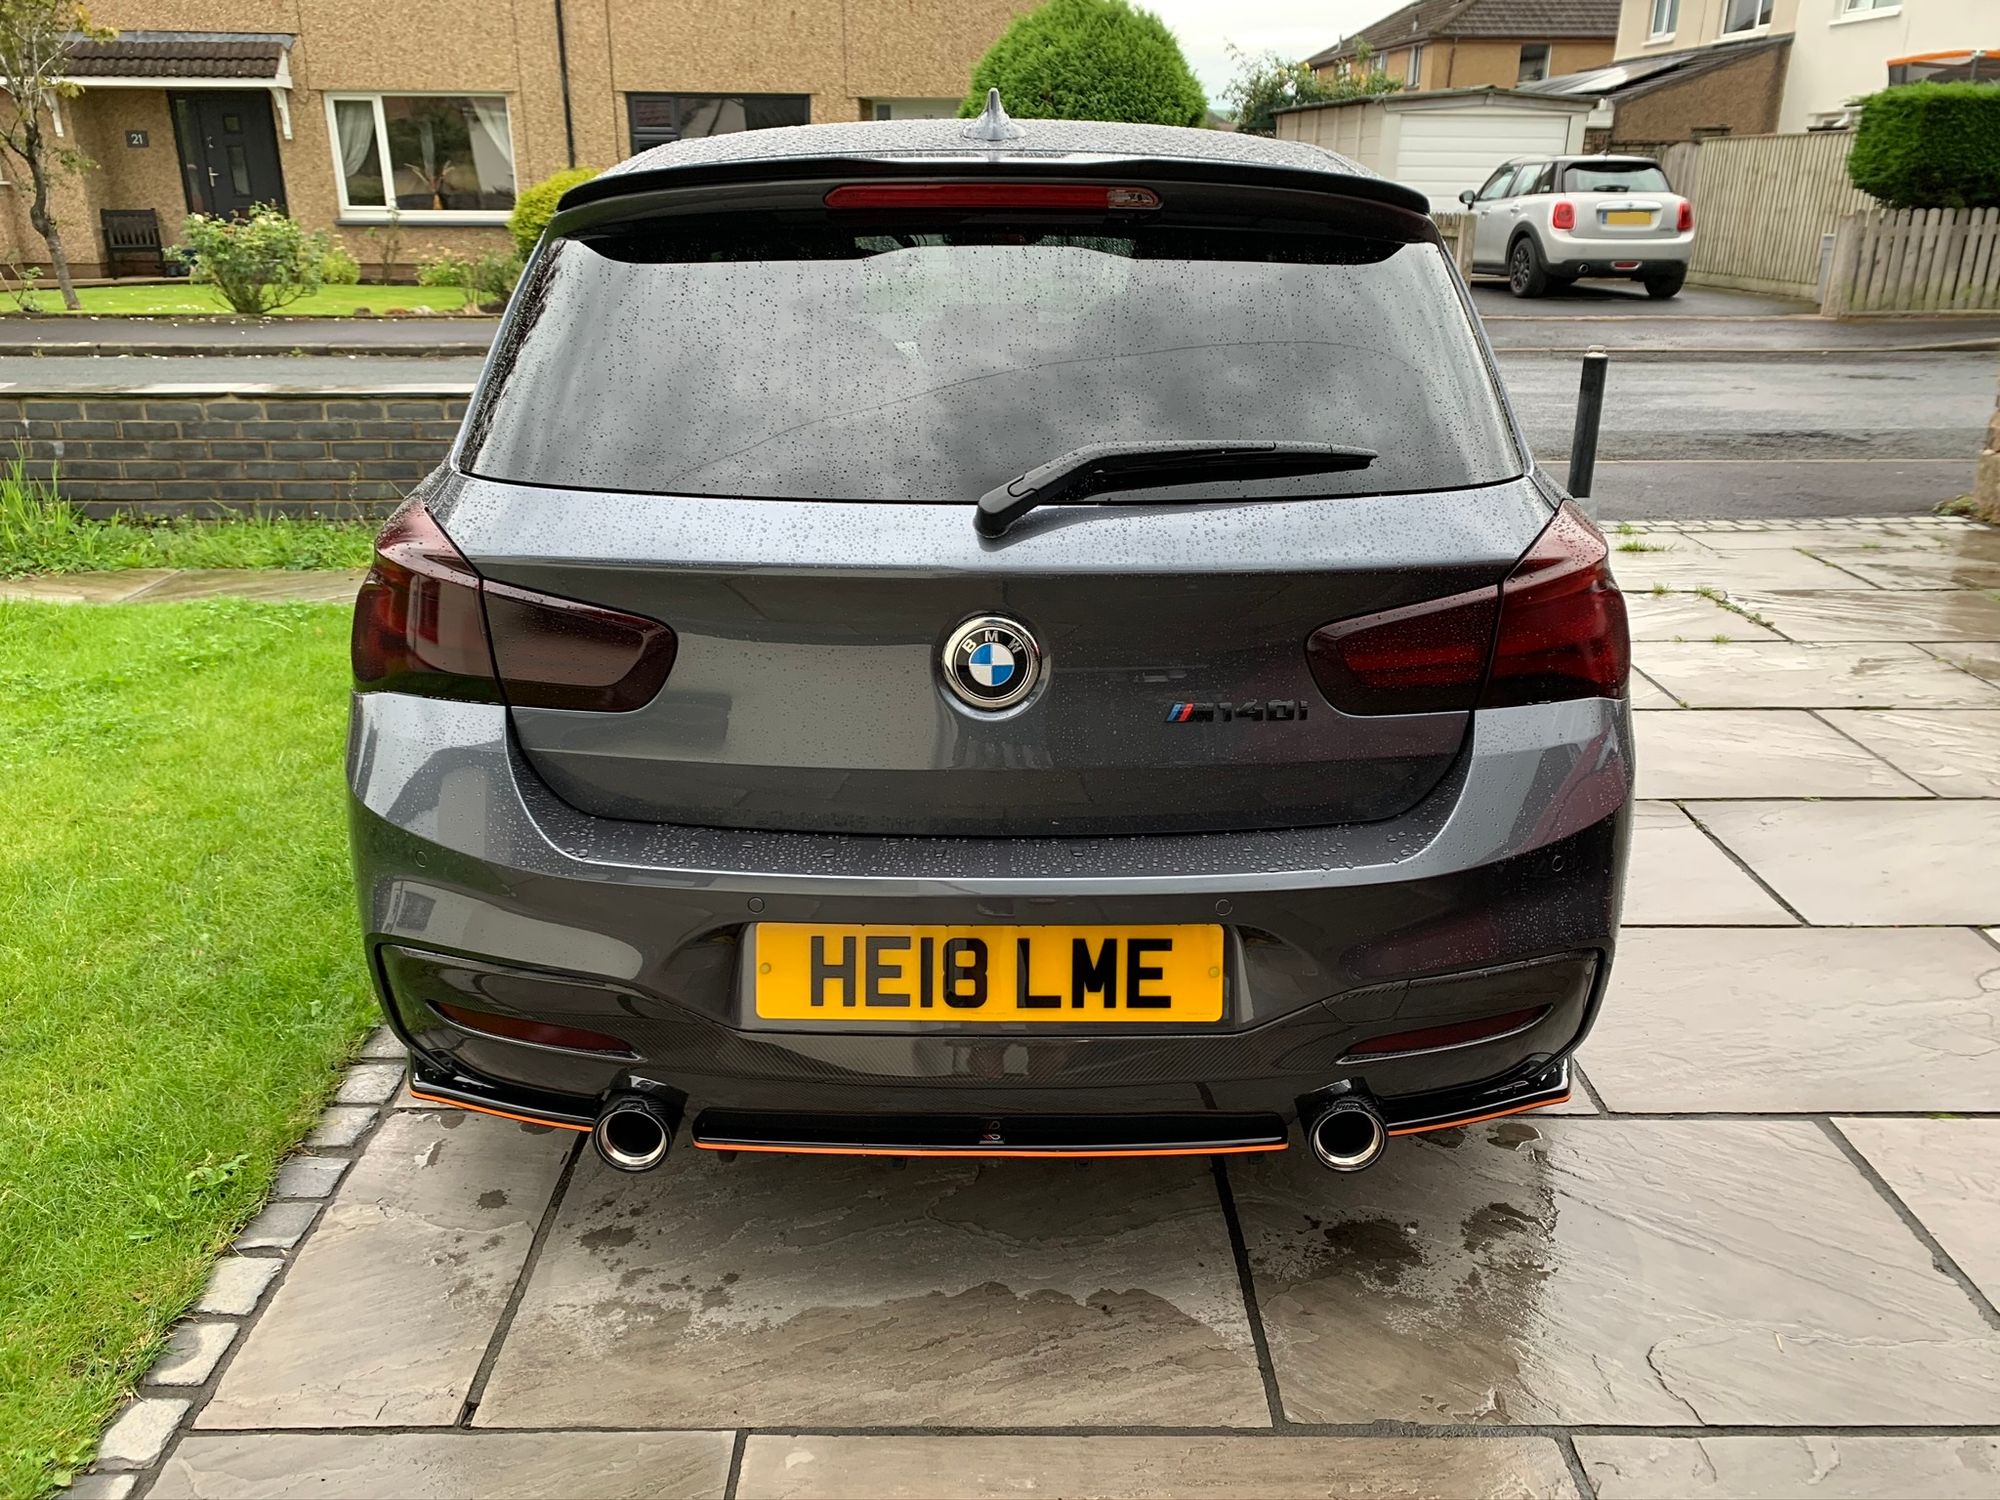
With the final piece of the puzzle in place, the job was done and I think the rear end looks a lot better with a little less red and a bit more dark red.
Spicing up the engine bay
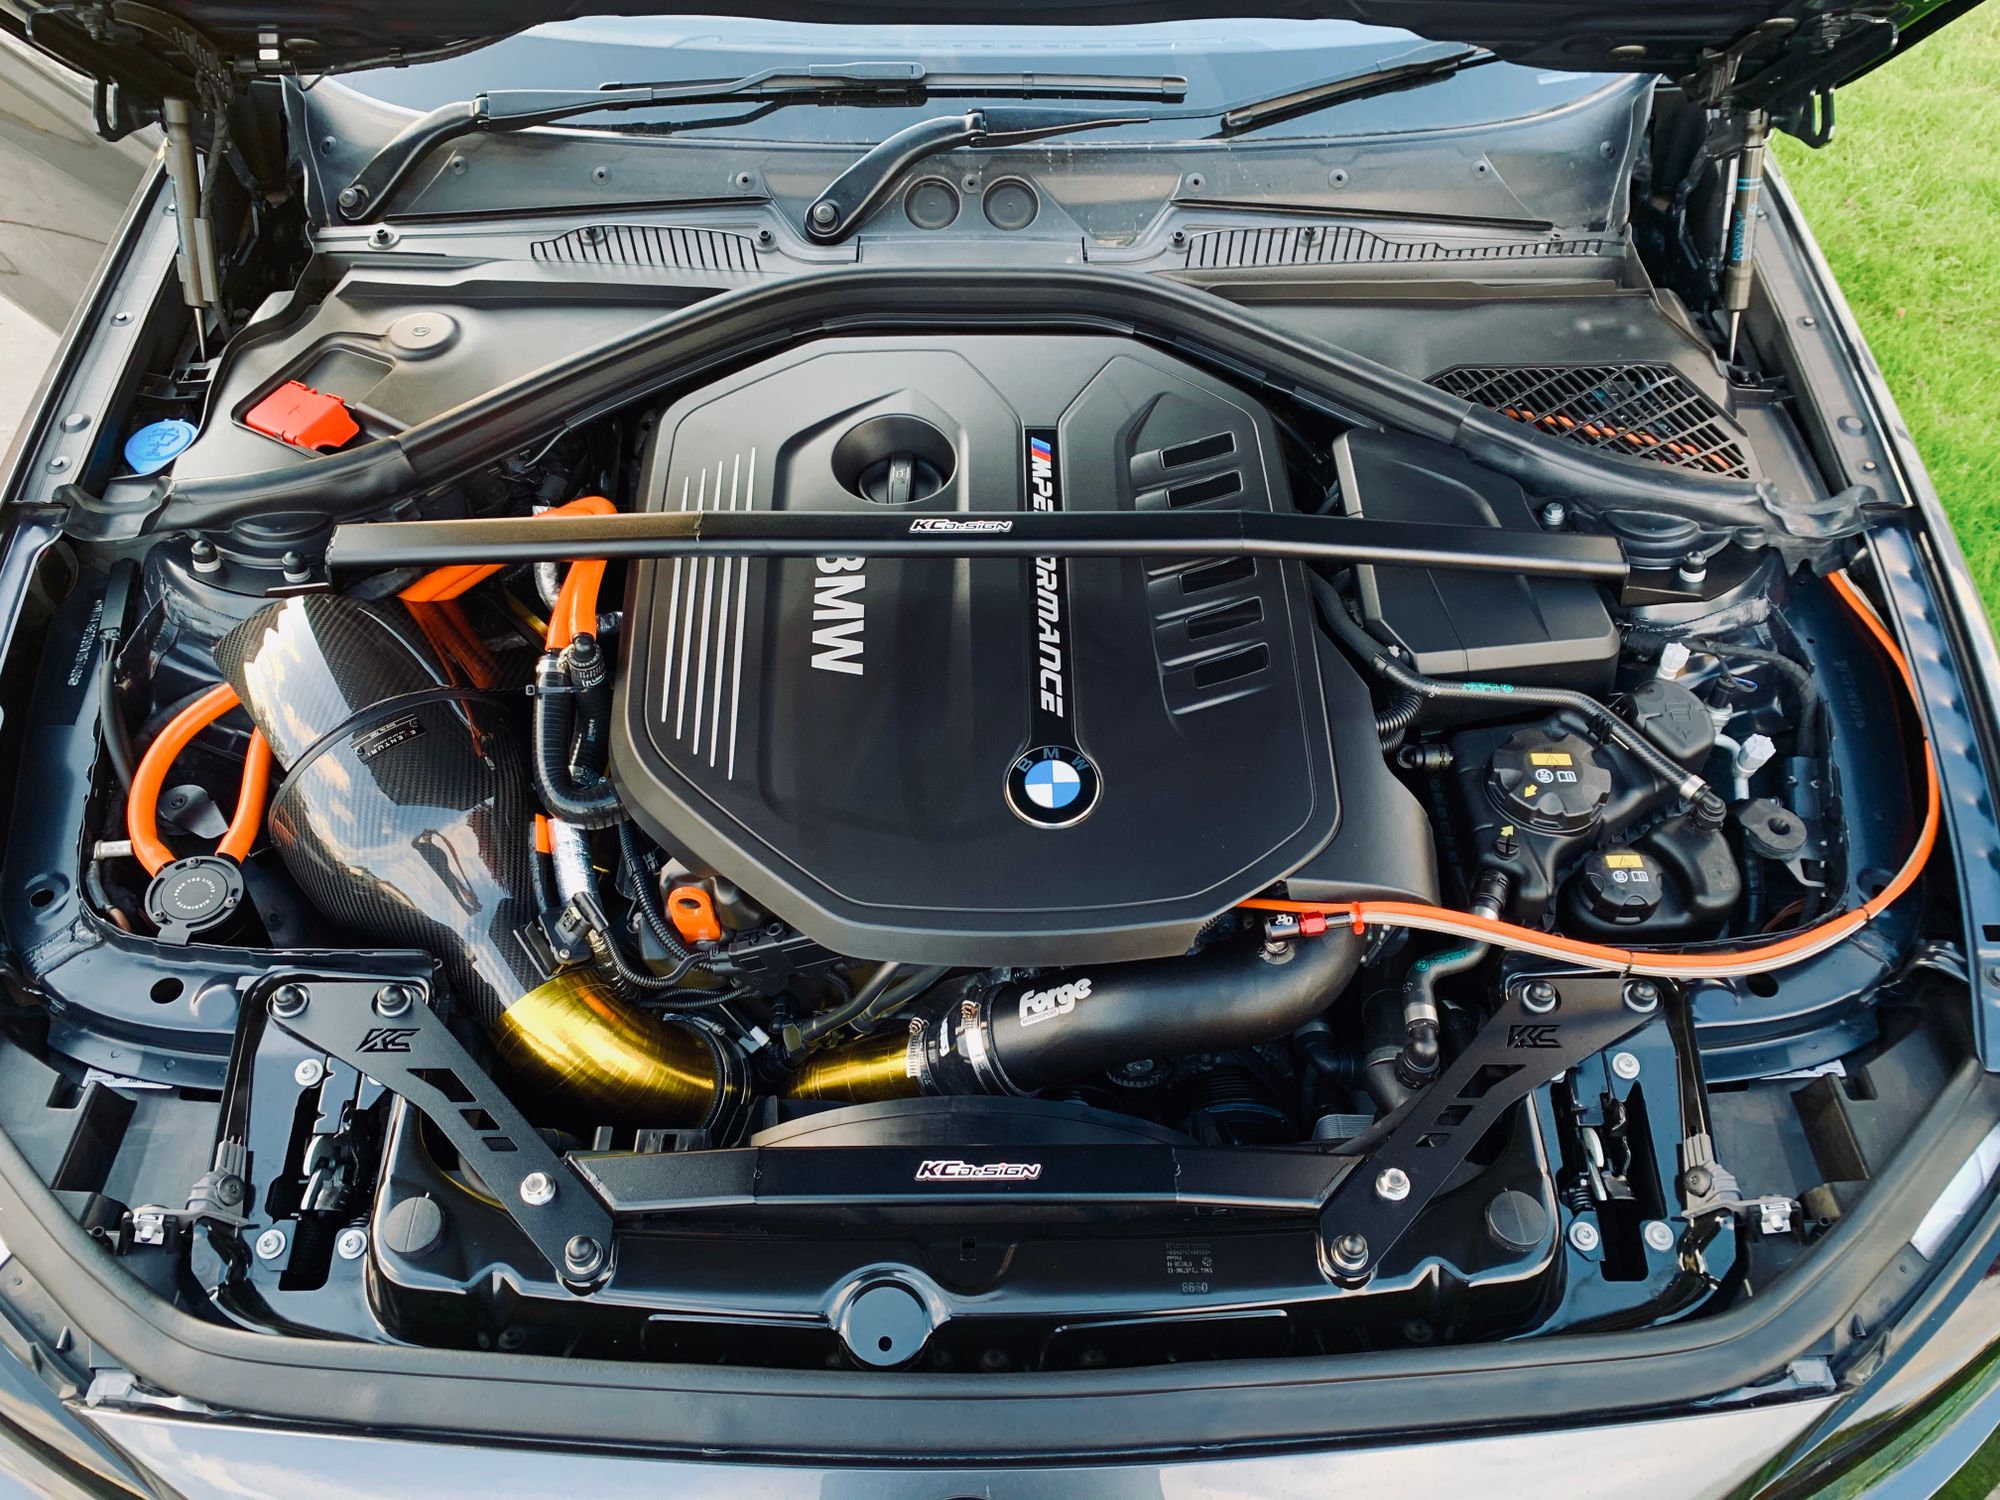
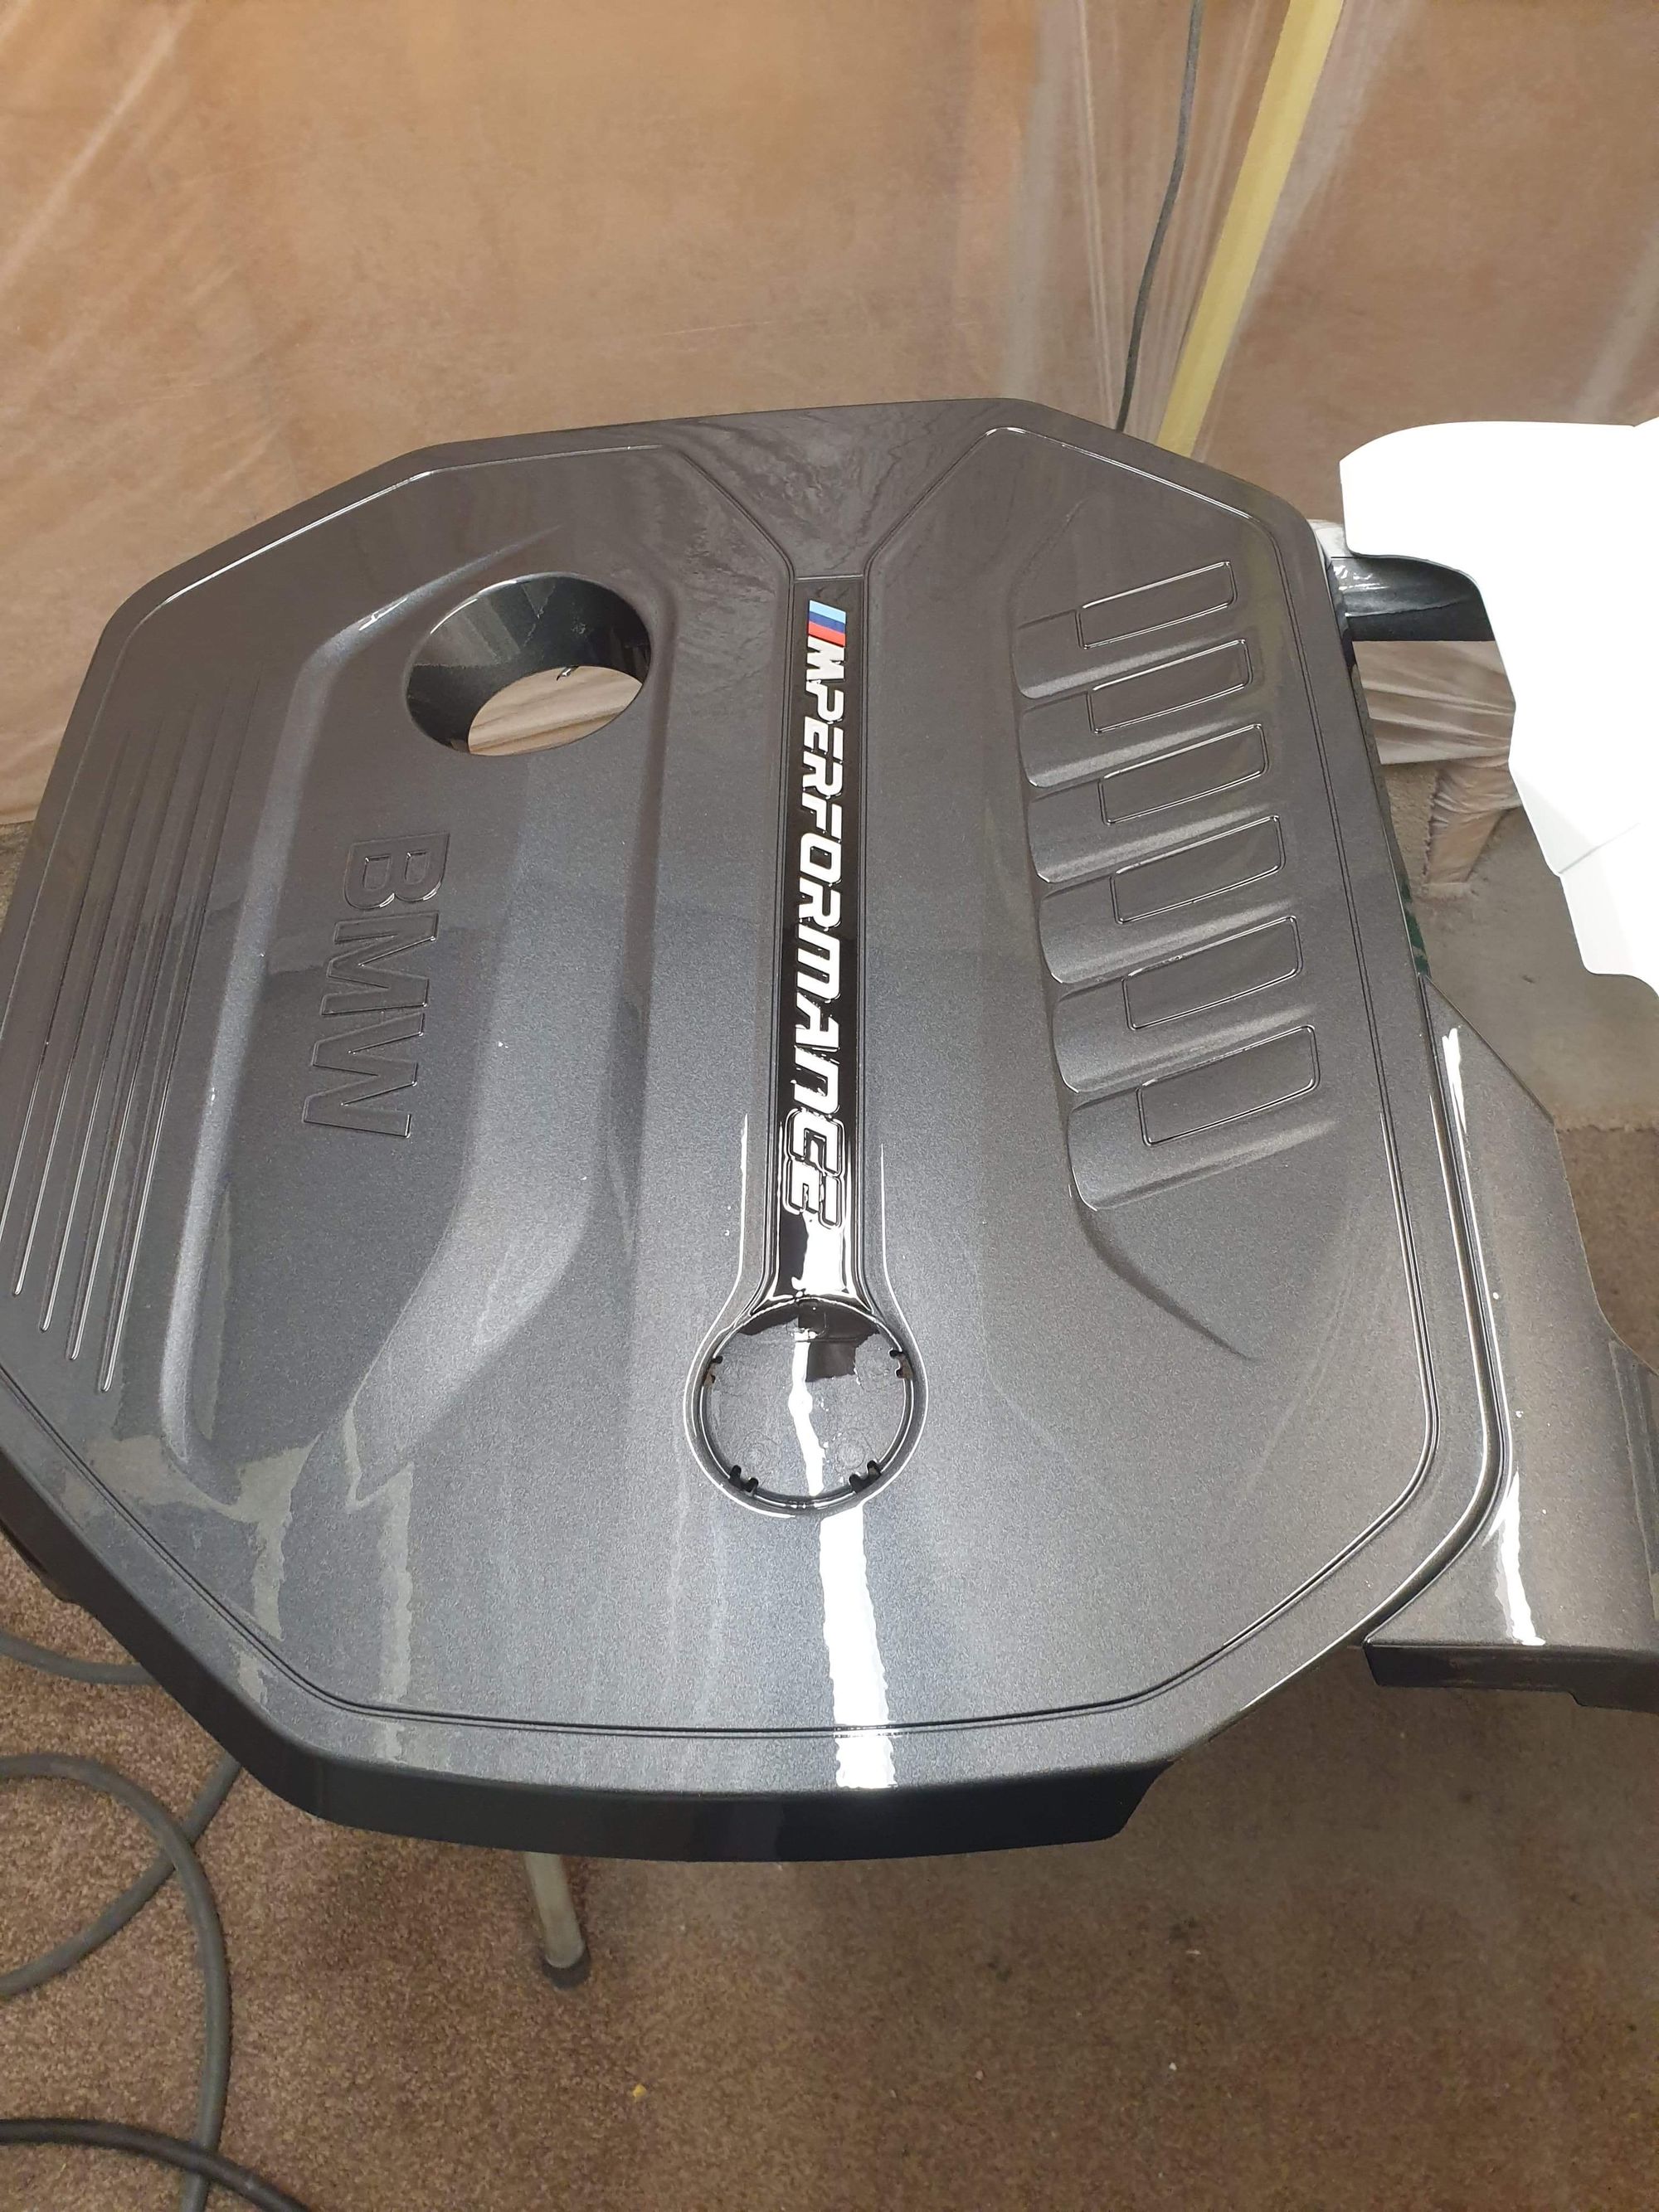
As far as engine bays go, I quite liked how mine had come along. The Eventuri Intake looks good, the KC Designs braces add a little more and the orange meth line simply can't be missed! There was something I didn't like in there though and it was the huge engine cover and the smaller ECU cover. Huge pieces of black plastic that just sit there and don't do much nor look particularly good.
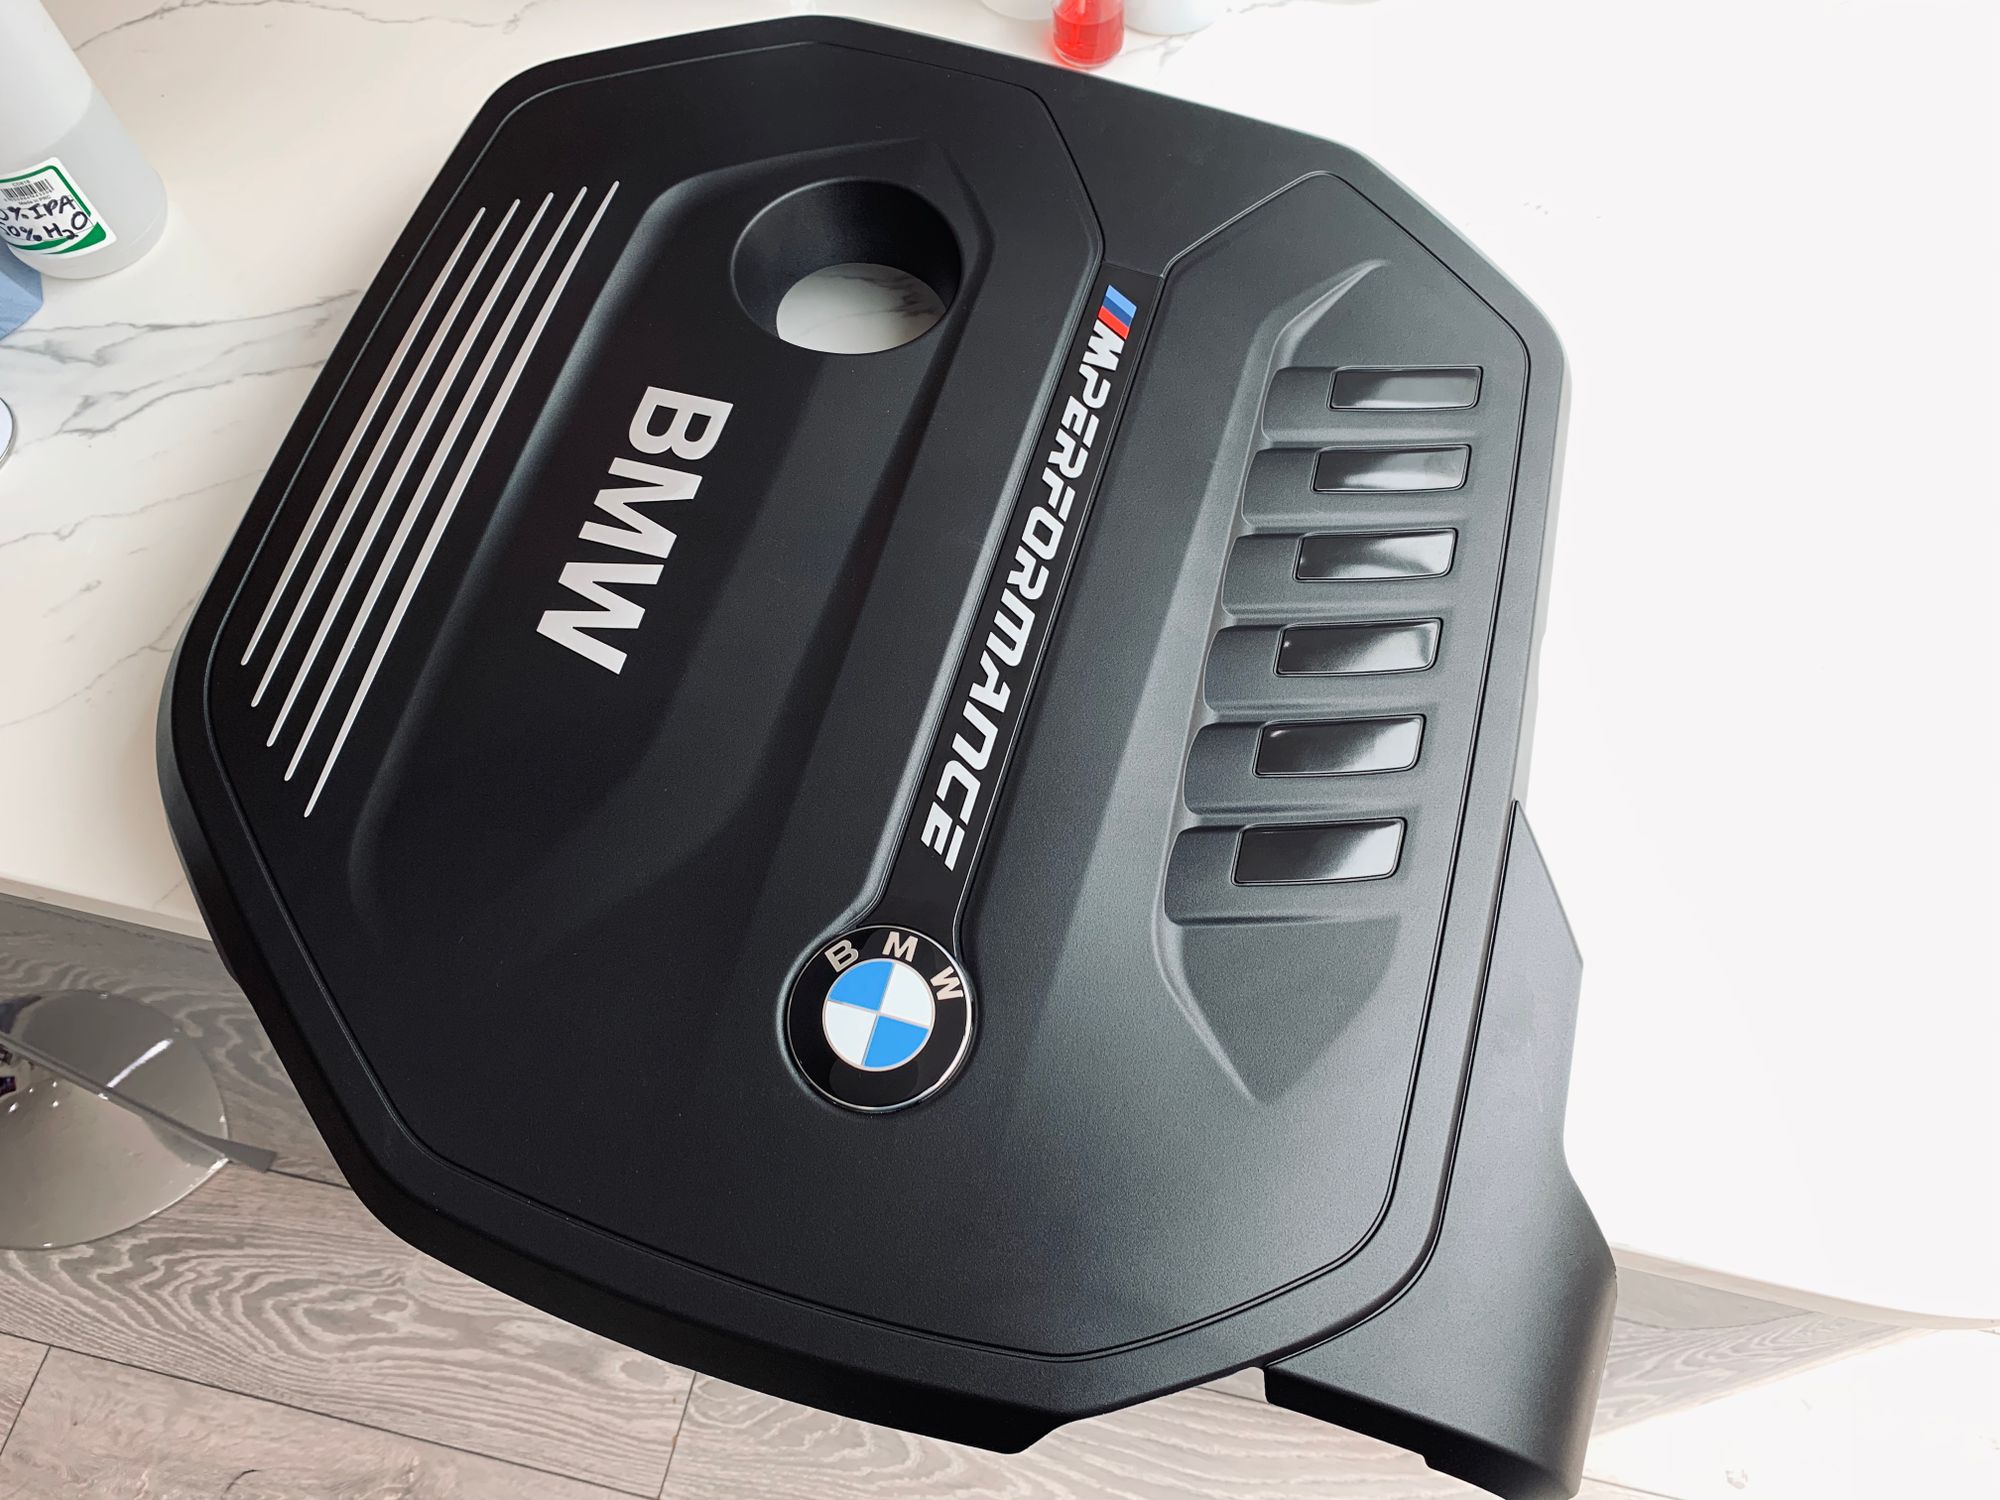
I thought I'd change the colour of them and add a little more colour to the engine bay whilst I was at it. The bulk of the plastic would become mineral grey like the paint and I could add in some highlights like the 5 white stripes on the left could bear the BMW M colours and the 6 features on the right, to represent the 6 cylinders, could do with a little orange. The cover just simply pulls off the engine so it's easy to work with and I thought I'd have a try!
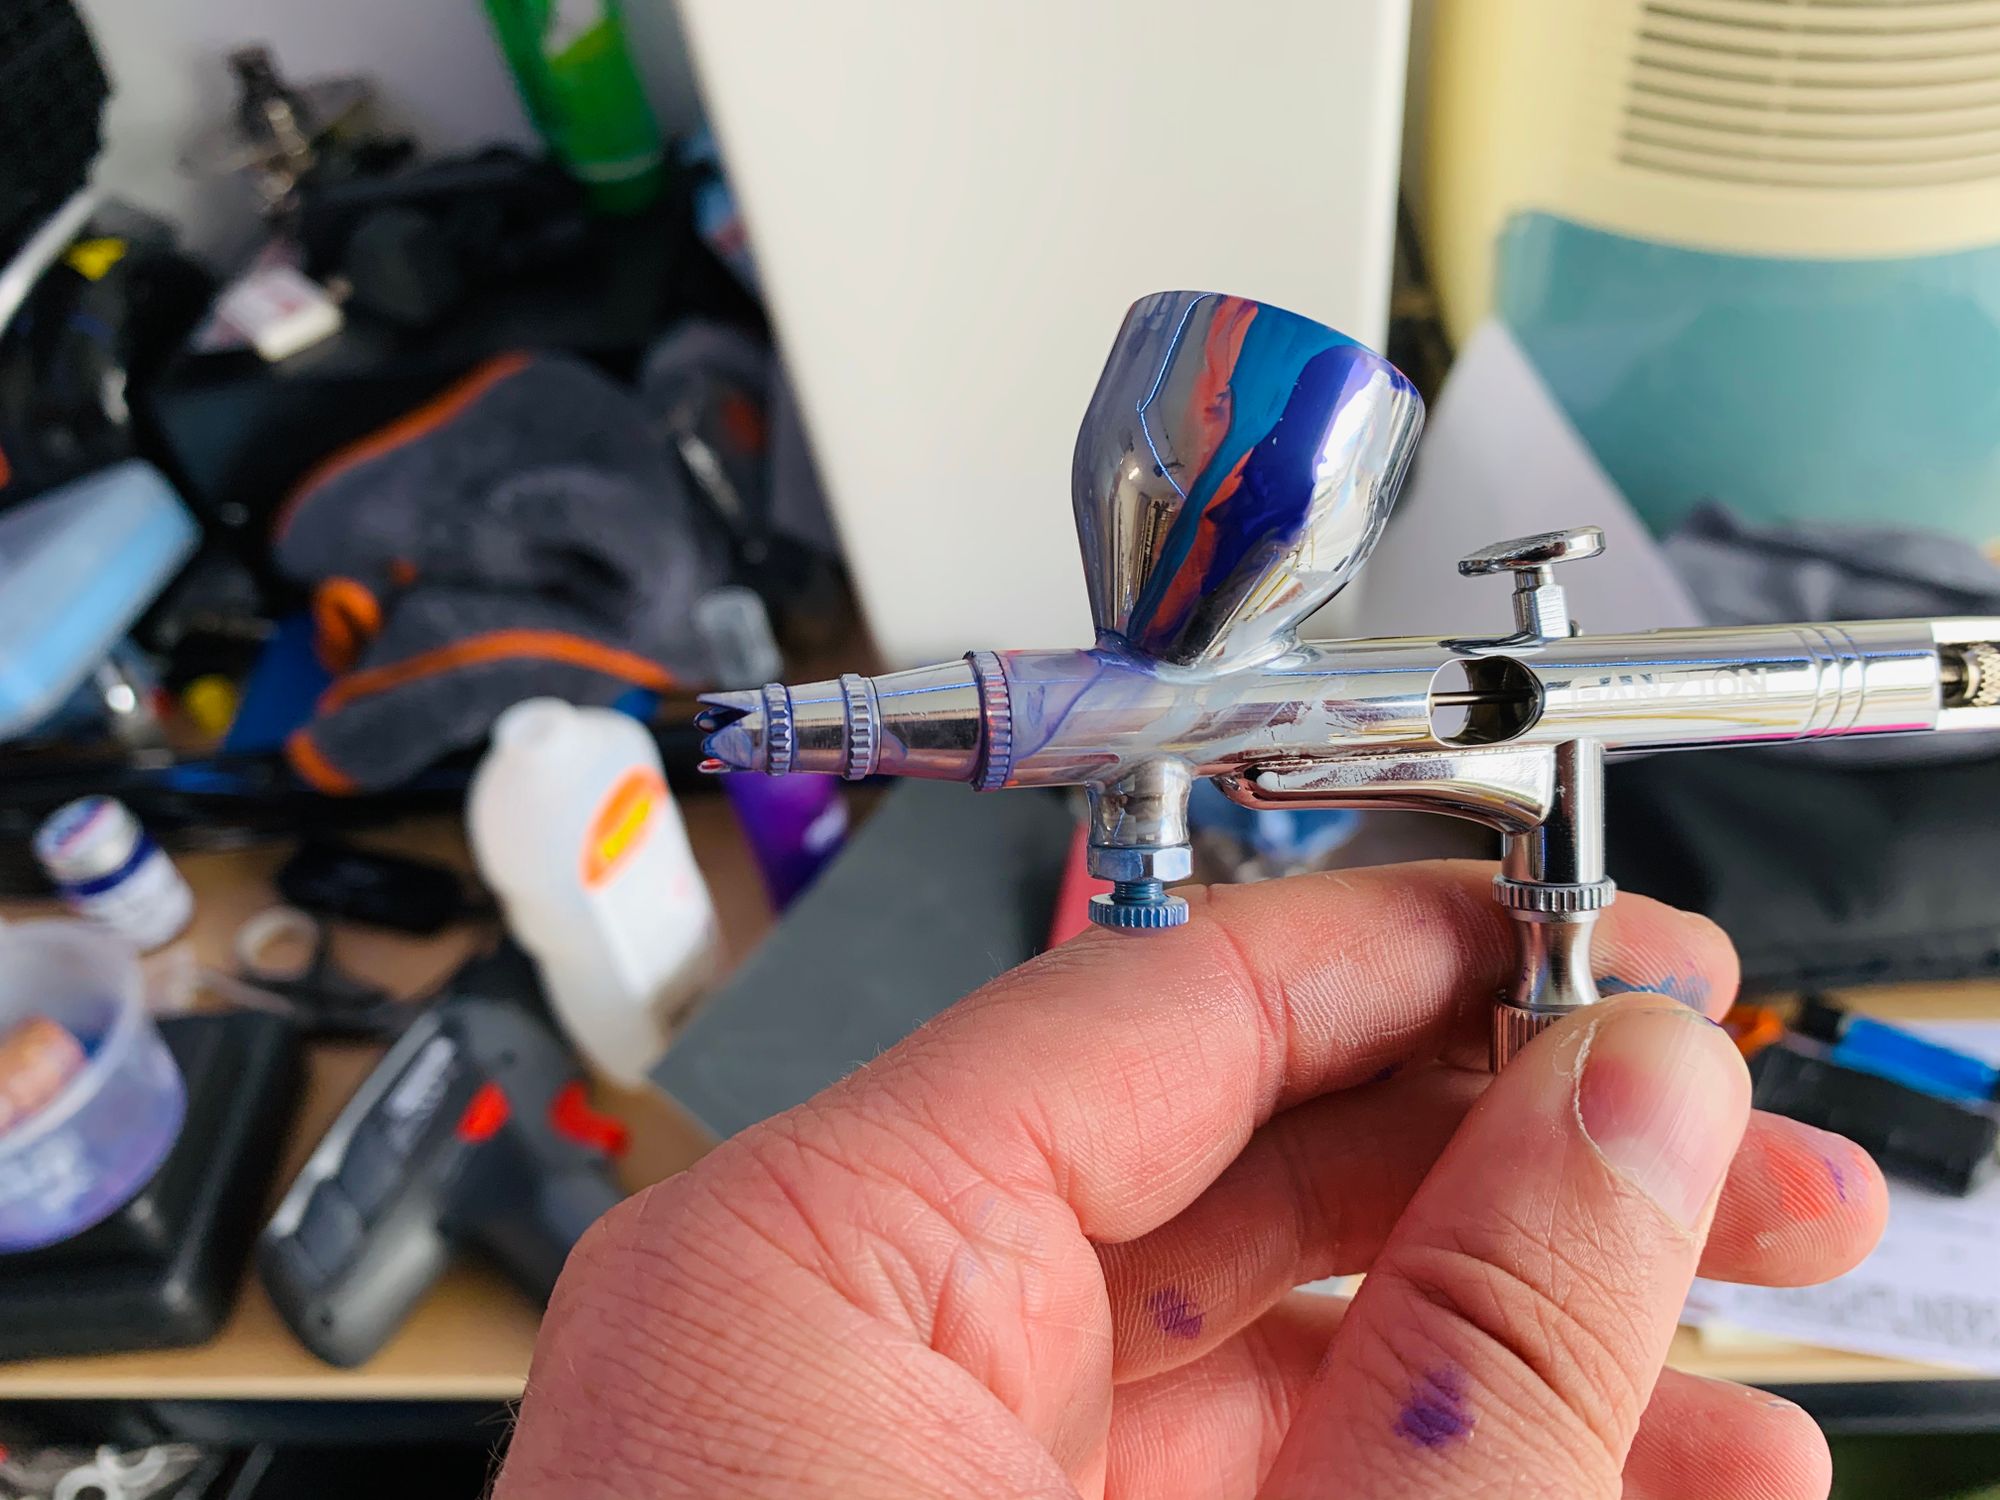
I ordered up some sample pots of the BMW M colours and got to work on masking off the section I wanted to paint. Using my airbrush kit hooked up to my garage compressor with an adapter, I set out to do some testing.
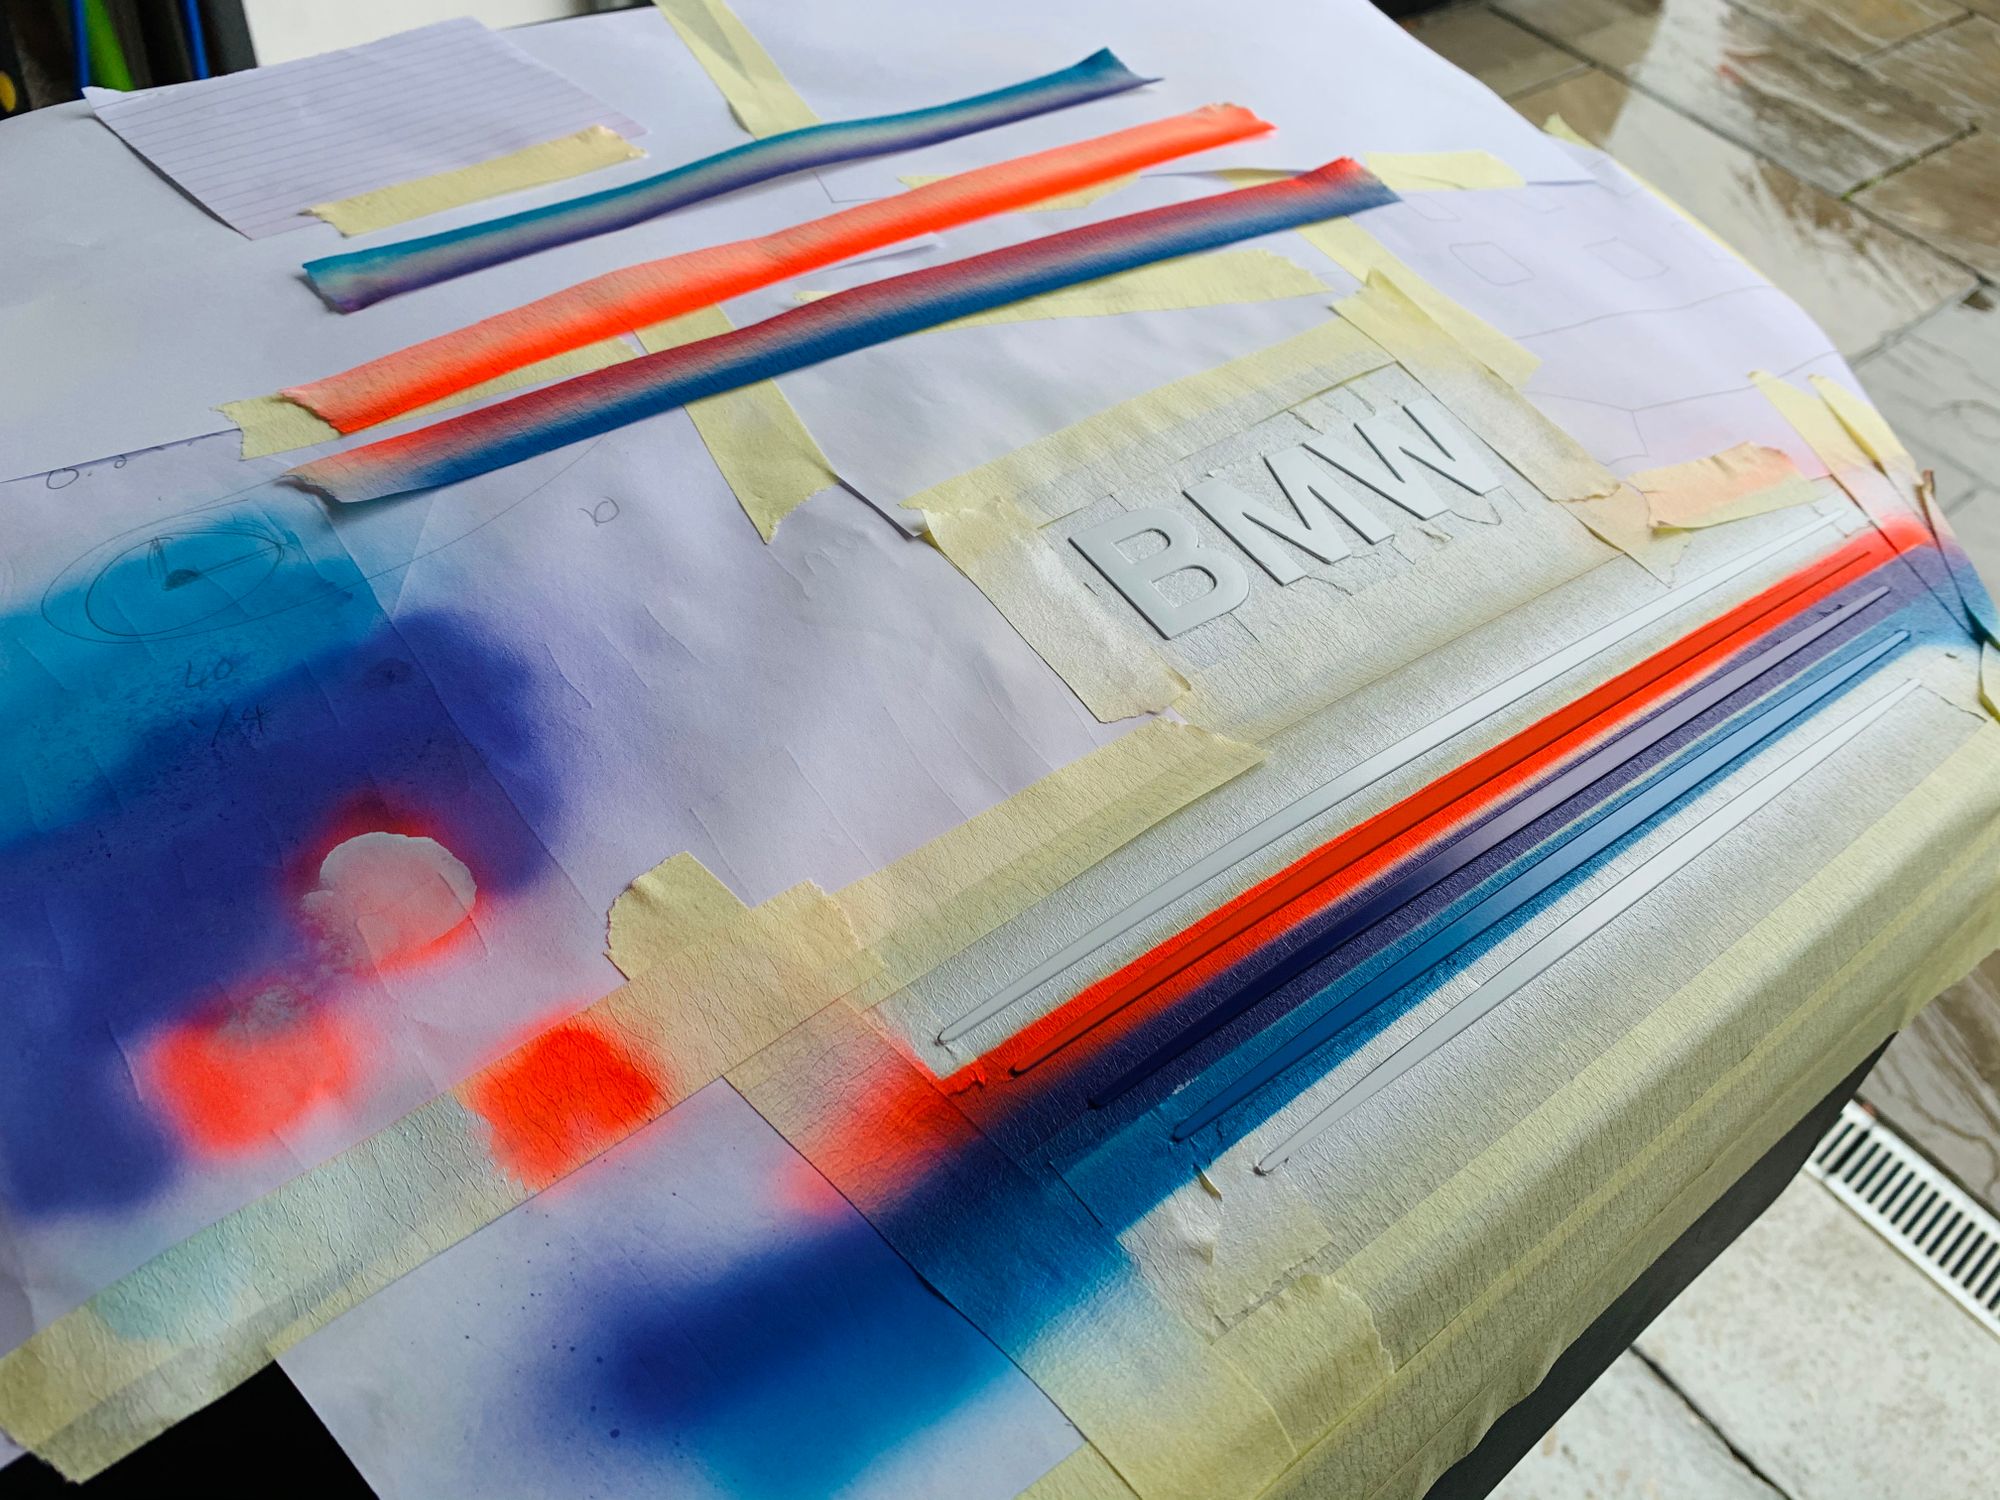

Adding the BMW M colours worked quite well and I liked the direction this was going, but, I also quickly realised that this level of painting was beyond my skill level. I found a specialist online that works in a body shop by day in the evenings/weekends he paints engine covers for car enthusiasts! He needed to know what I wanted doing so I expertly drew a design brief in MS Paint and sent this over. They. Were. Impressed!
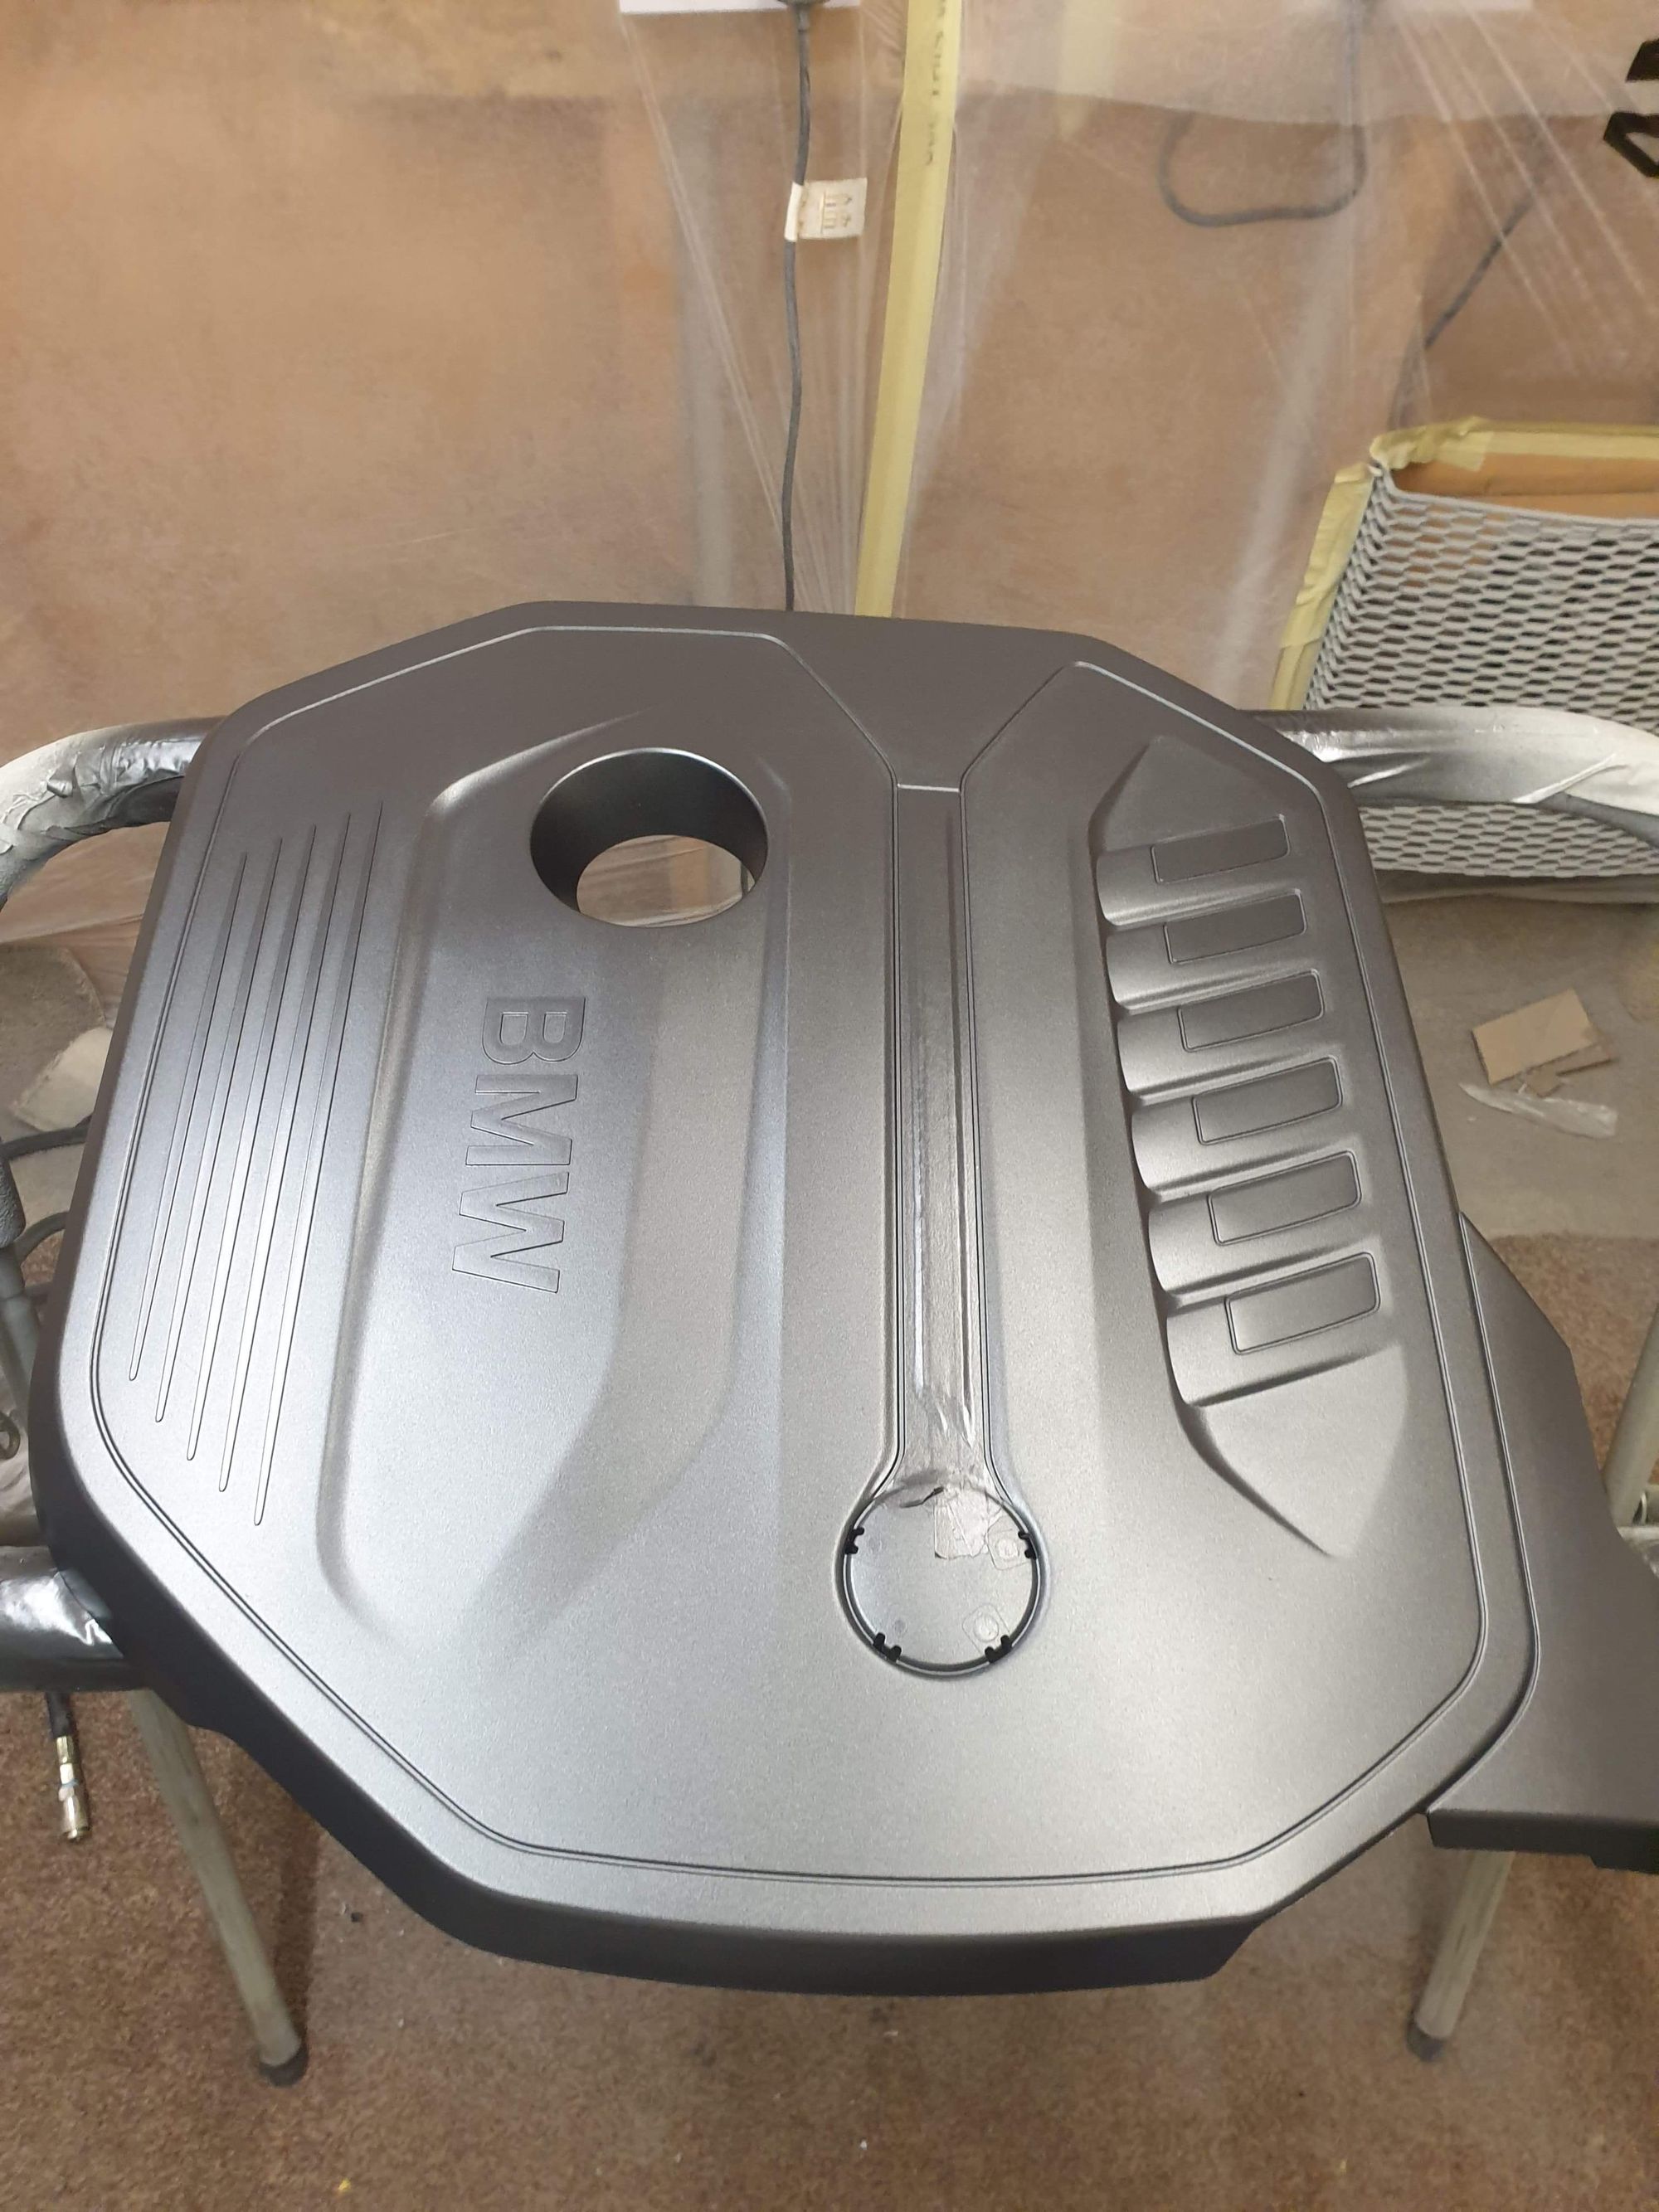
With the covers sent off, the photos of progress came back and it was now time for me to be impressed. Here's the engine cover having it's first coat.
Now with some gloss from the lacquer.
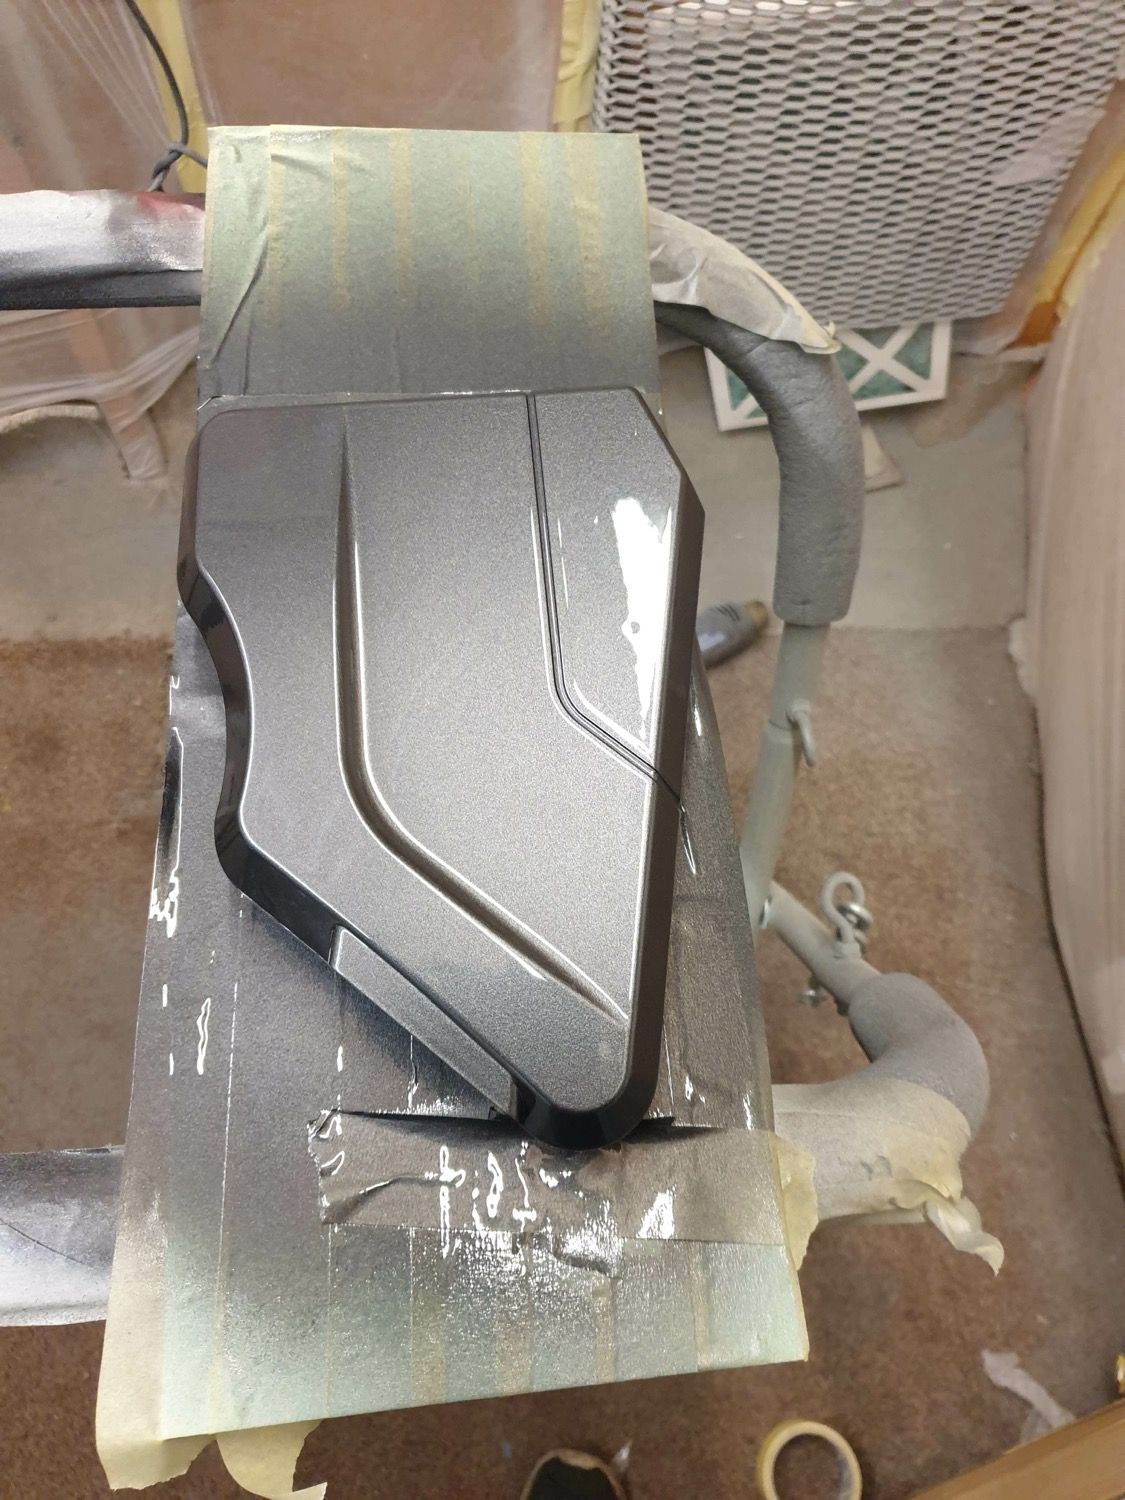
The ECU cover is getting the same treatment too!
Then, the colour highlights.
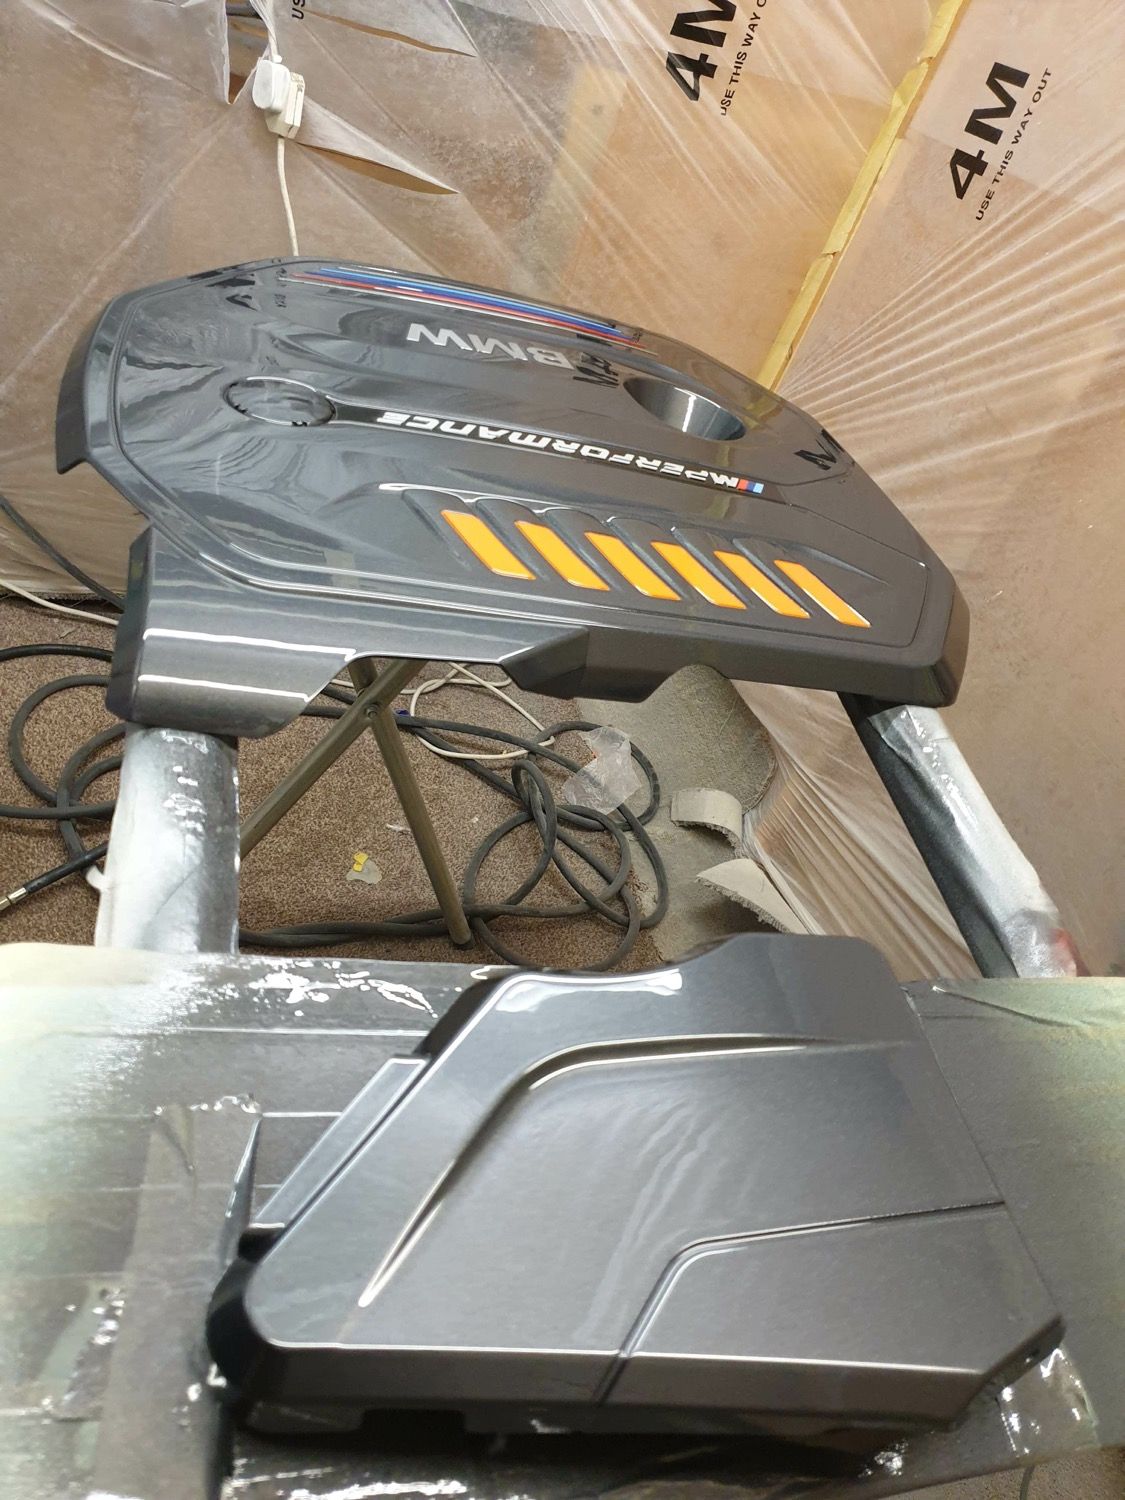
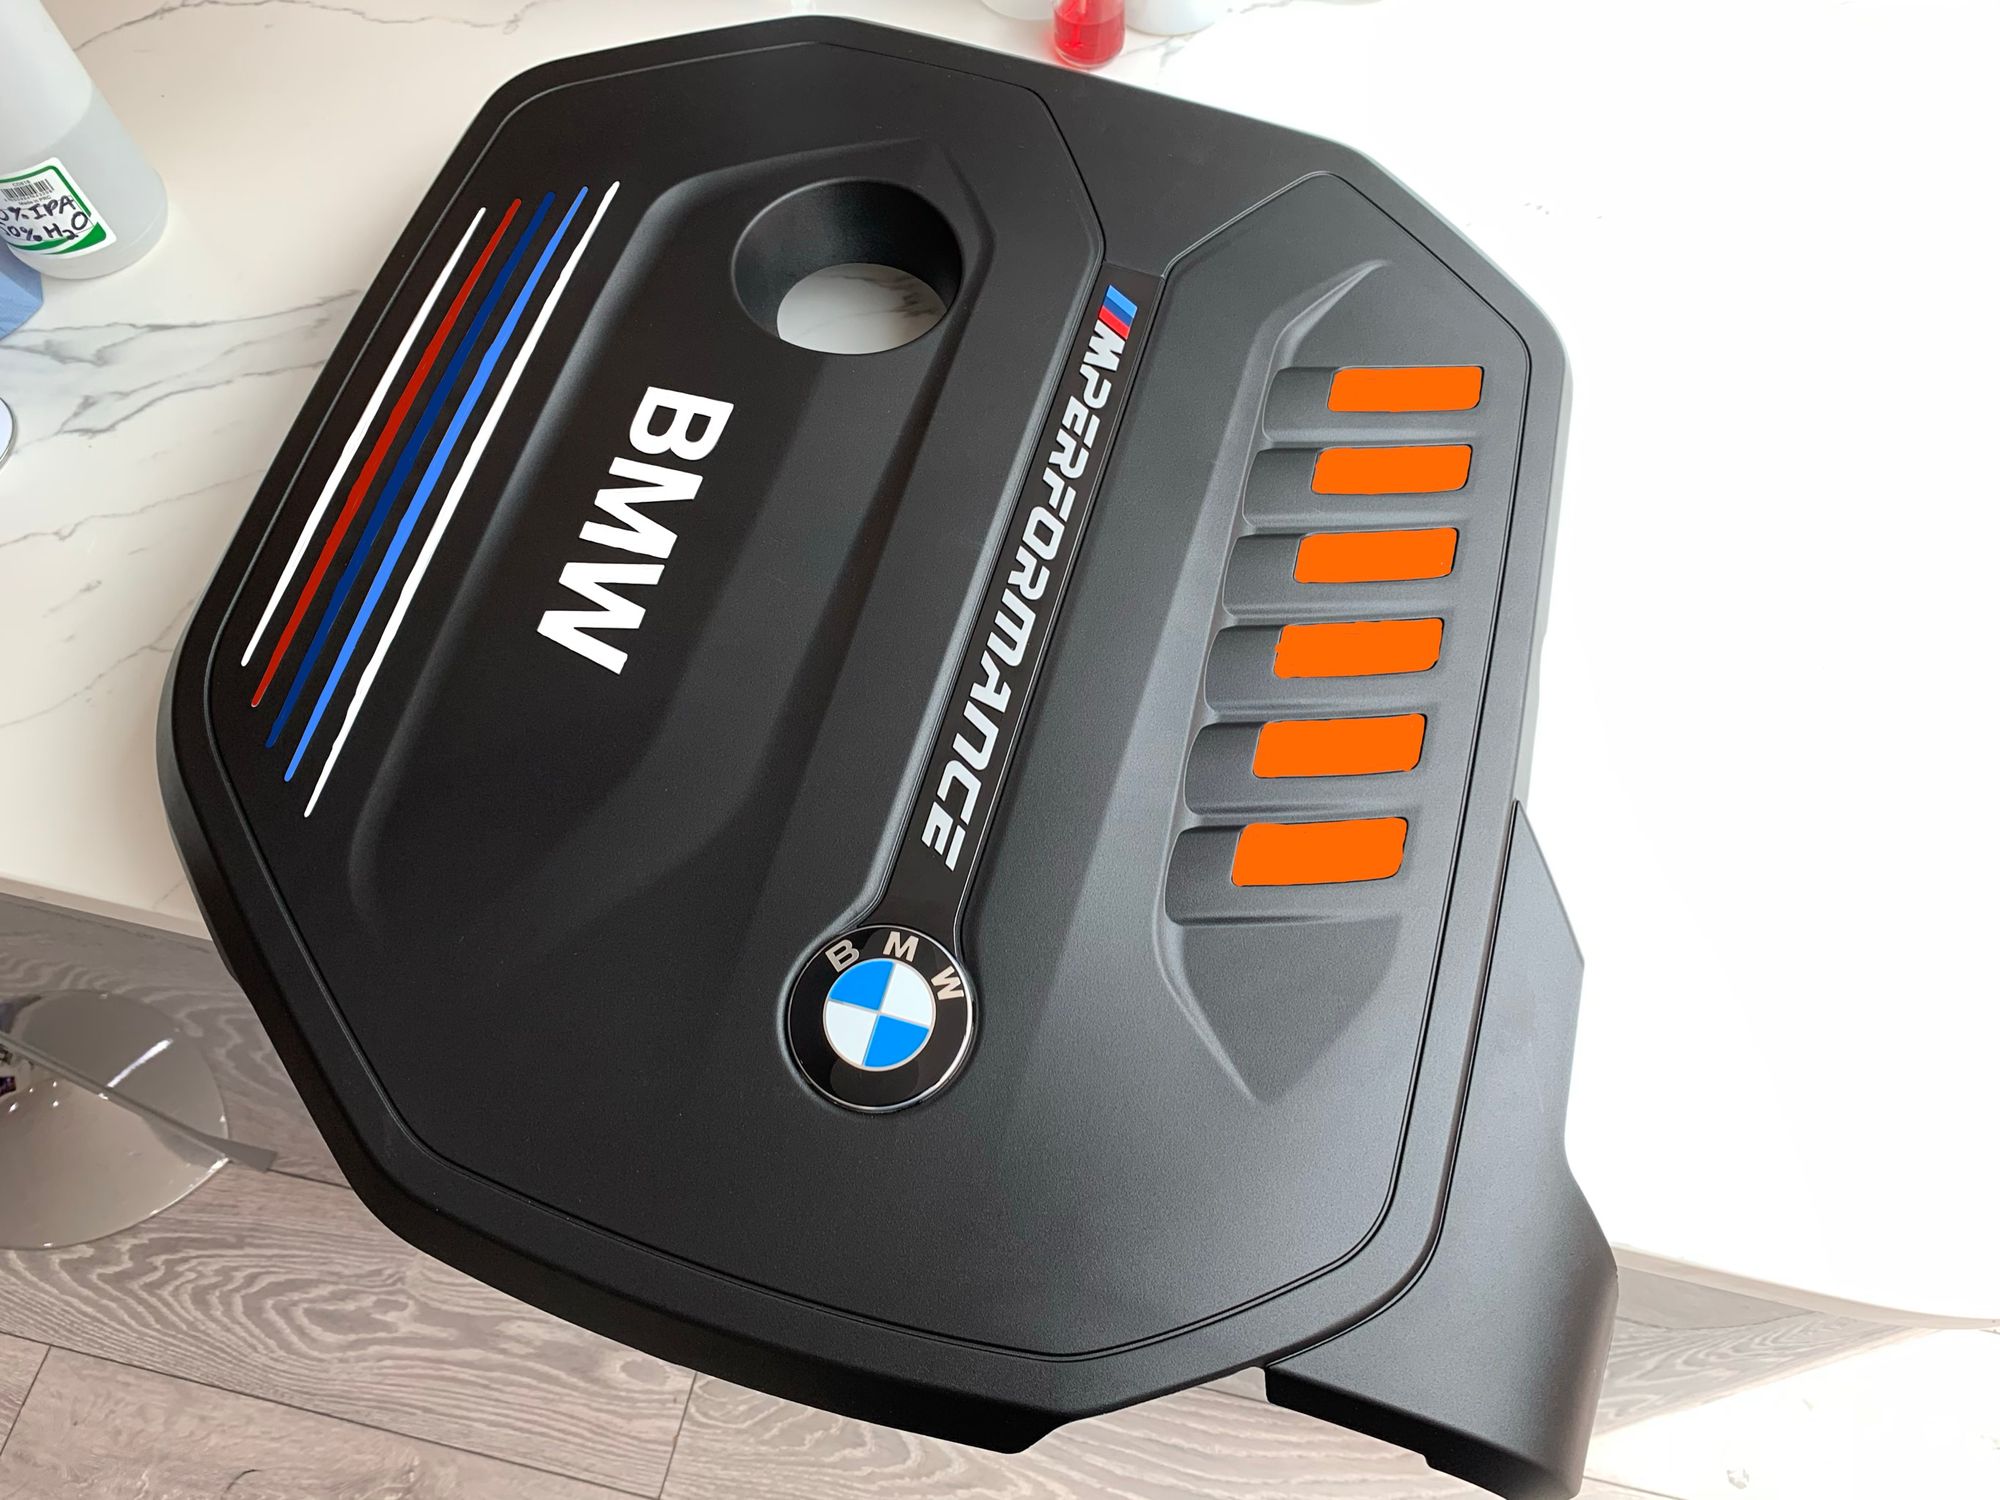
I love this next photo because you can really see the sparkle of the metallic in the mineral grey paint and you can get the first clear view of the orange highlights.
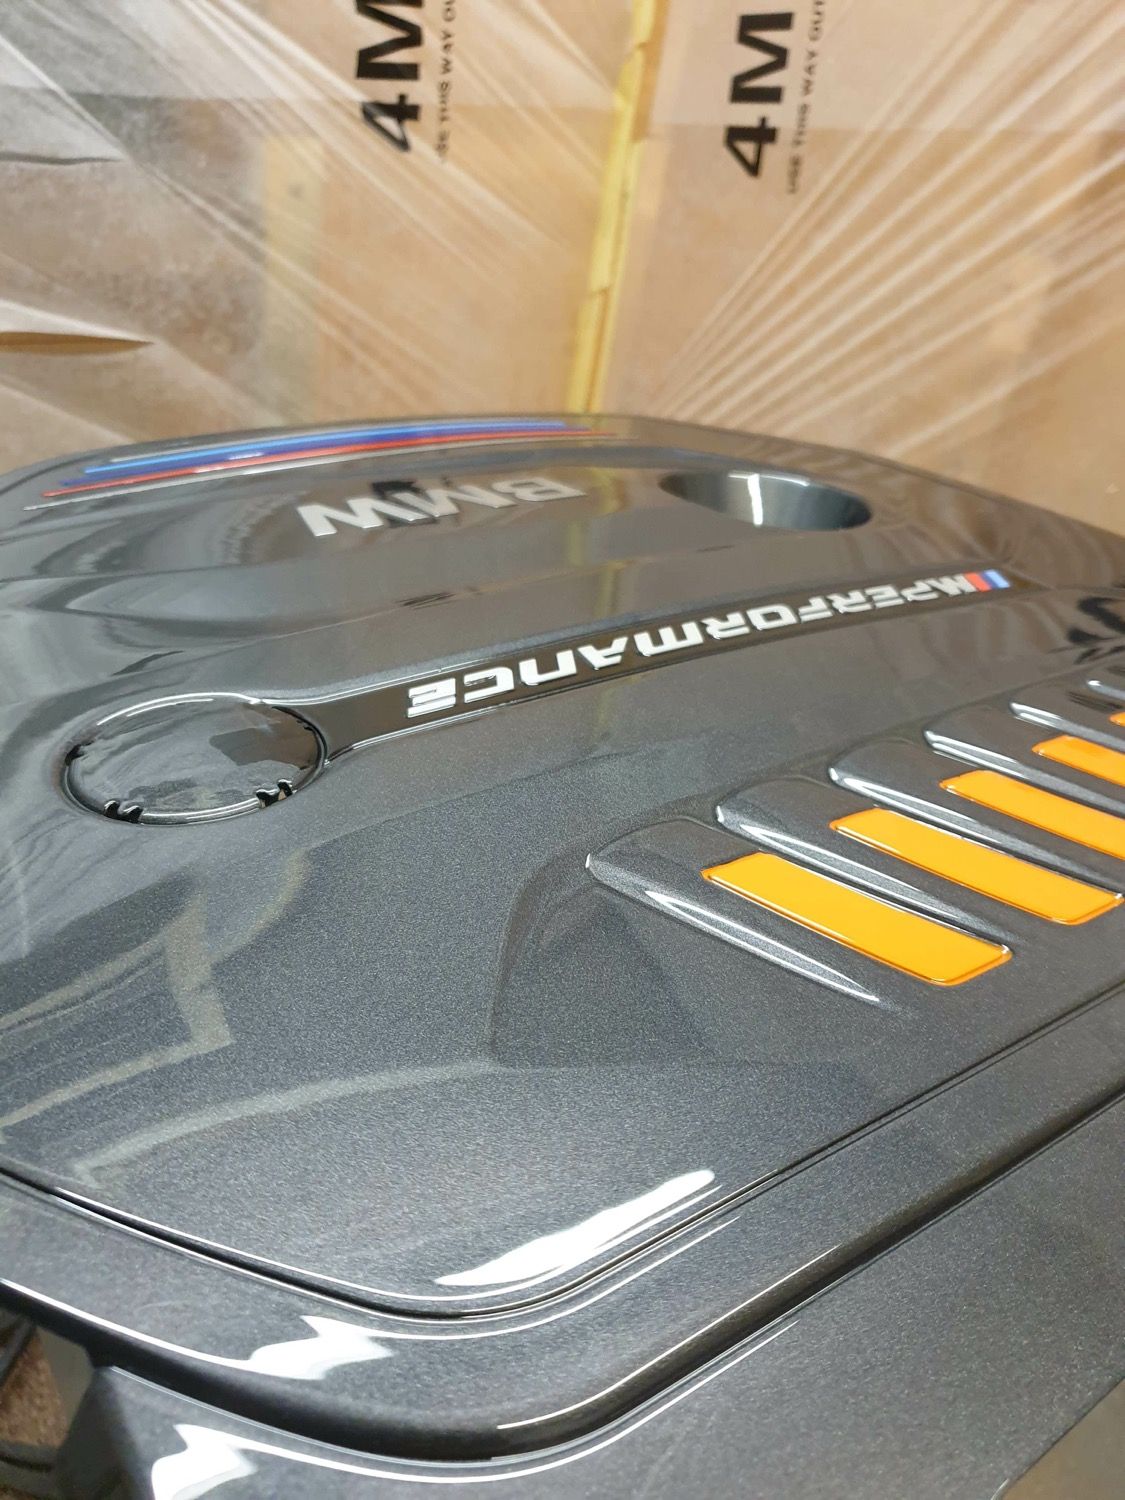
Of course, following the orange theme from the rest of the car was logical and the 6 orange stripes now represent the 6 cylinders inside the beating heart of the B58. With the 'BMW' text and remaining strips alongside the 'M Performance' colours done in silver, the cover is complete.
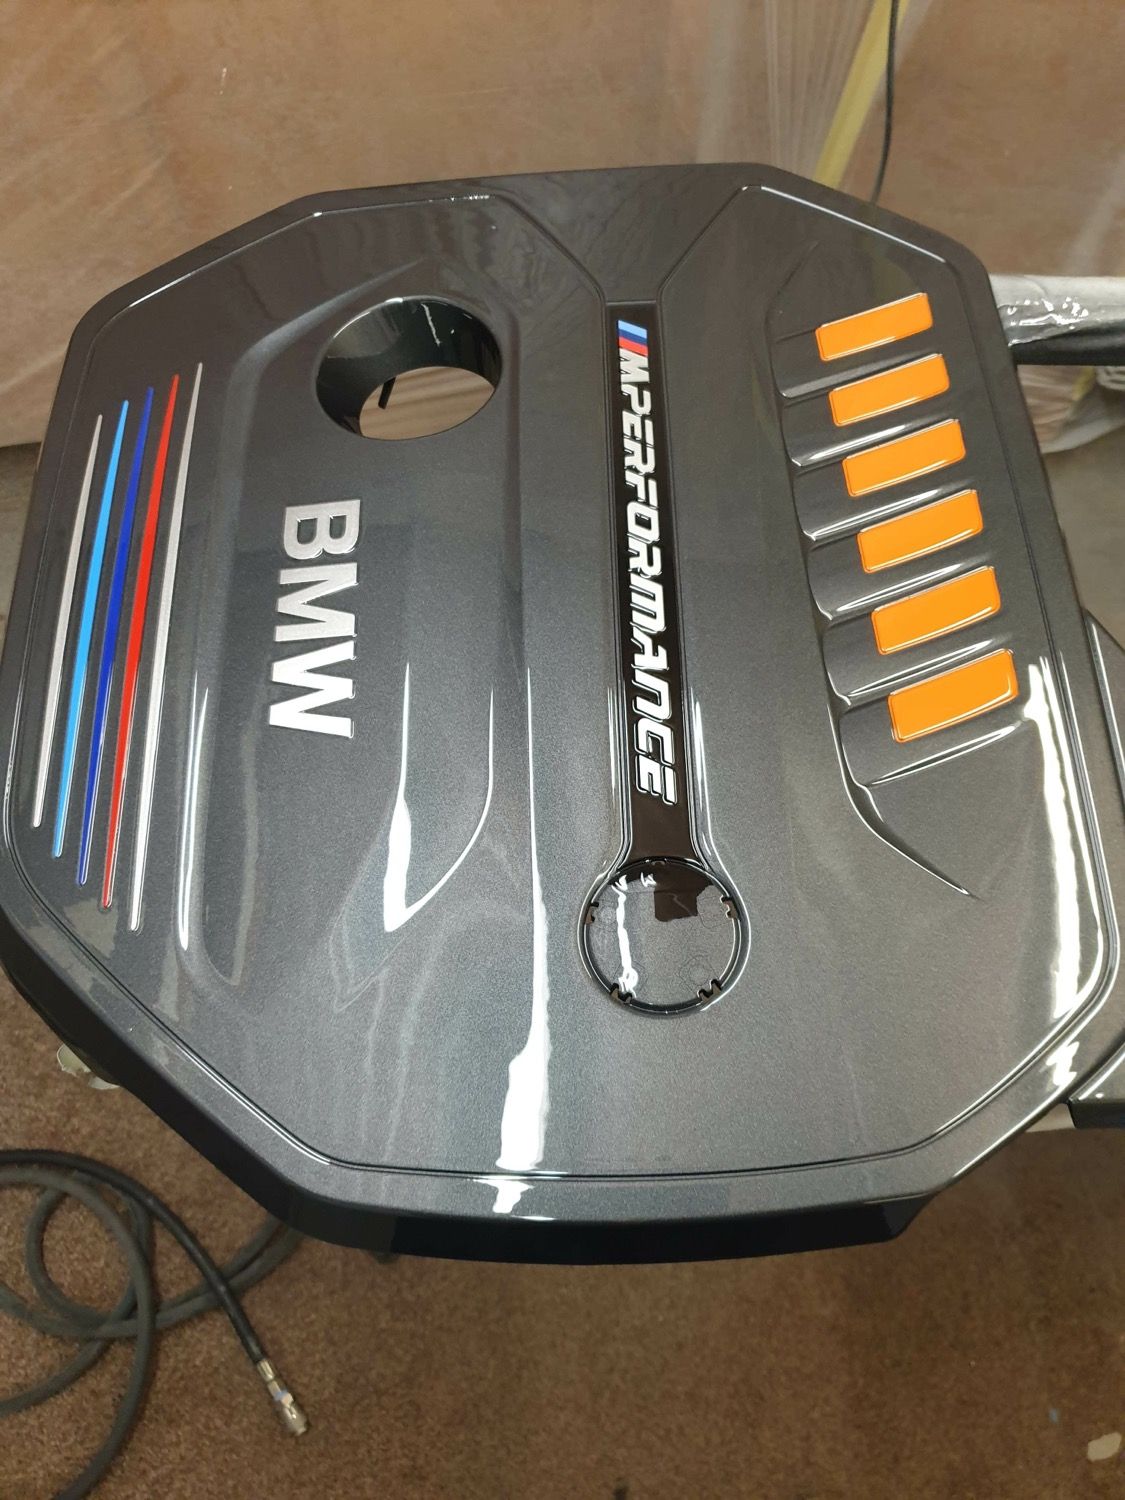
Woah! This thing looked amazing and I couldn't wait to get it under the bonnet where it can really shine. Just look at this now!
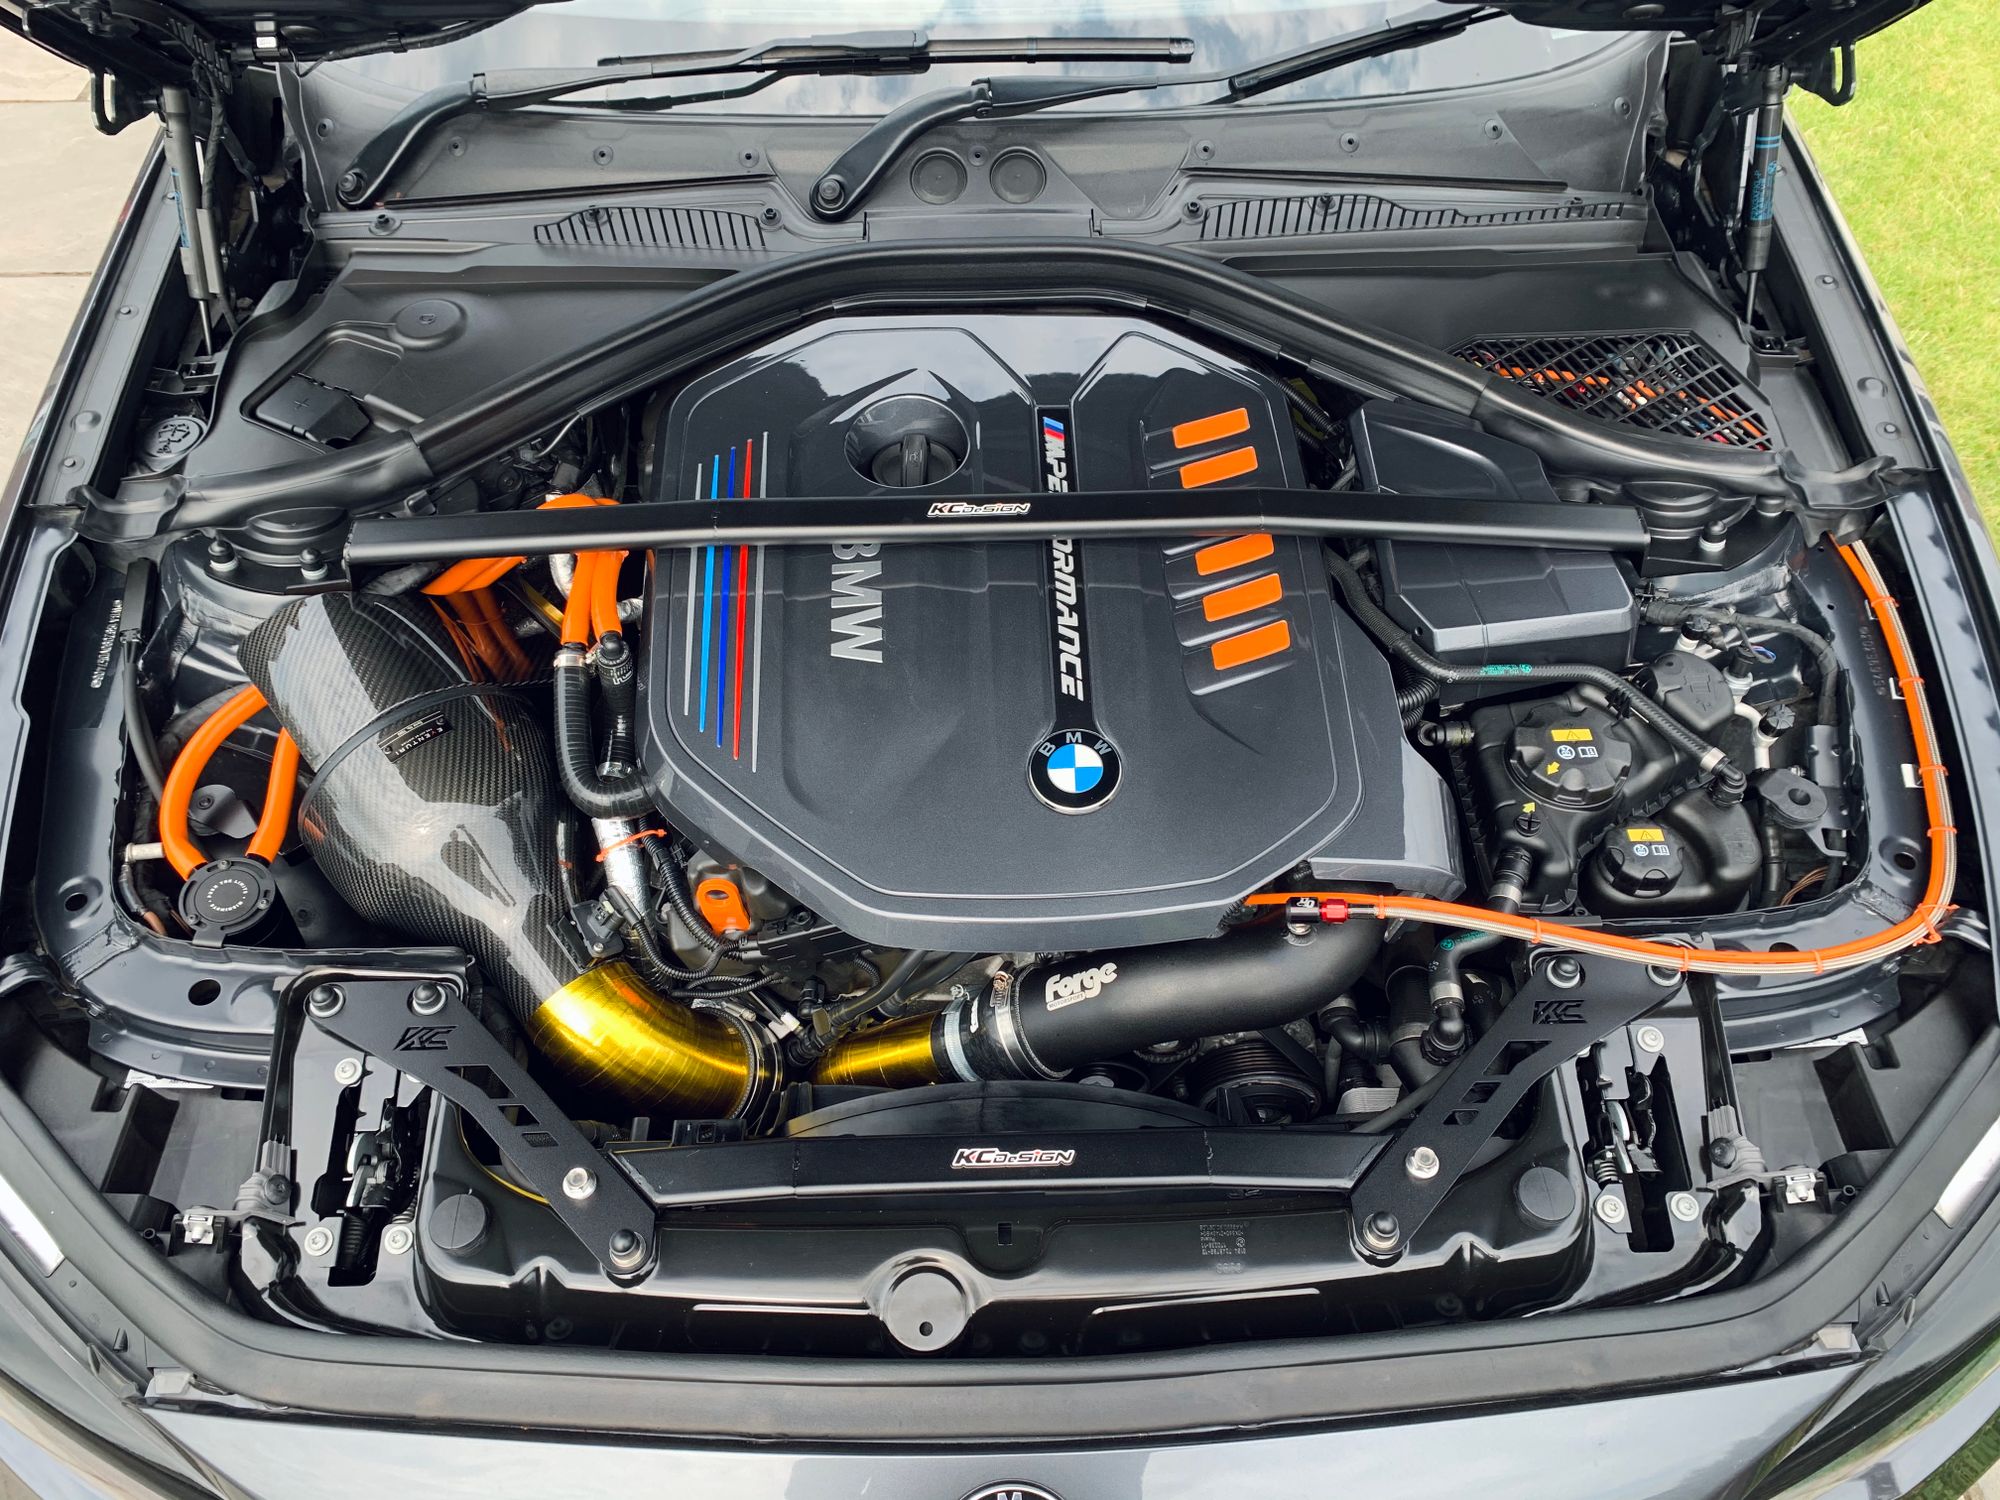
All in all it was a relatively inexpensive modification that made quite a stark difference in the engine bay. Whenever fellow car enthusiasts take a look, or even those that are not particularly car-minded, it's always appreciated.
4D Plates
Here in the UK, like everywhere else I believe, we have to carry an identifying mark on our vehicle that we call a registration plate, officially a Vehicle Registration Mark (VRM). This is so that it's easy to identify a vehicle's owner should there ever be a need. The standard format of a VRM looks like this in the UK:
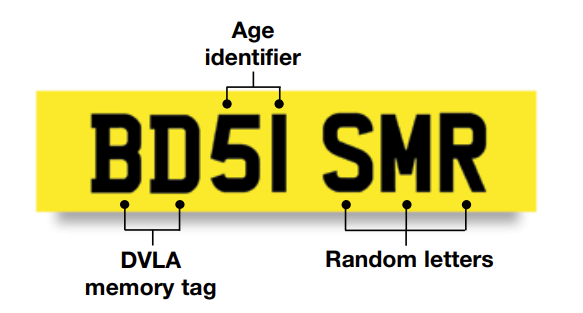
The first two letters are a code for the geographic region where the car was first registered, the two number are then a code to identify the year the car was first registered and the last 3 letters are random to uniquely identify a vehicle. I'm quite fortunate that my name fits into this format and it's very common in the UK when casually reading a registration plate to ignore the numbers, HE18 LME. My surname HELME and the 18 year for when my car was registered. I have already purchased this registration though and you can see it on my car, but I wanted to make my plate 'stand out' a little more.
There are very strict laws on the size, colour, reflectivity, font, spacing and many other characteristics of a registration plate here in the UK. There are also restrictions on where on the vehicle the plate can be fitted. It's not an area where there's a lot of room to play around, but where there's a will there's a way, and someone found a way. There is no law that dictates the maximum height of the letters and this has resulted in the creation of '4D' plates.
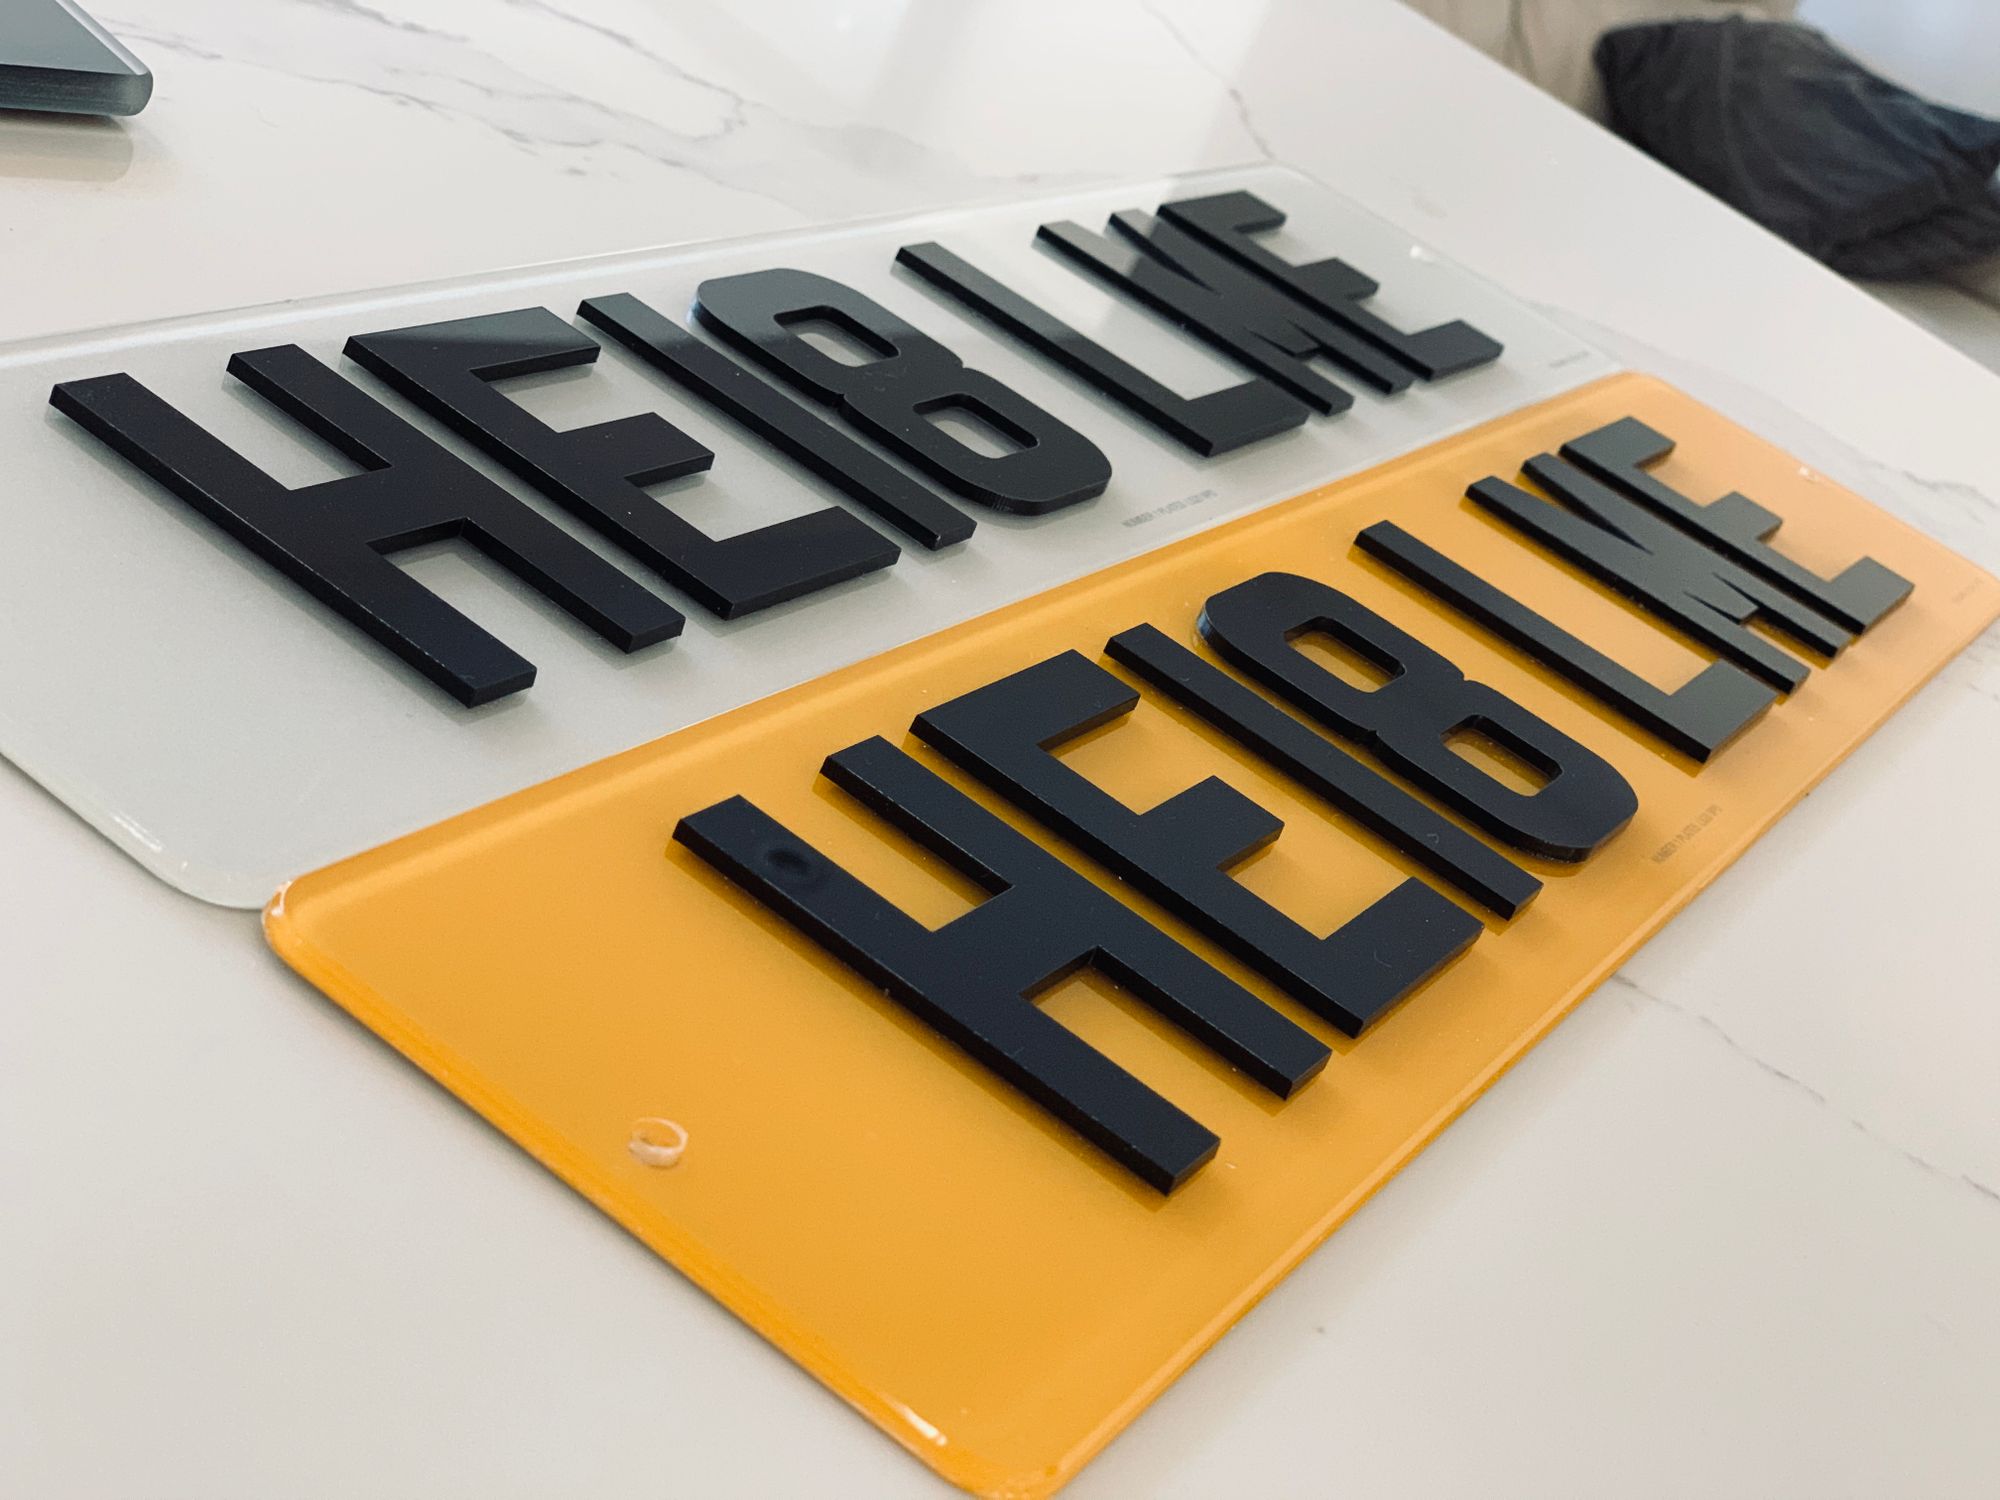
There had been much controversy about this in the UK because the law was not clear but we can now safely display 4D plates on our cars and not worrying about breaking the law.
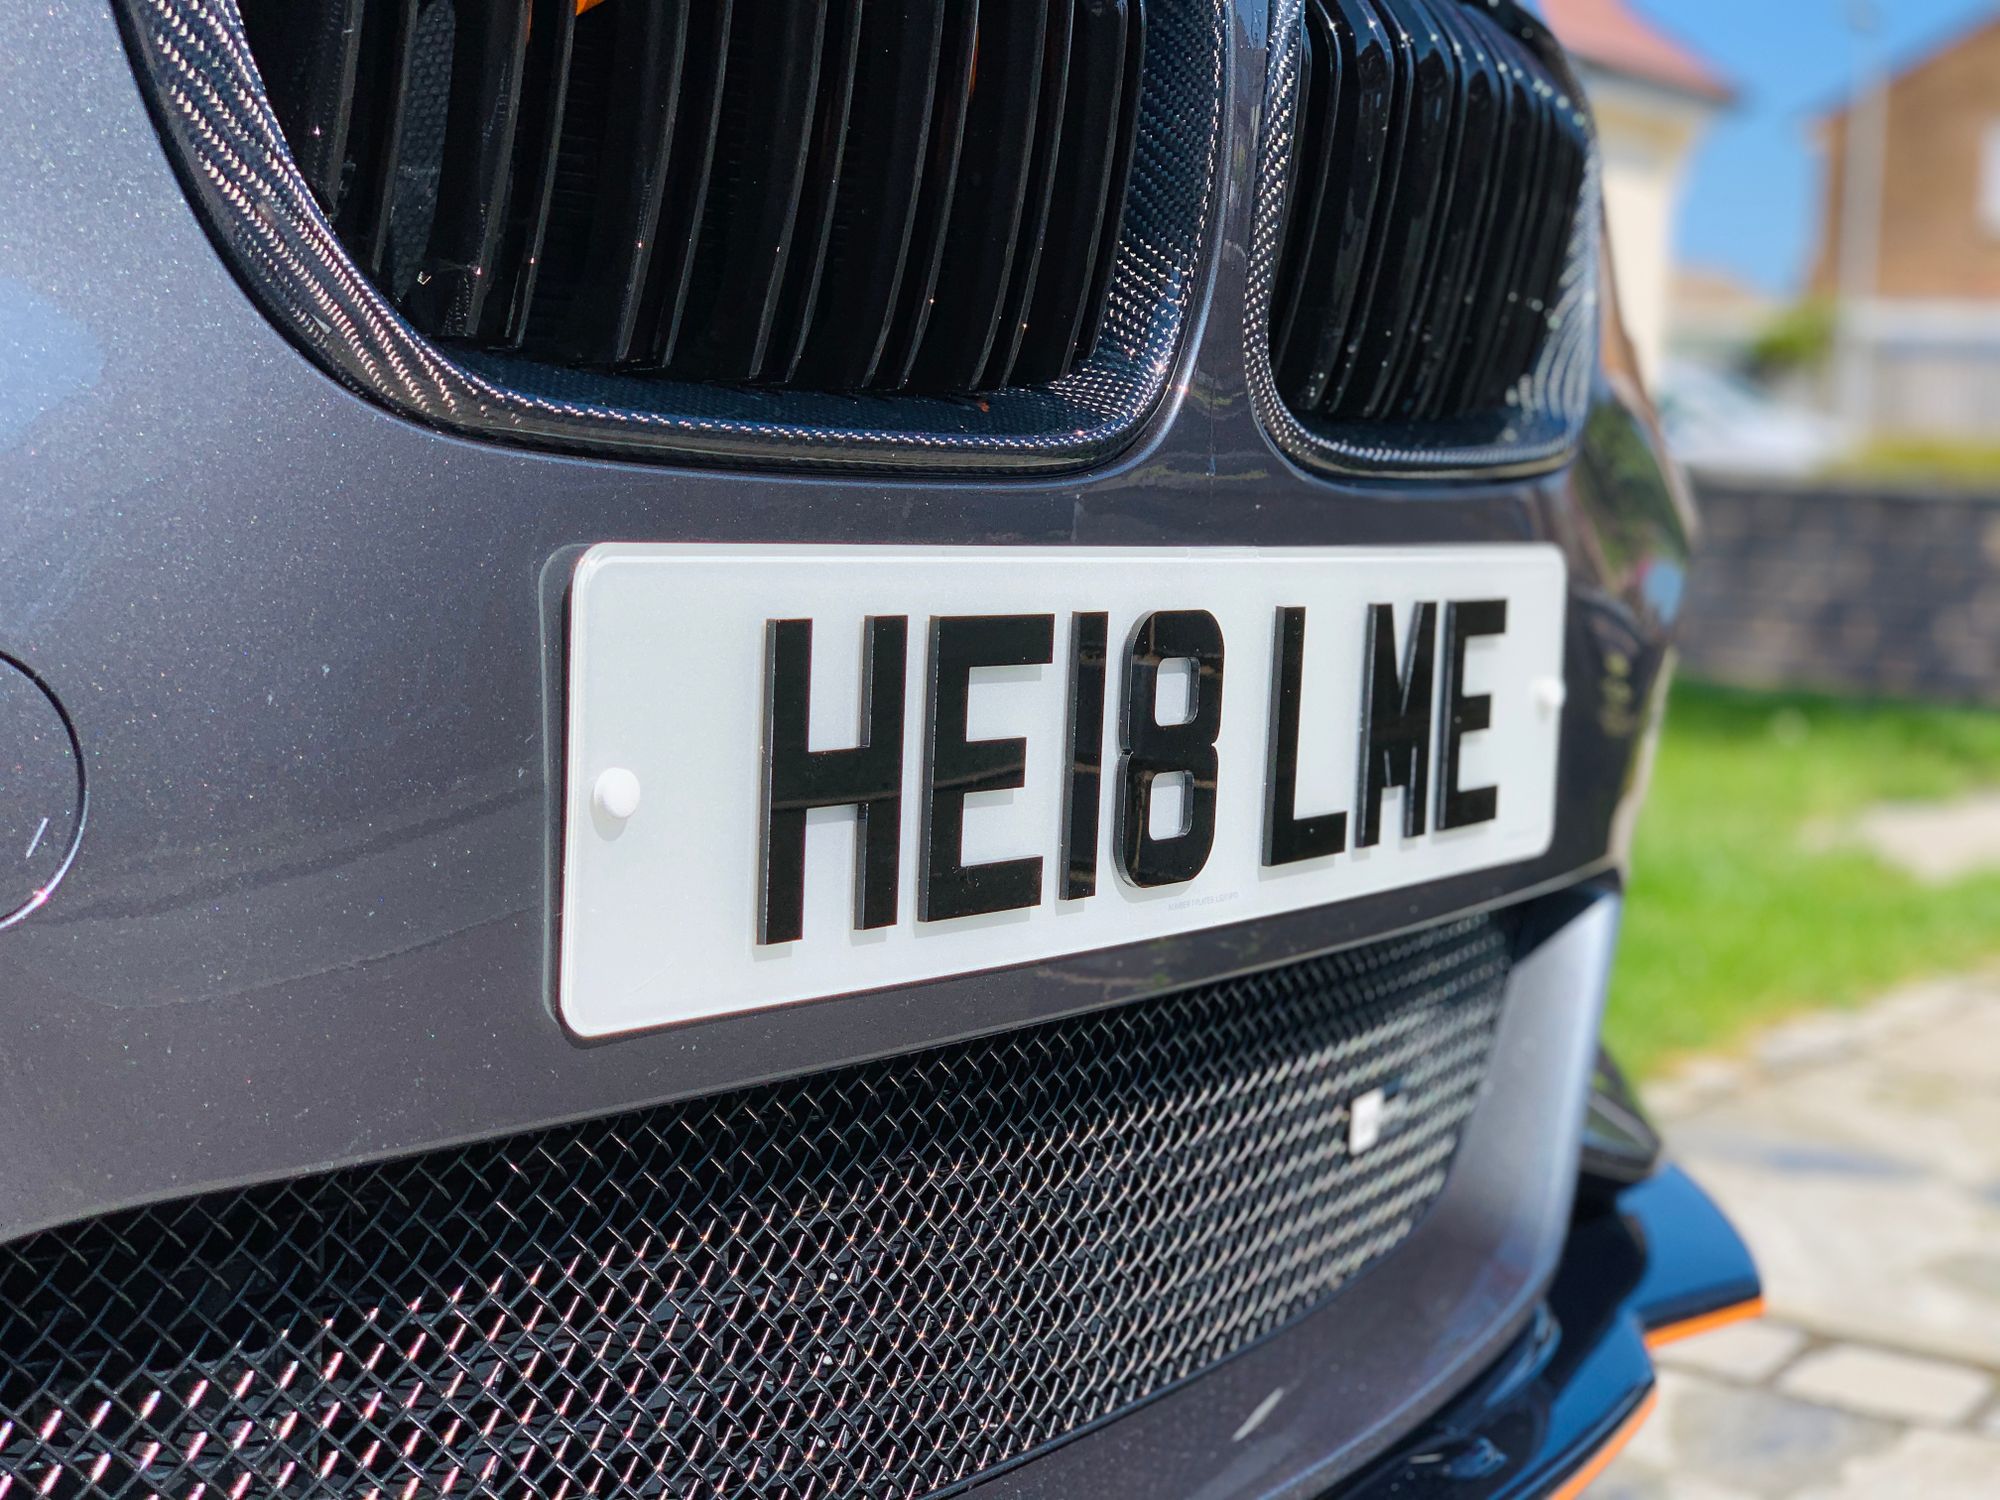
It's not a huge difference, but it's another nice little personalisation.
More to come!
I recently got to take my car on a bit of a driving adventure and during the preparation for doing ~3,000 miles in 10 days, I did a few more handling modifications that really transformed the car. I will probably dedicate the entire next blog post in the series to those because there are quite a few things to cover and explain! Following that, there are still at least a couple more blog posts worth of work on the car to talk about, so if you're enjoying the series, there's more to come!
Parts
Here's the list of part used in Part 15 and where you can get them.
For all of the interior items, you should contact your local BMW dealership and they should be able to price match or beat the prices here:
Carbon Interior Kit – 51952454348 - £514.99
Carbon Gear Selector – 61312250698 - £119.99
Carbon/Alcantara Gear Surround – 51162343740 - £56.99
Carbon/Alcantara Hand Brake – 34402222539 - £110
Carbon/Alcantara Arm Rest – 51162405916 - £159.98
M Performance floor mats - 51472407300 51472409929 - £162.49
M Performance pedal supports + footrest - 35002232278 51472413361 - £169.99
The total for the above would be £1309.44 including VAT and delivery to mainland UK.
The engine cover I had painted by Kustom Covers here in the UK. They do a great job as you can see and their prices includes return postage.
For the 4D plates, there are numerous suppliers here in the UK but I used Number1Plates and got the 4D laser cut premium acrylic.
View all of the other blog posts here: The BMW M140i Project Series