
As a modern day smartphone packs about as much punch as a low spec laptop or even desktop, Wardriving with a GPS enabled device became a whole lot easier. Using a WiFi and GPS enabled Android smartphone I have accurately mapped out every available WiFi network in Clitheroe. Concluding my series on WiFi (in)Security it's time to see if your WiFi network is on the map, and if there's anything you need to do to secure it.

Introduction
Whilst it might sound dark or suspicious, Wardriving is simply the act of searching for WiFi networks. Originally a hacker might have patrolled their local neighbourhood in their car with a laptop scanning for networks with little or no protection for them to exploit. As technology became more mobile Warriding, Warjogging and Warwalking became feasible but the terms never stuck. I wonder why... Now, as the technology is so widely available and so mobile, people have started projects and studies purely out of interest or entertainment to map the available WiFi networks in their local area, much as I have done.
The Setup
As long as you have a GPS and WiFi enabled Android device you have everything you will need. Head over to the Google Play Store and download a free copy of Wigle Wifi Wardriving. Once started, Wigle will make a record of every WiFi network that is broadcasting it's information and use your current position from the GPS to geotag the network. All of the information is stored in a database that can then be easily exported for you to create your map with later on. As there was a brief spell of nice weather and I intended on covering a lot of areas that would be hard to navigate in a car, I decided to complete the mapping exercise on a bicycle. With a mount for my phone securely (ish) fixed to the handlebars, my phone would have no barriers to the signals from WiFi networks and should get maximum coverage. You will have to excuse the improvised setup.
The Result
The result is quite striking and as you can see below provides almost a street by street map of the entire town using just WiFi networks. You can interact with the map like you would any Google Map and click on a WiFi network to view more details about it.
If you want a larger version of the map you can click HERE where you can also view all of the raw data used to create the map in a Fusion Table.
Analysis
After compiling all of the data into the Fusion Table it was fairly easy to grab some basic statistics.| Total | 7,514 |
|---|---|
| No Security | 2,886 |
| WEP Security | 296 |
| WPS Enabled | 2,858 |
| WPA/WPA2 Security | 4,332 |
A staggering 2,886 WiFi networks are operating without security, most of which are BT WiFi Hotspots. Whilst anyone can connect to these networks you do require BT account credentials to use the Internet. Still, because traffic to the access point is not encrypted, if the site you're using doesn't employ proper Transport Layer Security (TLS) your communications are susceptible to eavesdropping from anyone in range. If you were to use an open WiFi network you would be at risk of attacks like Code Injection, Session Hijacking, DNS Spoofing and SSL Stripping without an attacker even having to bypass any security.
WEP security is still being used to protect 296 of the WiFi networks detected. Considering my previous blog post explaining Why WEP Is No Longer Capable Of Protecting Your WiFi, if you realise that your network is one of those 296, you really should take steps to upgrade your security.
WPS was advertised as being enabled on 2,858 of the access points located. Covered in my previous blog on How WPS Makes It Even Easier To Crack Your WiFi Security this probably isn't a good thing. Where possible you should upgrade your router firmware and disable WPS.
Finally, 4,332 networks were protected with WPA or WPA2 security. Whilst no indication of key strength can be obtained it's a good start that a majority of networks are using a security protocol that can at least withstand trivial attacks. Even if your network is secured with WPA or WPA2, when was the last time you changed your WiFi password and is it strong enough? Take a look at the demonstration of how easy it is to break weak WPA/WPA2 passwords in my previous blog explaining why Even WPA Can't Compensate For A Weak Password.
Create Your Own
Creating your own WiFi map is really easy and won't cost you a penny assuming you already have a suitable Android device. The Wigle app is free to download and Google provide Fusion Tables and Google Maps for free too. To get started you can go ahead and download Wigle from the link above or just search for it on the Google Play Store. Make sure you have GPS enabled on your device and start the app. Wigle will start listening for WiFi networks that are broadcasting their information and as soon as you have a GPS location fix, will start tagging them and storing them in the database. Here you can see Wigle started up waiting for a GPS location.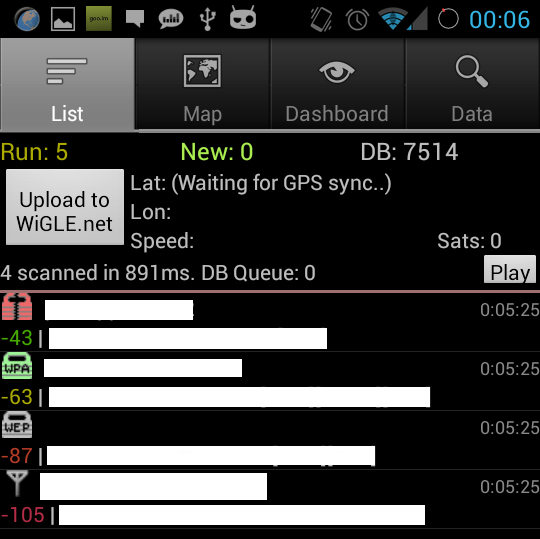
Once started Wigle will tell you how many networks it has picked up in total for this session up at the top; look for 'Run'. Next to that you have 'New', which is how many of those networks detected have not previously been found. On the right you have 'DB' which is the total number of networks you have scanned and stored in the database. When the app has a GPS location fix, all you need to do is walk/run/drive/ride around the area you want to map and let the app record the data. Once you've covered everywhere that you want to map, you need to select the 'Data' tab at the top and click 'KML Export DB'. This will export the entire database to a KML file.

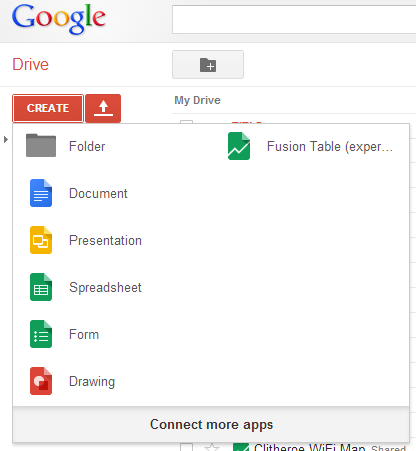
Once the database has been exported you need to get the file over to your PC. Use a file manager to locate the file and email it to yourself or connect your phone via USB and copy it over. Google Maps wasn't intended to plot such a large amount of data and struggles to handle it gracefully. Thankfully, you can use Fusion Tables to create one and get much better levels of performance if you have a large number of networks in the list like I have. Open your Google Drive (formerly Google Docs), click 'Create' and then 'Connect more apps' if you don't already have Fusion Table.
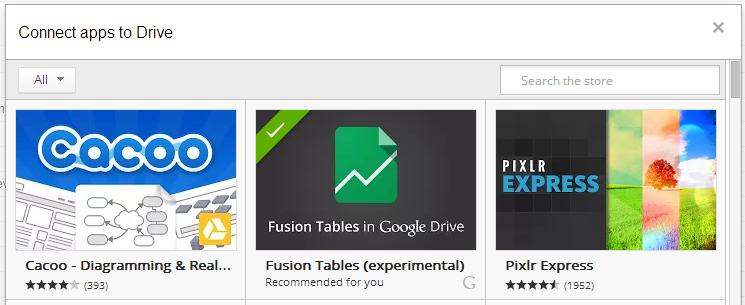
In the 'Connect apps to drive' window, locate 'Fusion Tables', select it and click 'Connect'.
Once you have connected Fusion Tables to your Google Drive account you should be able to create a new Fusion Table.
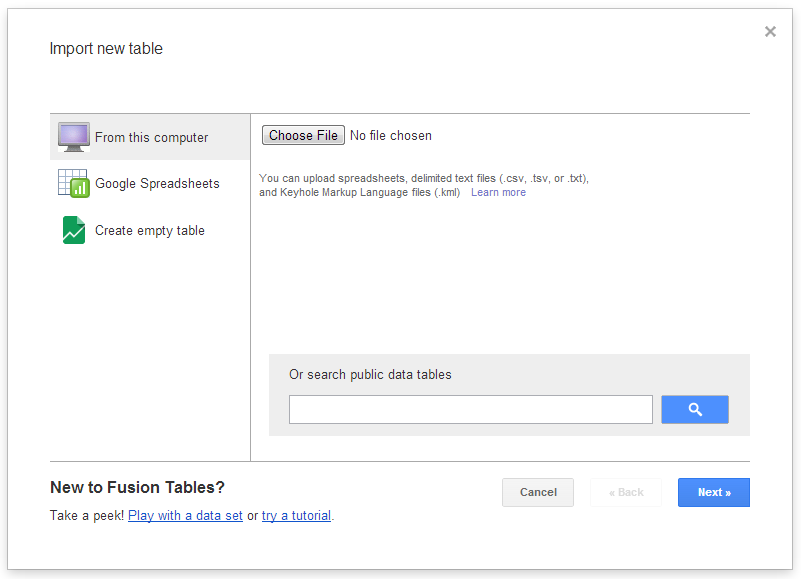
Unfortunately I had some trouble when trying to upload my KML file.
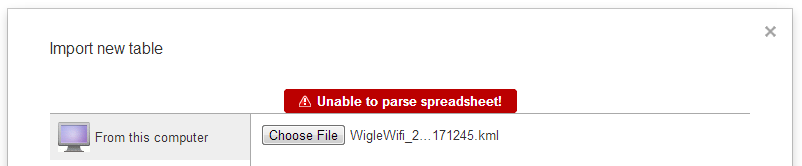
I tried several approaches to resolve the problem but in the end it proved easier to use a KML to CSV converter and upload the data as a CSV file. I also tried exporting the data as CSV from the Wigle app but it turns out that didn't work either. The best way is to export as KML and convert it.
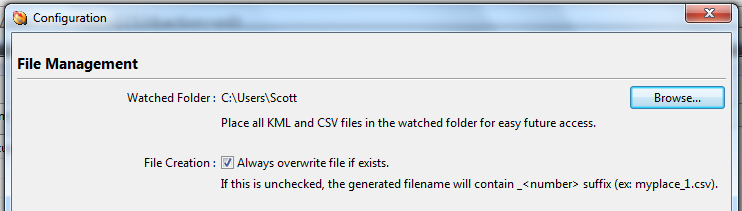
Once you have KMLtoCSV installed open the app, click File and then Configure. In the config window change the watched folder to the location of your KML file and click OK.
Once you do that your KML file should appear in the left pane. When you double click the file it should load the data and show a preview.
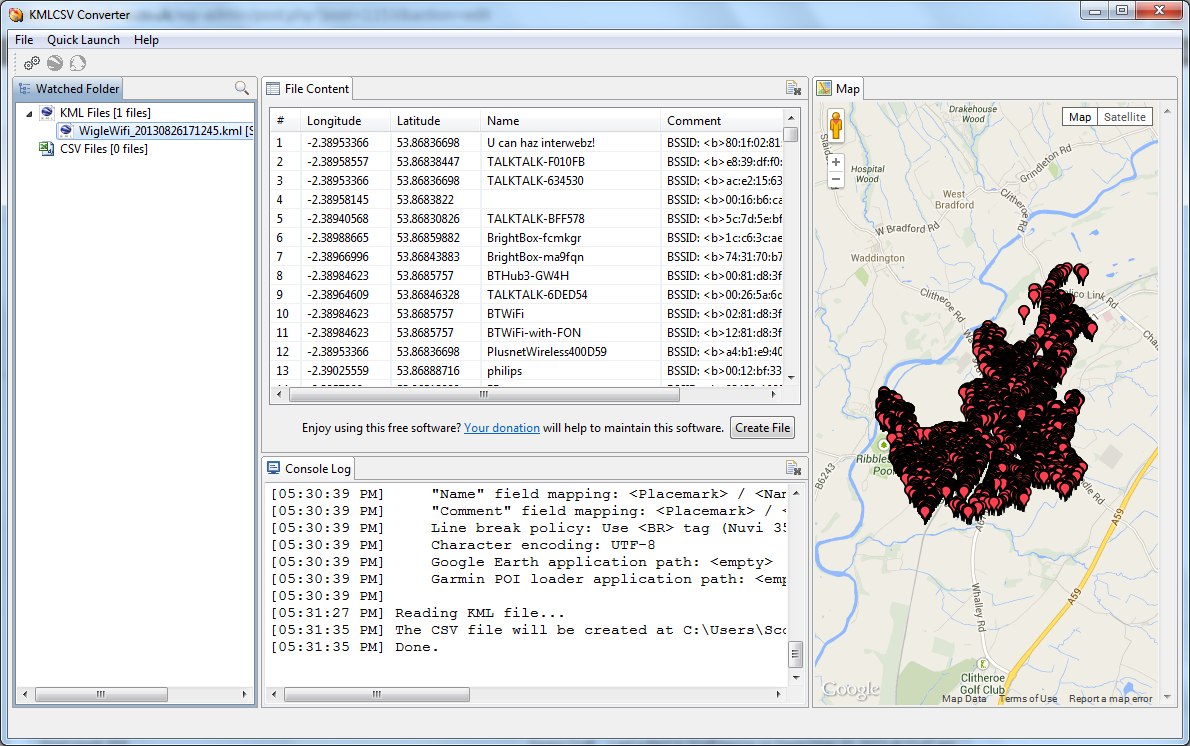
Once the preview has loaded hit the 'Create File' button and the CSV export of your data will be created in the same directory.

Now if you try to create a new Fusion Table with the exported CSV you should have no problems.
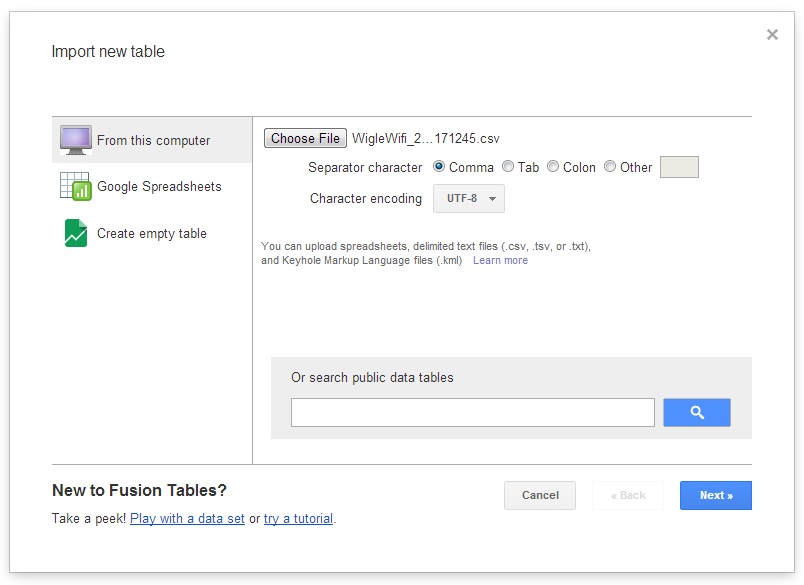
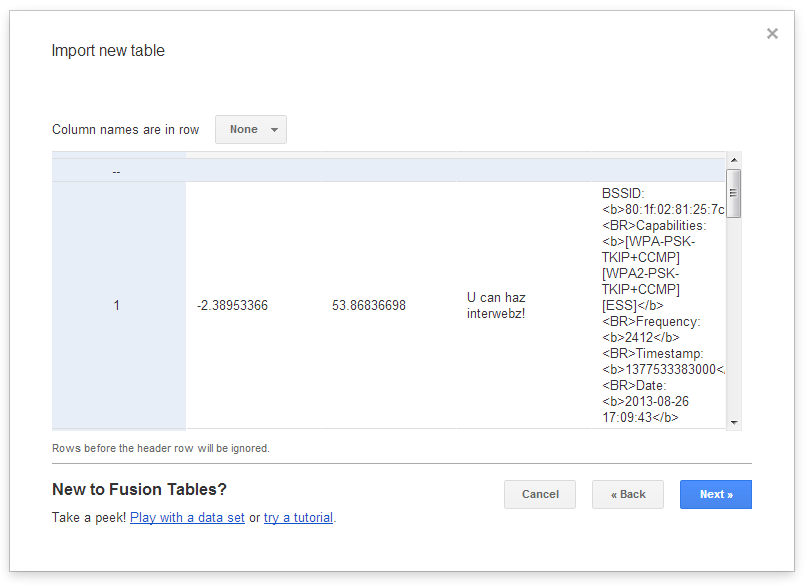
When prompted to select where the column names are choose the 'None' option as we need to insert column names later.
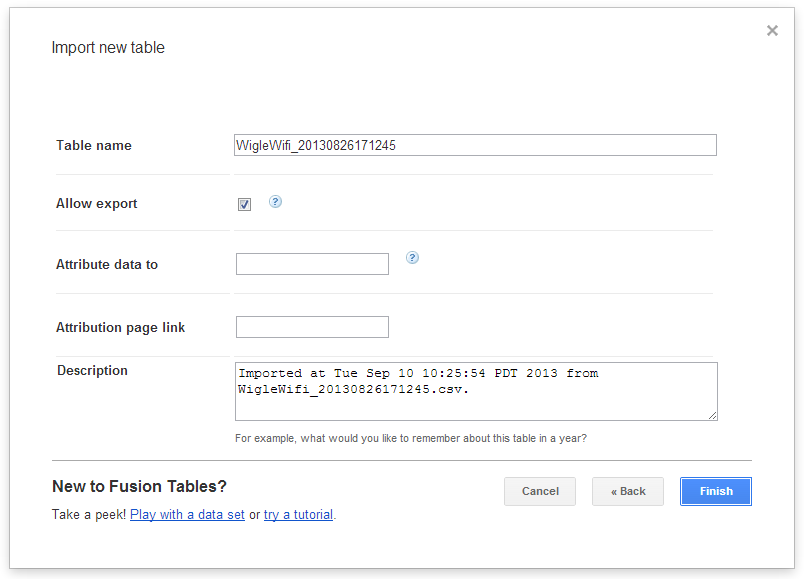
You can then insert some data about the table such as a name and description and then click Finish to create your table.
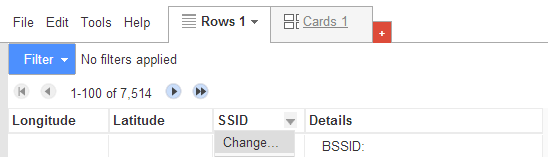
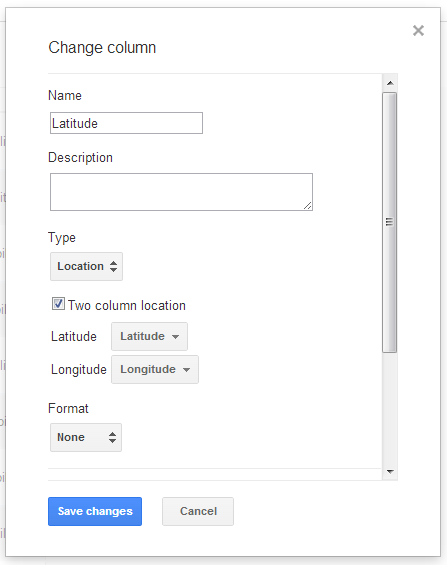
Once the table is up and running you need to change the column names. Use the little drop down menus on each column and set the appropriate names. When setting the name for the Latitude and Longitude columns make sure to change the type to Location and set the appropriate columns.
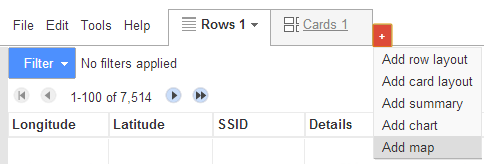
Don't worry, there's only one more step to go! You just need to use the red plus icon to add a new map to the Fusion Table and it will plot all of the points using the location columns you just created.
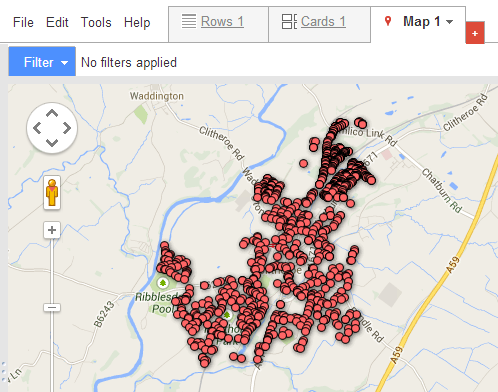
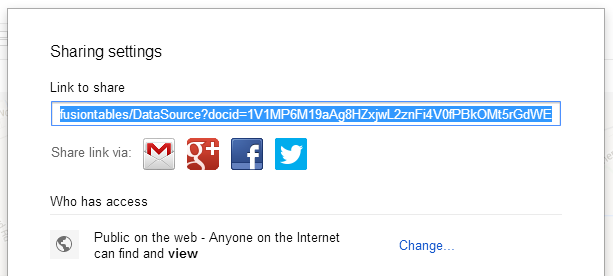
There we have it! The map should be nice and responsive and you can zoom all the way in to select individual networks. If you want to link to the map click Share in the top right and alter the sharing settings. You can make the map public so anyone can find and view it, or restrict it so that only people with the direct link can access it.
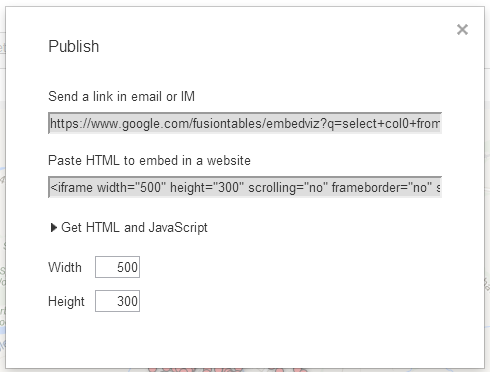
You can also embed the map or data in a HTML page like I have done above. Select the Tools menu and then Publish. Here you can get the necessary code to embed it in your page.
If you do decide to create your own WiFi map please let me know in the comments below! For now, make sure you take steps to protect your WiFi network where needed.