
I had a little break from the car writing but now it's time to hit it again and look at the next batch of upgrades and this blog post is going to contain some big ones! It's time for some more power 😎
The Series
In the last blog post a lot of effort went into improving the chassis and the transmission which is going to help a lot now that more power is coming. It's time for a Stage 2 Tune on the car and with all of the extra BHP and torque it's also time for some new wheels and tyres!
Stage 2 Tune
Back in Part 4 I talked about the various stages of tuning and how the Stage 1 tune took the car from 335bhp and 369lb/ft (250kW and 500Nm) up to 402bhp and 465lb/ft (299kW and 630Nm) with no modifications required. With the further work done on the car it's now time to take the next step and see what Stage 2 can bring.
I didn't want to just flash a new map and drive though, I wanted to verify the power claims of the maps I was flashing and I also wanted to make sure the car was running right and nothing was wrong. To do that, it needed to be strapped down to a dyno (dynamometer / rolling road) and tested under load to measure the power/torque output but also take live diagnostics from the car while it was working hard. If there's any time something will go wrong, it will be when you have your right foot pinned to the floor and that's exactly when you need to be checking things.
After much review reading online, and talking to tuning shops, I decided to go with the Performance Centre which is a couple of hours drive from me in the North-East of England. They would dyno the car to give me a true power output and also took countless diagnostic readings with the car running under load. I wanted to make sure everything was running perfectly. We checked ignition timing, air/fuel ratio and boost pressure amongst other things but I was also looking for a smooth power/torque curve, and boy did it provide one!
For those that haven't seen or experienced this before, putting your car on a dyno is pretty cool. The car is driven onto a set of rollers in the floor which allow it to 'drive' but without going anywhere. That's kind of handy because there's a heap of diagnostic equipment hooked up to it! It's strapped down so it can't move and there are a load of fans to replace the natural airflow you'd have when travelling at speed which is really important because the car would overheat without them. The car is taken up to steady speed in the appropriate gear to prepare for a power run and then you're ready. In my car, with the ZF8 transmission, the power run should be done in 6th gear as that has a 1:1 gear ratio so the engine isn't being helped or hindered by the gearing, allowing for an accurate read of the power output from the engine. With all that done, you drop the hammer and hope for the best.
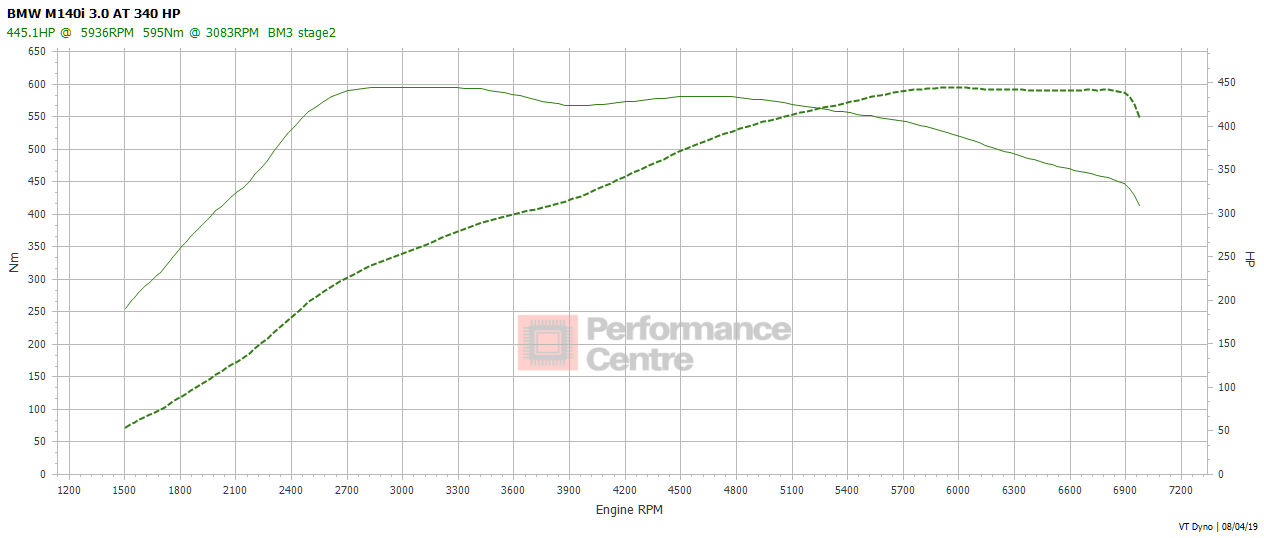
Yeah! Peak power was 445.1 BHP (331.9Kw) at 5,936 RPM and peak torque was 438.8 lb/ft (595Nm) at 3,083 RPM which is crazy! Another thing I love about this is just how long that torque pulls for. Peak torque at just over 3,000 RPM and it doesn't really start to dip until you're well over 5,000 RPM.
Some people chase peak figures, and my car could comfortably hit the 620Nm peak torque of the gearbox, but the torque fades quickly after the peak at ~2,700rpm. Whilst I have a lower peak torque of 595Nm at ~3,000rpm, it holds a much higher torque output until ~5,000rpm. This makes the car a lot more driveable and means I can hold gears longer and continue to pull through the revs.
Given my targets of 450bhp and 440lb/ft (335kW and 596Nm) I'm really happy to be hitting 445.1bhp and 439lb/ft (332kW and 595Nm). Seeing what other owners had achieved with their cars put me right on target for what to expect with mine.
New Wheels
With the stage 2 map on the engine and the stage 3 map on the transmission, the car was certainly becoming a handful to drive! Calling it a handful is not actually doing it justice, sometimes this thing will try to break loose at the rear even when you're not trying... I put in place boost limits in 1st and 2nd gear but it's still, constantly trying to break traction at the back under hard acceleration and when cornering. Remember that I have the LSD too and I'm still getting unexpected oversteer! It's time to try and tame the beast a little and for that, we need some new footwear.
The car came with the following setup:
Front 7.5J x 18 ET45 - 225/40/18
Rear 8.0J x 18 ET52 - 245/35/18
Being a rear wheel drive car it's typical to have a 'staggered' setup where the rear wheels are wider than the front because you need more traction on the driven wheels. The values to pay attention to there are 7.5J, which means a 7.5" wide wheel, and 8.0J, which likewise is an 8" wide wheel. You will also see the rear tyres are of course wider to match the wider wheel (225mm wide at the front and 245mm wide at the rear). Here's a full breakdown of all the numbers from my front wheels and tyres if you're interested:
7.5J - This means a 7.5" wide wheel.
18 - This means an 18" wheel diameter.
ET45 - The German words Einpress Tiefe, or insertion depth in English, is how far in mm the mounting face of the wheel is offset from the geometric centre of the wheel. This is the 'offset' of the wheel and controls how far it sinks into the wheel arch or how far it sticks out of the wheel arch. A larger offset sinks the wheel into the wheel arch and a lower offset causes it to poke out of the wheel arch.
225 - The tyre is 225mm wide.
40 - The profile is how 'tall' the tyre is. You often hear of 'low profile' tyres which means the tyre wall isn't very big on the tyre. This is the height in mm of the tyre wall measured as a % of the width. This tyre is 40% of 225mm tall, so 90mm tall.
18 - The diameter of the tyre in inches. This should generally match the diameter of the wheel!
With all of those measurements in mind, if you want your car to have better grip then you have a couple of options. The first is to put better tyres on the car and this is so often overlooked when people want to make their cars go faster. People will chase more BHP all day long and not think about tyres but better tyres allow you to accelerate faster, corner faster and brake harder. All of those things are more important than most power gains and are also pretty important when it comes to safety too. My car came with Michelin Pilot Super Sports from the factory as it was a 'performance spec' BMW so it's reasonably well equipped with good rubber to start with. That said, with all of the power gains and handling improvements the car has seen, the tyres need improving.
Tyres come in an insane number of varieties and everything from how hard the rubber is to the tread pattern on the tyre can dictate how they perform. The softer the rubber the more grip you have as it will 'stick' to the road better, but they will also wear faster as a result. Stickier tyres was definitely on my list of things to do, but the other option is also bigger tyres so that you have more rubber in contact with the ground.
There are 2 dimensions that matter that you can control when it comes to the tyres, the diameter and the width. If you think about the tiny patch on the bottom of your tyres, that's all that sticks the car to the ground. Those contact patches are tiny and I mean really tiny! Often they're not much larger than a sheet of A4 paper when all combined and that's all your car has to hold onto Terra Firma! A larger diameter wheel/tyre combo will increase the size of the contact patch from front to back and a wider tyre will increase the size of the patch from side to side. Doing both of these things together, getting bigger and wider tyres, will give you a good step up in terms of traction.
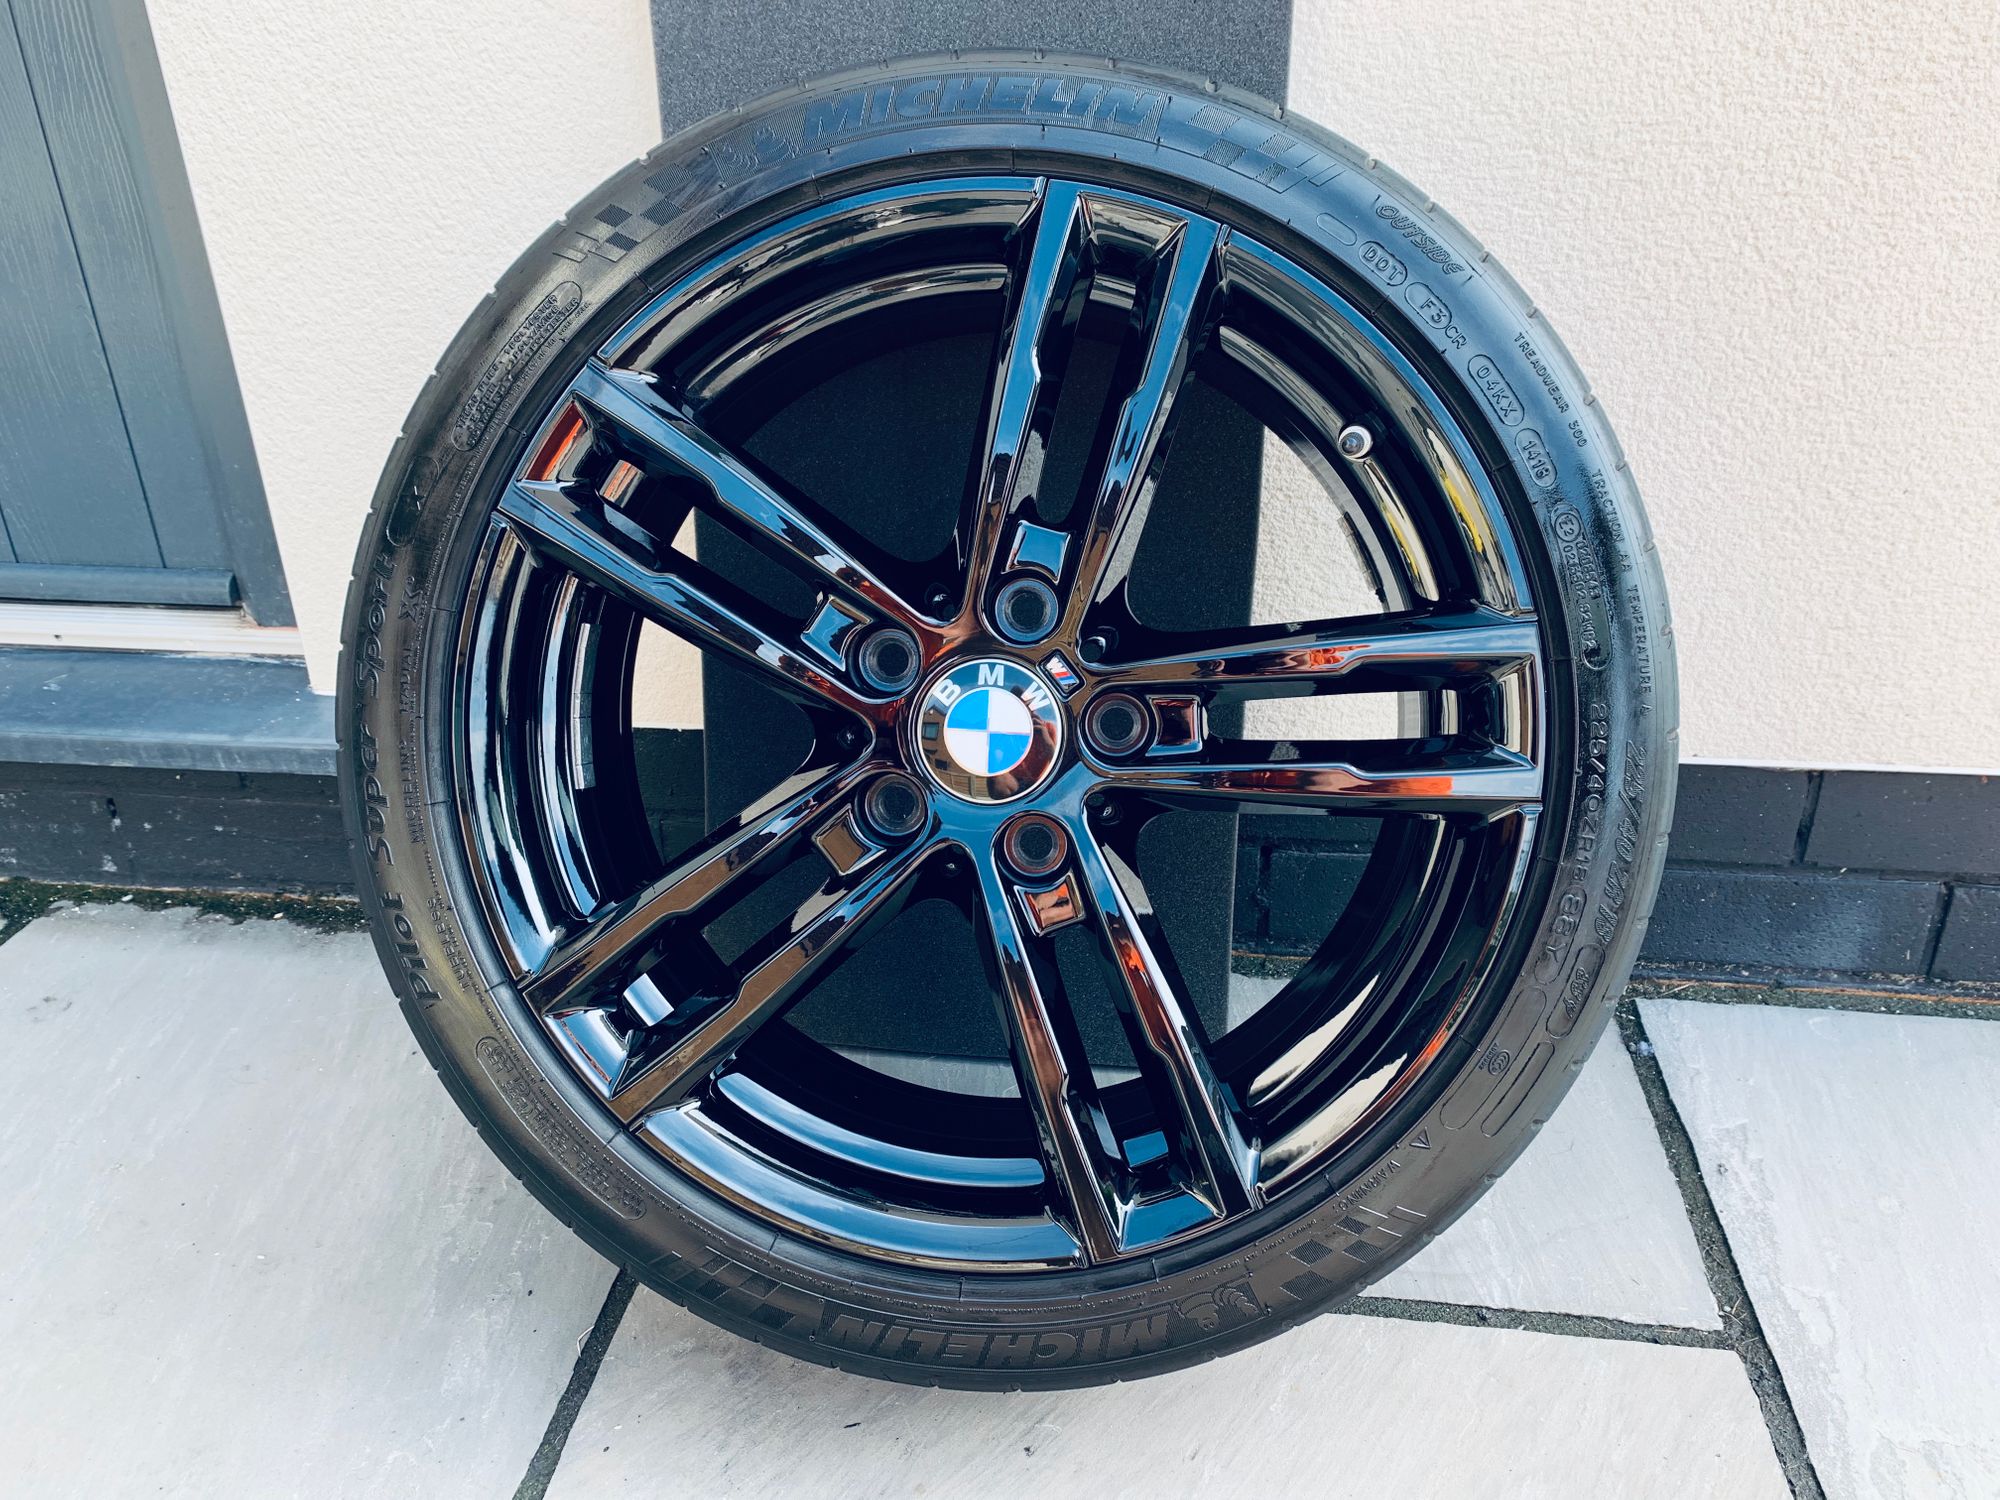
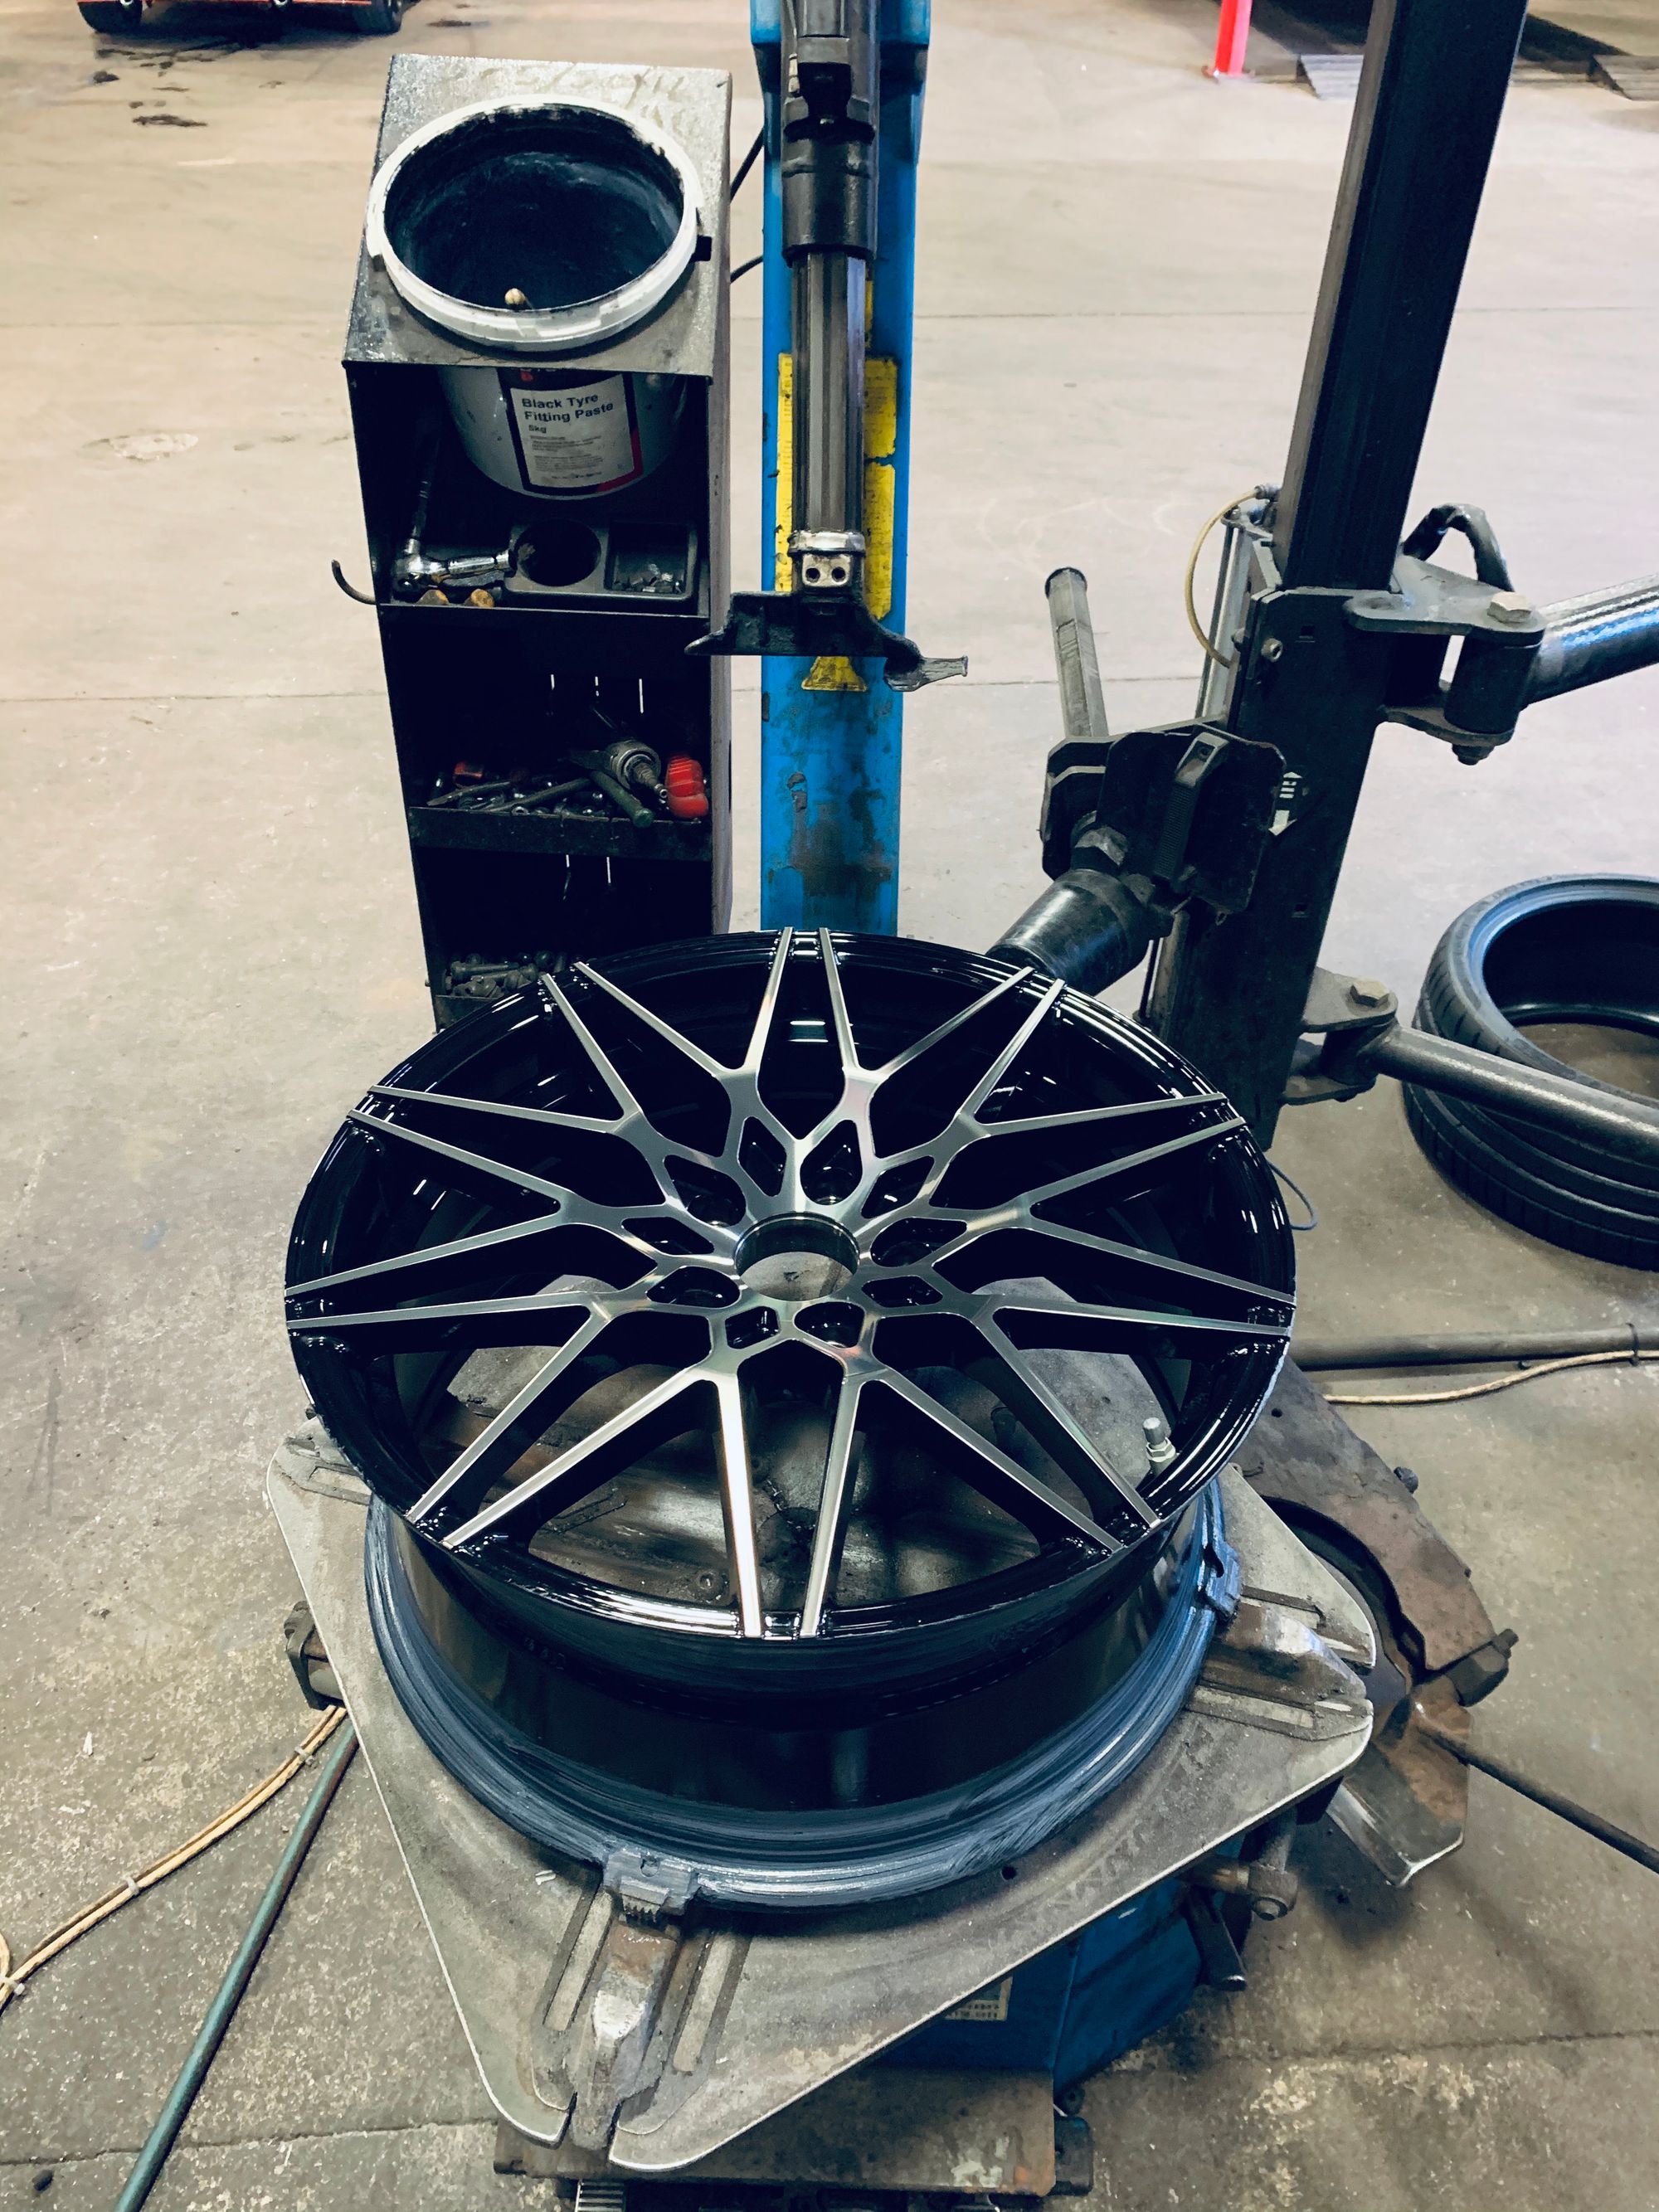
Because I was changing the wheels out for larger ones I could change them to any style I wanted and there's a world of choice out there. The ones that came with the car are known as the '716m' style in gloss black. Here's one of them when I had them off for cleaning.
They're a really good looking wheel but one thing I've always liked is the '666m' wheels you seen on cars like the M2 and M3. What's not to like about these?
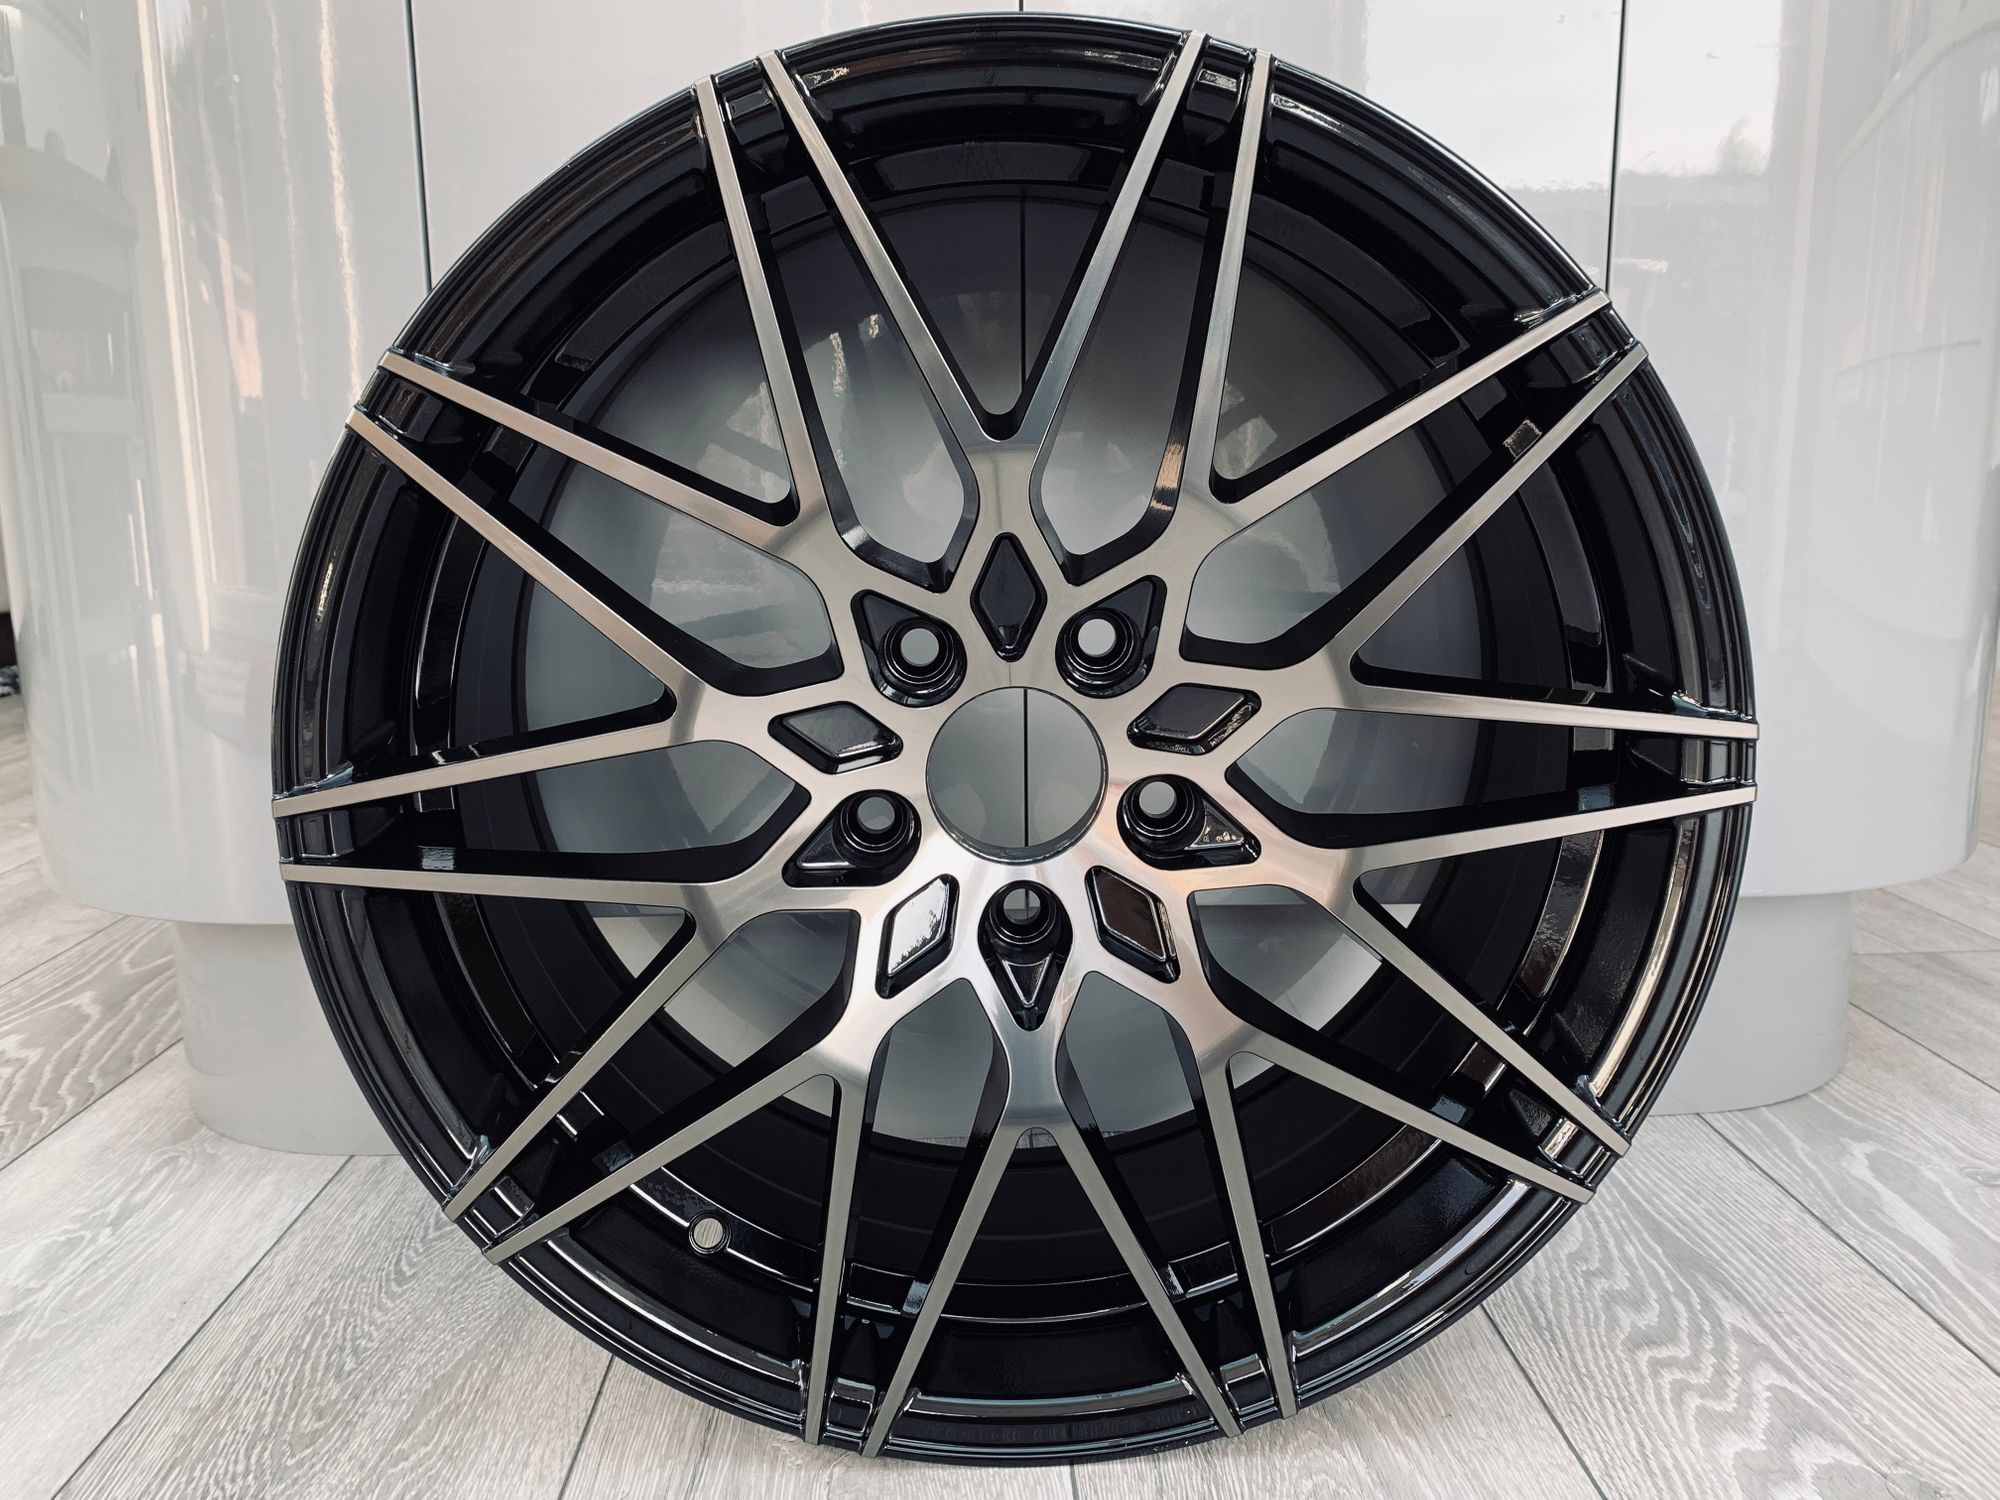
I chose the 19" 666m style wheels known as the VMR V801 and something to watch out for with wheels is how they are made. There are cheap wheels and there are good wheels. Cast wheels are generally best avoided and whilst they are the cheapest variety, there's a reason for that. You can see on the VMR website that my chosen wheels are Flow Formed (sometimes referred to as Flow Forged or Forged Hybrid) and this is a considerably better choice. Flow forming will increase the price a little but you will get a much lighter and much stronger wheel. A lighter wheel is better for performance, of course, and the stronger wheel means it's less likely to buckle or crack on impact.
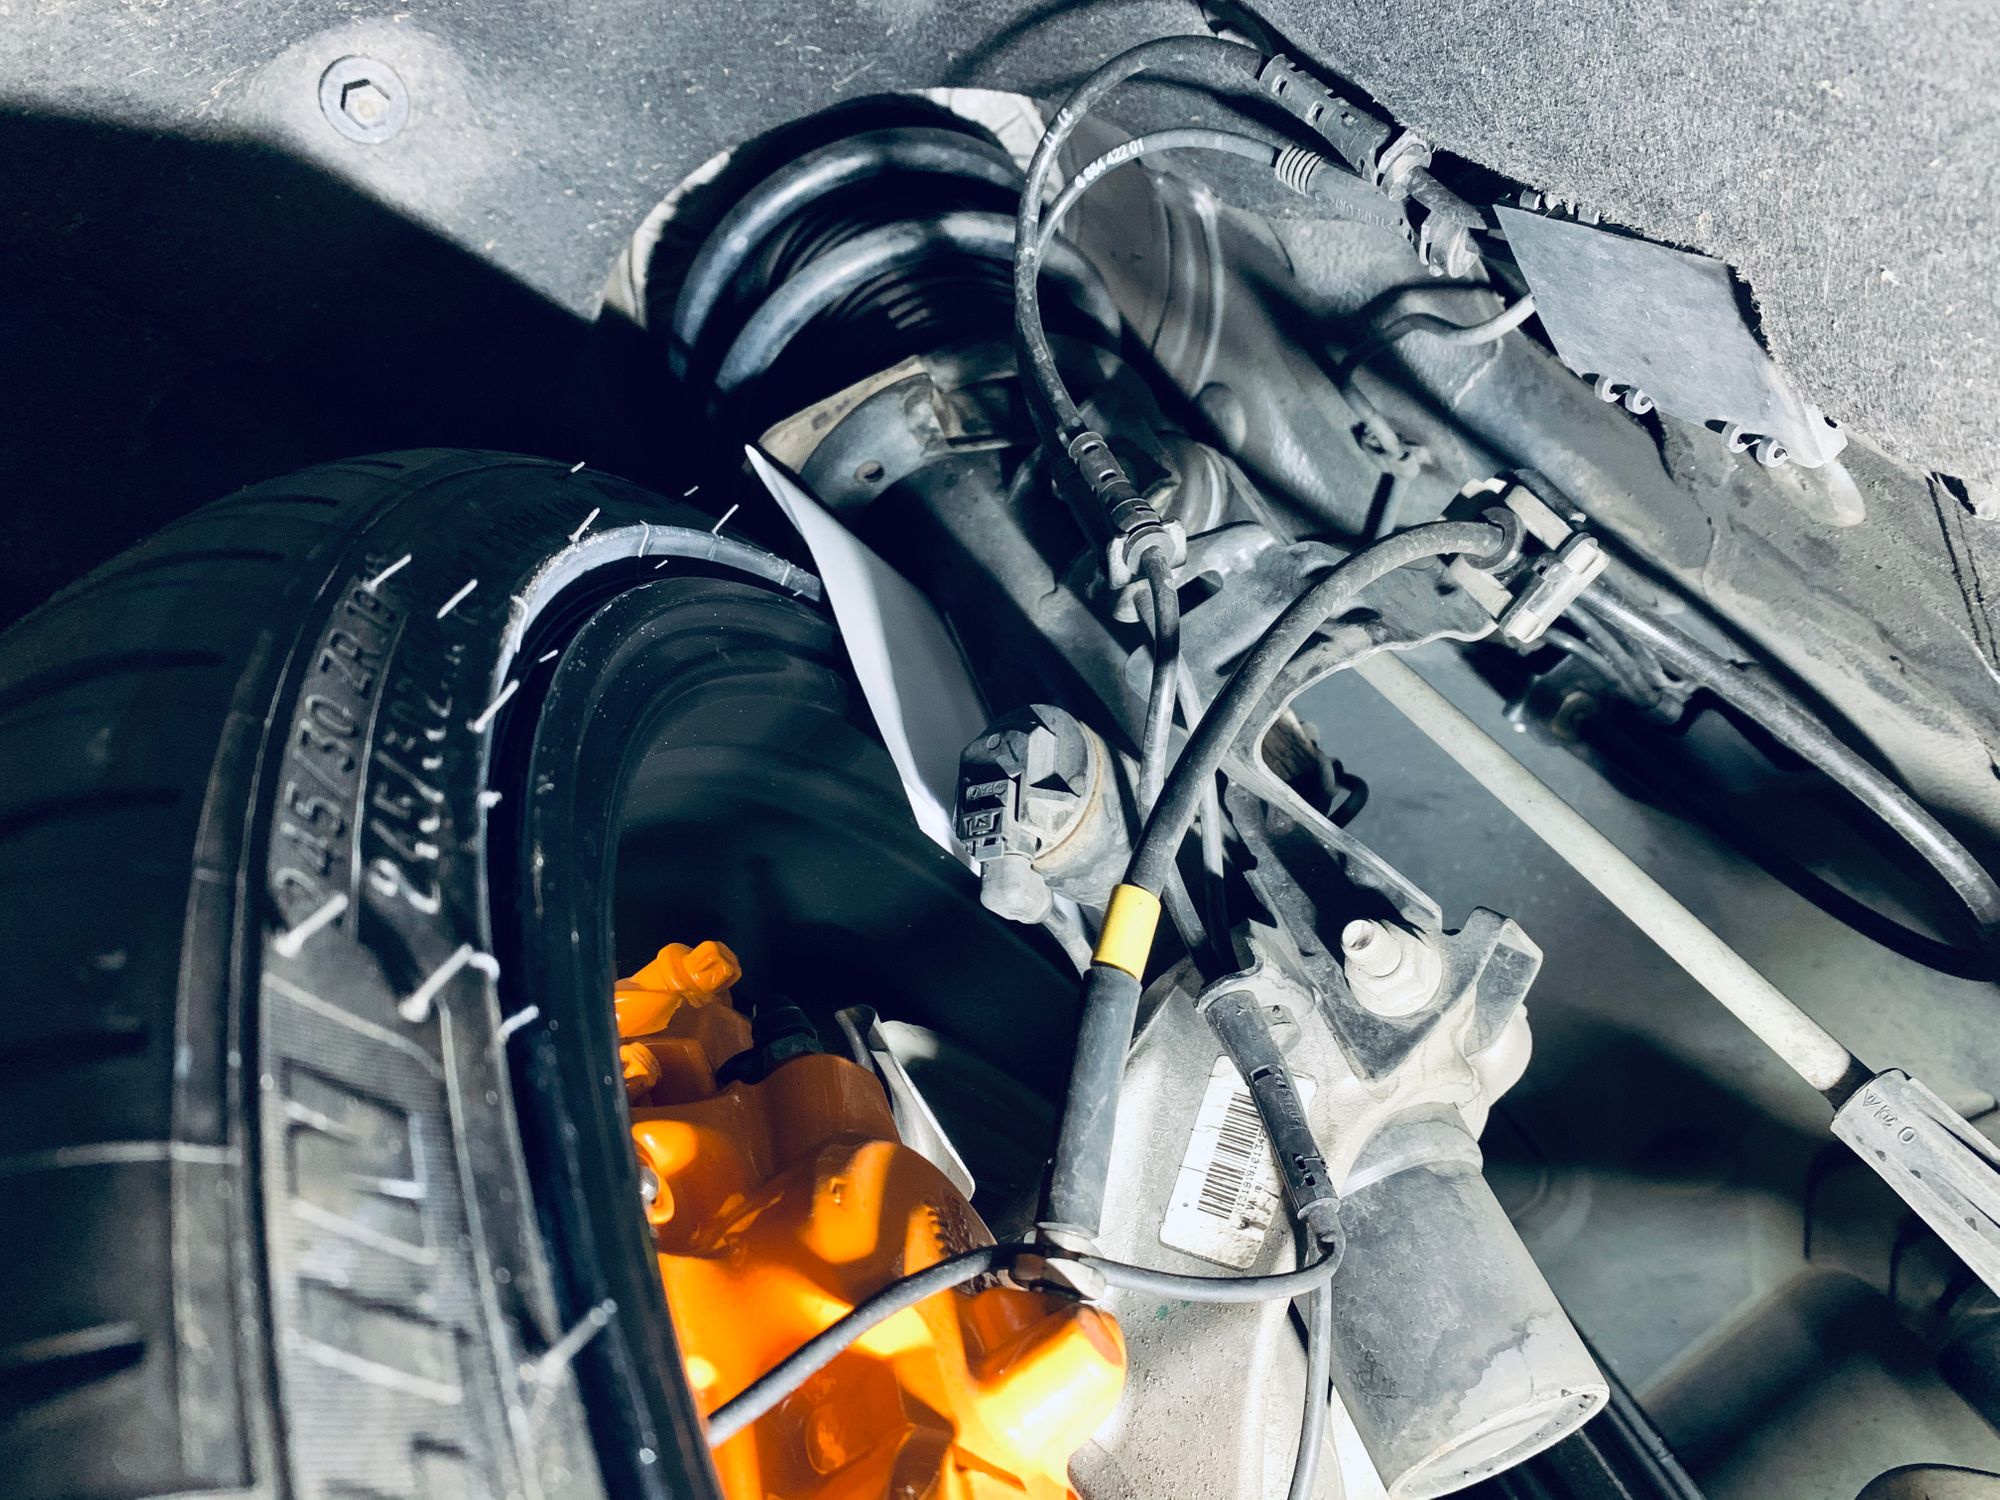
Even though the car started with a staggered setup, I'm now running a square setup on the wheels. Both the front and rear are an 8.5J ET43 wheel but I will be using different tyres to keep the staggered setup so more on that soon. The concern here is fitting the wheels in the arches themselves and it's a careful balance. The front are a whole 1" (25mm) wider wheel and if you kept the same offset they'd probably start making contact with suspension components with that extra 0.5" sticking out on each side. You can see the offsets are different in the measurements above, with the front wheels going from an ET45 to an ET43 offset which will pull the wheel out of the wheel arch by 2mm, giving me an extra 2mm of clearance on the back side of the wheel. You can't pull it too far out as the wheel might make contact with things like the inside of the wheel arch, especially when turning at speed, but that 2mm was all I needed to clear the strut. Once the wheels and tyres were on, here is us using a sheet of folded paper to measure the clearance to the strut because there was no way to get any tool in the gap! You just keep folding it until it's snug in the gap and measure the thickness.
The rear wheels aren't so bad with only a 0.5" increase in total wheel width but the offset is going from ET52 to ET43, pulling the wheel out of the wheel arch by 9mm. This gives more room in the rear wheel arch again and allows for better clearance of components inside like the suspension. I could have easily managed a 9.0J or even, maybe, a 9.5J in here as there are much fewer things to contact in the rear arch so we have a lot more room and obviously we don't need to worry about the wheel turning left or right to hit the arch liner or anything else!
New Tyres
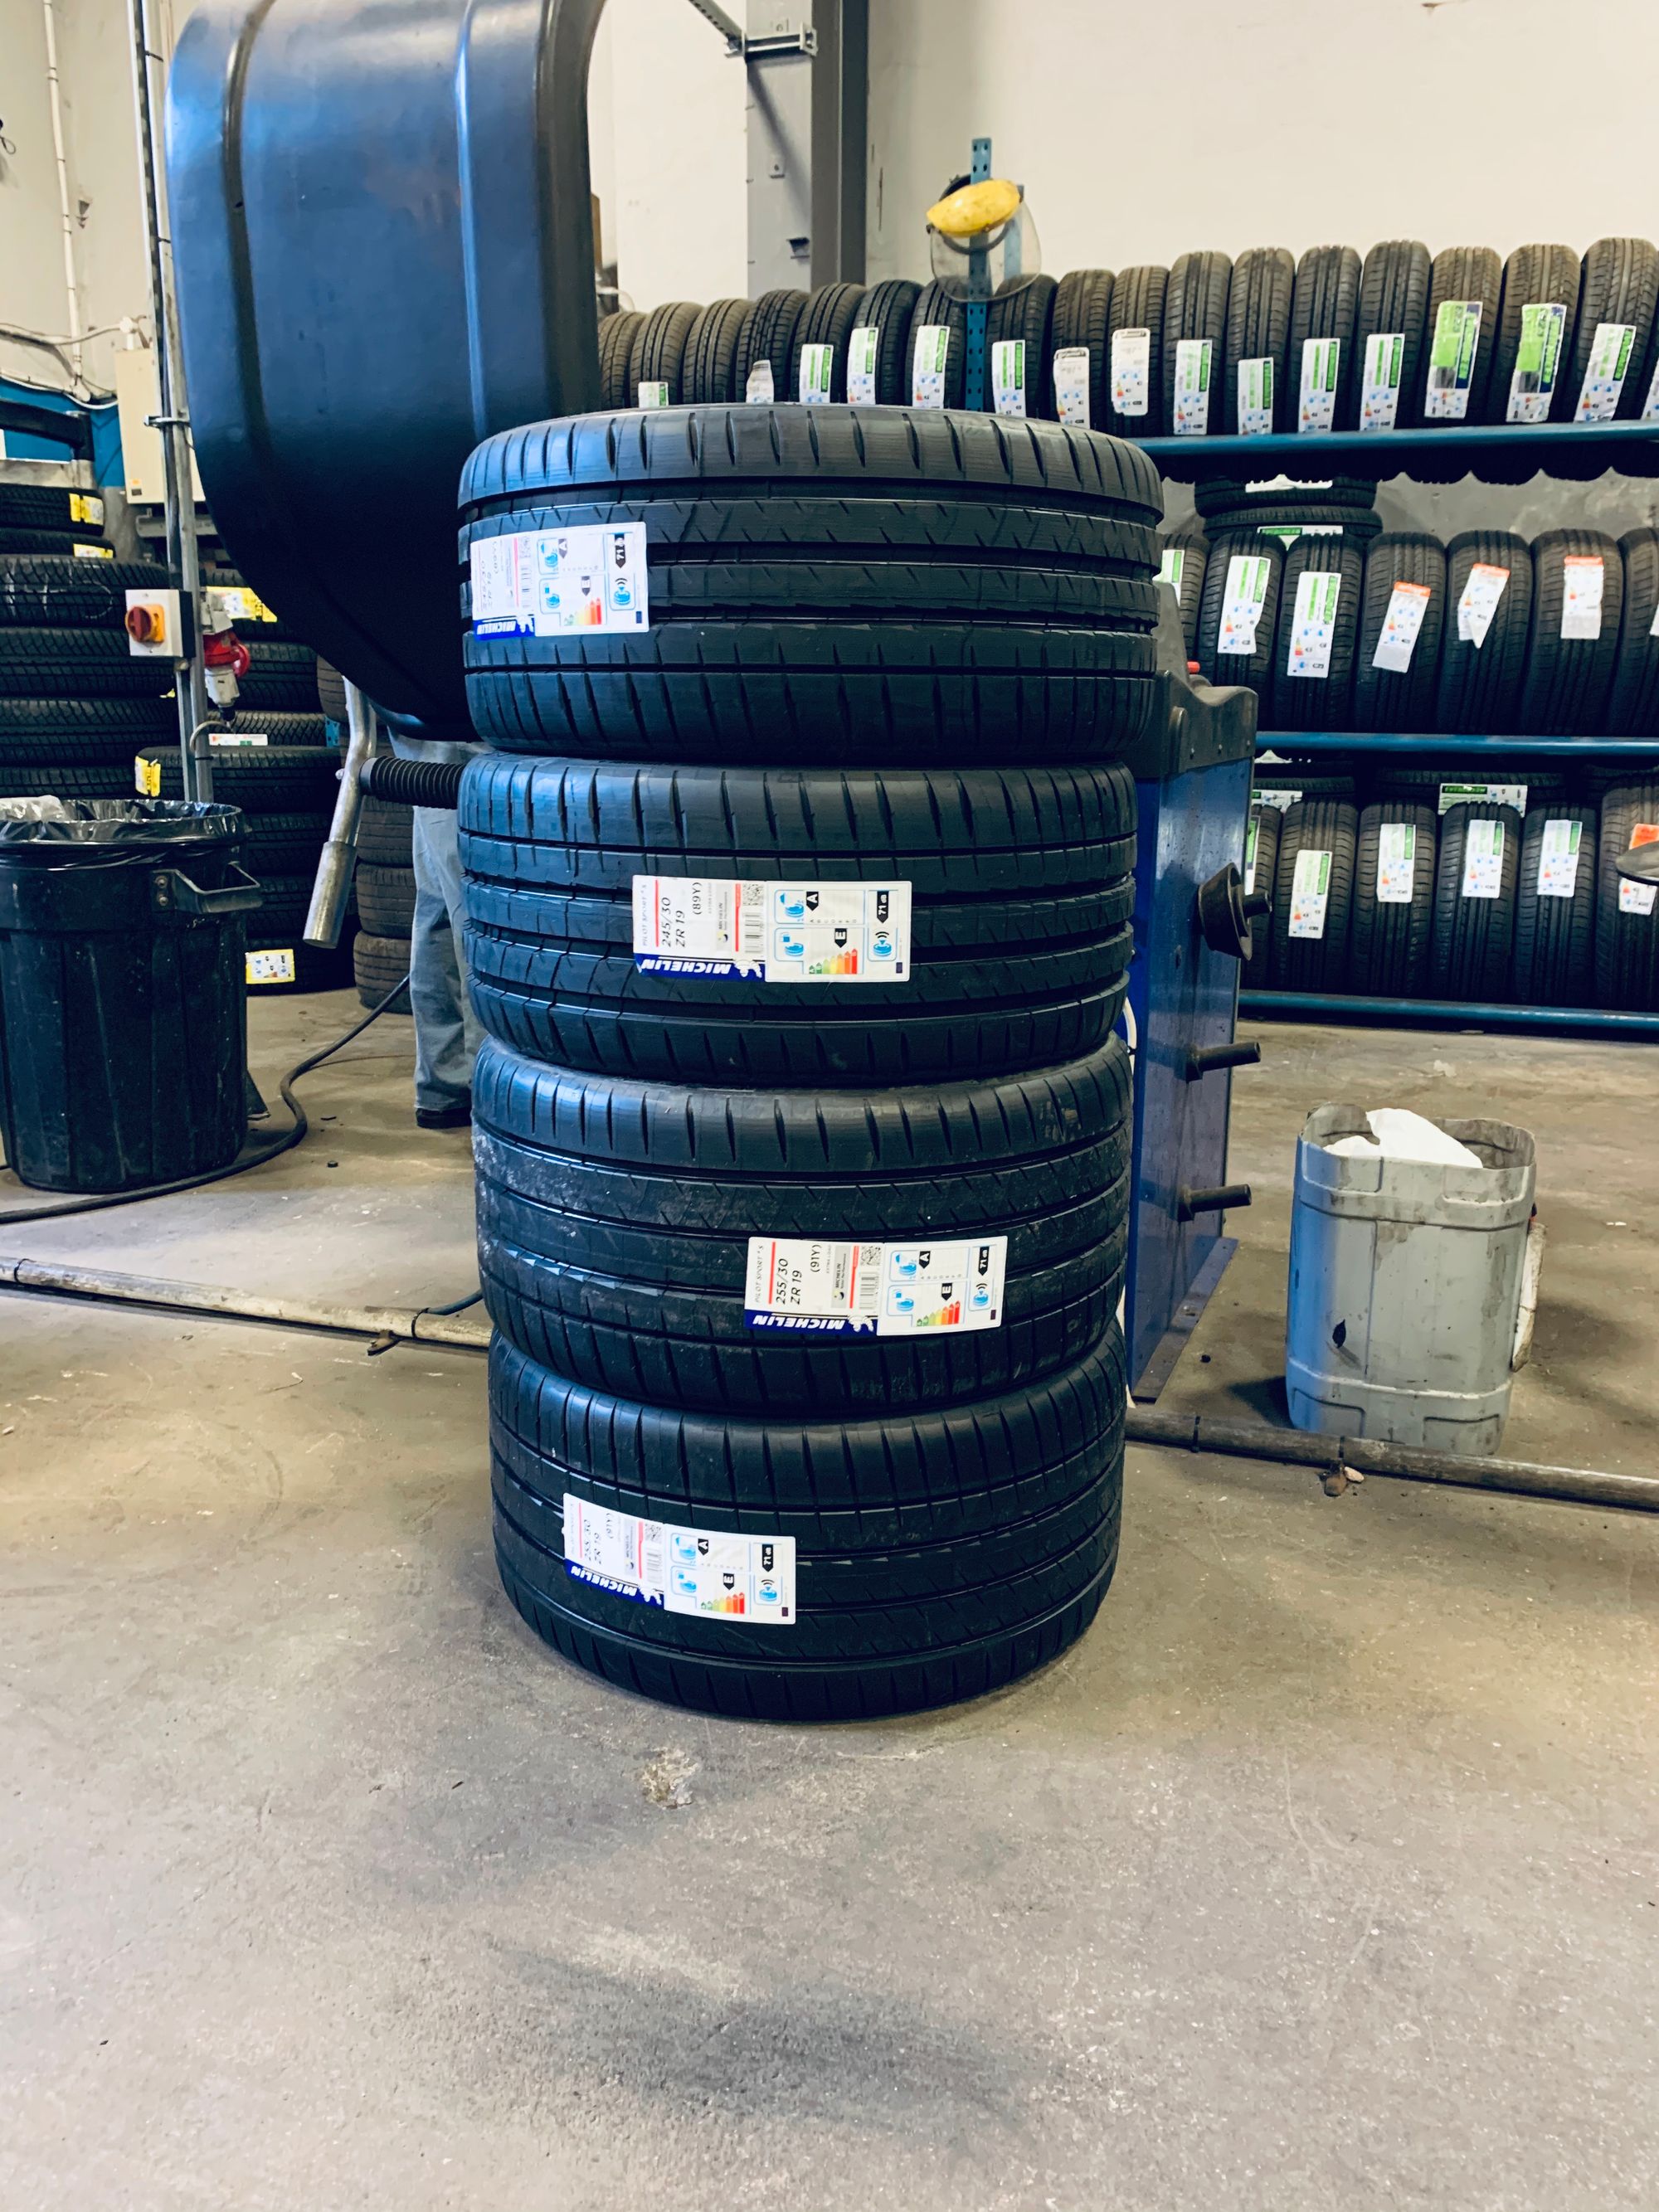
The next big question is tyres and as I mentioned above, purchasing good tyres can make an enormous difference to your car. I had the Michelin Pilot Super Sport which come fitted from the factory and they're a really good tyre... for the car that came from the factory. I just needed more grip, way more grip. The bigger wheels and wider tyres I was going for would certainly help there but I also needed to step up the performance of the tyres too and get something a lot stickier with a lot more grip. In the end I went for the Michelin Pilot Sport 4S and a healthy increase in size all around with 245/30/19 at the front and 255/30/19 at the rear. That makes the final measurements:
Front 8.5J x 19 ET43 - 245/30/19
Rear 8.5J x 19 ET43 - 255/30/19
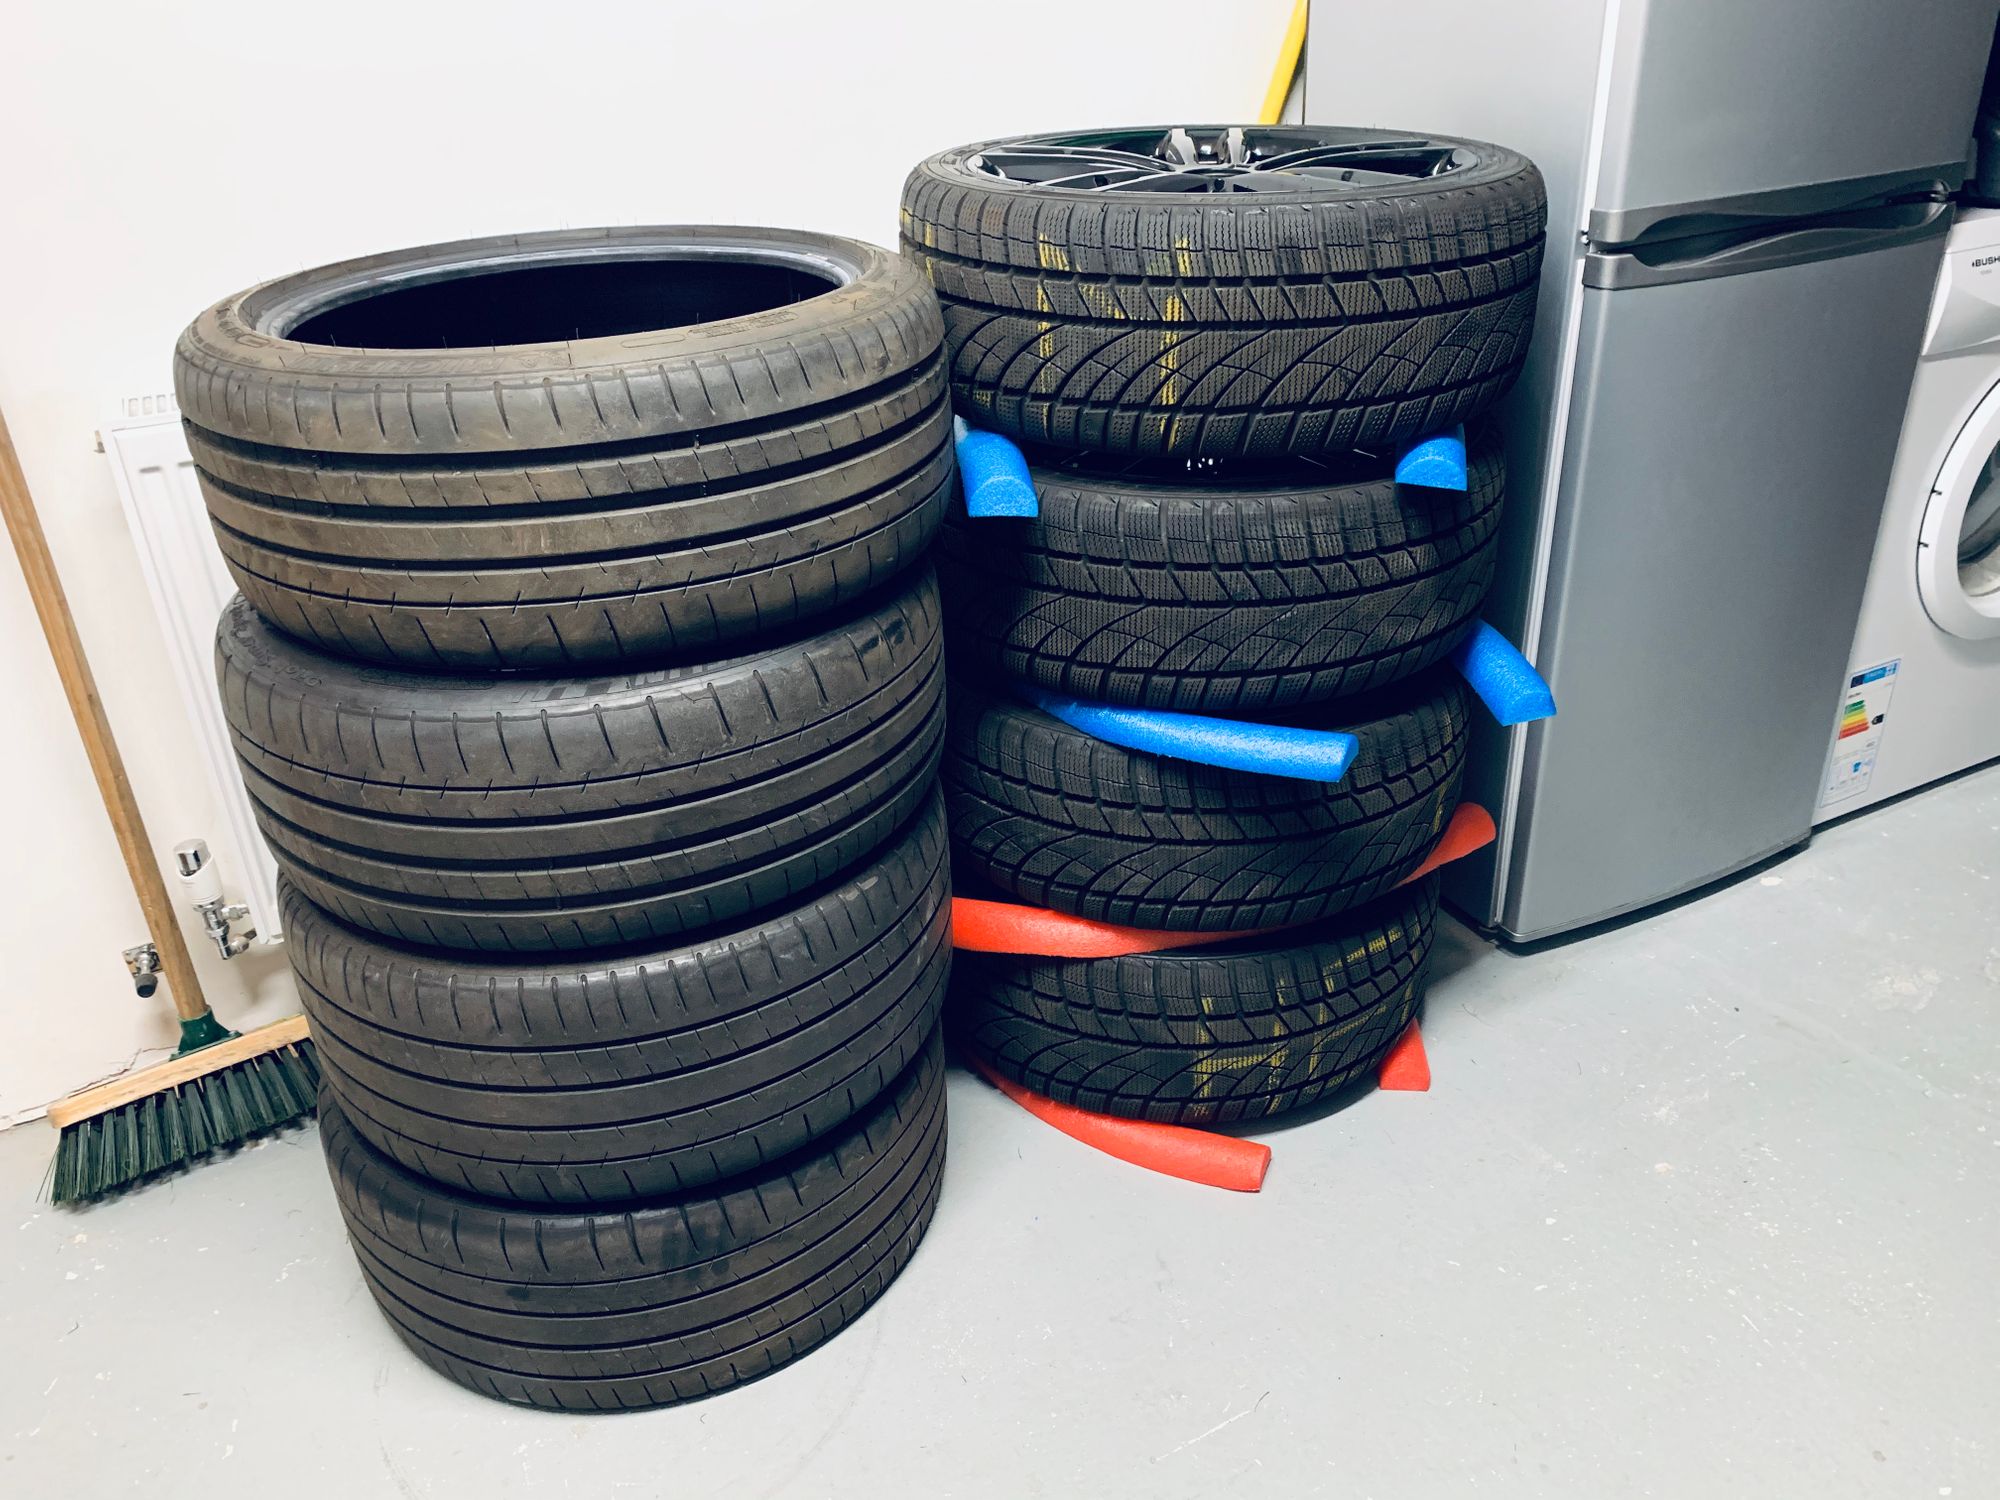
Here's a few snaps of the new tyres being fitted to the wheels. This is the stack off all 4, shiny new tyres ready to go.
The first step is mounting the wheel and then 'encouraging' the tyre to slip over the rim and into place. This usually requires some pry bars and help from the machine.
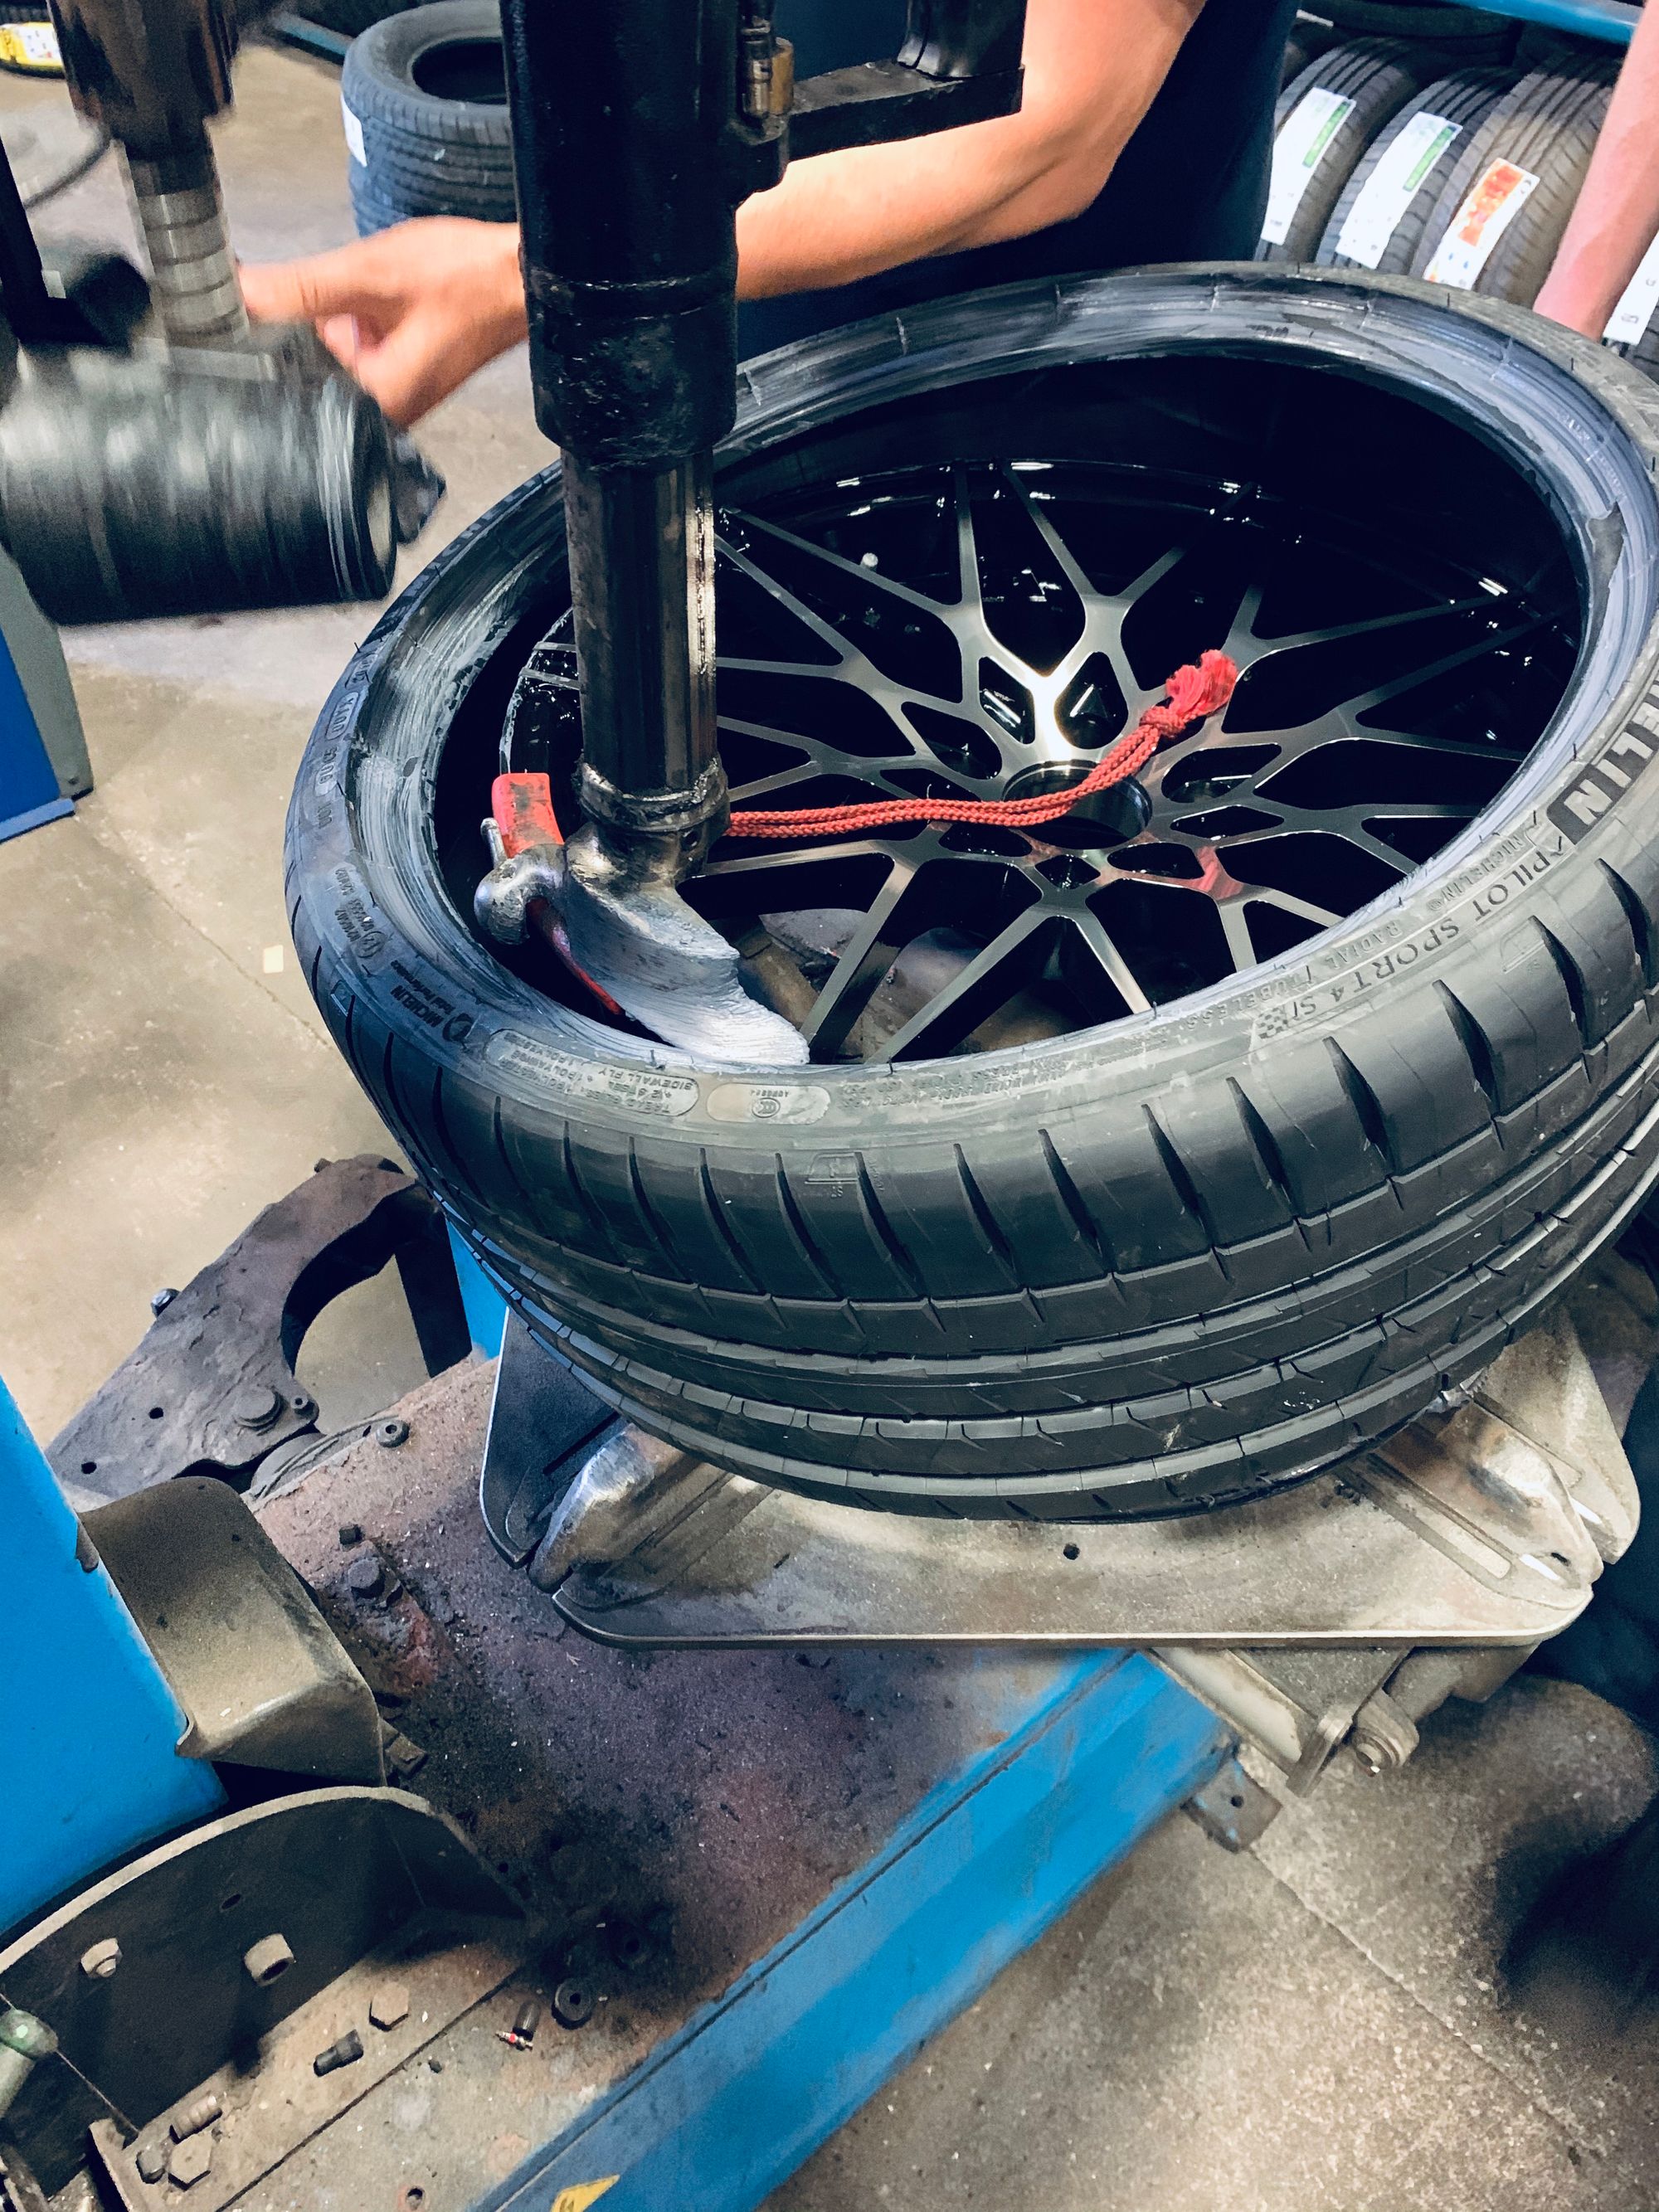
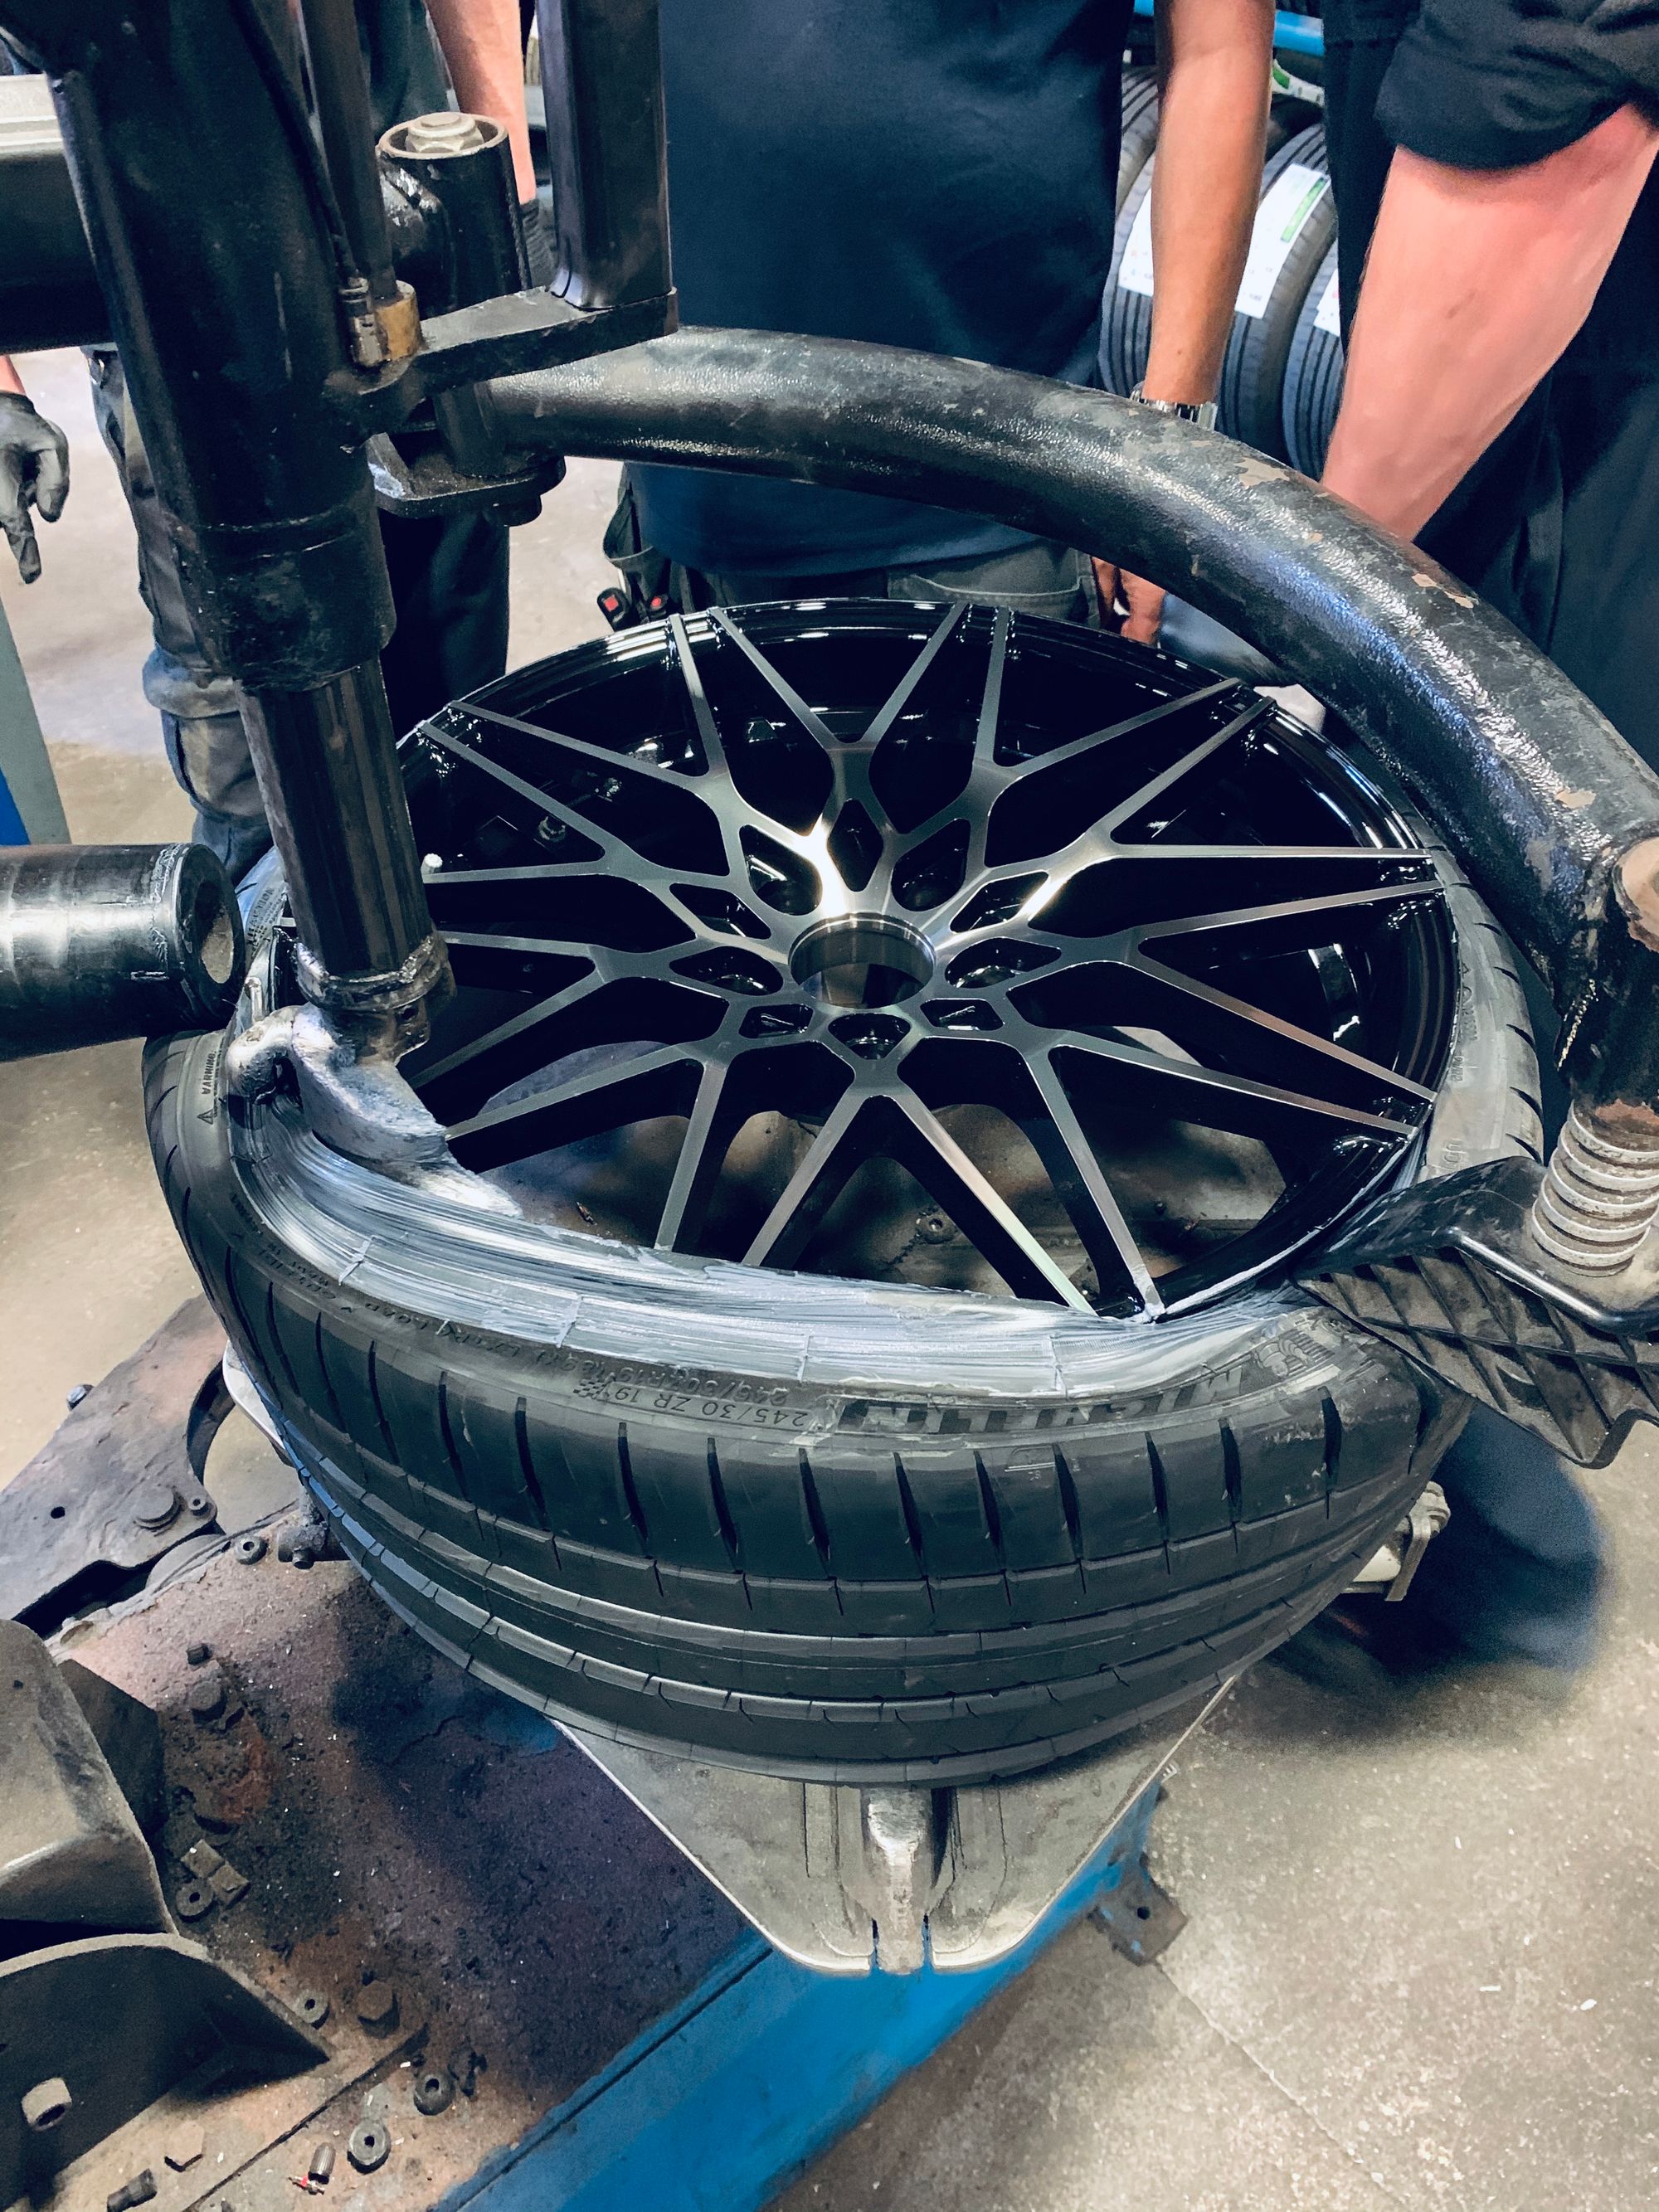
Once the tyre is fitted it can be inflated and then it needs to be balanced. With the manufacturing process of the wheels and the tyres, there can be minor imperfections that cause either to have a minor imbalance. A minor imbalance can cause vibrations, especially at speed, and is sorted out by this next machine. It spins the wheel, measure any imperfection and instructs the operator to attach weights to the inner side of the wheel. The weights can be as small as 5g to make it perfect but once it's balanced, you're good to go.

I was a bit nervous watching it all happen but the new tyres went on without a hitch, the wheels were balanced and then fitted to the car. It was totally worth it, just look at this! 😎
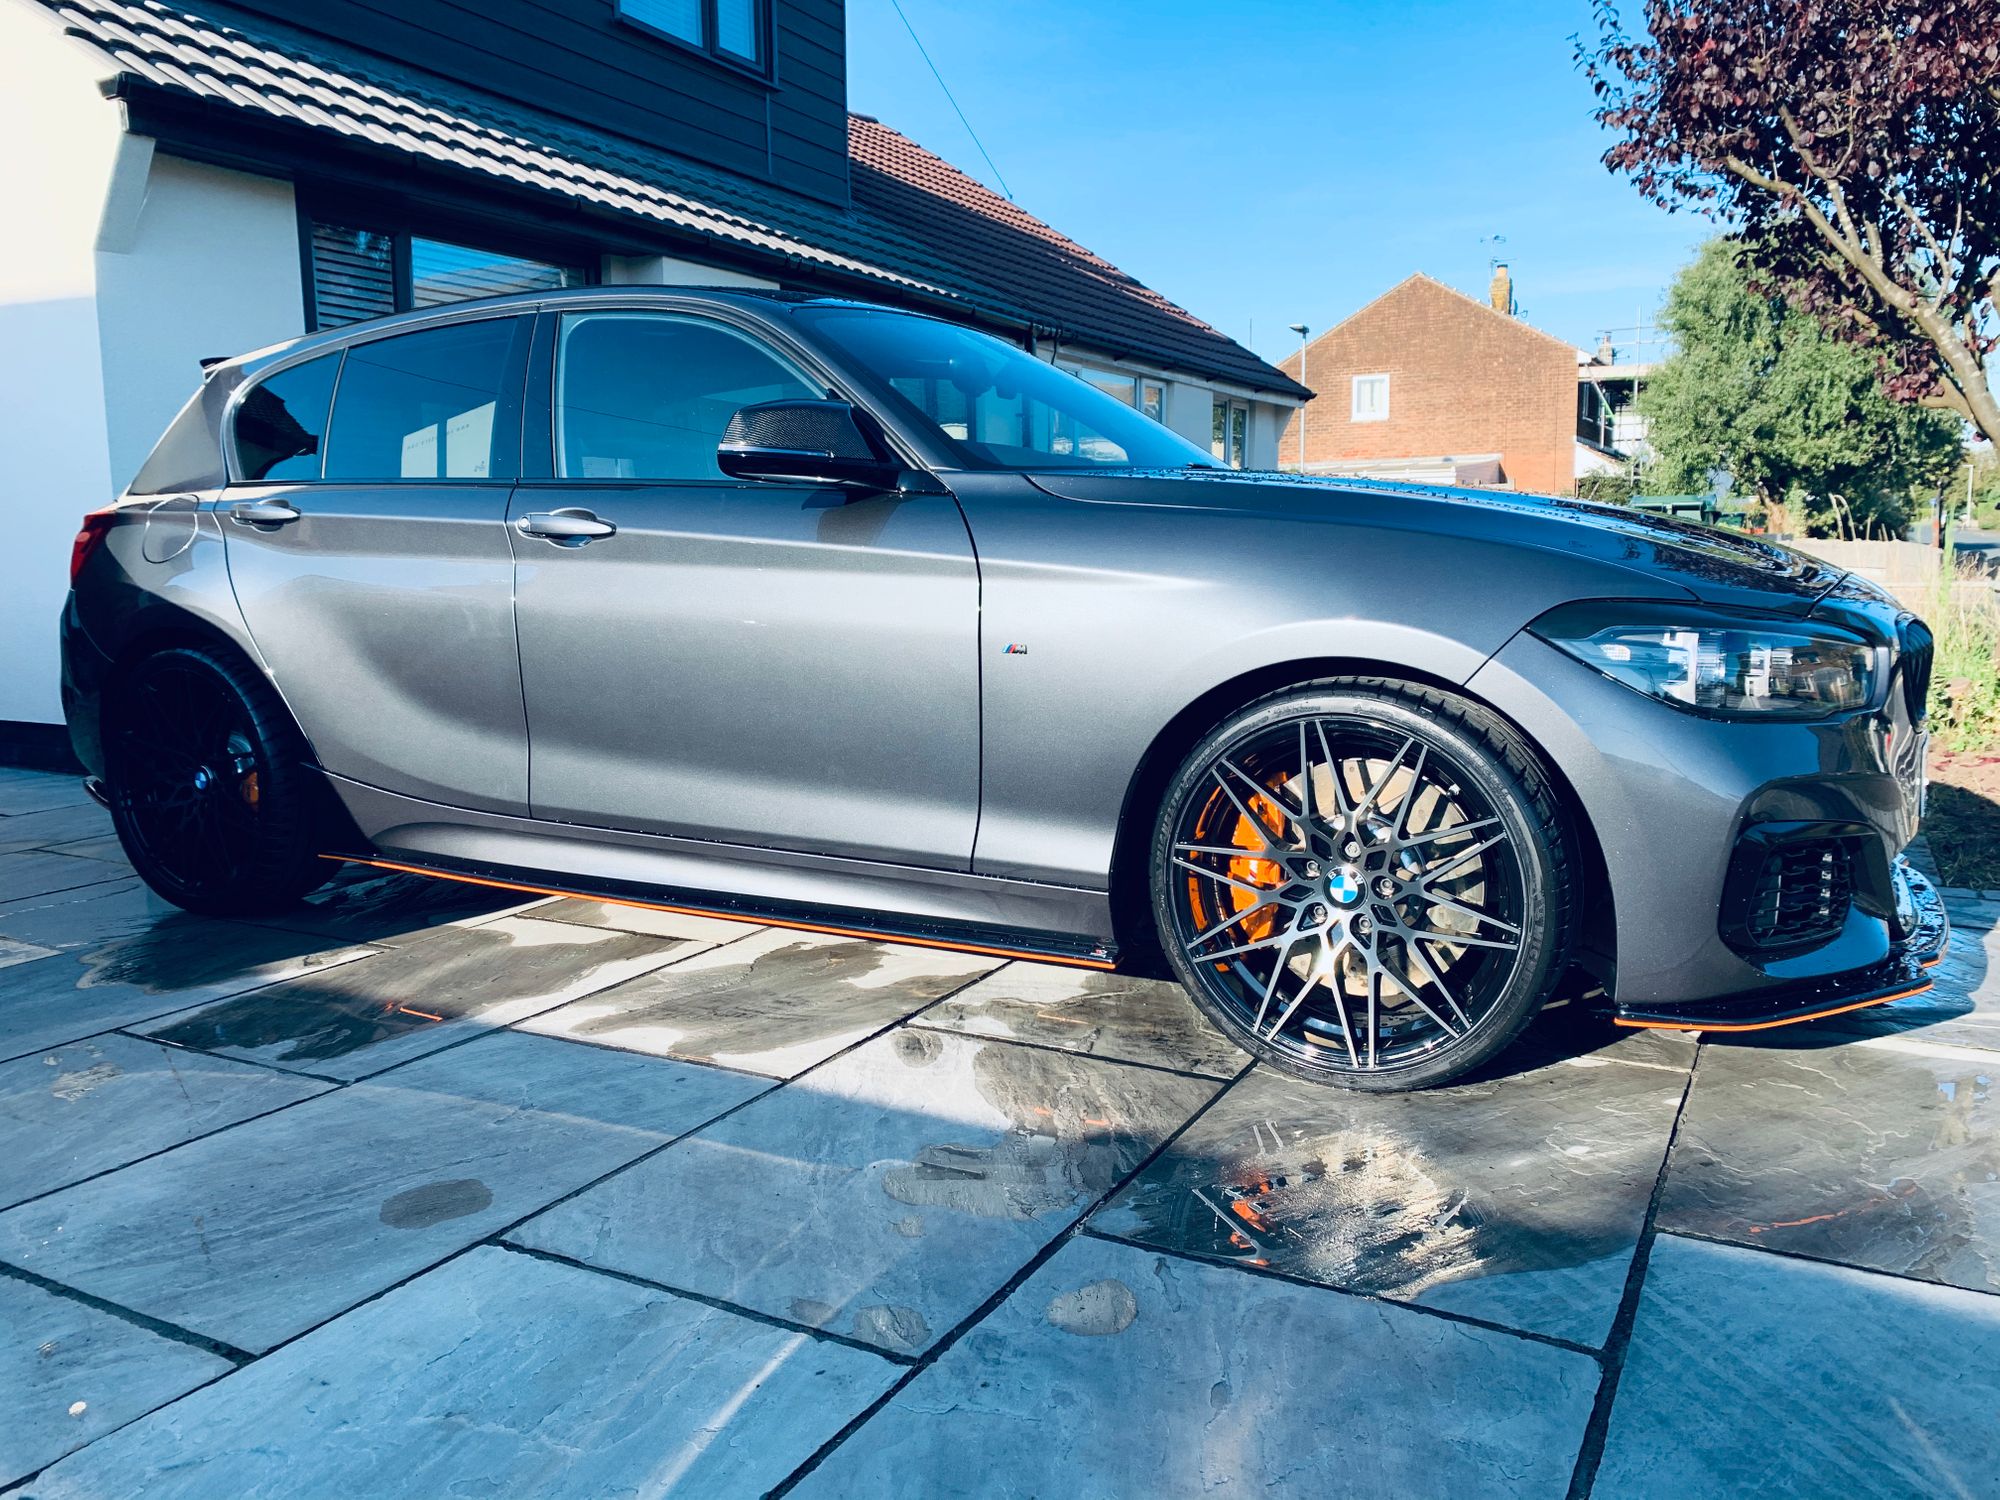
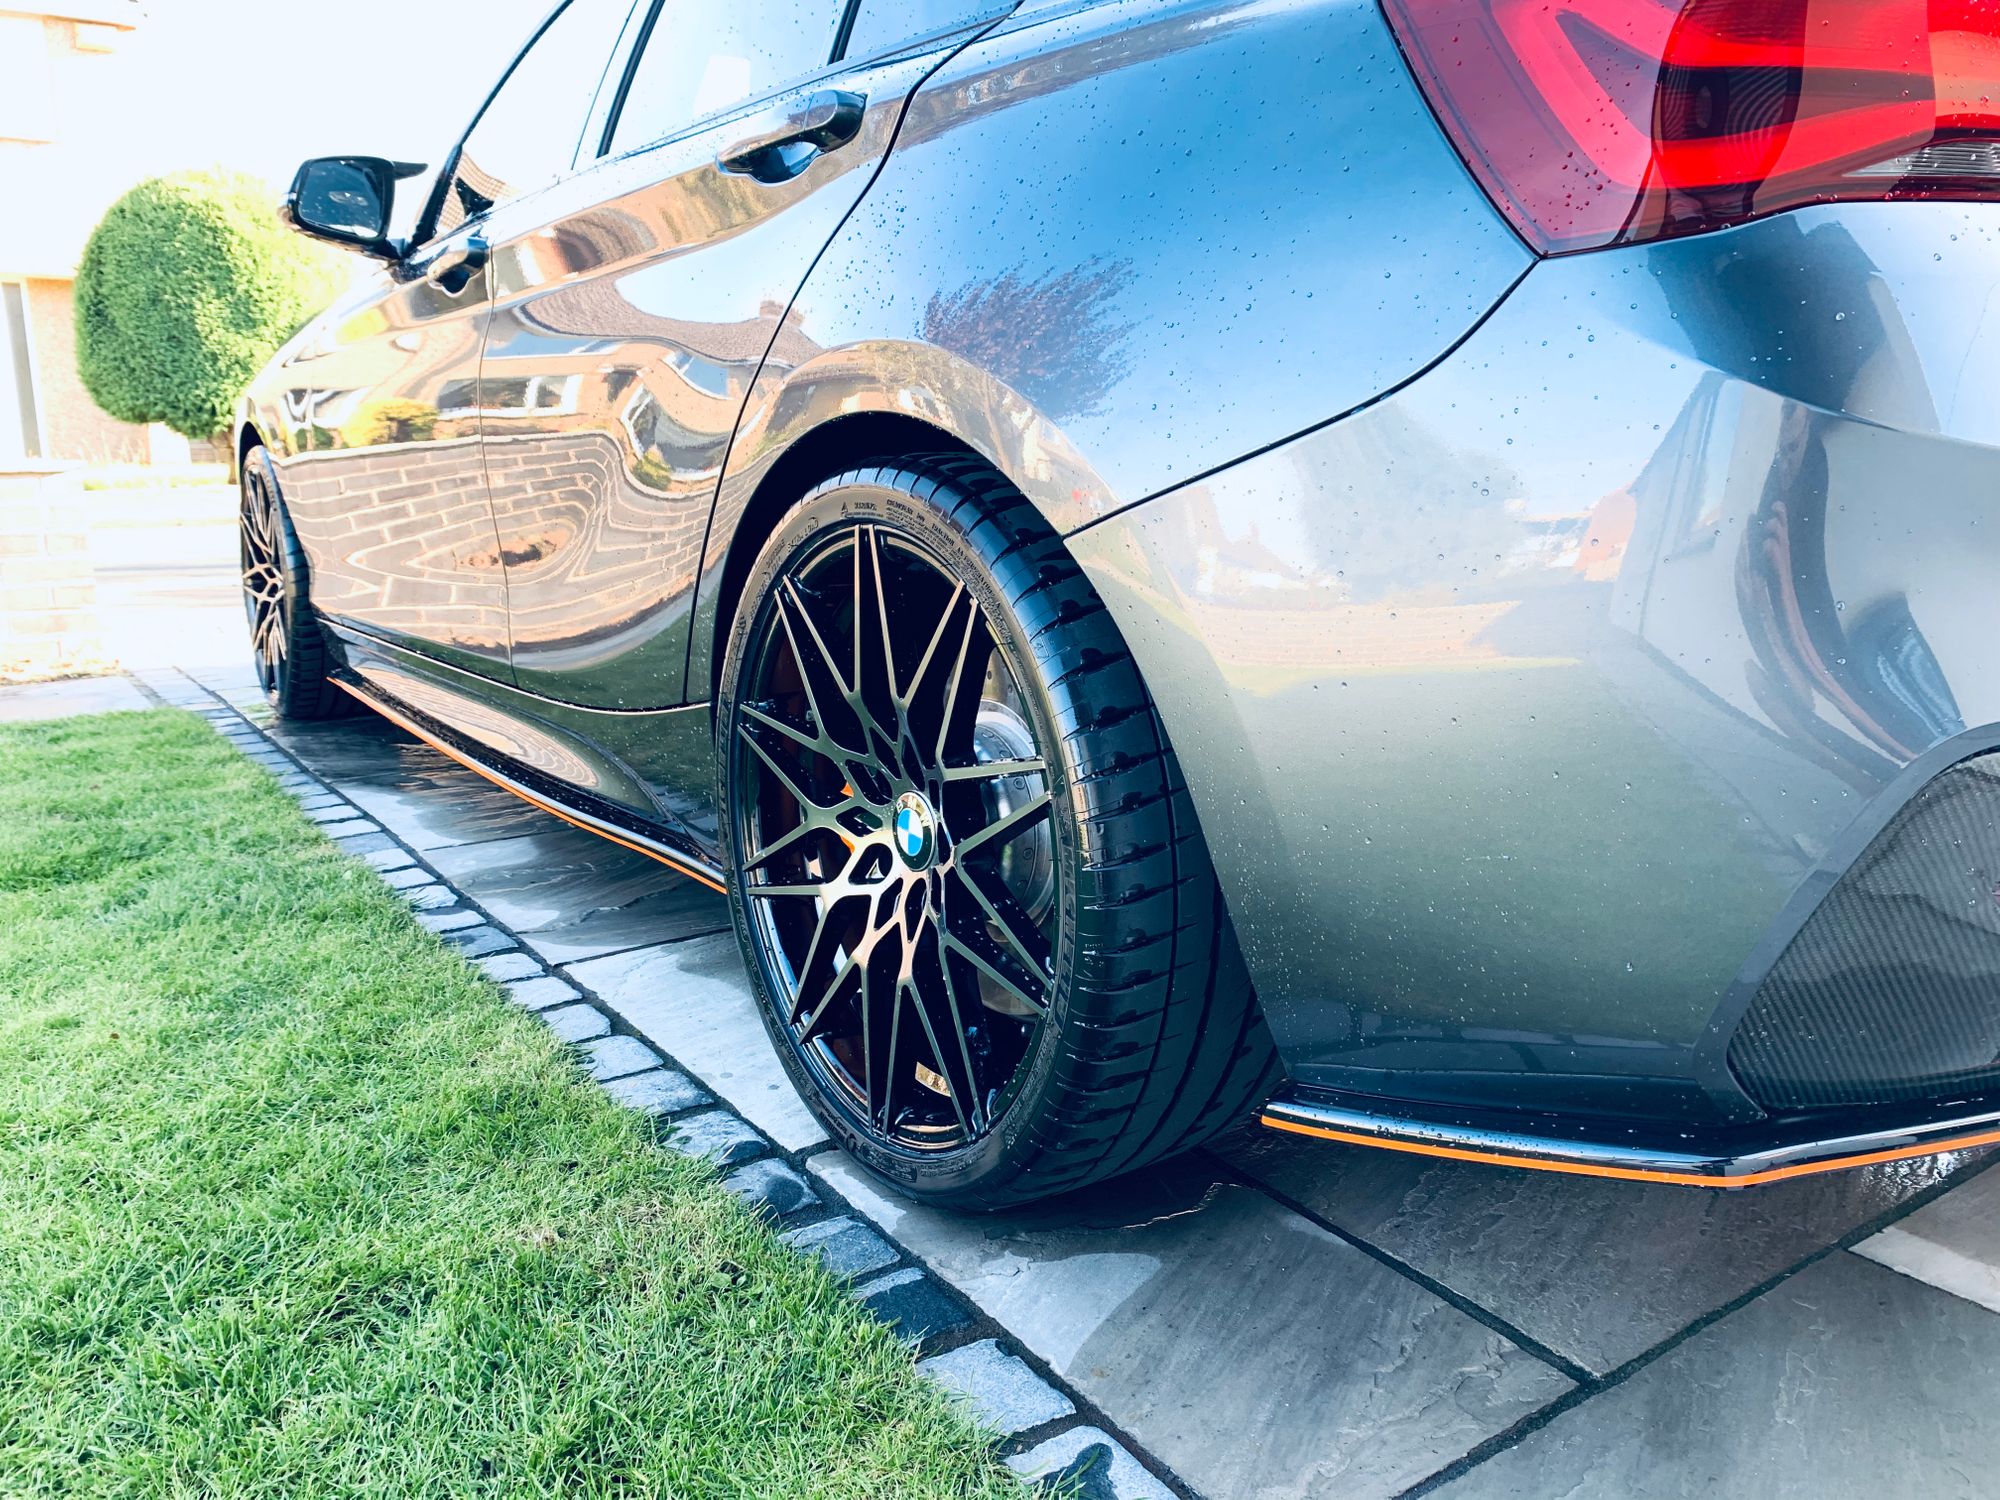
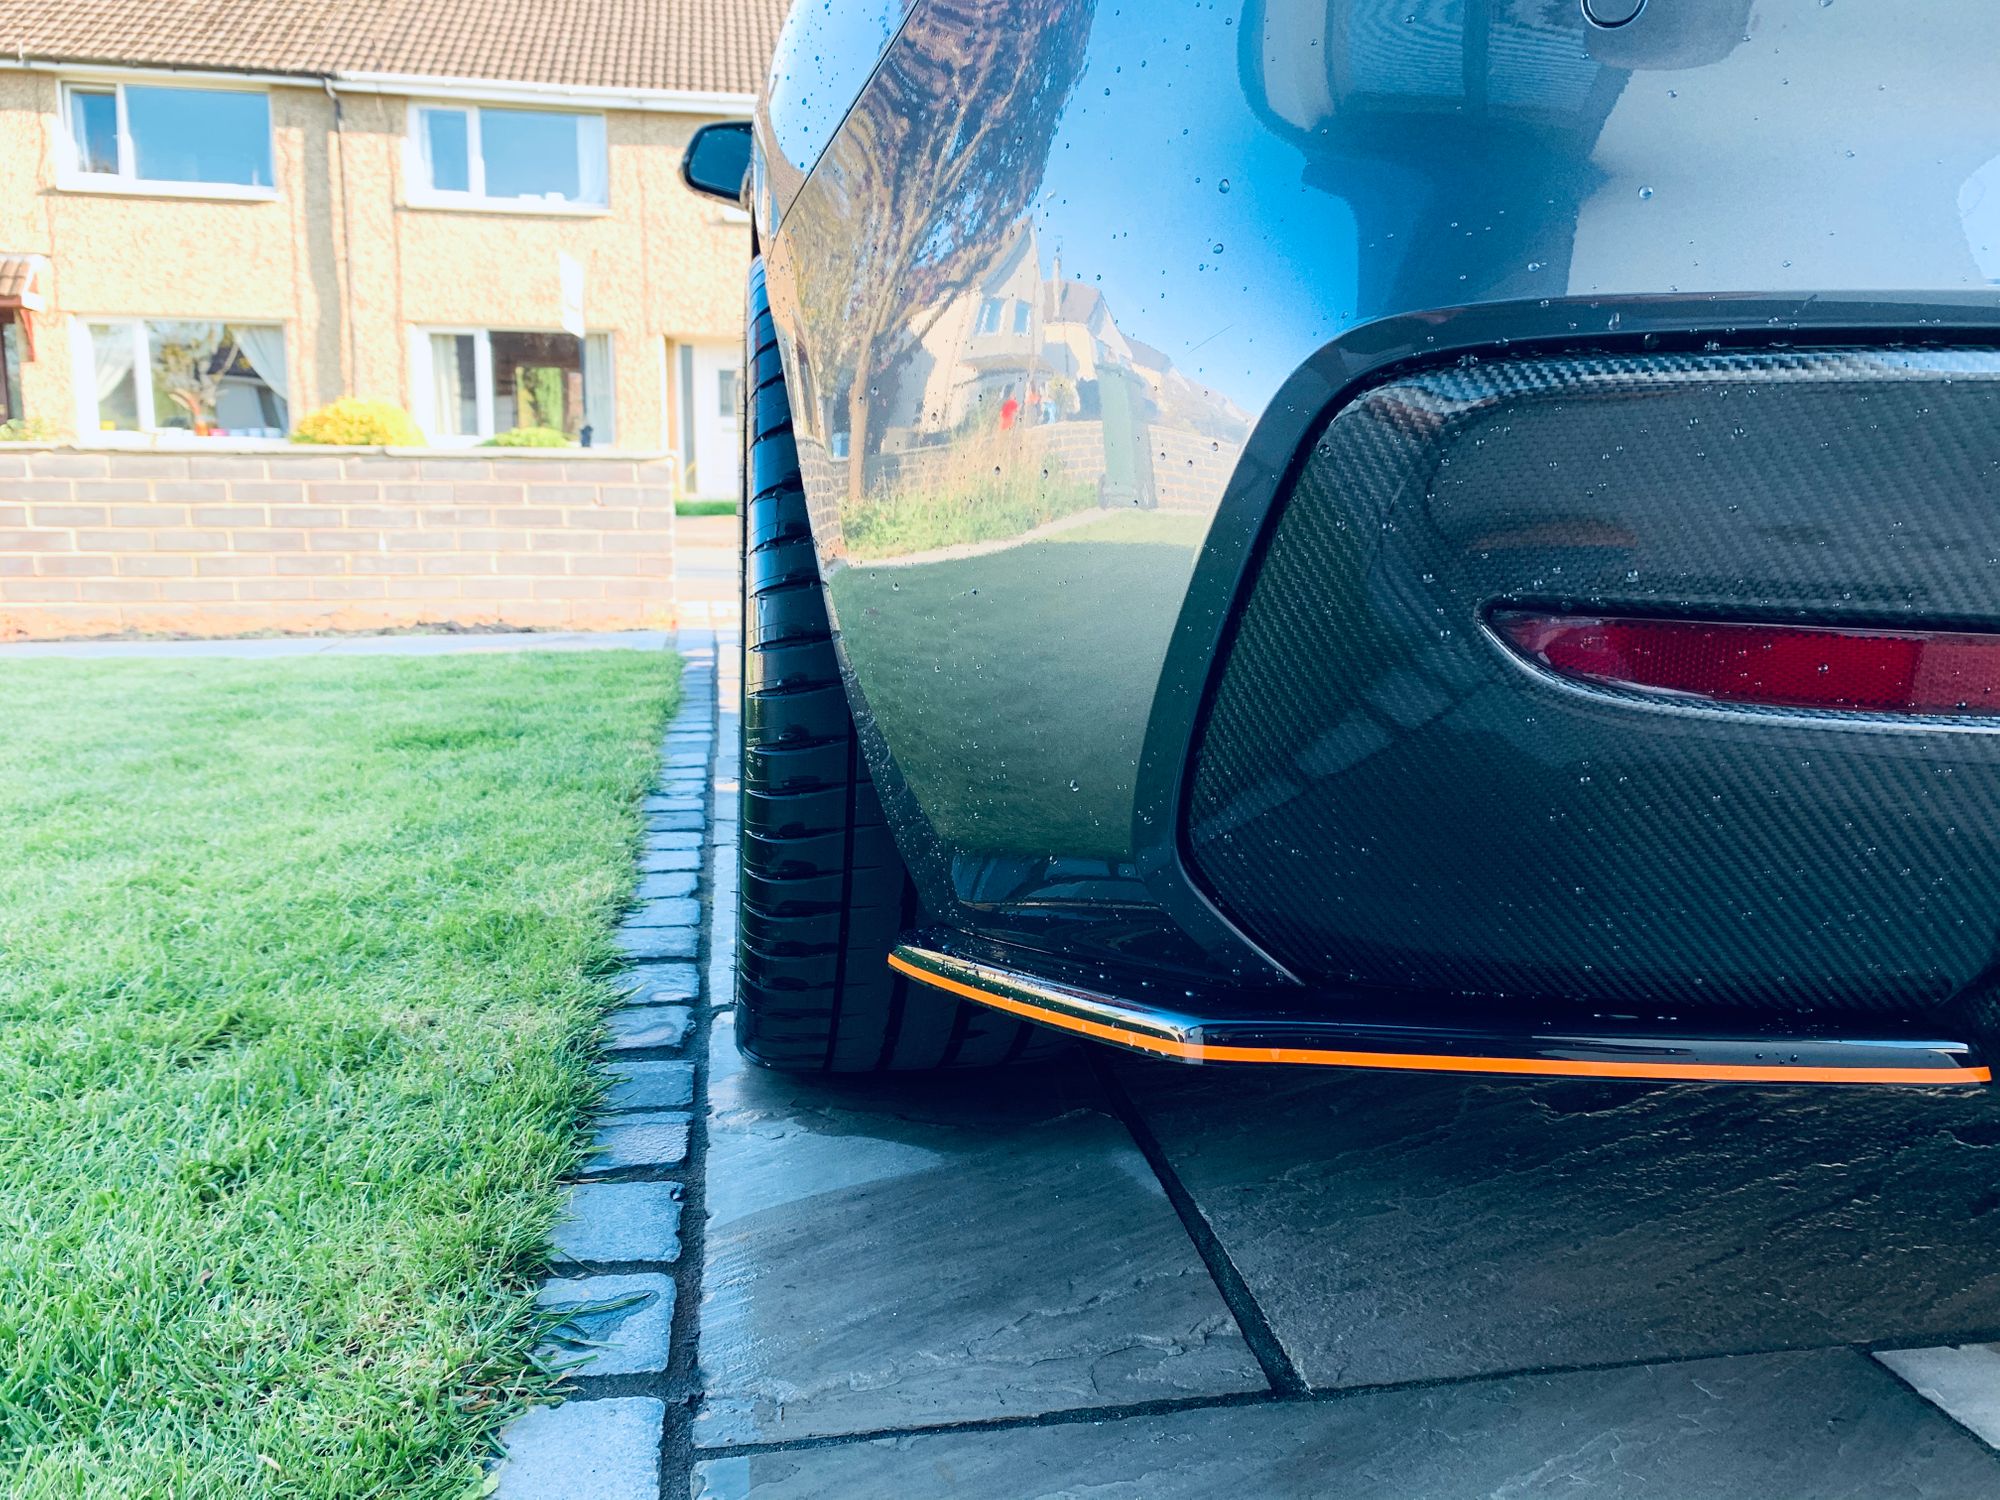
As you can see, the rear tyres do poke out quite a little bit more now which contributes to the looks with such an aggressive stance. It's also great to see a little more of that awesome brake kit now it's not squashed into the wheel so tightly. Of course, this change wasn't about looks, it was about performance and it certainly delivered in that department, let me tell you. The combination of bigger and wider wheels with a lot wider tyres plus the better rubber with the Pilot Sport 4S all added together for a fantastic combination. When using launch control the amount of wheel slip was noticeably reduced and the car was a lot quicker off the line. Under hard acceleration the traction control light spent a lot more time turned off than it did before and when cornering there's a remarkable ability to deliver more power through the rear than there was before.
To see what those rear tyres were really made of I went back in to the xHP Flash Tool and started to increase the amount of torque delivered when using launch control. You can dial the amount of torque up and also configure it to allow a small amount of wheel slip which you want when trying to get off the line as fast as possible. I also went back in to BM3 and reduced the boost limits in 1st and 2nd gear to have a little bit more boost on tap when sat on wide open throttle during a launch and subsequent pull. All I can say is I'm not finished tweaking but holy shit this thing is now seriously fun.
The final benefit was the reduction in understeer which isn't a particularly common thing to happen in a car like this but it does happen and it's quite unusual to experience. Now though, it's a heap better but there are definitely going to be further mods up front to try and tame the remaining understeer.
To put my sensible hat on for just a second, the other cool thing I got to do was put my winter tyres back on my 18" wheels and keep them in the garage. Now all I have to do when the bad weather comes in is jack the car up and quickly swap the wheels over to go back to winter rubber. This will be a lot easier than changing them at the shop and smaller wheels are better for the bad weather too. To top it off I got a few £ back by selling my original Pilot Super Sport tyres that were in great condition with plenty of tread left.
More to come!
The car is really coming along now and I'm seriously happy with where it's heading. In the next blog I'm going to look at a couple of smaller but important mods and write up the first time I took the car out on a track and unleashed it! 😈
Parts
Here's the list of parts used in Part 8 and where you can get them:
View all of the other blog posts here: The BMW M140i Project Series