For a long time it's been difficult to set security headers when you use certain hosted solutions like Ghost Pro or GitHub Pages. All of that is about to change and you can now quickly and easily deploy any security header of your choosing and the best part, it might not even cost you anything.
Security Headers
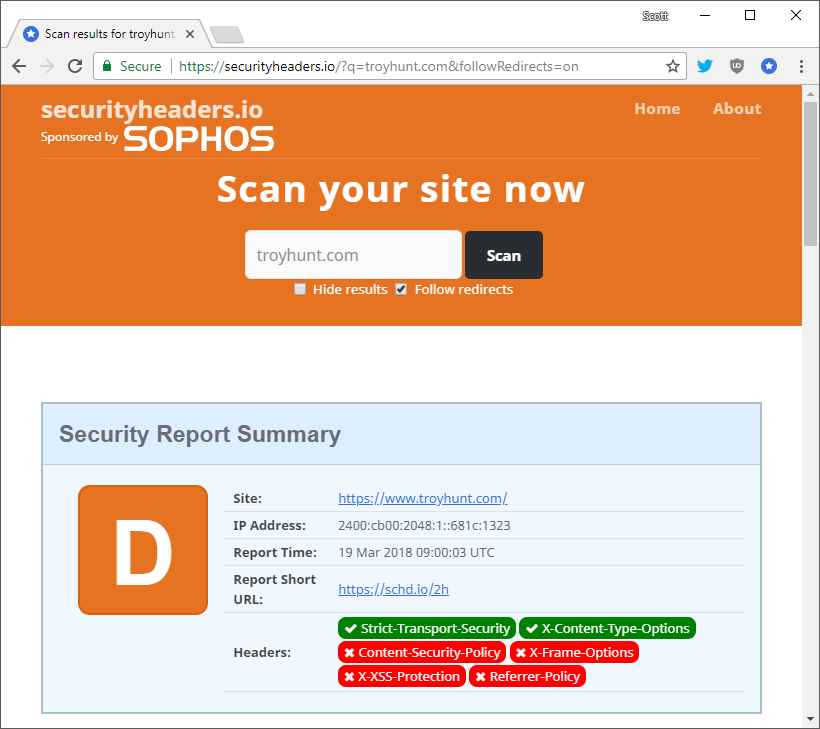
Long time readers of my blog will know I'm a huge supporter of security headers, the HTTP response headers that allow us to configure and deploy security features on our site. There are headers like Content Security Policy, Strict Transport Security, Referrer Policy and several more. Each of them serve a specific function and allow you as a website operator to ensure a safer browsing experience for your visitors. If you're interested in what security headers exist, and whether or not you or any other site may be using them, I created my free scanning tool securityheaders.io to help you.

The difficulty deploying headers
To set a security header on one of your responses you generally need to be able to access server configuration or possibly application code to insert it from there. These are levels of access that are not always available to you on certain hosting platforms. Take Ghost Pro, where my blog is hosted, or GitHub Pages as great examples. On these platforms, and many others like them, you only get to control the HTML content of pages you serve which is just fine for many, but it does make it impossible to deploy security headers.
![]()

There were some steps taken to get around these limitations with companies like Cloudflare, who reverse proxy your traffic, and can inject the header on the fly for you. Their dashboard now has the option to set the STS response header for you on your responses for example.
We have a similar problem with CSP because if you can't set the header you can't set the policy, but there was a limited workaround by deploying the policy in a meta tag, although with a subset of features available. To allow people who set CSP via meta to still have reporting, because reporting is disabled in meta tags, we created Report URI JS.
All in all there is a range of possibilities between it being impossible to set security headers through to some workarounds that get you some of the features in some cases. No more.
Introducing the new Security Headers Cloudflare Worker
In short, Cloudflare workers allow you to deploy and run code at Cloudflare's edge to apply custom processing to requests and responses to your site. We already use Workers a lot at Report URI and Security Headers is now launching this Worker to help sites deploy security headers.
If you want to know more about Workers then you can read the Cloudflare product page, launch blog or head straight to the playground and start tinkering with one. For now though, I want to get straight on with announcing our new Worker for Security Headers.
let securityHeaders = {
	"Content-Security-Policy" : "upgrade-insecure-requests",
	"Strict-Transport-Security" : "max-age=1000",
	"X-Xss-Protection" : "1; mode=block",
	"X-Frame-Options" : "DENY",
	"X-Content-Type-Options" : "nosniff",
	"Referrer-Policy" : "strict-origin-when-cross-origin",
}

let sanitiseHeaders = {
	"Server" : "My New Server Header!!!",
}

let removeHeaders = [
	"Public-Key-Pins",
	"X-Powered-By",
	"X-AspNet-Version",
]

addEventListener('fetch', event => {
	event.respondWith(addHeaders(event.request))
})

async function addHeaders(req) {
	let response = await fetch(req)
	let newHdrs = new Headers(response.headers)

	if (newHdrs.has("Content-Type") && !newHdrs.get("Content-Type").includes("text/html")) {
        return new Response(response.body , {
            status: response.status,
            statusText: response.statusText,
            headers: newHdrs
        })
	}

	Object.keys(securityHeaders).map(function(name, index) {
		newHdrs.set(name, securityHeaders[name]);
	})

	Object.keys(sanitiseHeaders).map(function(name, index) {
		newHdrs.set(name, sanitiseHeaders[name]);
	})

	removeHeaders.forEach(function(name){
		newHdrs.delete(name)
	})

	return new Response(response.body , {
		status: response.status,
		statusText: response.statusText,
		headers: newHdrs
	})
}
This a really simple Cloudflare worker given what you could possibly do with one, but it enables a huge amount of security. Let's break this down and see exactly what it does. First of all we define the list of security headers that we want to set on our responses and the appropriate values for them.
let securityHeaders = {
    "Content-Security-Policy" : "upgrade-insecure-requests",
    "Strict-Transport-Security" : "max-age=1000",
    "X-Xss-Protection" : "1; mode=block",
    "X-Frame-Options" : "DENY",
    "X-Content-Type-Options" : "nosniff",
    "Referrer-Policy" : "strict-origin-when-cross-origin",
}
This is followed by a list of headers we want to sanitise. This is any header that will be set by the origin that you want to change the value of, the Server header is probably a great example.
let sanitiseHeaders = {
    "Server" : "My New Server Header!!!",
}
Last is a list of headers you want to remove. This could be a header that leaks information about the software and version running on your origin, or wanting to protect yourself from a rogue Public Key Pinning policy getting into the wild and causing harm.
let removeHeaders = [
    "Public-Key-Pins",
    "X-Powered-By",
    "X-AspNet-Version",
]
Of course you will need to change these values to ones that suit your needs and you may also want to add additional headers or remove some of the ones being set/changed/removed here, but these are the changes that will be made to responses from your site. Next we setup the worker to process requests made to your site.
addEventListener('fetch', event => {
    event.respondWith(addHeaders(event.request))
})
With any request made to your site the worker will respond with the result of calling the addHeaders() function on the request. Let's take a look at that function.
async function addHeaders(req) {
	let response = await fetch(req)
	let newHdrs = new Headers(response.headers)

	if (newHdrs.has("Content-Type") && !newHdrs.get("Content-Type").includes("text/html")) {
        return new Response(response.body , {
            status: response.status,
            statusText: response.statusText,
            headers: newHdrs
        })
	}

	Object.keys(securityHeaders).map(function(name, index) {
		newHdrs.set(name, securityHeaders[name]);
	})

	Object.keys(sanitiseHeaders).map(function(name, index) {
		newHdrs.set(name, sanitiseHeaders[name]);
	})

	removeHeaders.forEach(function(name){
		newHdrs.delete(name)
	})

	return new Response(response.body , {
		status: response.status,
		statusText: response.statusText,
		headers: newHdrs
	})
}
The first thing the function does is fetch the response from your origin and store it in response. It then extracts the headers from the response and stores them in newHdrs. To check if we should add headers to this particular response we're going to check for the Content-Type and see if its value contains text/html. If it doesn't then the function returns the response from the origin but if it does contain text/html then it continues processing.
To add the new security headers the function iterates over the securityHeaders object and sets each key:value pair in the list of headers. One important thing to note here is that it's calling set() for the new header and not append(). Using set() will change the value of the header if it already exists or add it if it doesn't exist. If we were using append() and there was already one of the headers set from the origin it'd append the new value on to the end of the existing header. In this case we want the worker to be the definitive source of headers and are using set() to override anything that may come from the origin. The same applies to the sanitiseHeaders array and then of course for the removeHeaders array we're calling delete() for the headers to make sure they are not set.
Once that's done the function then returns a new response using the body, status and status text of the original response, but most importantly, the new headers that we've just created. With that, you're done! You can now have all of the security headers your heart desires.
Pricing
I said at the start of the article that setting these Security Headers may not even cost you anything. On the Cloudflare Worker plan you pay a $5 per month fee for workers that covers your first 10 million requests.

If you're already using Cloudflare Workers then you can roll the functionality of the Security Headers Cloudflare Worker into your existing worker and you won't pay a single penny more for the features. If you don't already use Cloudflare Workers then you can setup with the Security Headers Worker and then look at all of the other awesome things that you can do to maximise the benefit you get.
GitHub
You can find the code for our worker right here on GitHub and of course pull requests are welcome if you spot any areas where we can improve. If you want to fork the repo there are opportunities to optimise, perhaps only setting certain headers on certain content-type values or status codes, but the worker above is more than enough to get started. Let me know in the comments below if you use the worker!
Setting up the Worker
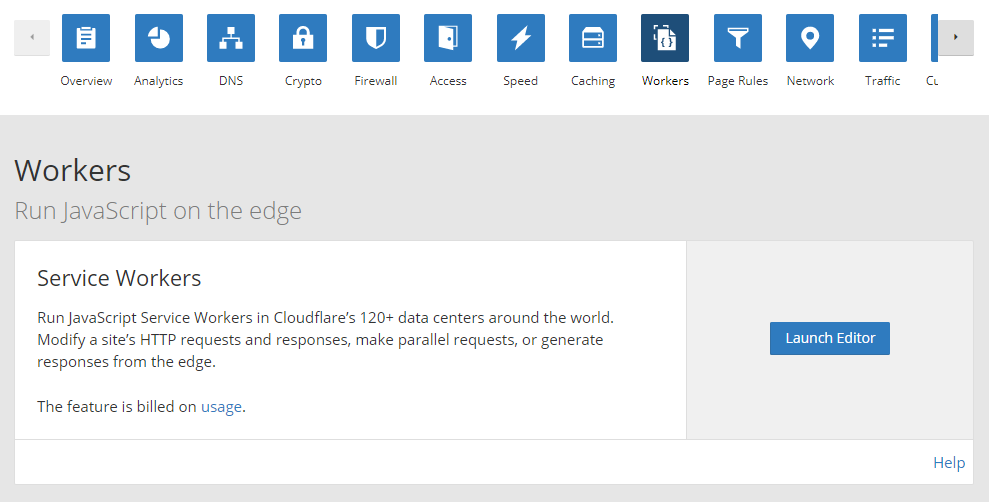
Enabling the Cloudflare Worker couldn't be easier, simply login to your account and head to the Workers page to get started.
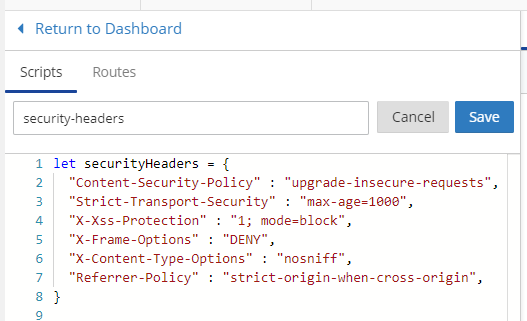
Click 'Launch Editor' and once in the Editor click 'Add Script' to create your new worker. Paste in the worker code from above and make any changes that you need, don't forget to name your worker and then click 'Save'.
Now all you need to do is enable the worker on your site by creating a route to tell the worker where to run. Click 'Routes' and 'Add Route' to create your first route.
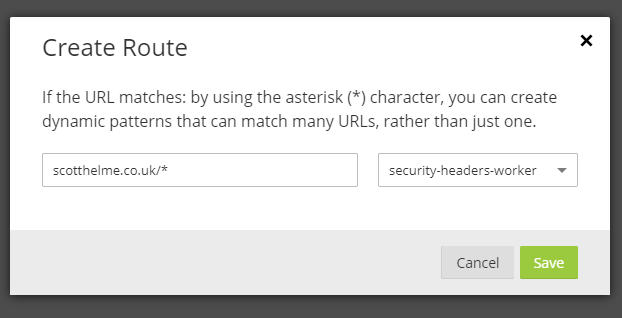
This route is telling the worker to execute on any request made to my blog and you'd simply replace my domain with your own. If you have multiple domains you serve off, let's say www.example.com and blog.example.com then you can set multiple routes to cover both of those.
scotthelme.co.uk/* - security-headers-worker
*.scotthelme.co.uk/* - security-headers-worker
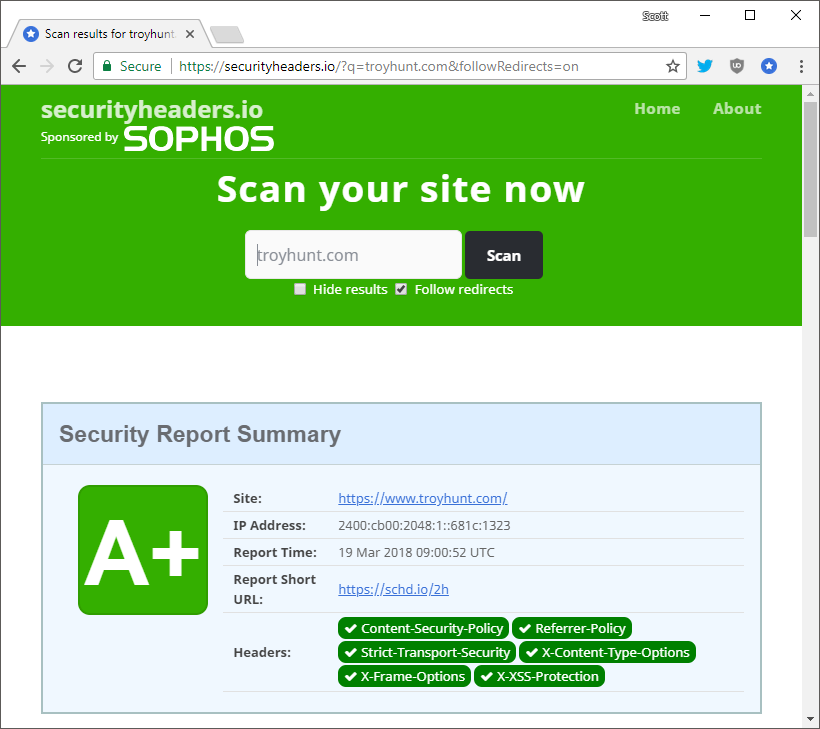
Once you save the route that is it! The worker should be active on your site within a matter of seconds and you can head on over to Security Headers to scan your site and see your new grade. Where it was previously difficult to set these headers it's now easy and you can go from a low grade to the highest possible grade of A+ in literally seconds.